Learn how to import a Self-Managed Catalog, add Products to the Catalog and update pricing.
Using the Import functionality, you are able to update the prices of existing Products in the Catalog, as well as add extra products to the Catalog, given that you have the P+ Product Code for the extra product you wish to add.
IMPORTANT: You are not able to create entirely new Products in PurchasePlus via this import process. See our Create a New Product article for help creating a new Product. Please also see our article Create a Self-Managed Catalog to learn more about creating the Catalog for the first time.
Jump to:
- Step 1: Navigate to the Self-Managed Catalog
- Step 2: Export the Catalog to Obtain the CSV Template
- Step 3: Update Products, Prices and Tax Percentage
- Step 4: (Optional) Adding Extra Products
- Step 5: Import the Updated CSV
Step 1: Visit the Self-Managed Catalog
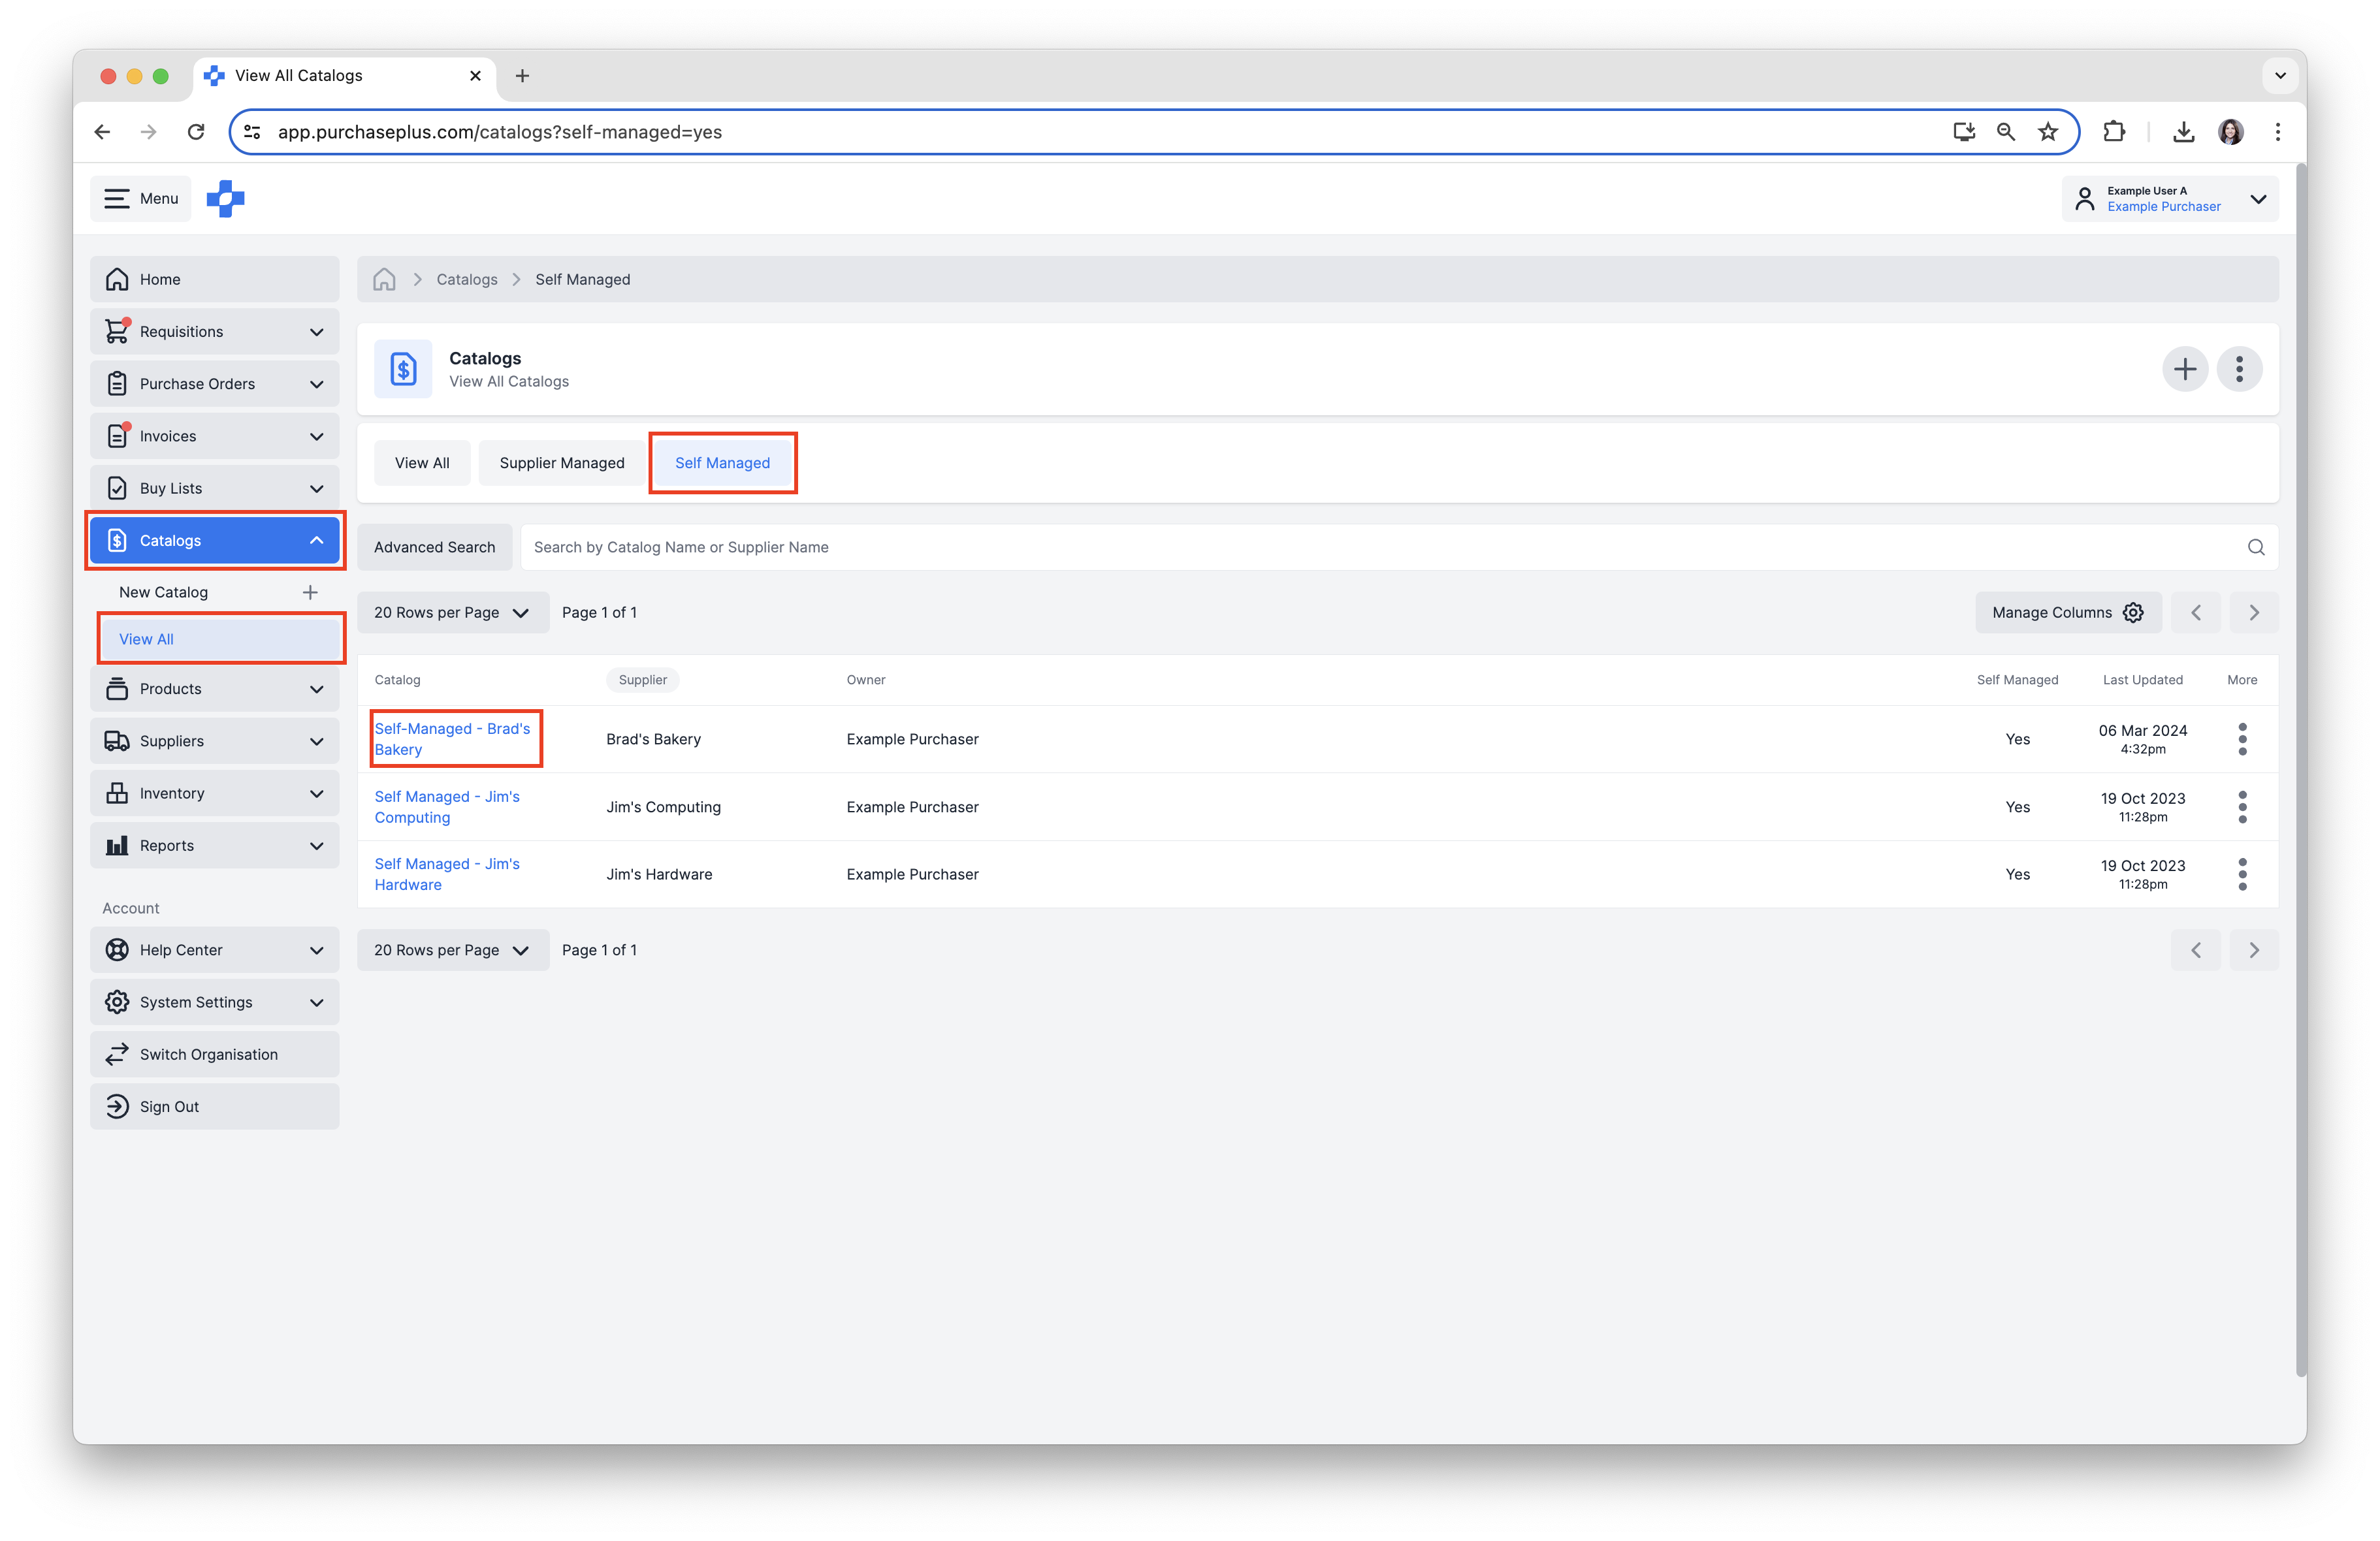
1. Select [Catalogs] → [View All] from the side navigation bar.
2. Select the [Self Managed] tab to only view Self-Managed Catalogs, then click the [Catalog], you wish to view or update.
Step 2: Export the Catalog to Obtain the CSV Template
1. Use the Export function inside the Catalog, in order to use the resulting CSV file as the template. Exporting the Catalog will provide you with a downloadable CSV file of your Catalog, with all existing products and prices included.
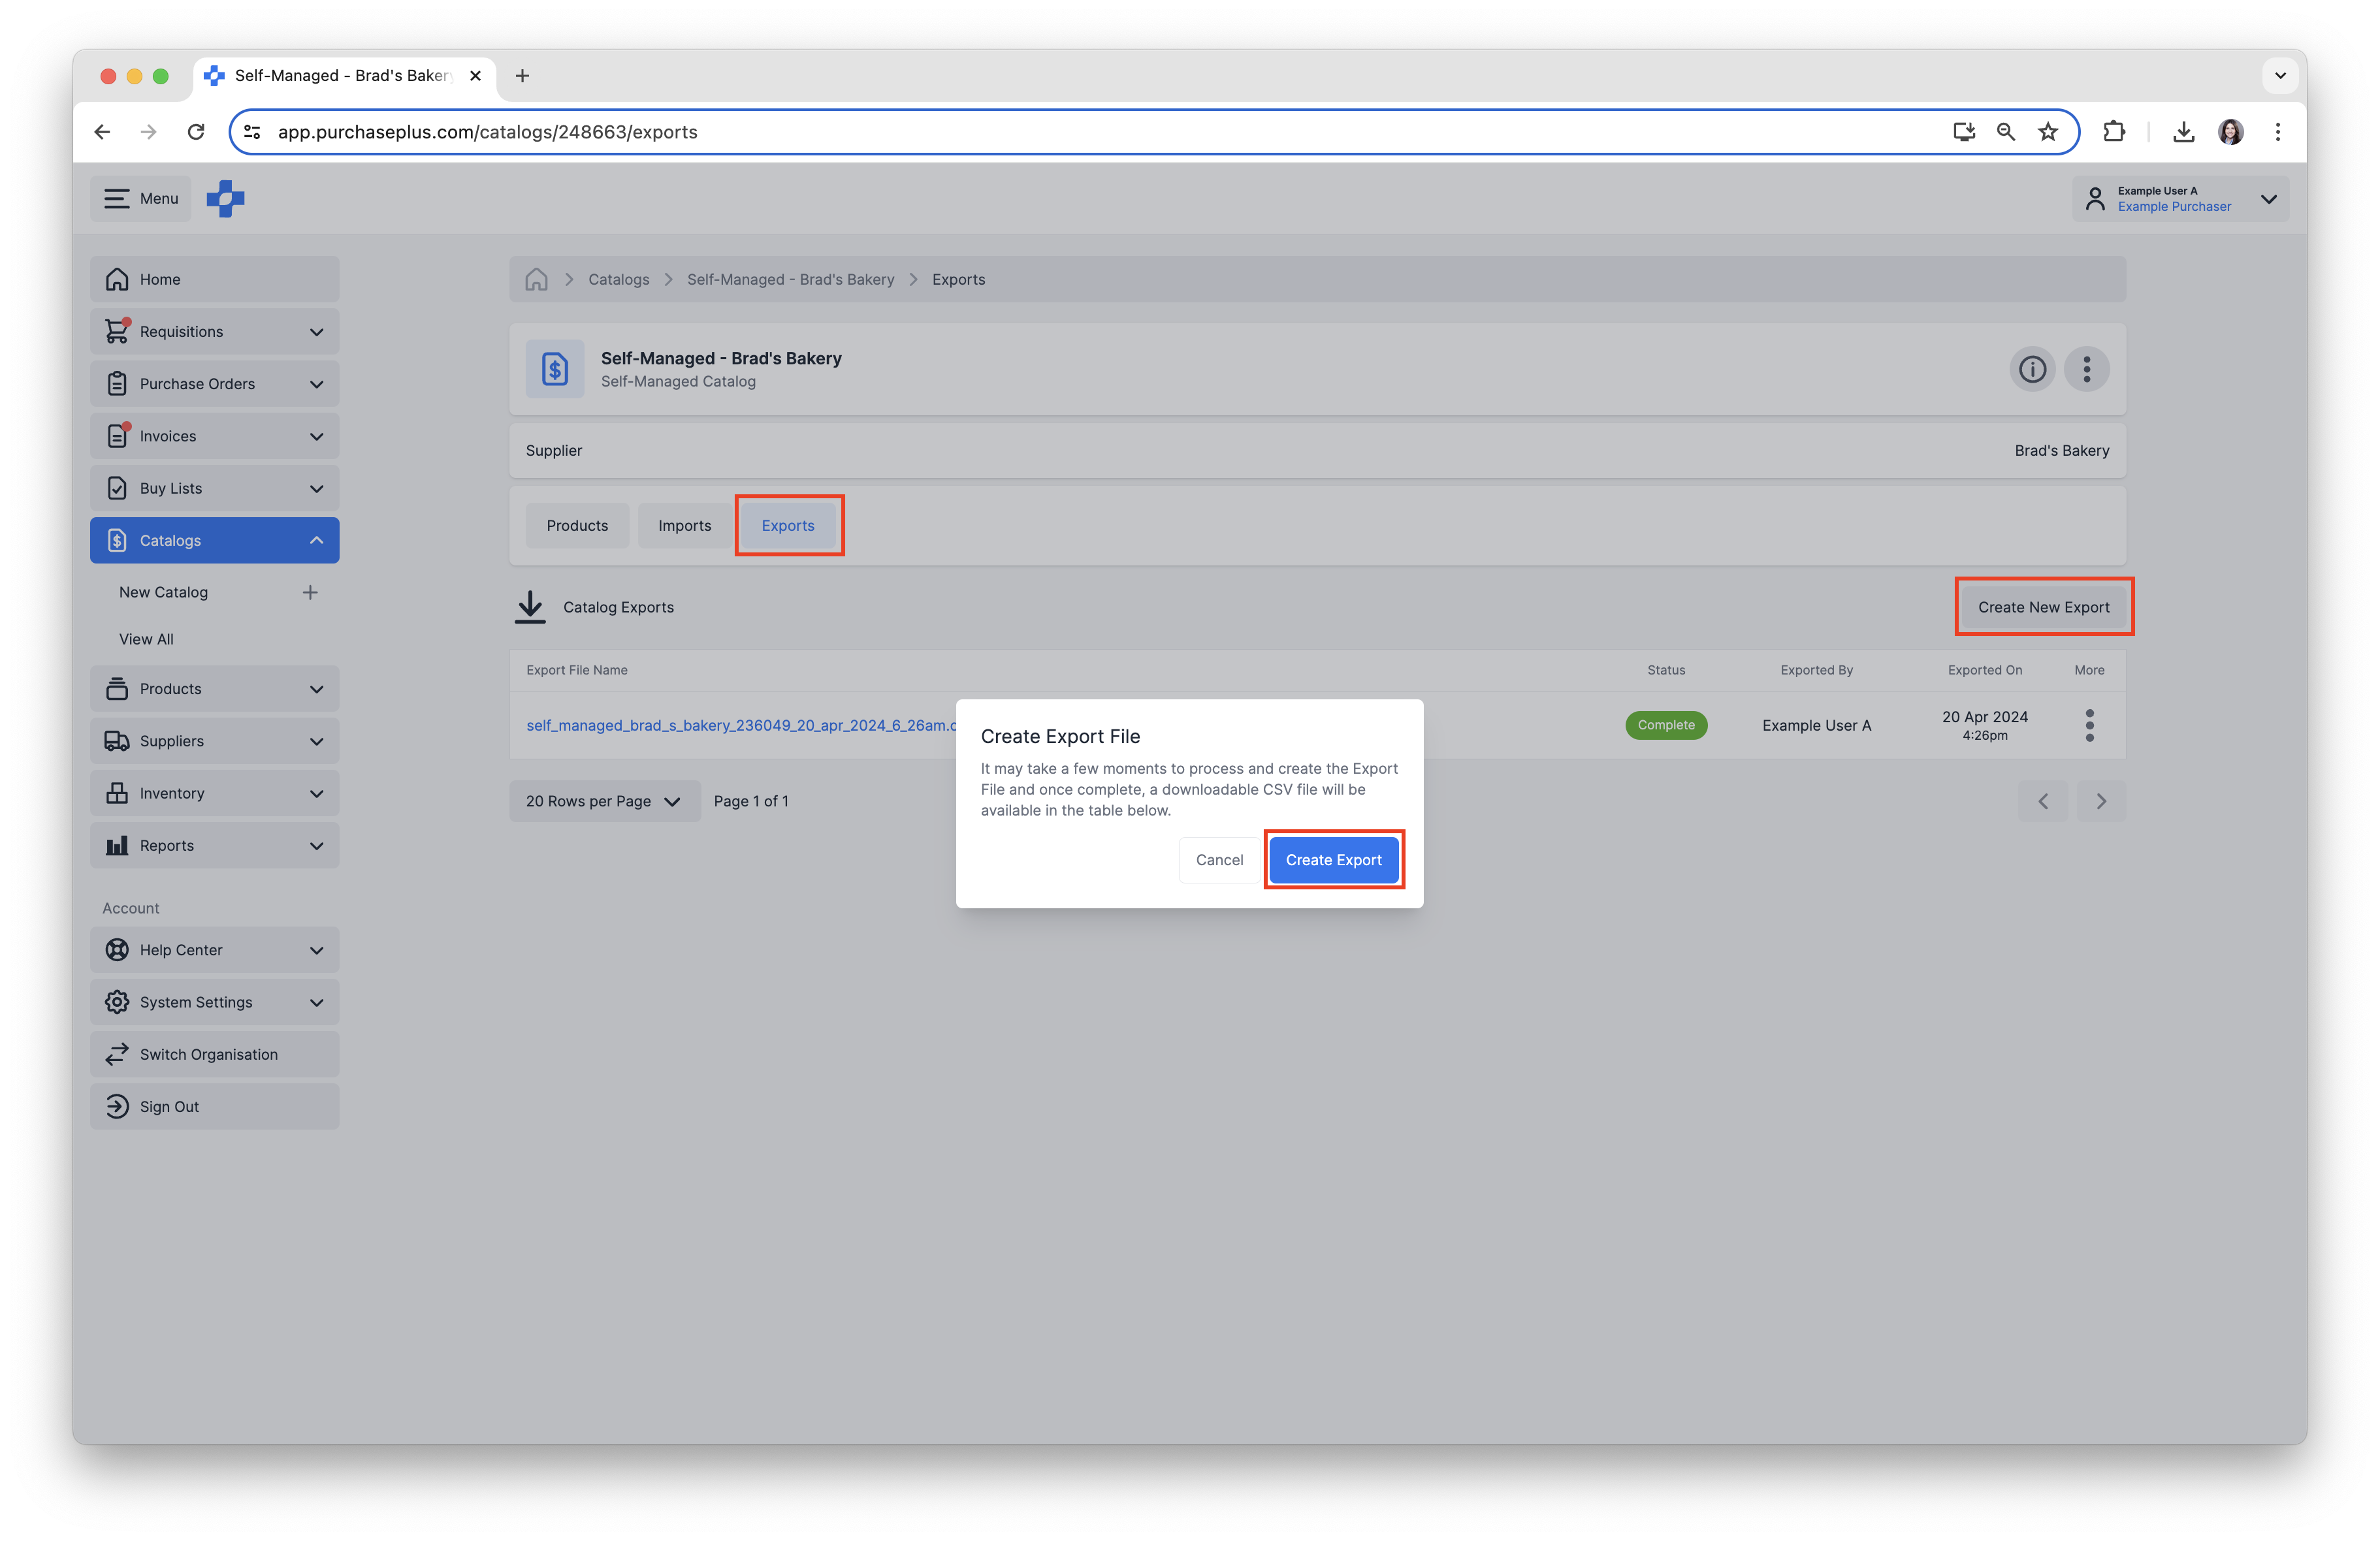
2. Select the [Exports] tab inside the Self-Managed Catalog, then click [Create New Export] located on the right side.
3. Click [Create Export] in the pop-up window, to confirm and begin the Export.
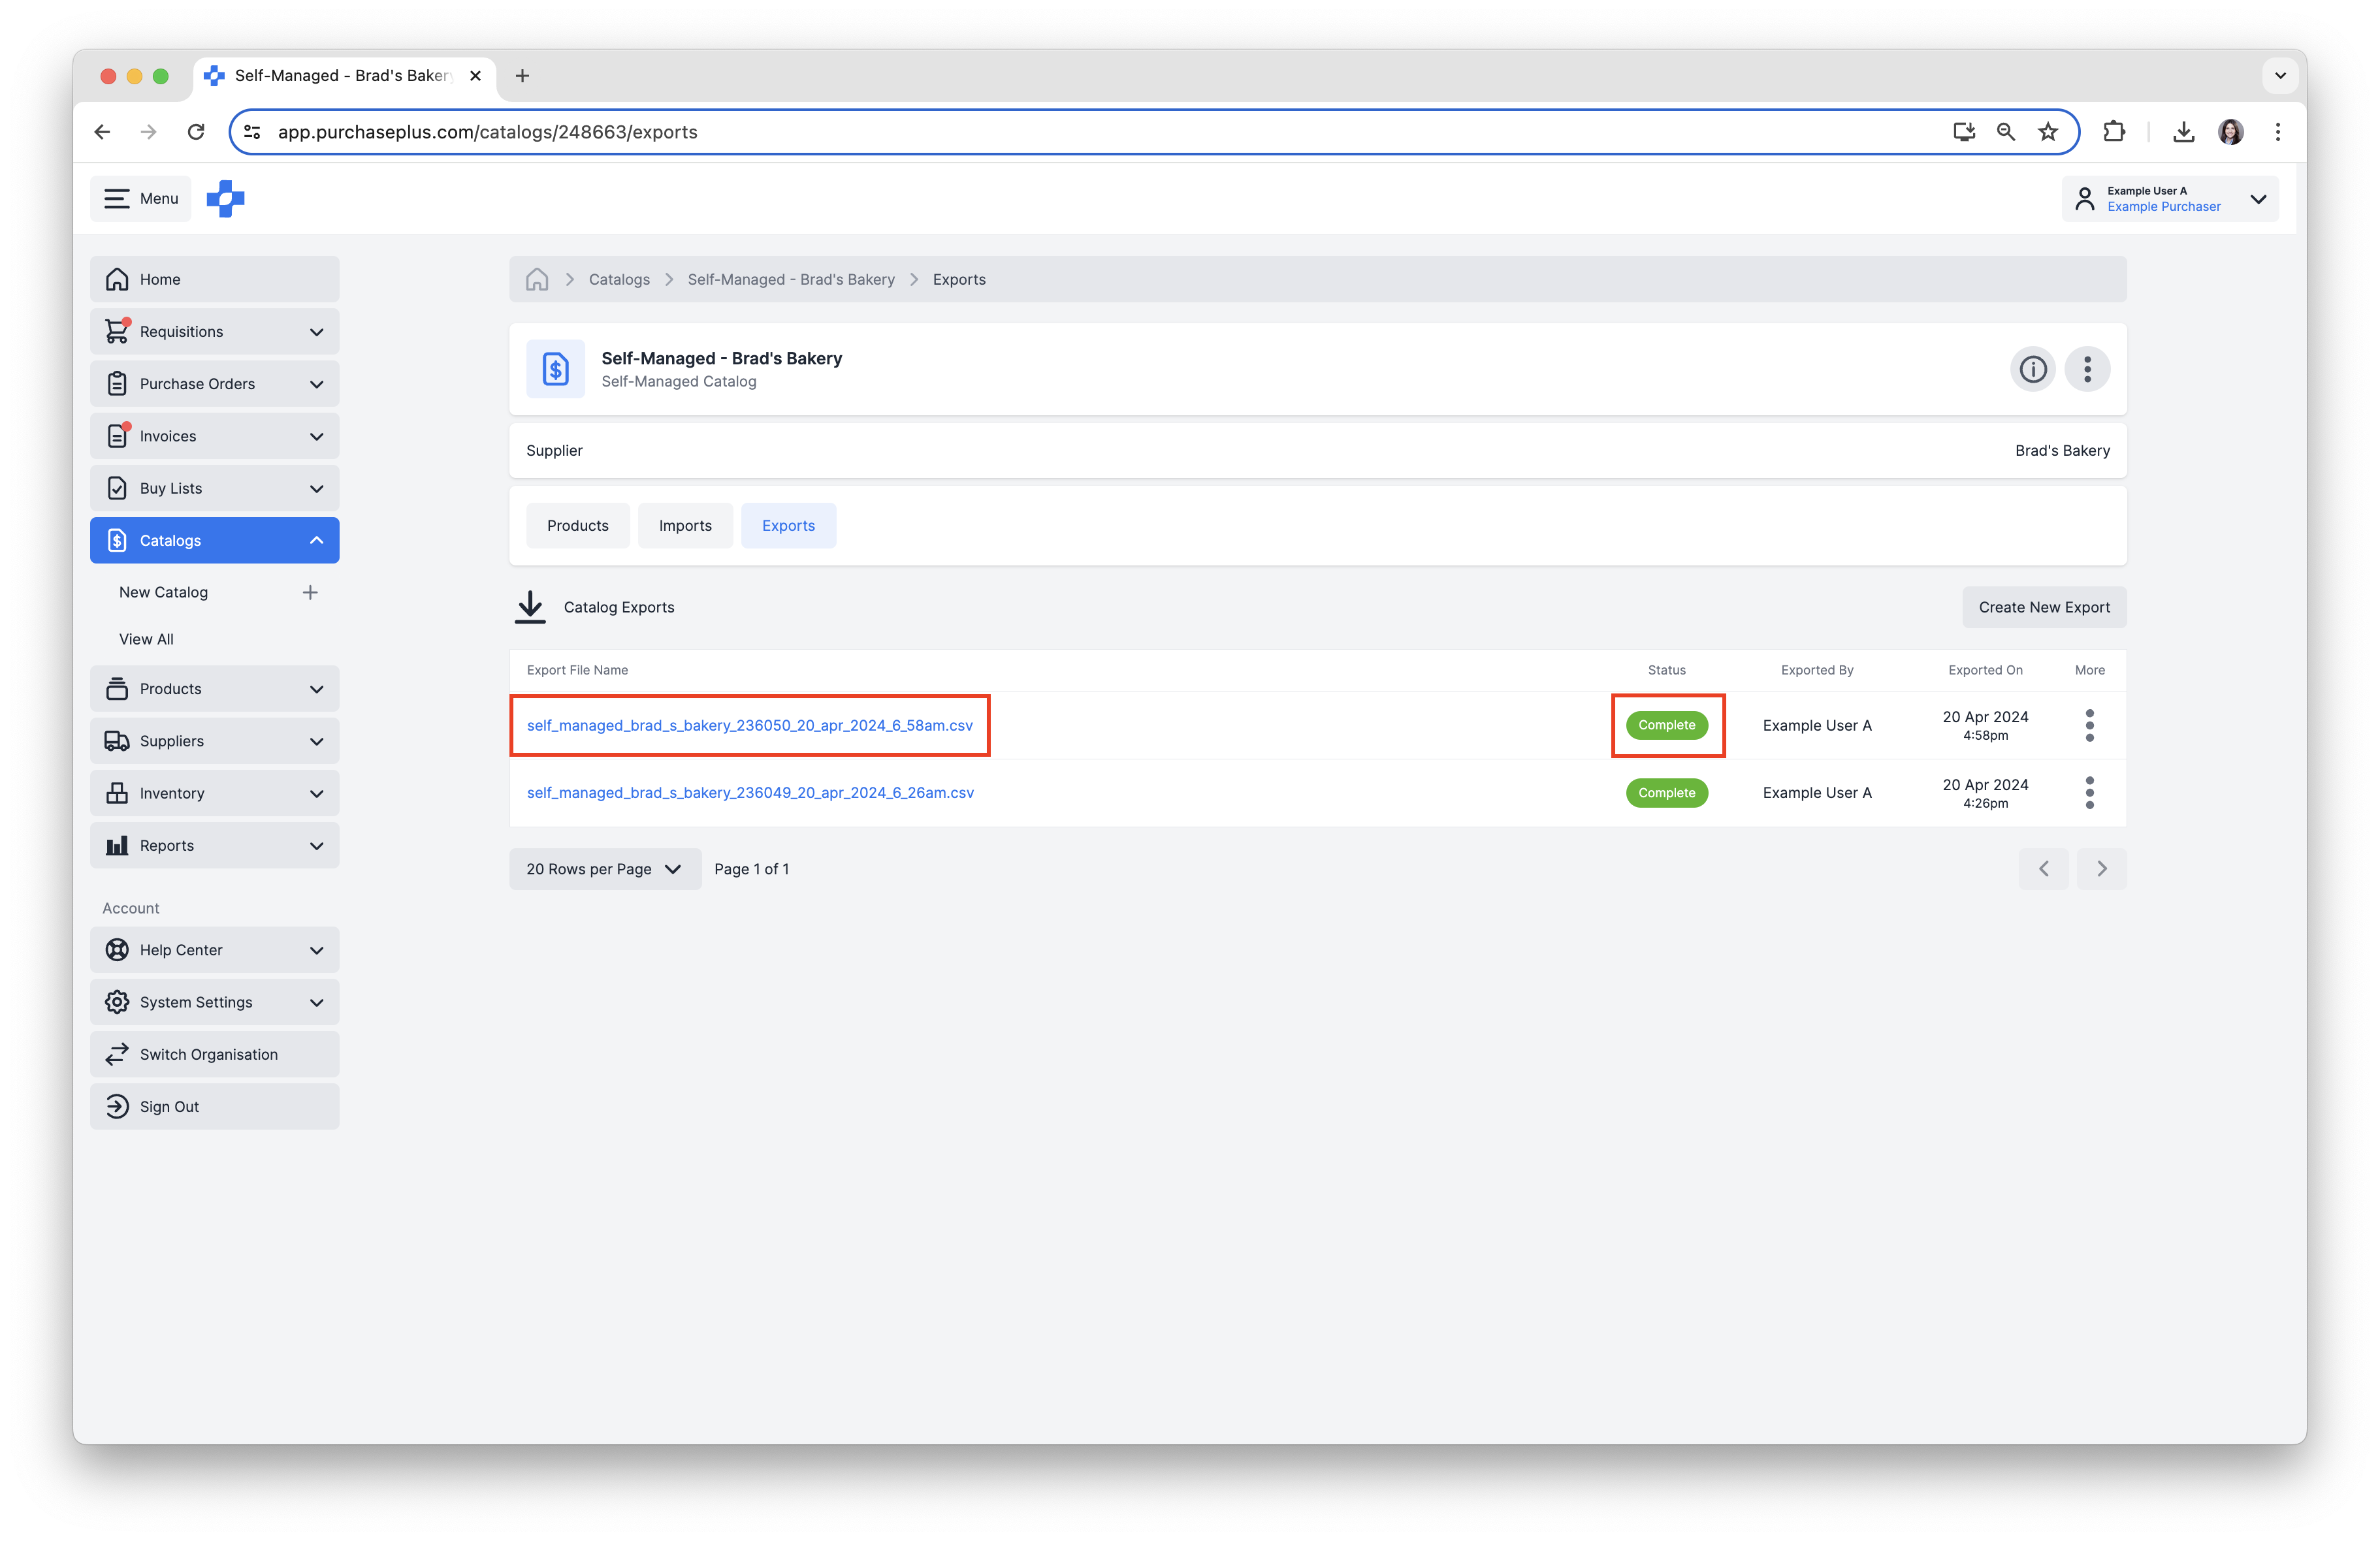
The status of the Export file will begin in a state of 'Processing', then progress to 'Complete'. Once completed, you can download the CSV file.
4. Select [Export File Name] to download the CSV file.
Alternatively, you can download our blank Catalog Import Template (CSV), and create a new Catalog from scratch. Remember: You are not able to create entirely new Products in PurchasePlus via this import process.
See our Create a New Product article for help creating a new Product, or see our article Create a Self-Managed Catalog to learn more about creating a brand new Self Managed Catalog.
Step 3: Update Products, Price and Tax Percentages
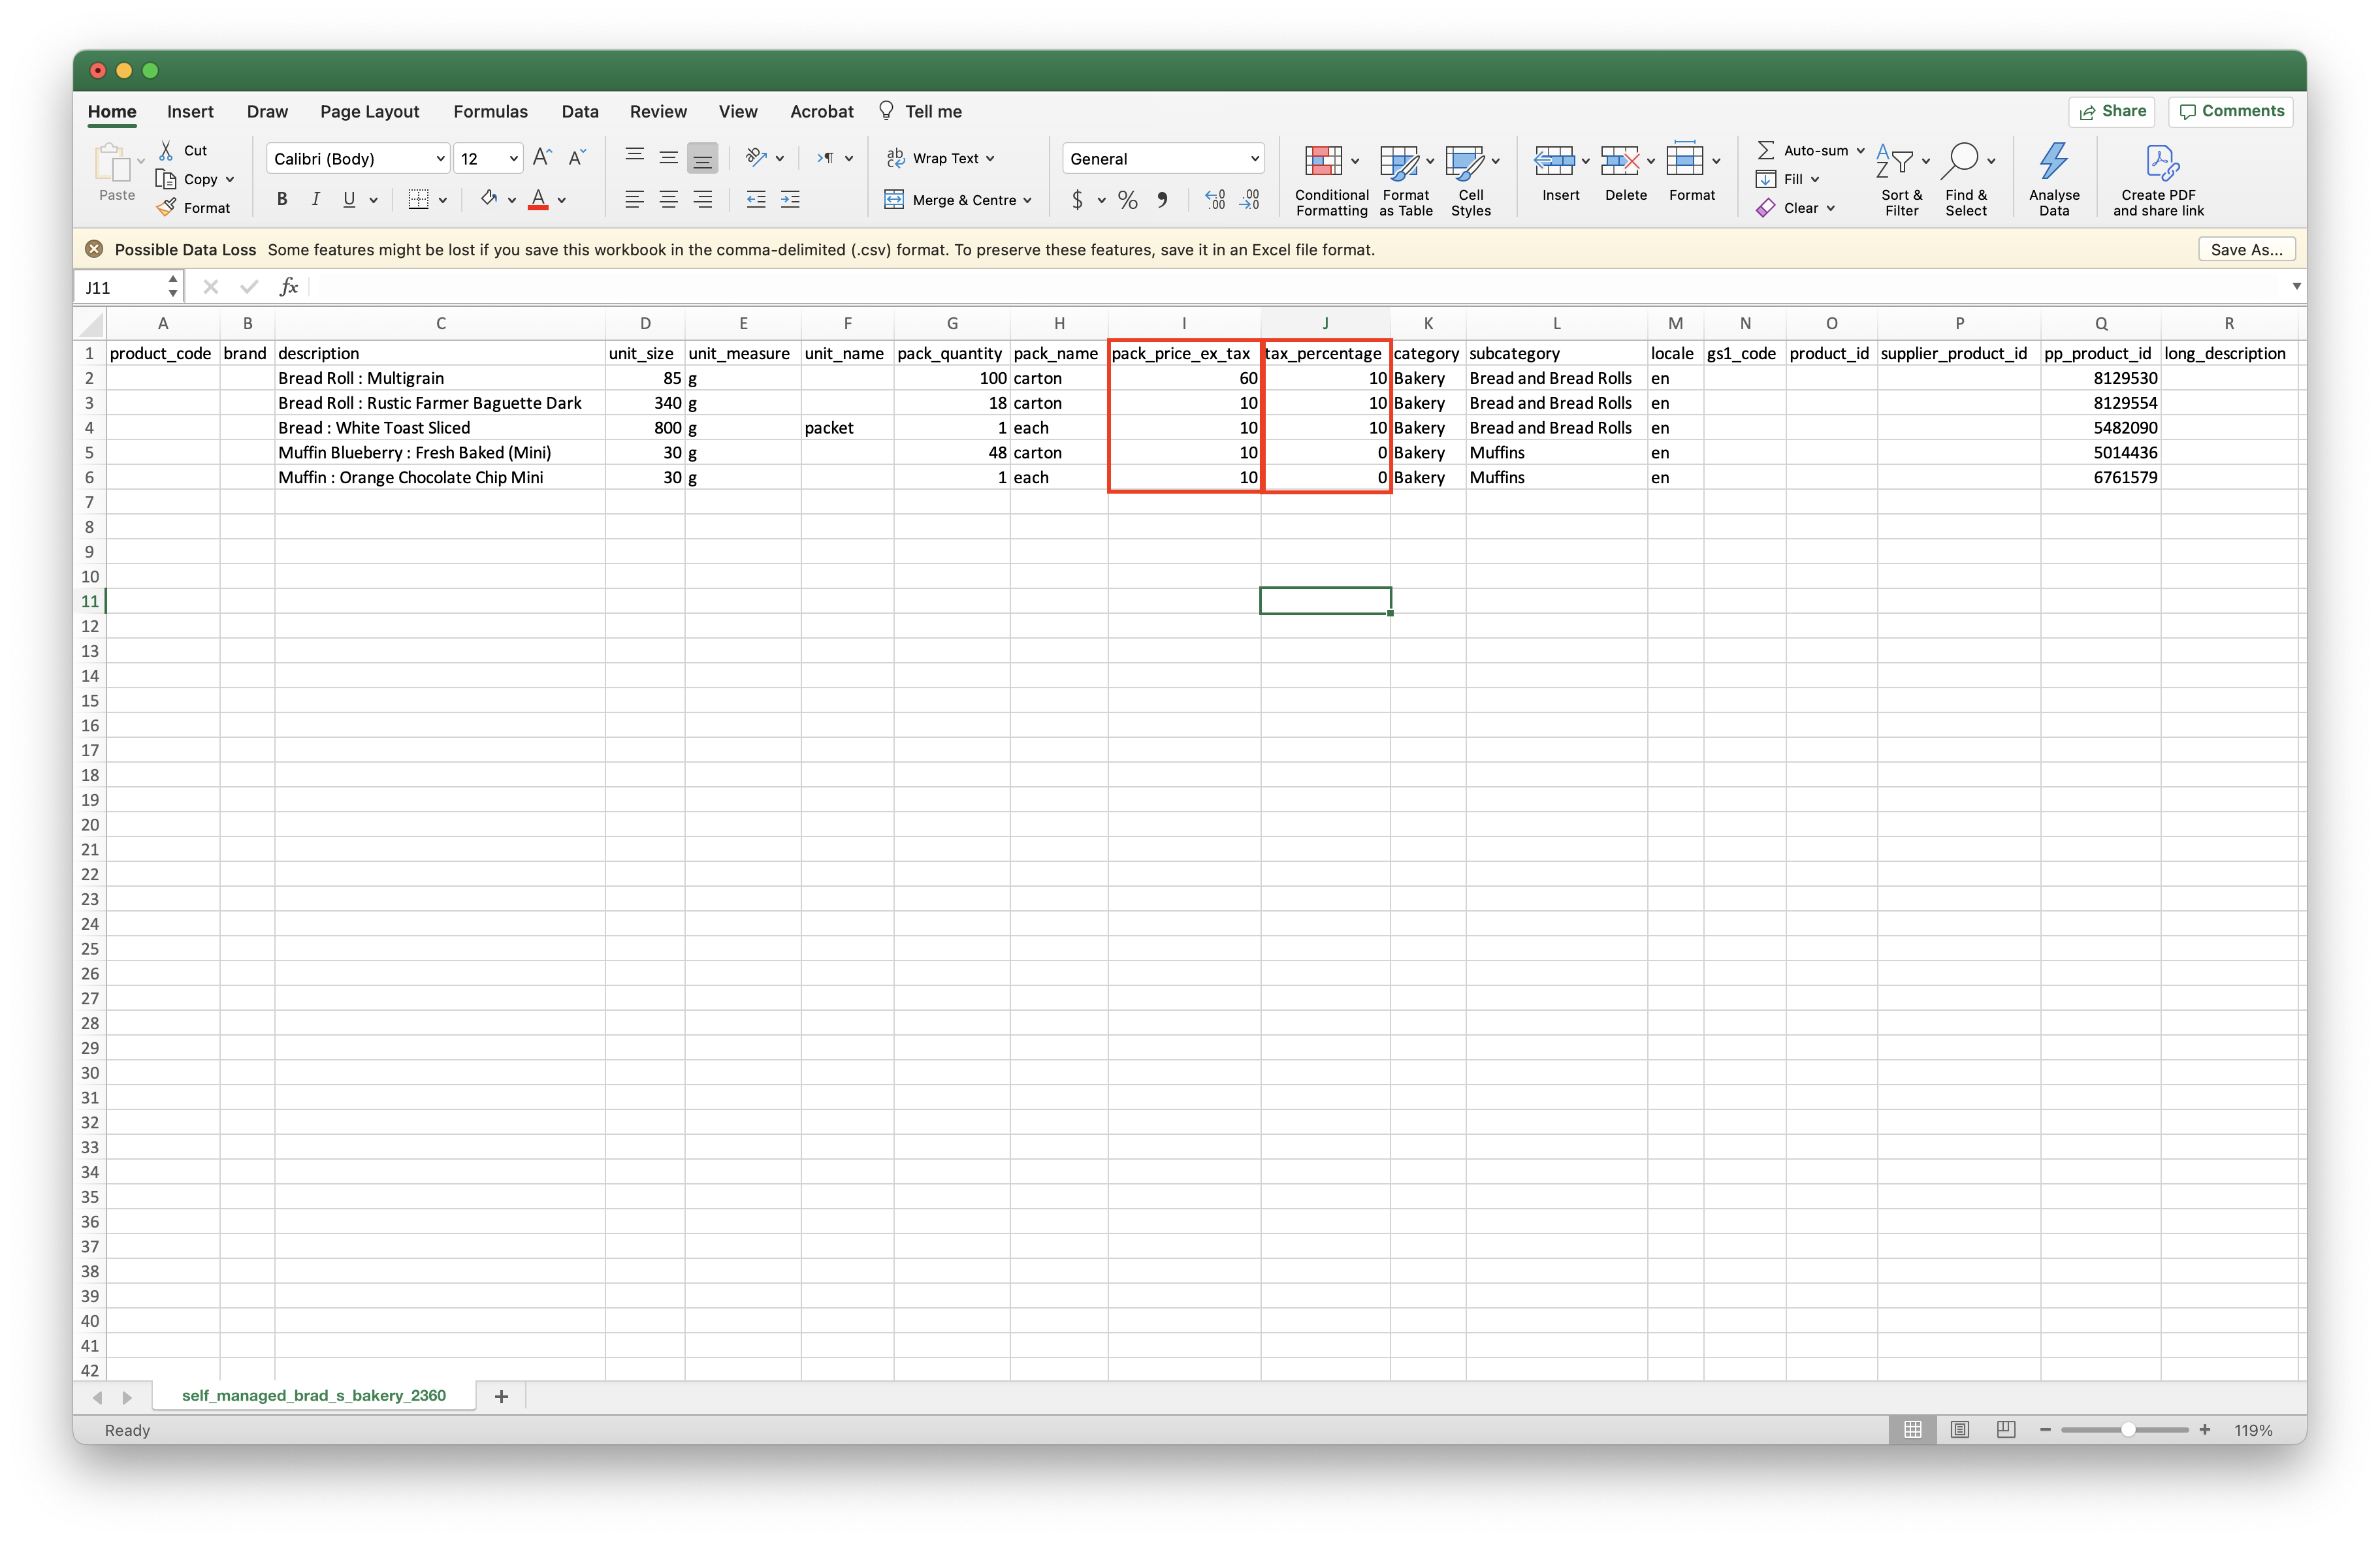
1. Enter the correct Unit Price excl. tax into column I [pack_price_ex_tax]. This will be the price when ordering a quantity of '1' of this item.
2. Enter the correct Tax Percentage into column J [tax_percentage]. The Tax Percentage is the amount of tax that should be calculated and added to the [pack_price_ex_tax]. If the Tax Percentage should be zero, then please simple enter a zero '0'.
3. Once, all of your price and tax percentage changes are completed. Ensure to save file in the CSV format, and proceed to the Import File steps below.
Step 4 (Optional): Adding Extra Products
Adding extra Products to the Catalog via the Import function is useful, when you need to add multiple products to your Self-Managed Catalog. You may wish to add extra products a Catalog because the Supplier has added new products to their range, or you may have unpriced products in your Buy List, and you need to add quotes from the Supplier, to these Buy List products.
The 'P+ Product Code' or 'P+ Code' is the unique identifier for a product, in the PurchasePlus system. There are multiple ways to find the P+ Product Code on any Product in PurchasePlus:
1. By visiting the Product in PurchasePlus.
2. Via a Catalog or Buy List Export File.
1. By Visiting the Product in PurchasePlus.
a. Visit the All Products area in the side-menu of PurchasePlus, and search for a Product.
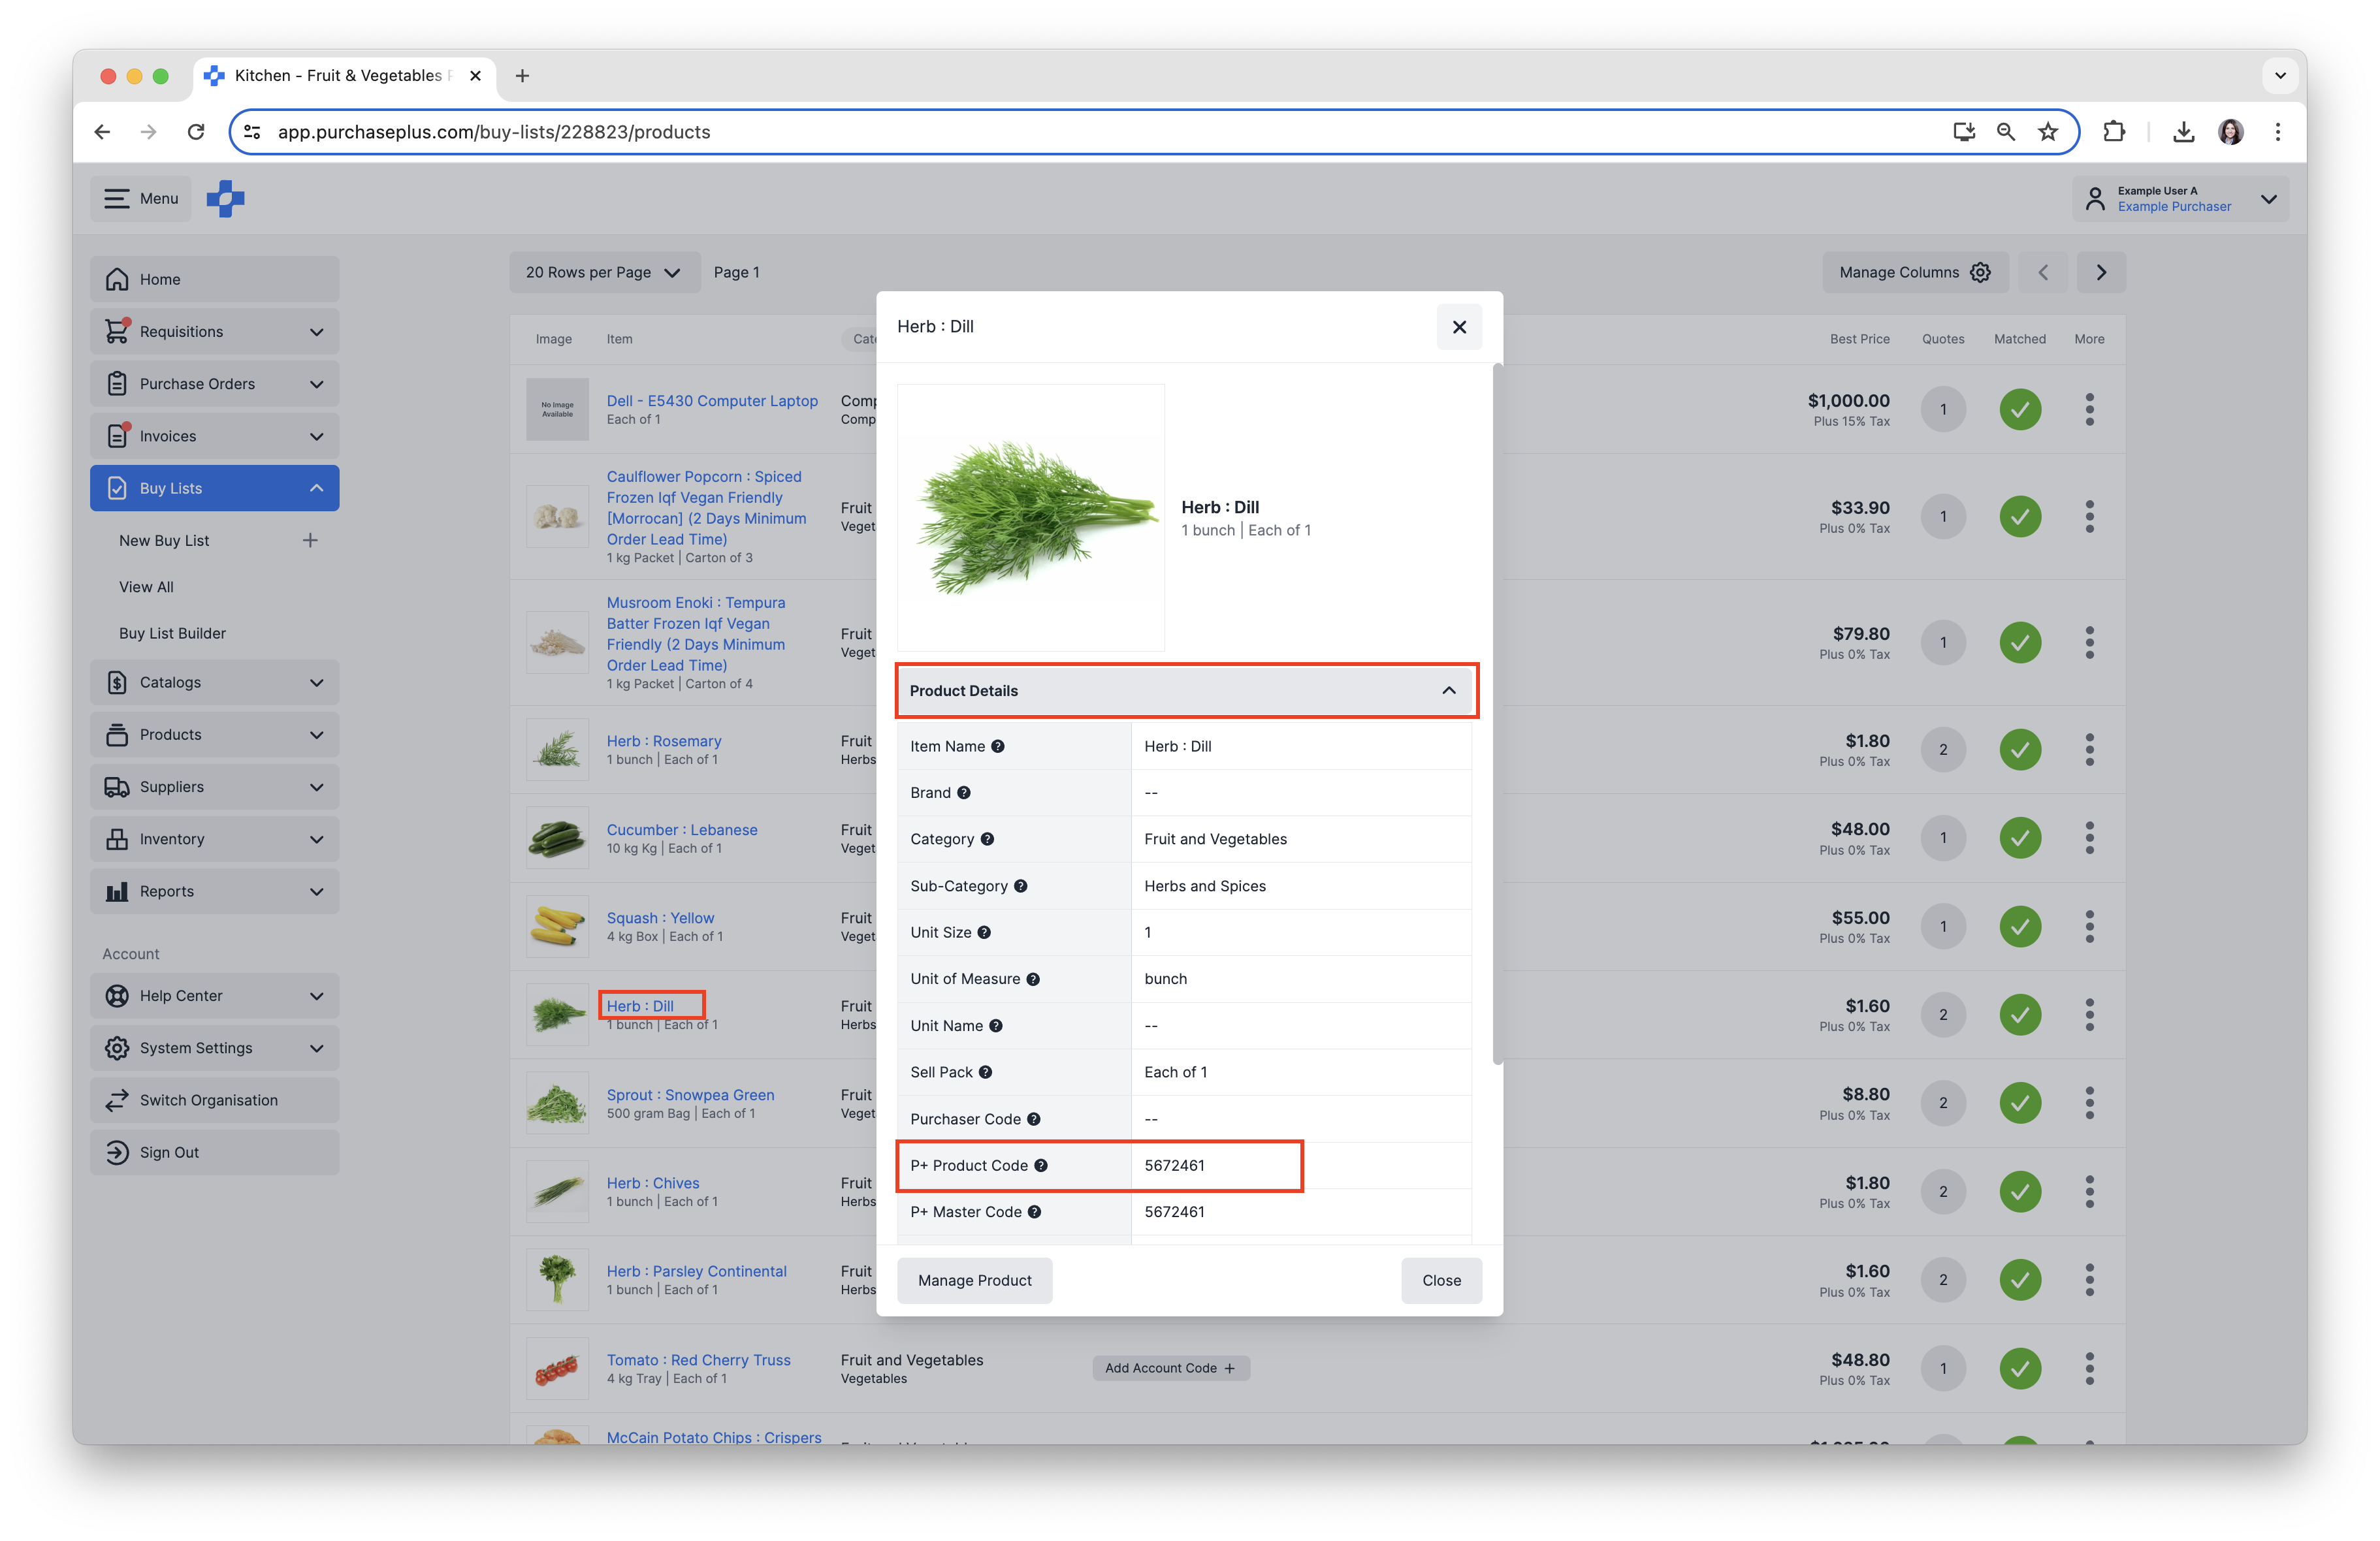
b. Click on the [Product Name], then expand the [Product Details] section.
c. Look for the P+ Product Code. This is the unique identifying Code for this Product in PurchasePlus.
d. Copy the P+ Product Code.
2. Via a Catalog or Buy List Export.
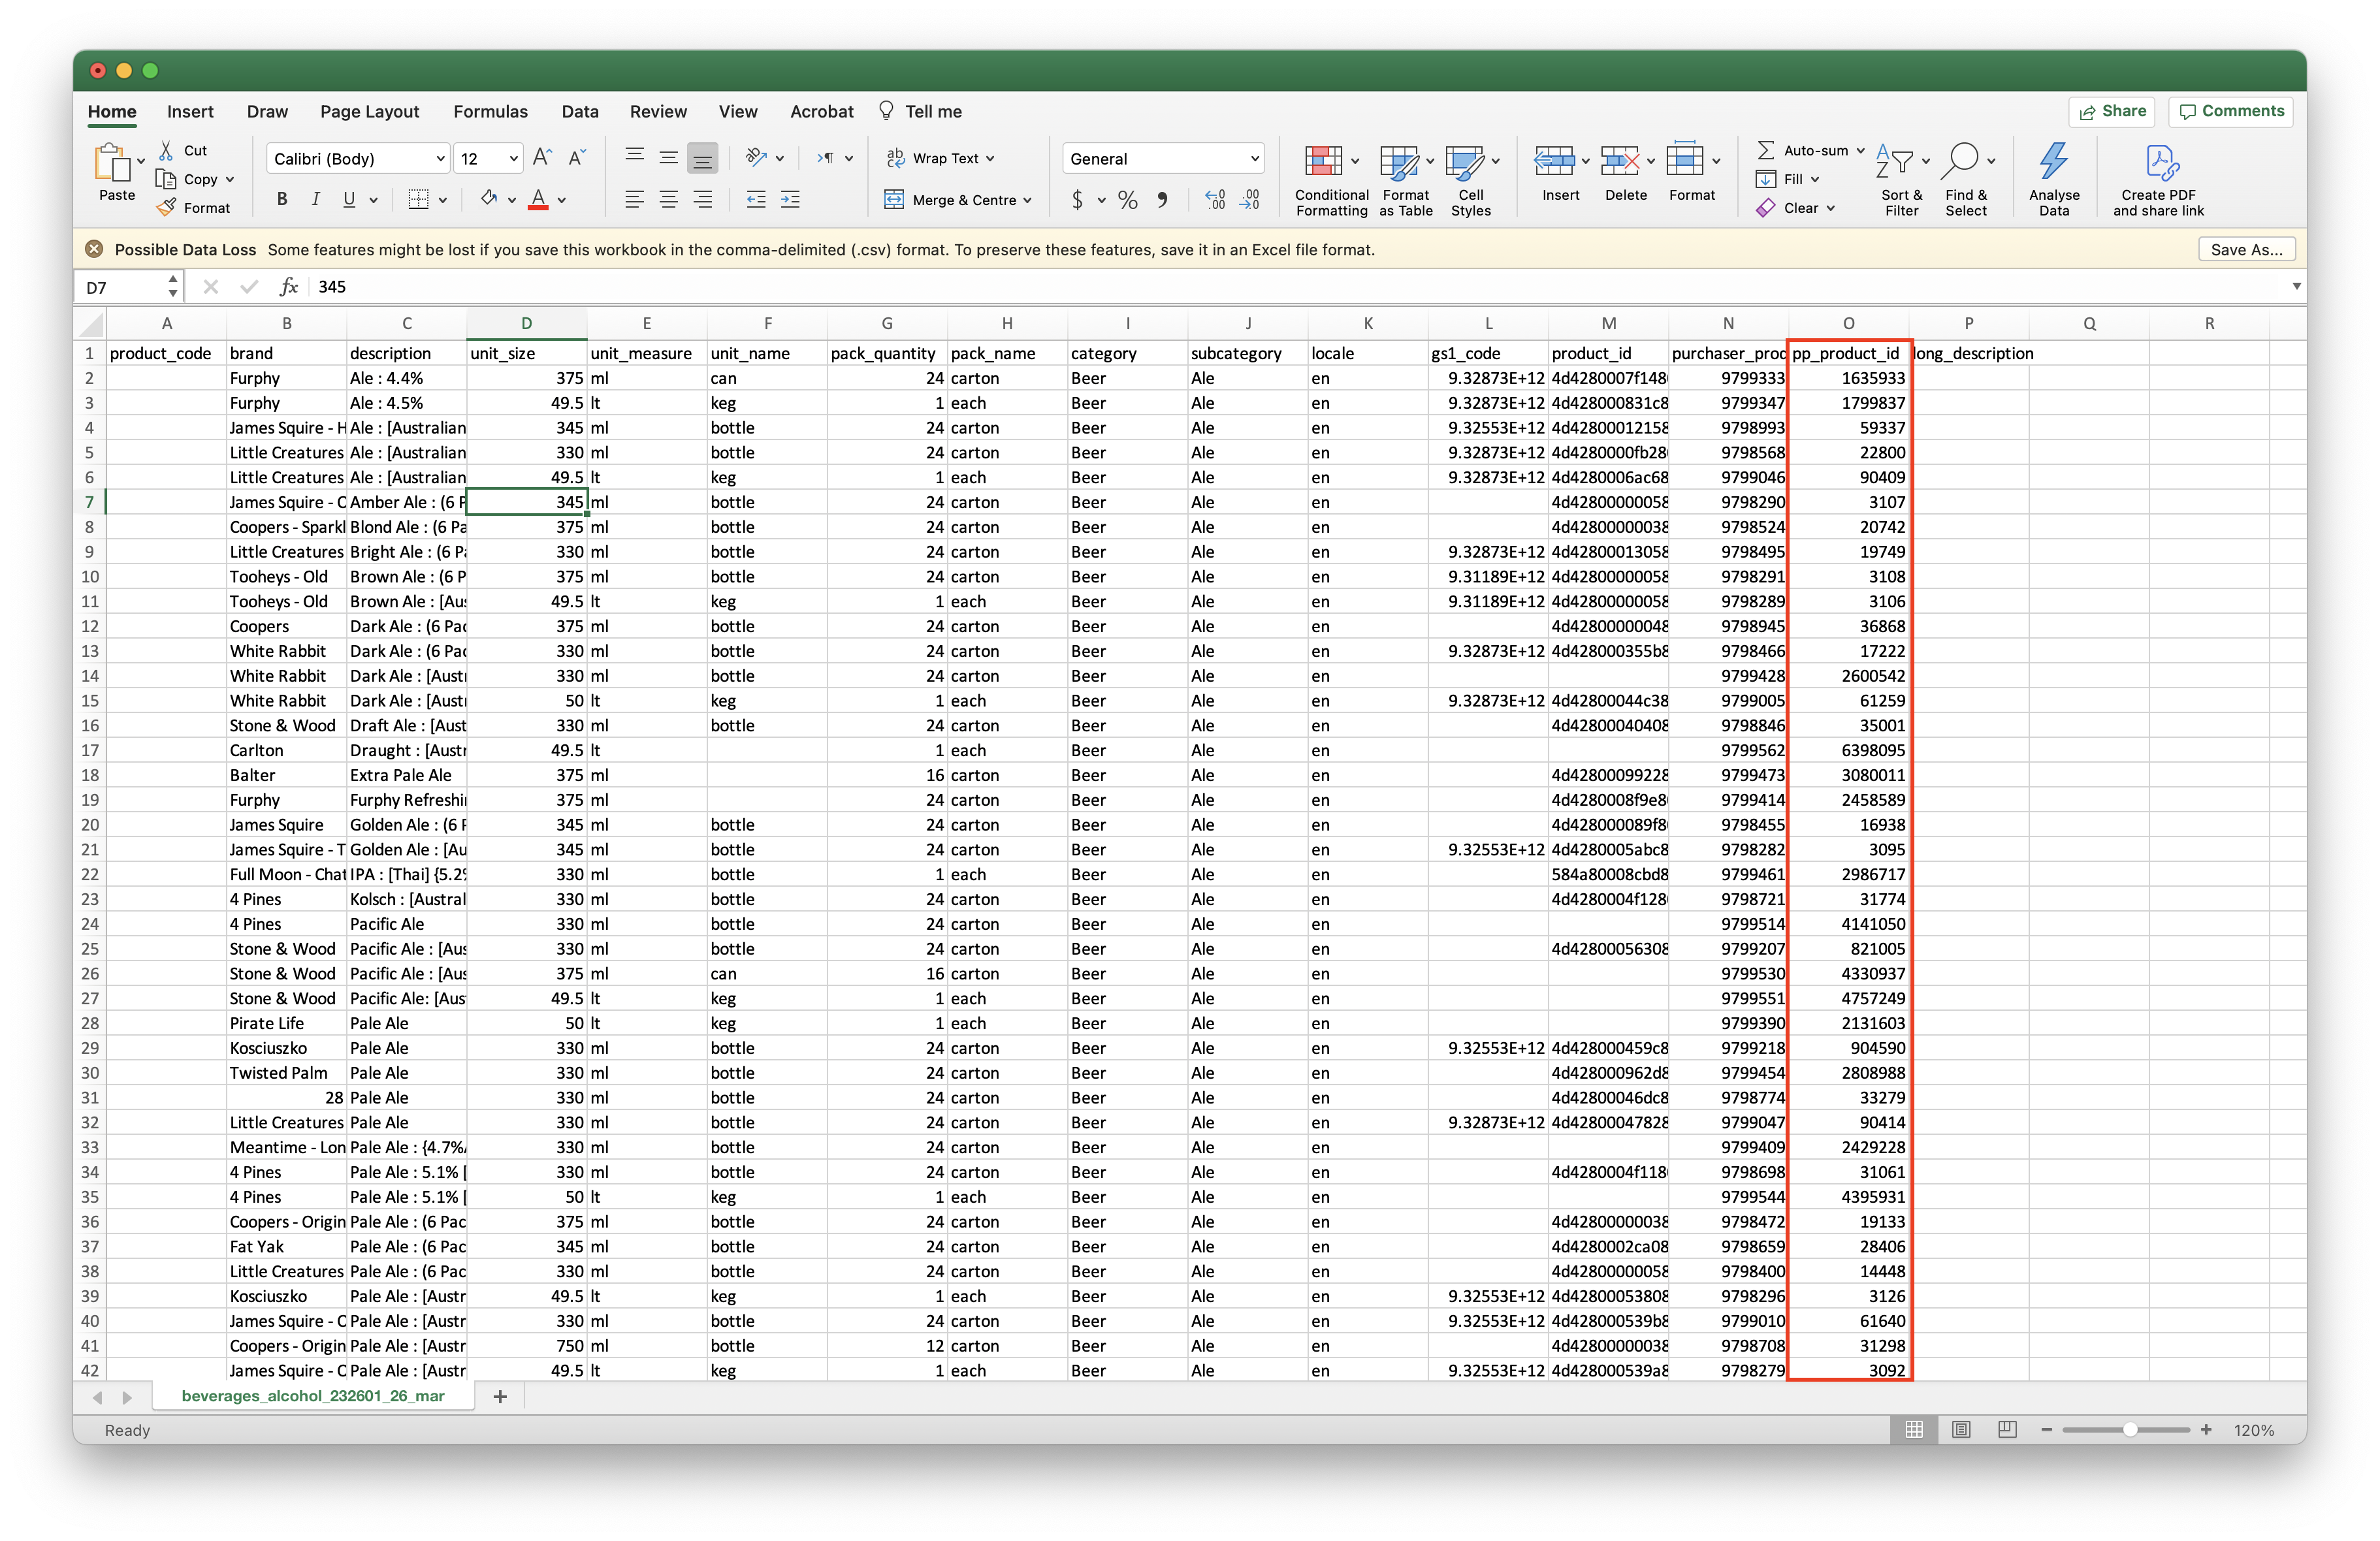
a. Follow the steps above to Export a Catalog, or you can follow the same steps to Export a Buy List.
b. Look for the column [pp_product_id] in the resulting CSV export file. This is the P+ Product Code.
c. Copy the P+ Product Code.
3. Enter the P+ Product Code into the Import File.
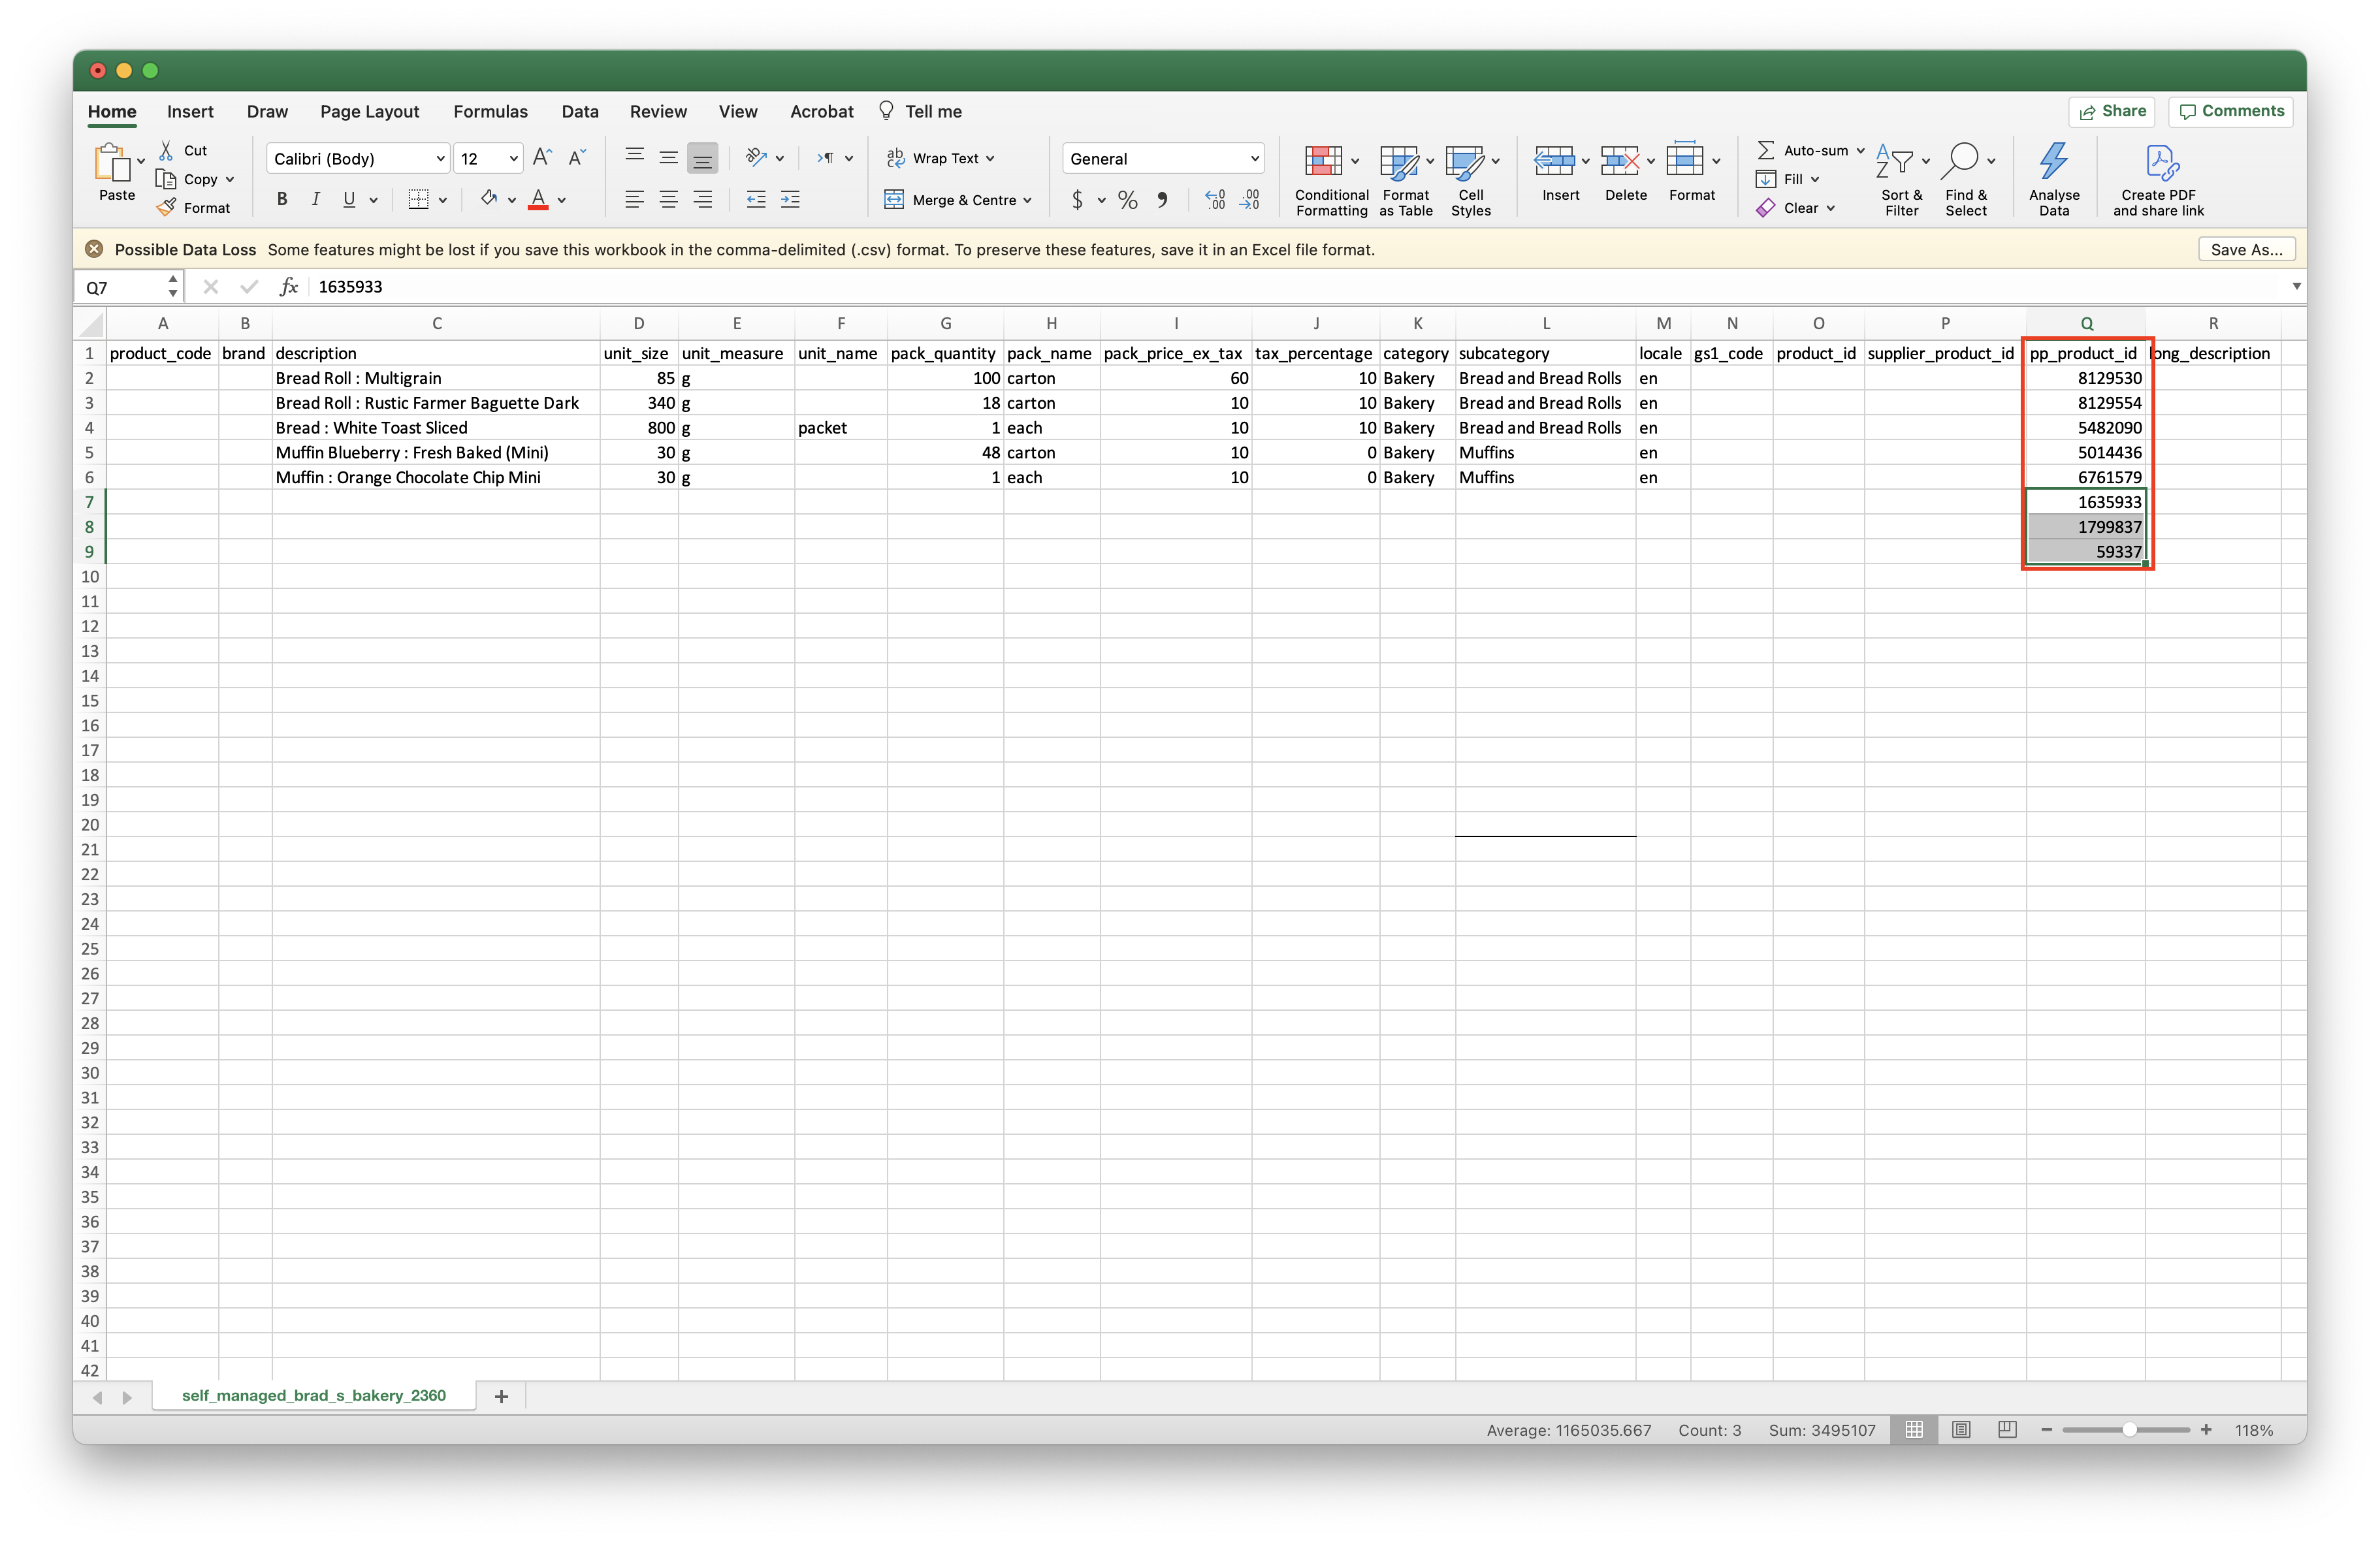
1. Enter the P+ Product Code into a new row on your Import File, making sure you enter the number into the [pp_product_id] column,
2. You will also need to enter the [pack_price_ex_tax] in column I, and the [tax_percentage] in column J.
IMPORTANT: You should leave all other cells empty on this new row, The cells you leave empty are things that PurchasePlus already knows about the product, based on the P+ Product Code you are providing.
Step 5: Import the Updated CSV
1. Visit the Self-Managed Catalog again in PurchasePlus, and select the [Imports] tab,
2. Click the [Create New Import] button located on the right side.
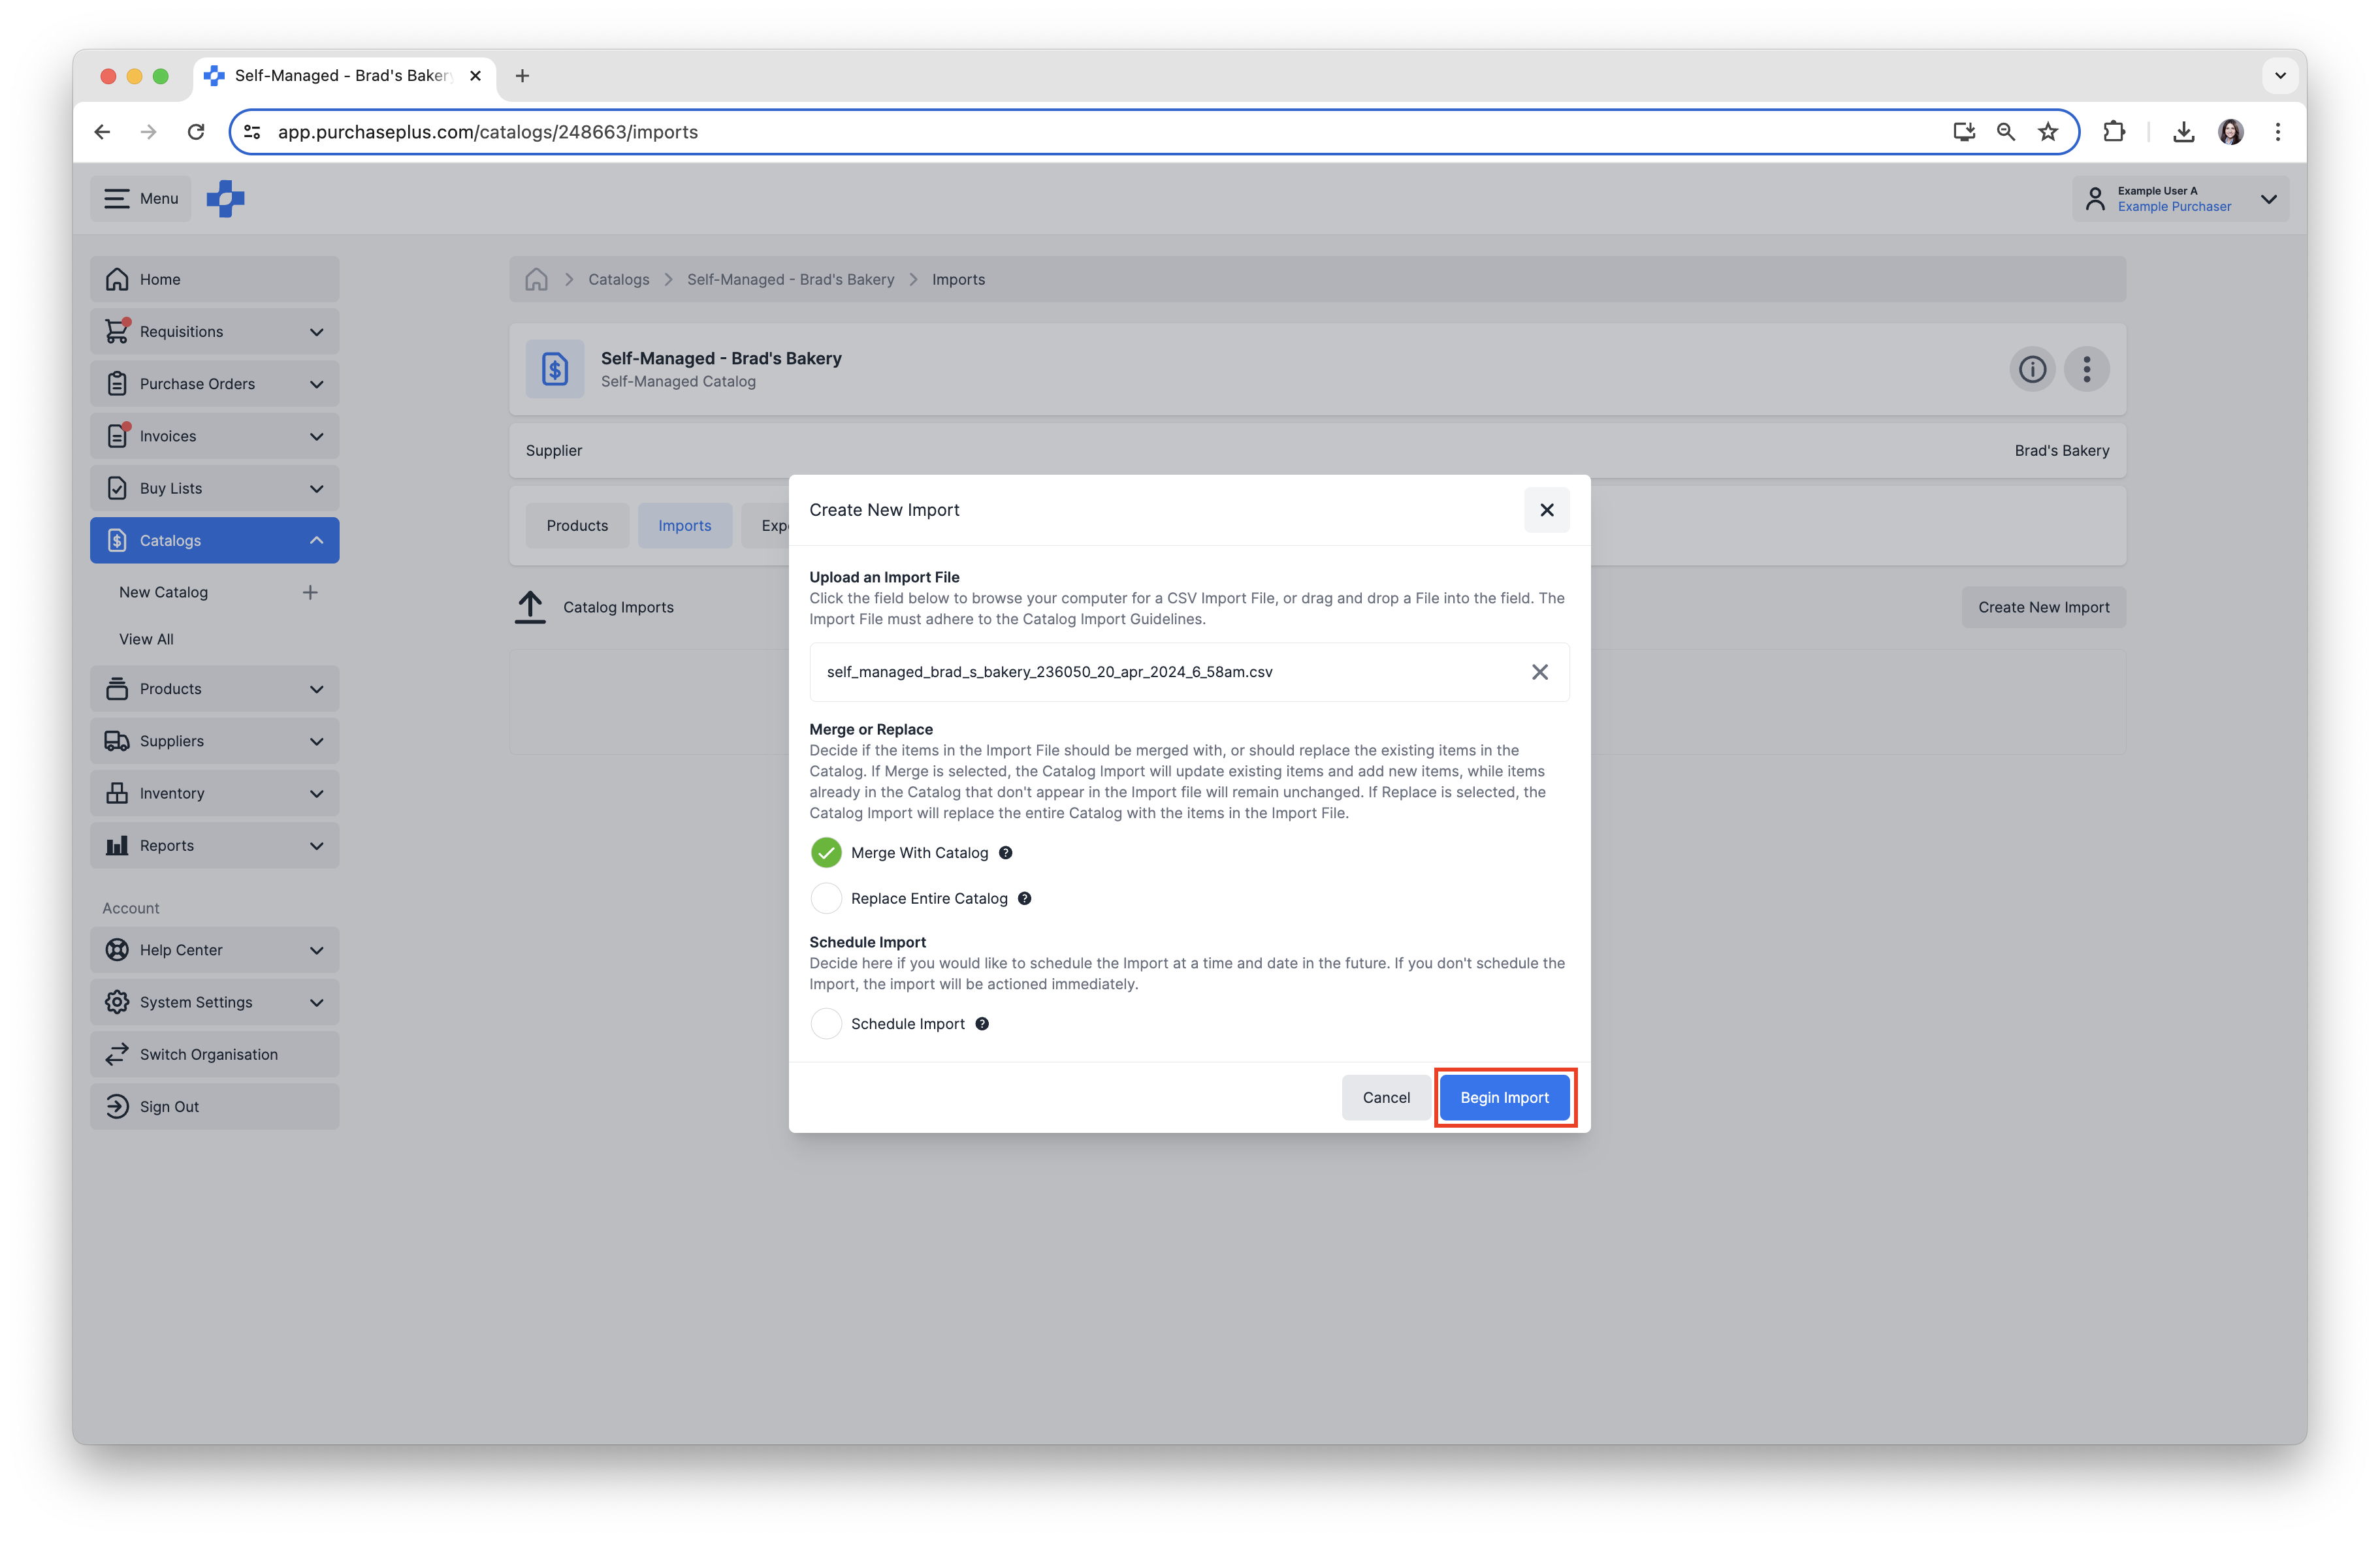
2. Upload your Import File by dragging and drop file here, or clicking the upload field to browse your device and select the file.
3. Decide if the items in the Import File should [Merge with the Catalog], or should [Replace the Entire Catalog].
Note: If 'Merge' is selected, the Catalog Import will update existing items and add new items, while items already in the Catalog that don't appear in the Import file will remain unchanged. If `Replace` is selected, the Catalog Import will replace the entire Catalog with only the items in the Import File.
4. Schedule Import, if required. Click [Schedule Import], then set a [Scheduled Date] and set a [Scheduled Time] for the Import to complete in the future. If you wish to delete the Scheduled Catalog Import Job, you have the option to do so.
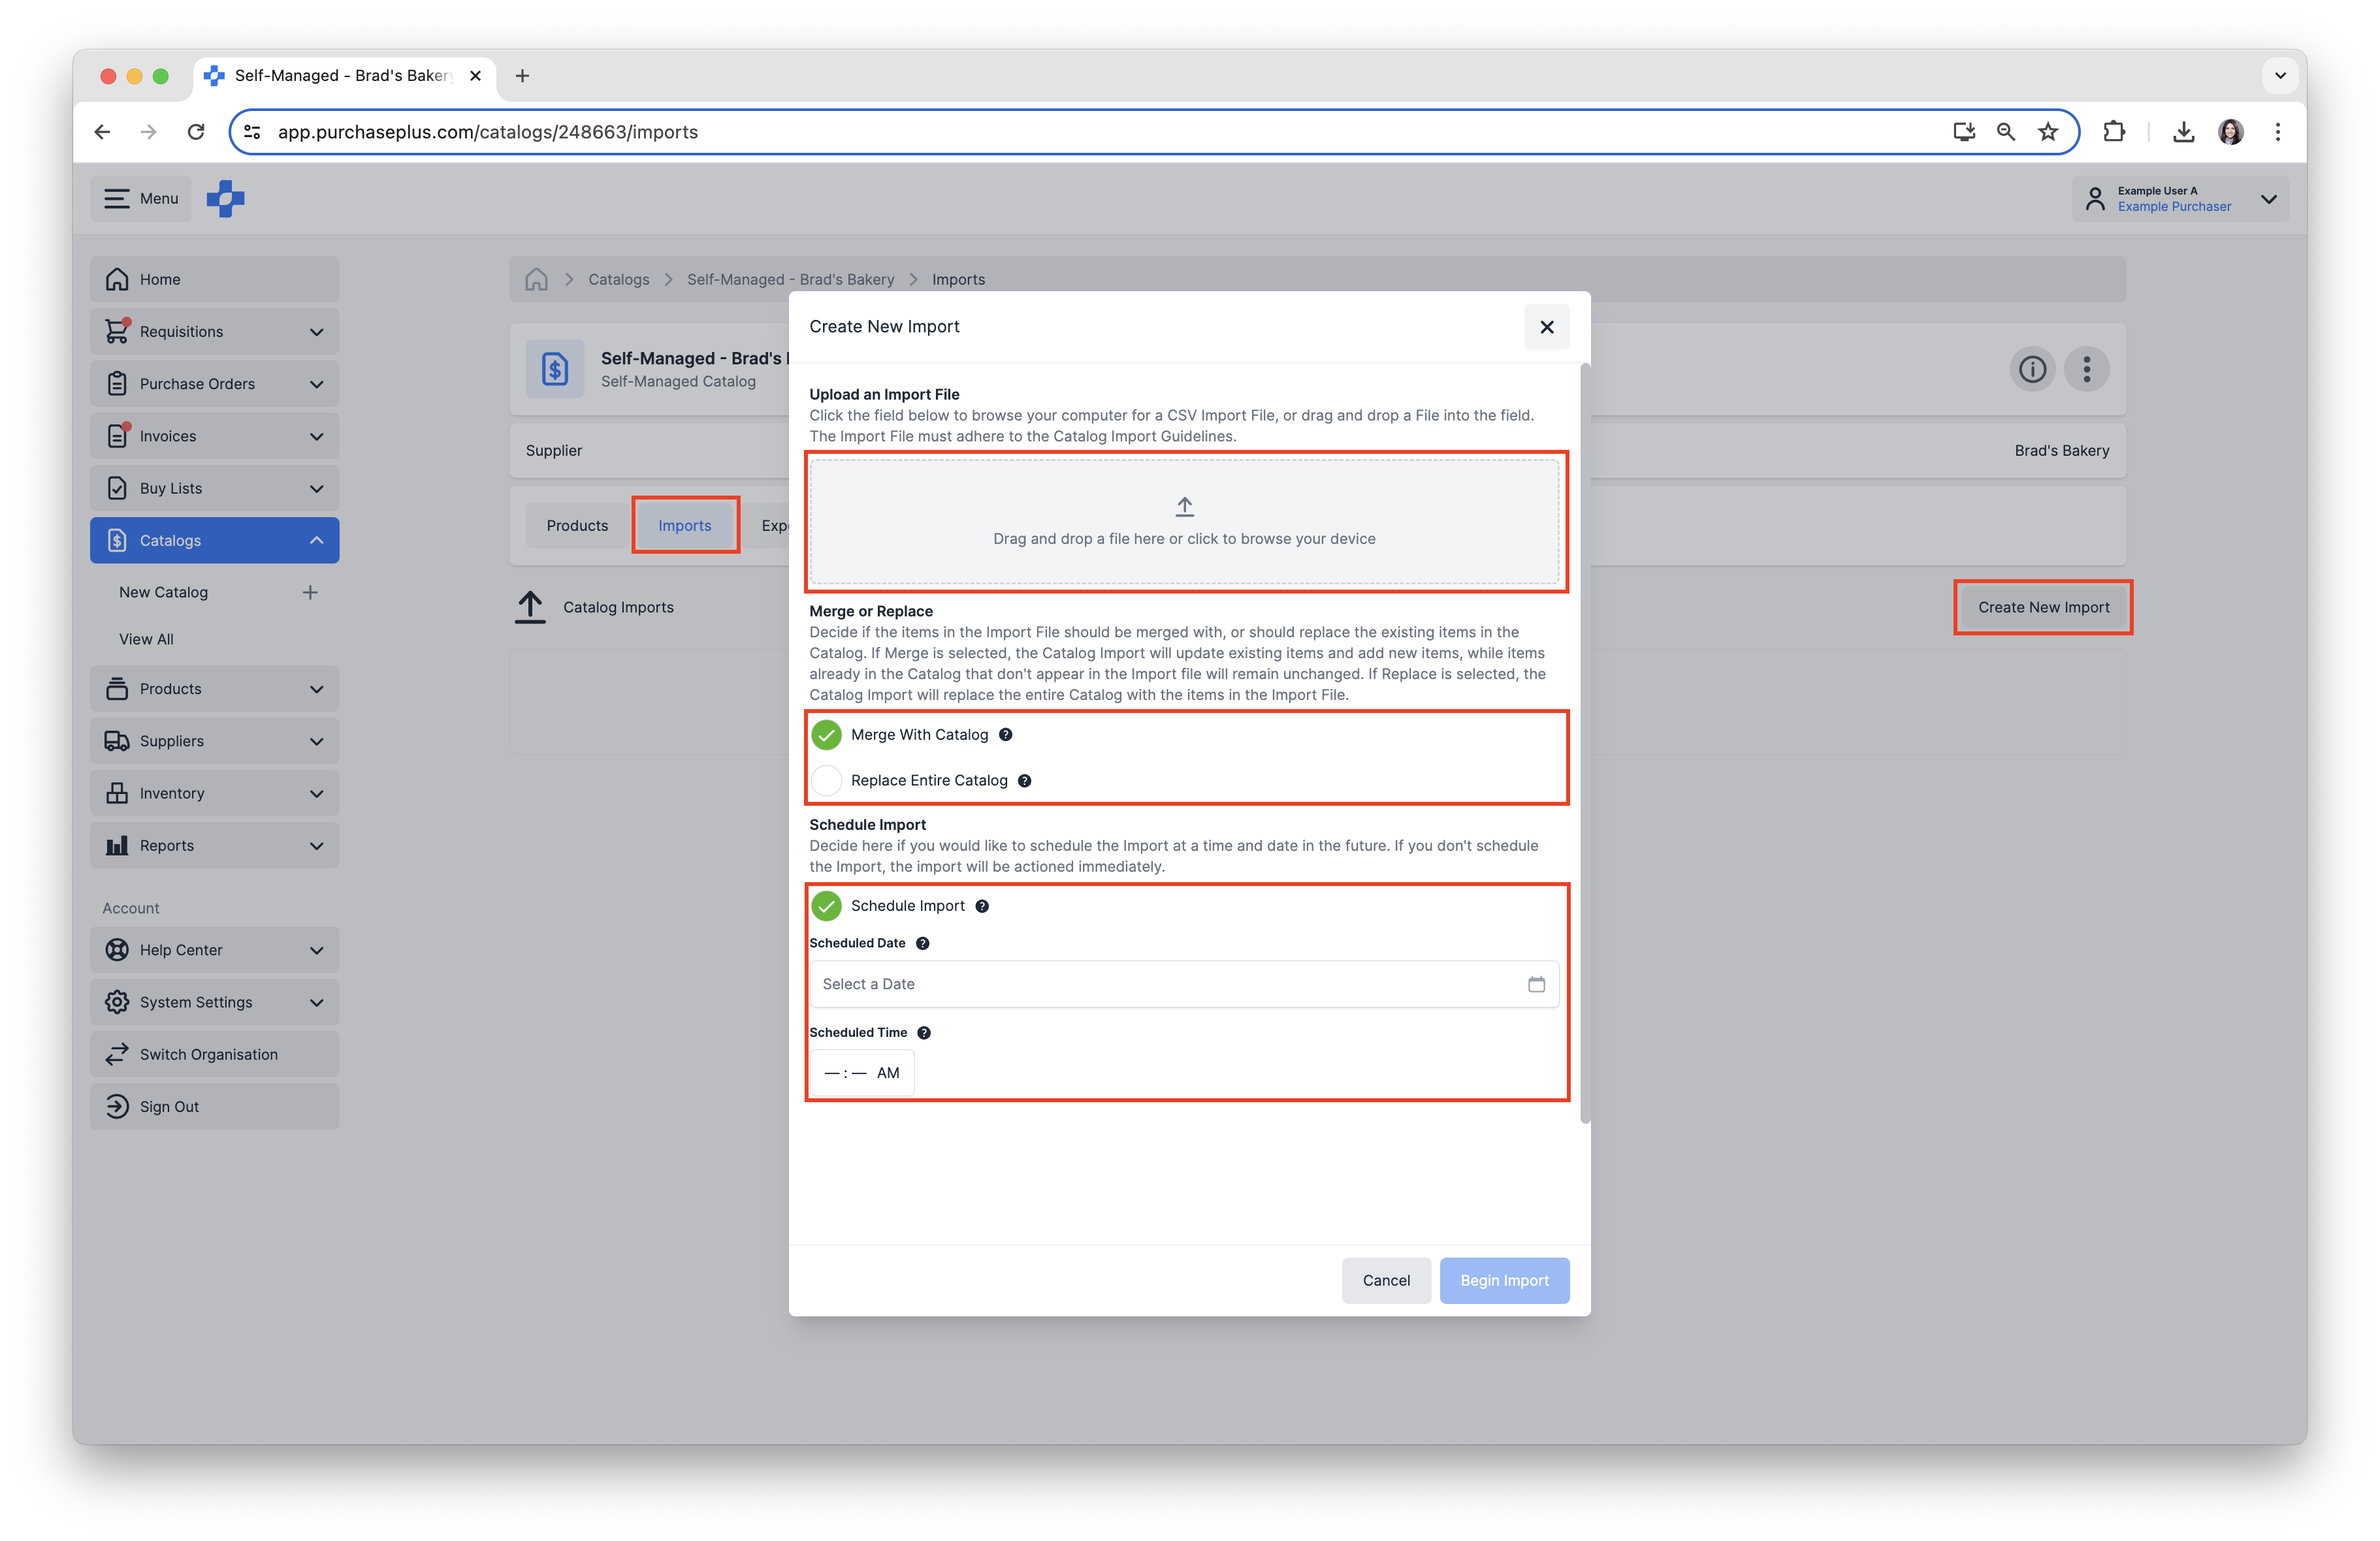
5. Click [Begin Import] to confirm and action the Import.
 The status of the Import file will begin in a state of 'Processing', then progress to one of the following 3 states:
- Green 'Complete' - all rows were imported successfully.
- Orange 'Compete' - some but not all rows were imported successfully.
- Red 'Failed' - none of the rows were imported successfully.
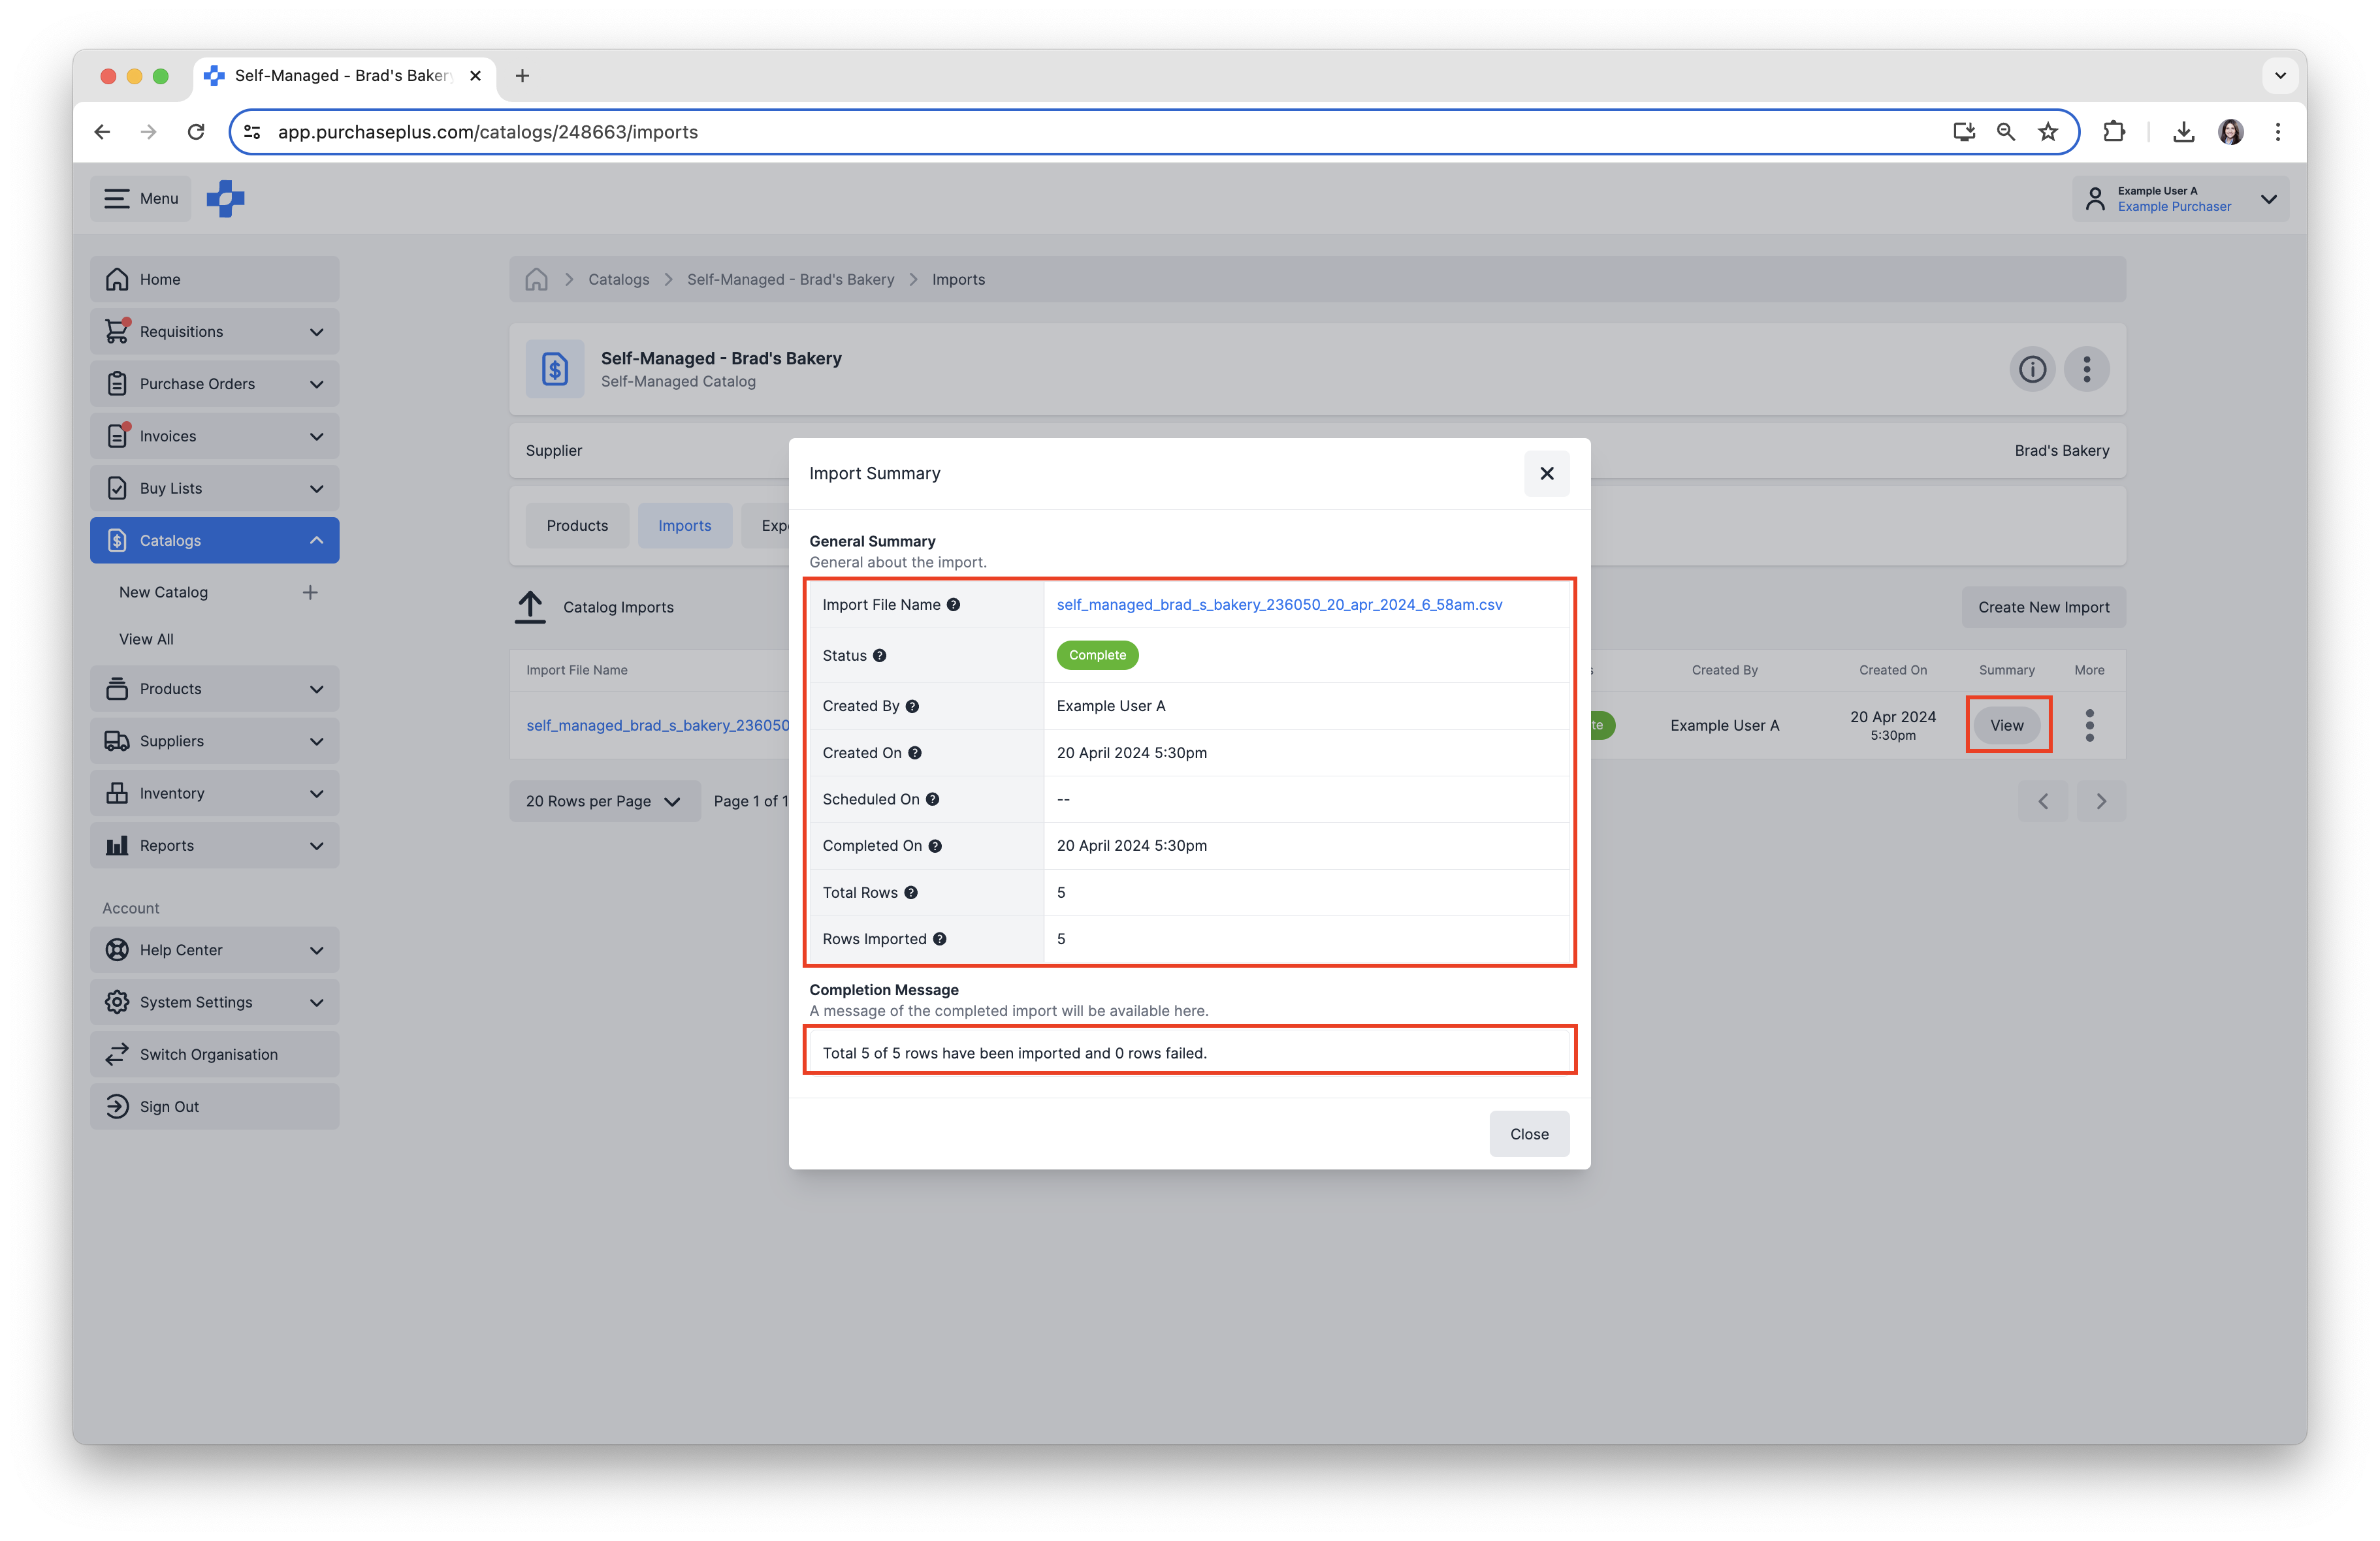
6. Once completed, click [View] in the Summary column, to view a summary of the Import in the pop-up window. The summary will indicate if the Import has been successful, as well as how many rows were imported successfully. If the Import was partially unsuccessful or is in a state of 'Failed', a summary of Total Rows compared to Rows Imported can be helpful to understand the outcome of the Import.
Examples of Successful and Unsuccessful Imports
A green 'Complete' message confirms that all rows have been successfully imported.
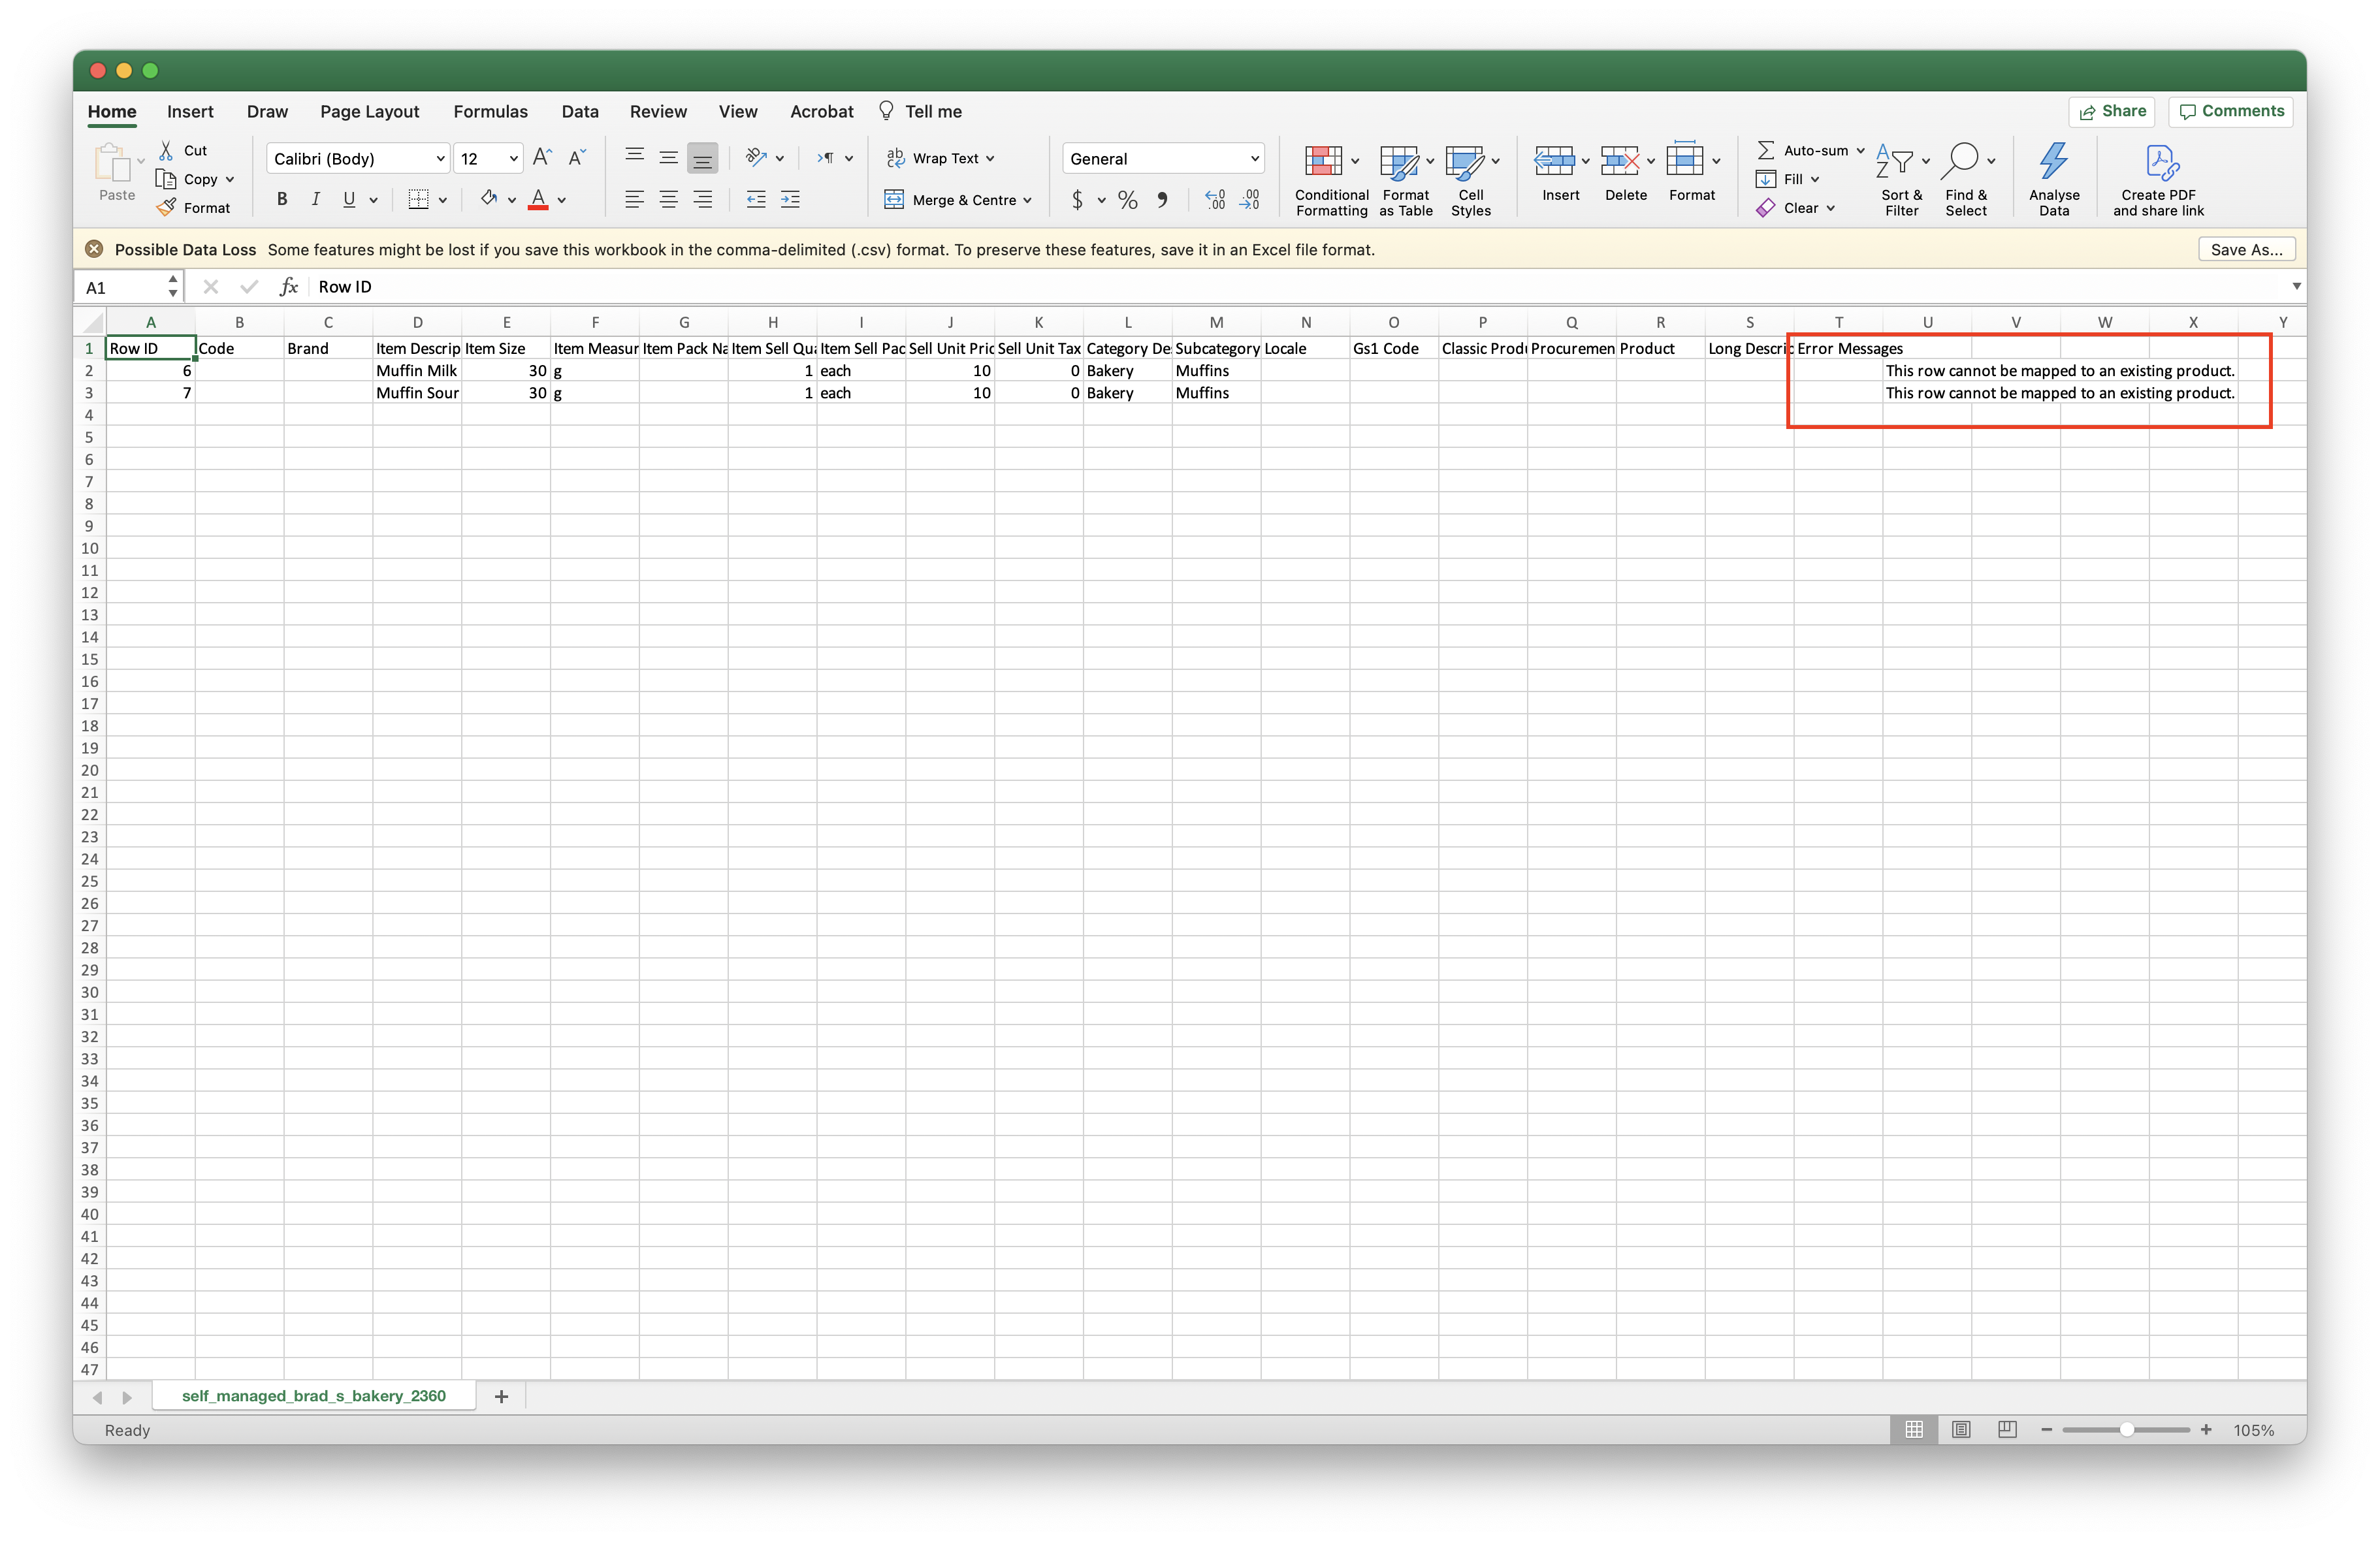
An Orange 'Complete' message means that only some rows have been imported. Click [Error File] to download and view the failed rows, as wells as error messages on each failed row.
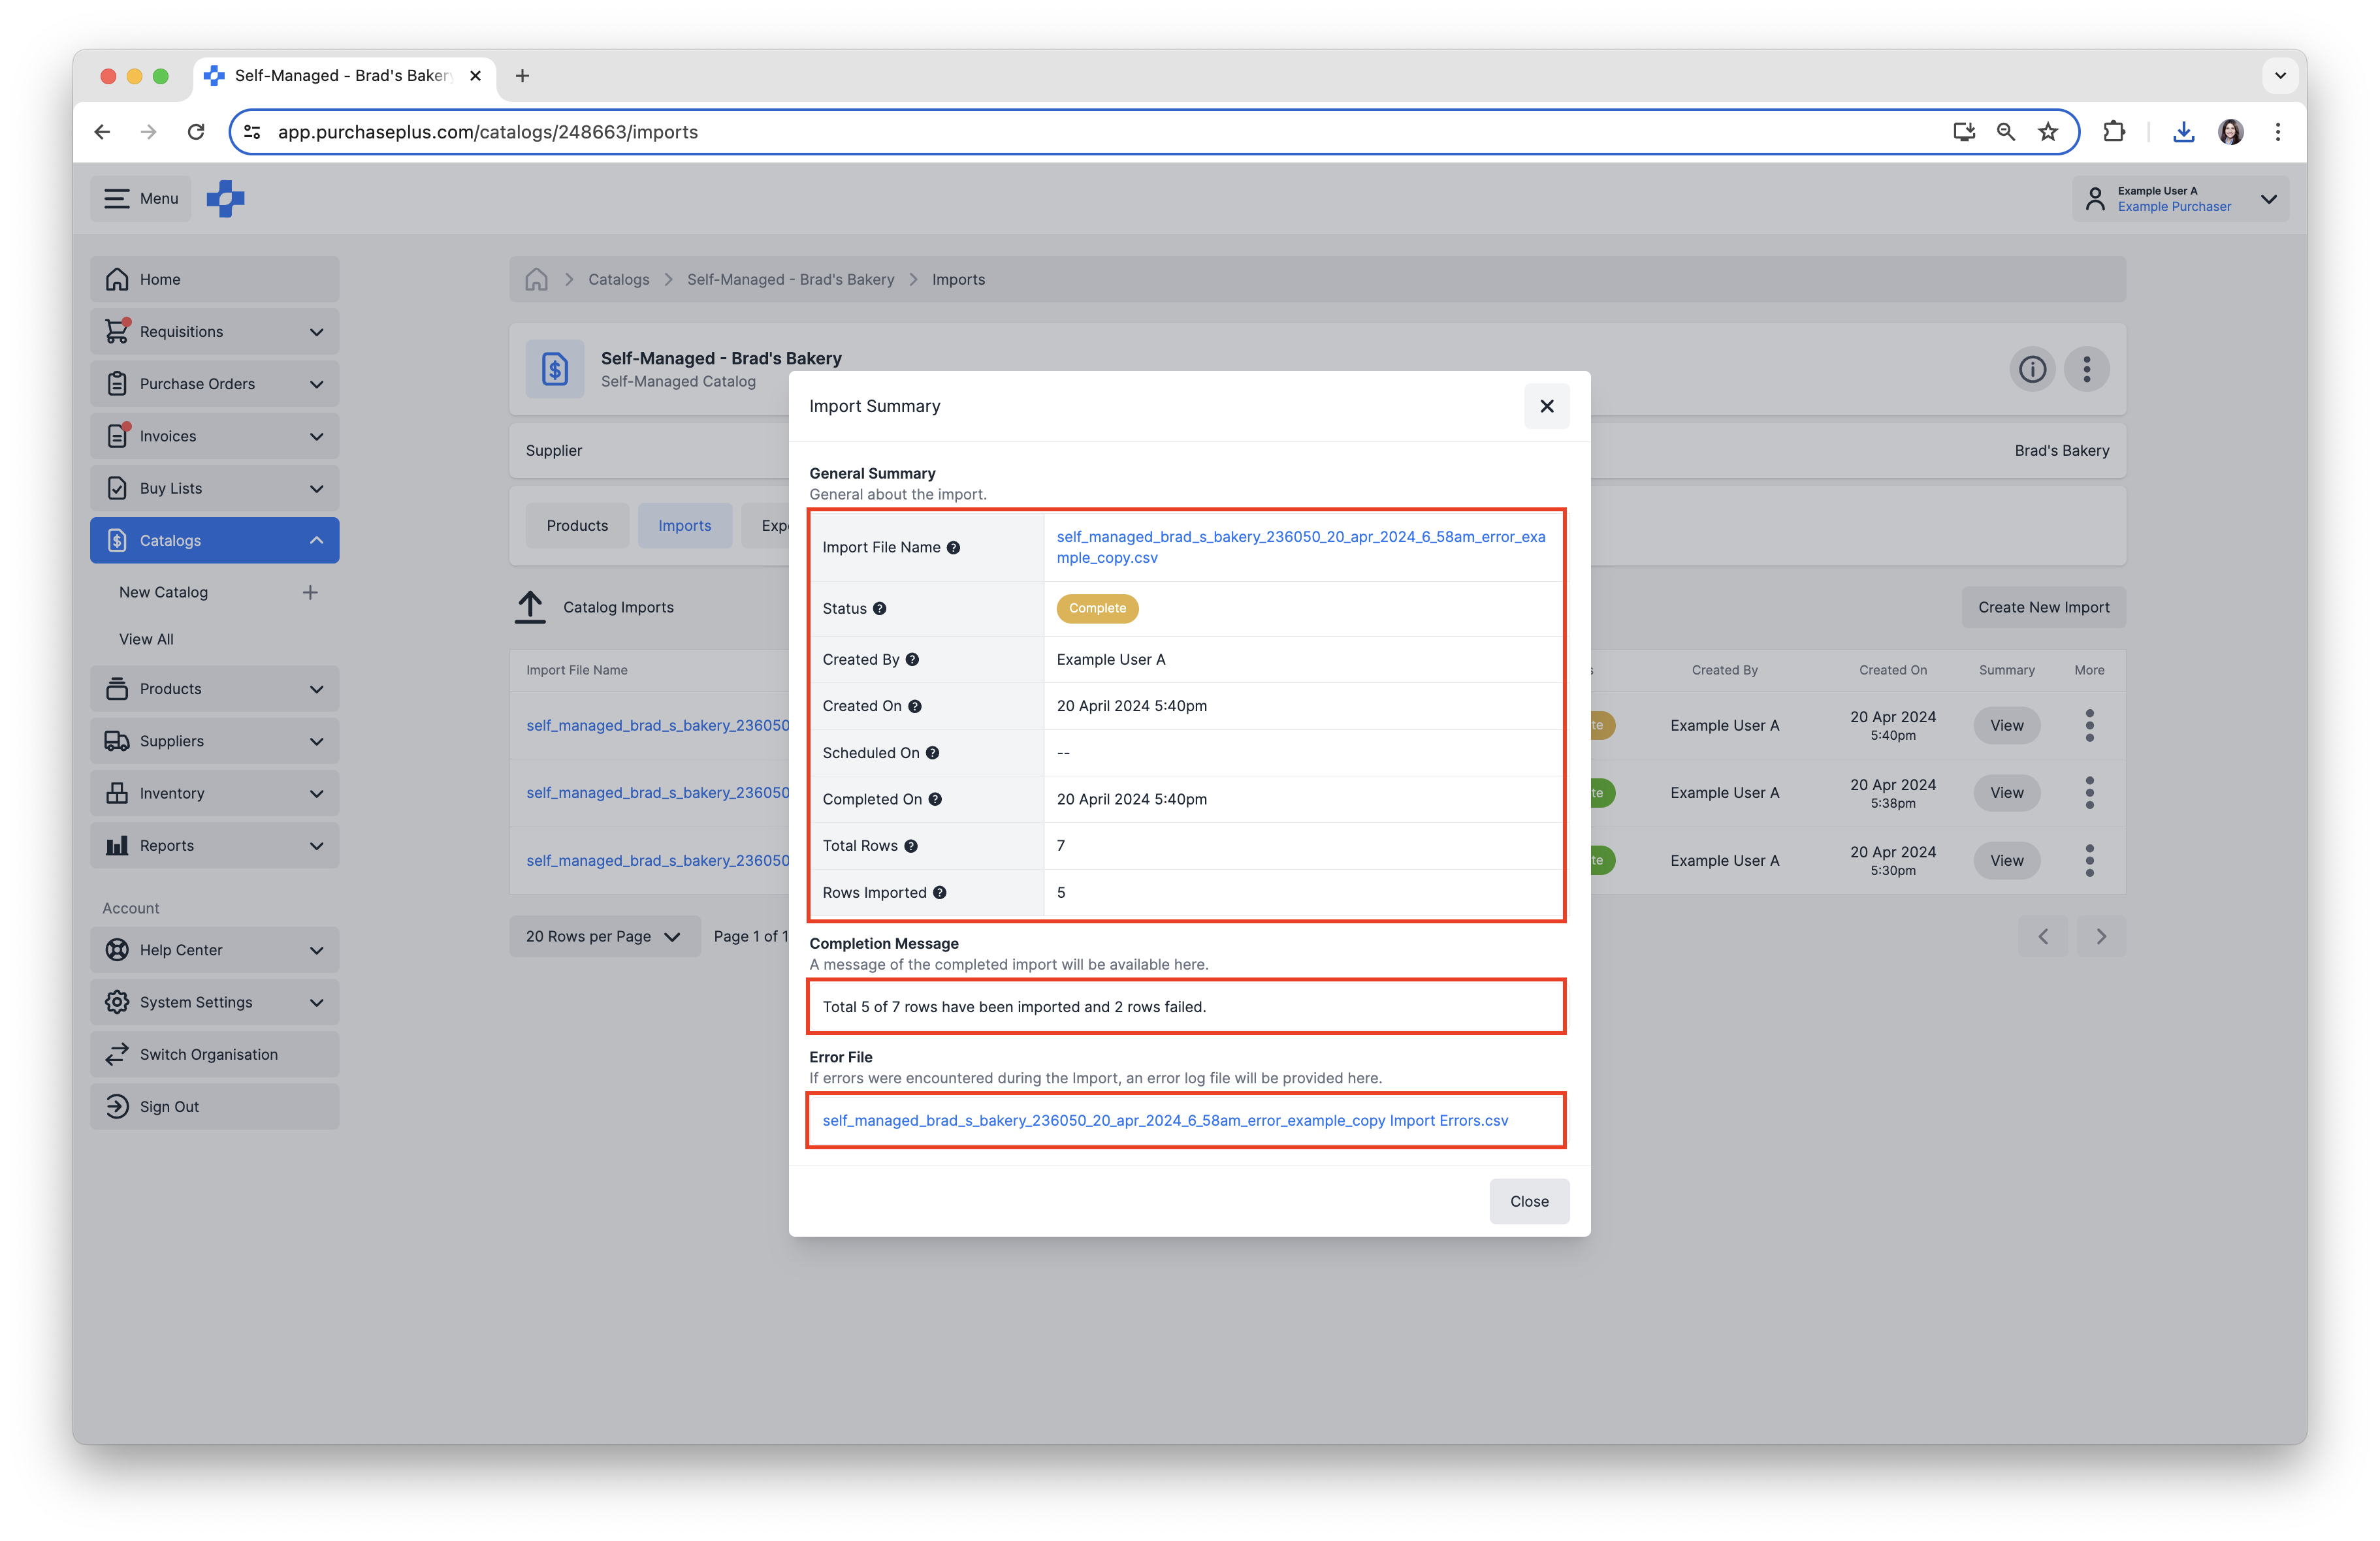
The Error Message for each row will be displayed in the far right, inside the Error file.