Learn how to create a Requisition using the Basic Shopping mode.
Jump to:
- What is Basic Shopping Mode?
- Tile View vs List View
- Best Quote Only Mode
- Navigating Basic Shopping Mode
- Guide: Completing a Requisition in Basic Shopping Mode
What is Basic Shopping Mode?
When shopping any Requisition type, you can opt either Enable Advanced Shopping Mode, or not:
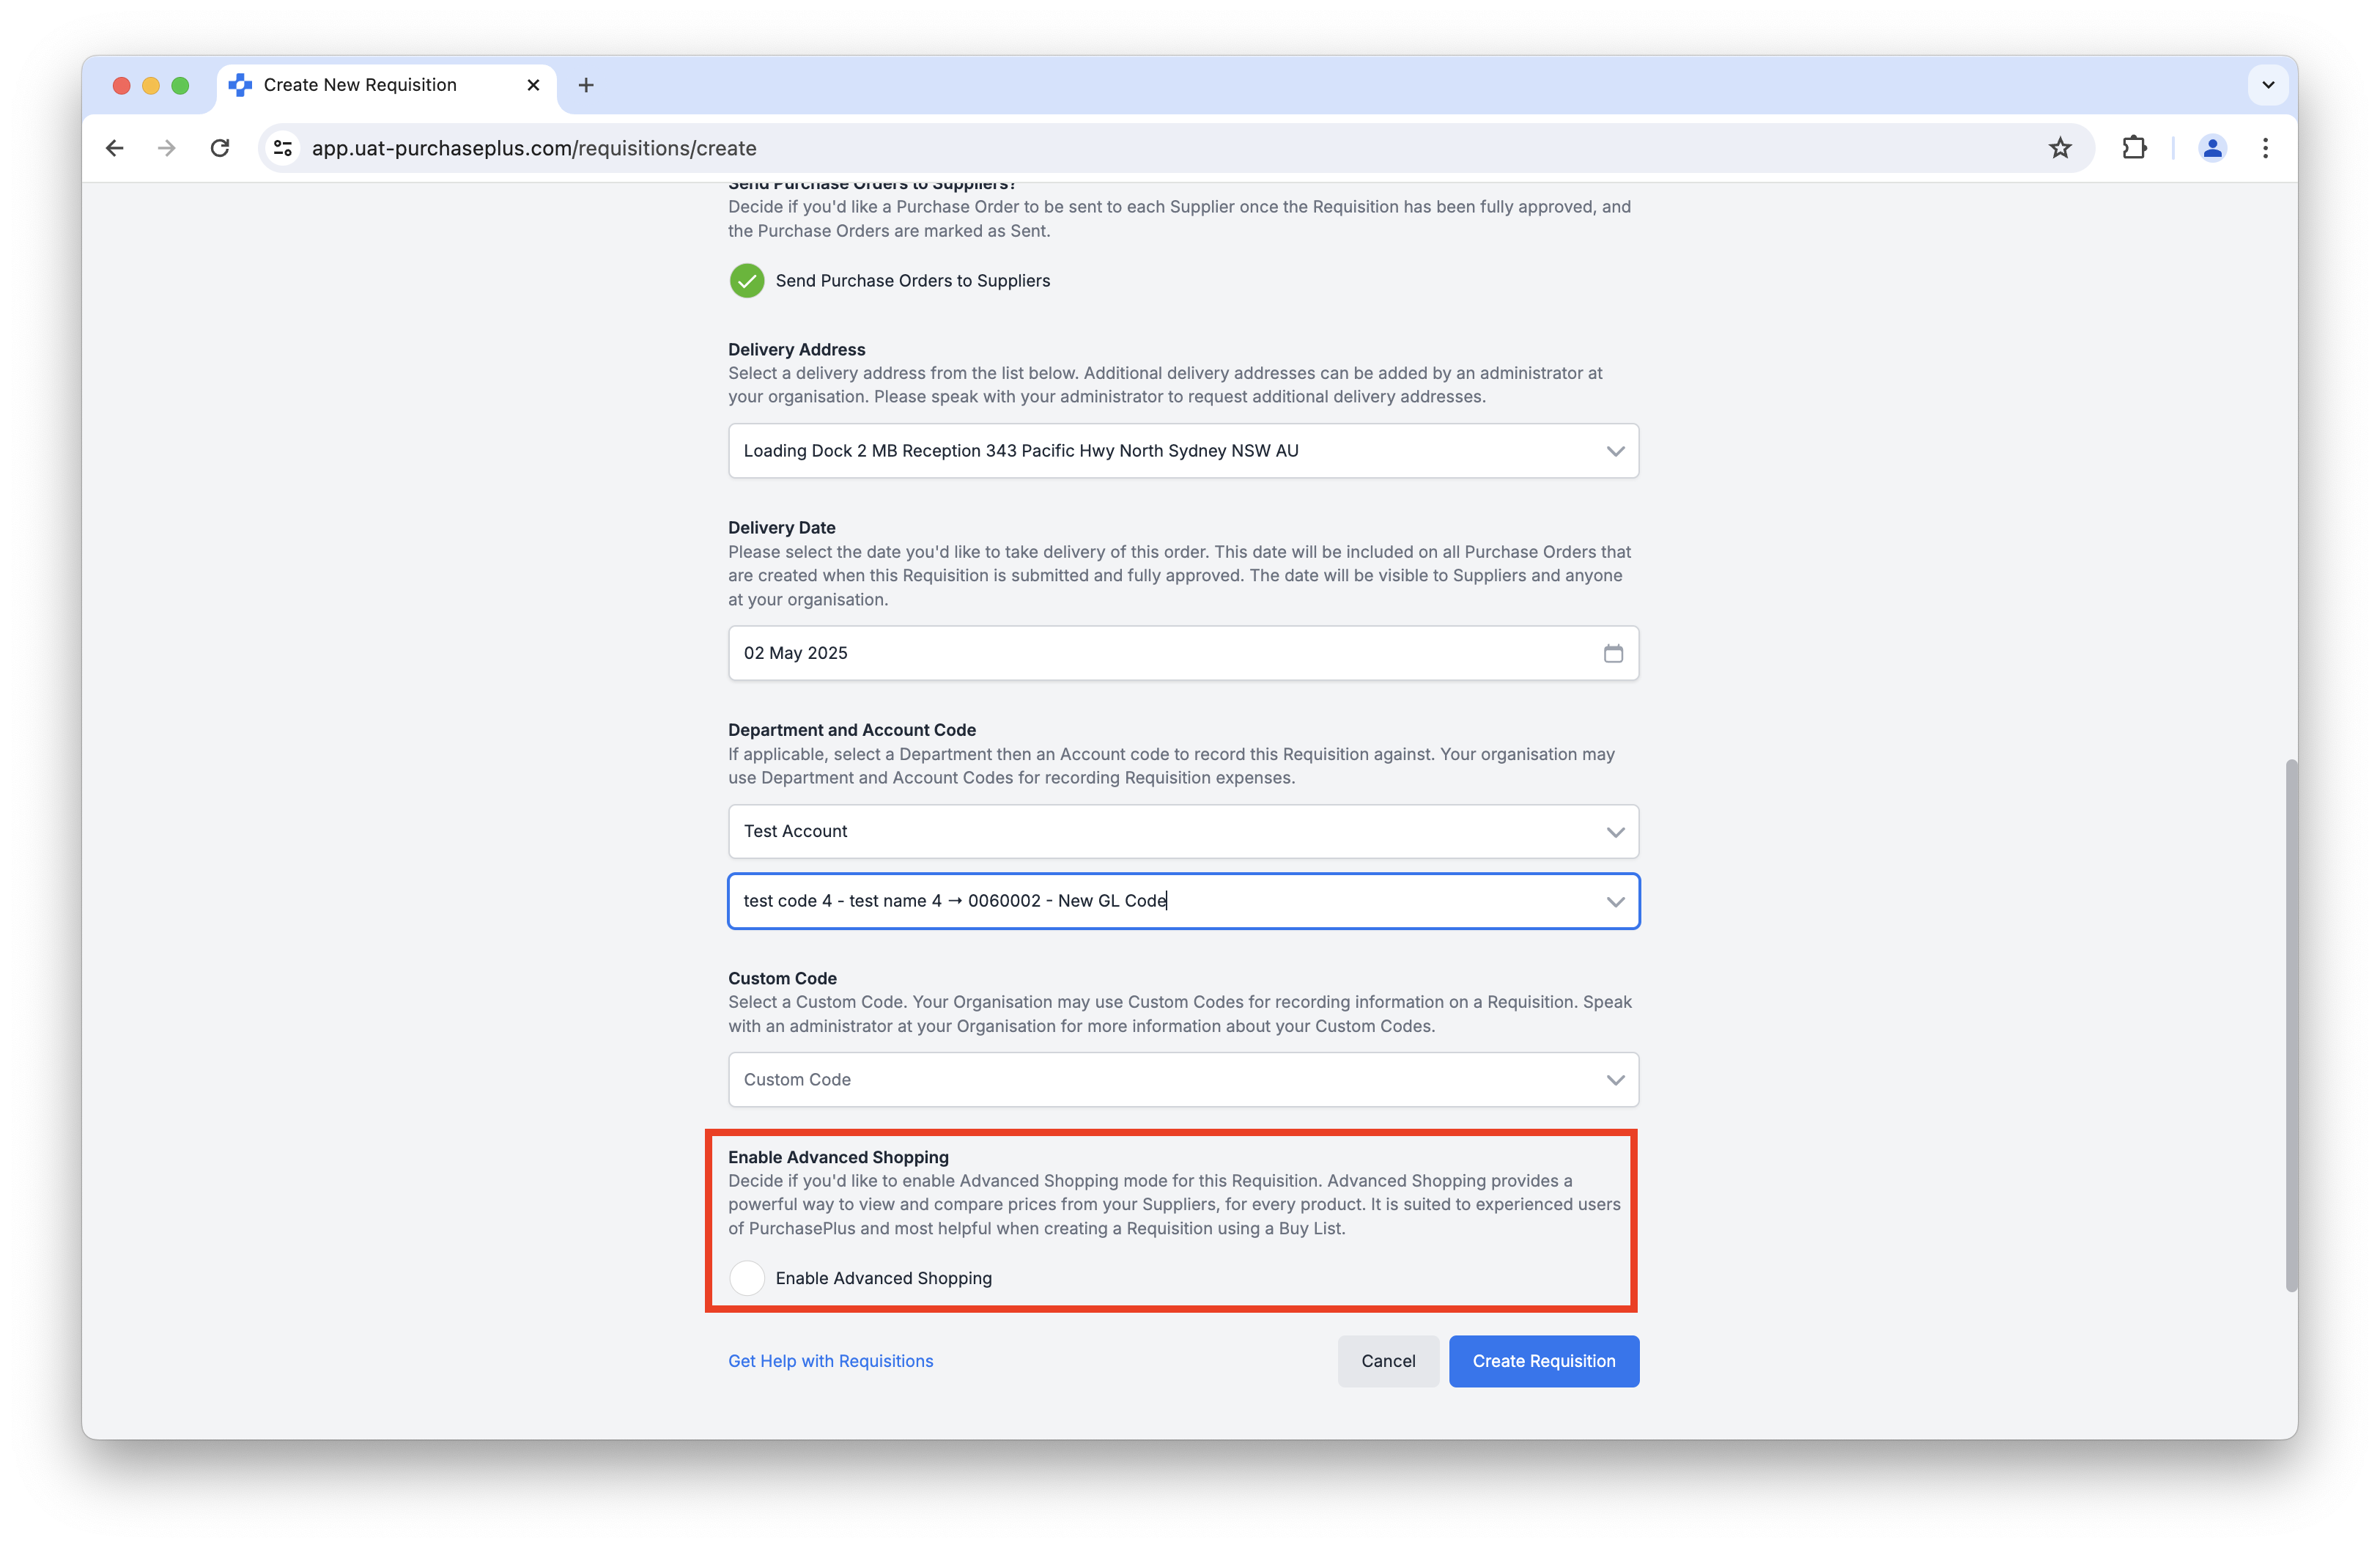
If you choose to Enable Advanced Shopping, you will be presented with a powerful way to view and compare prices from your Suppliers, for every available product in the one table. It is suited for experienced users of PurchasePlus and most helpful when creating a Requisition using a Buy List. It is designed to bypass some confirmation steps that new users will find helpful.
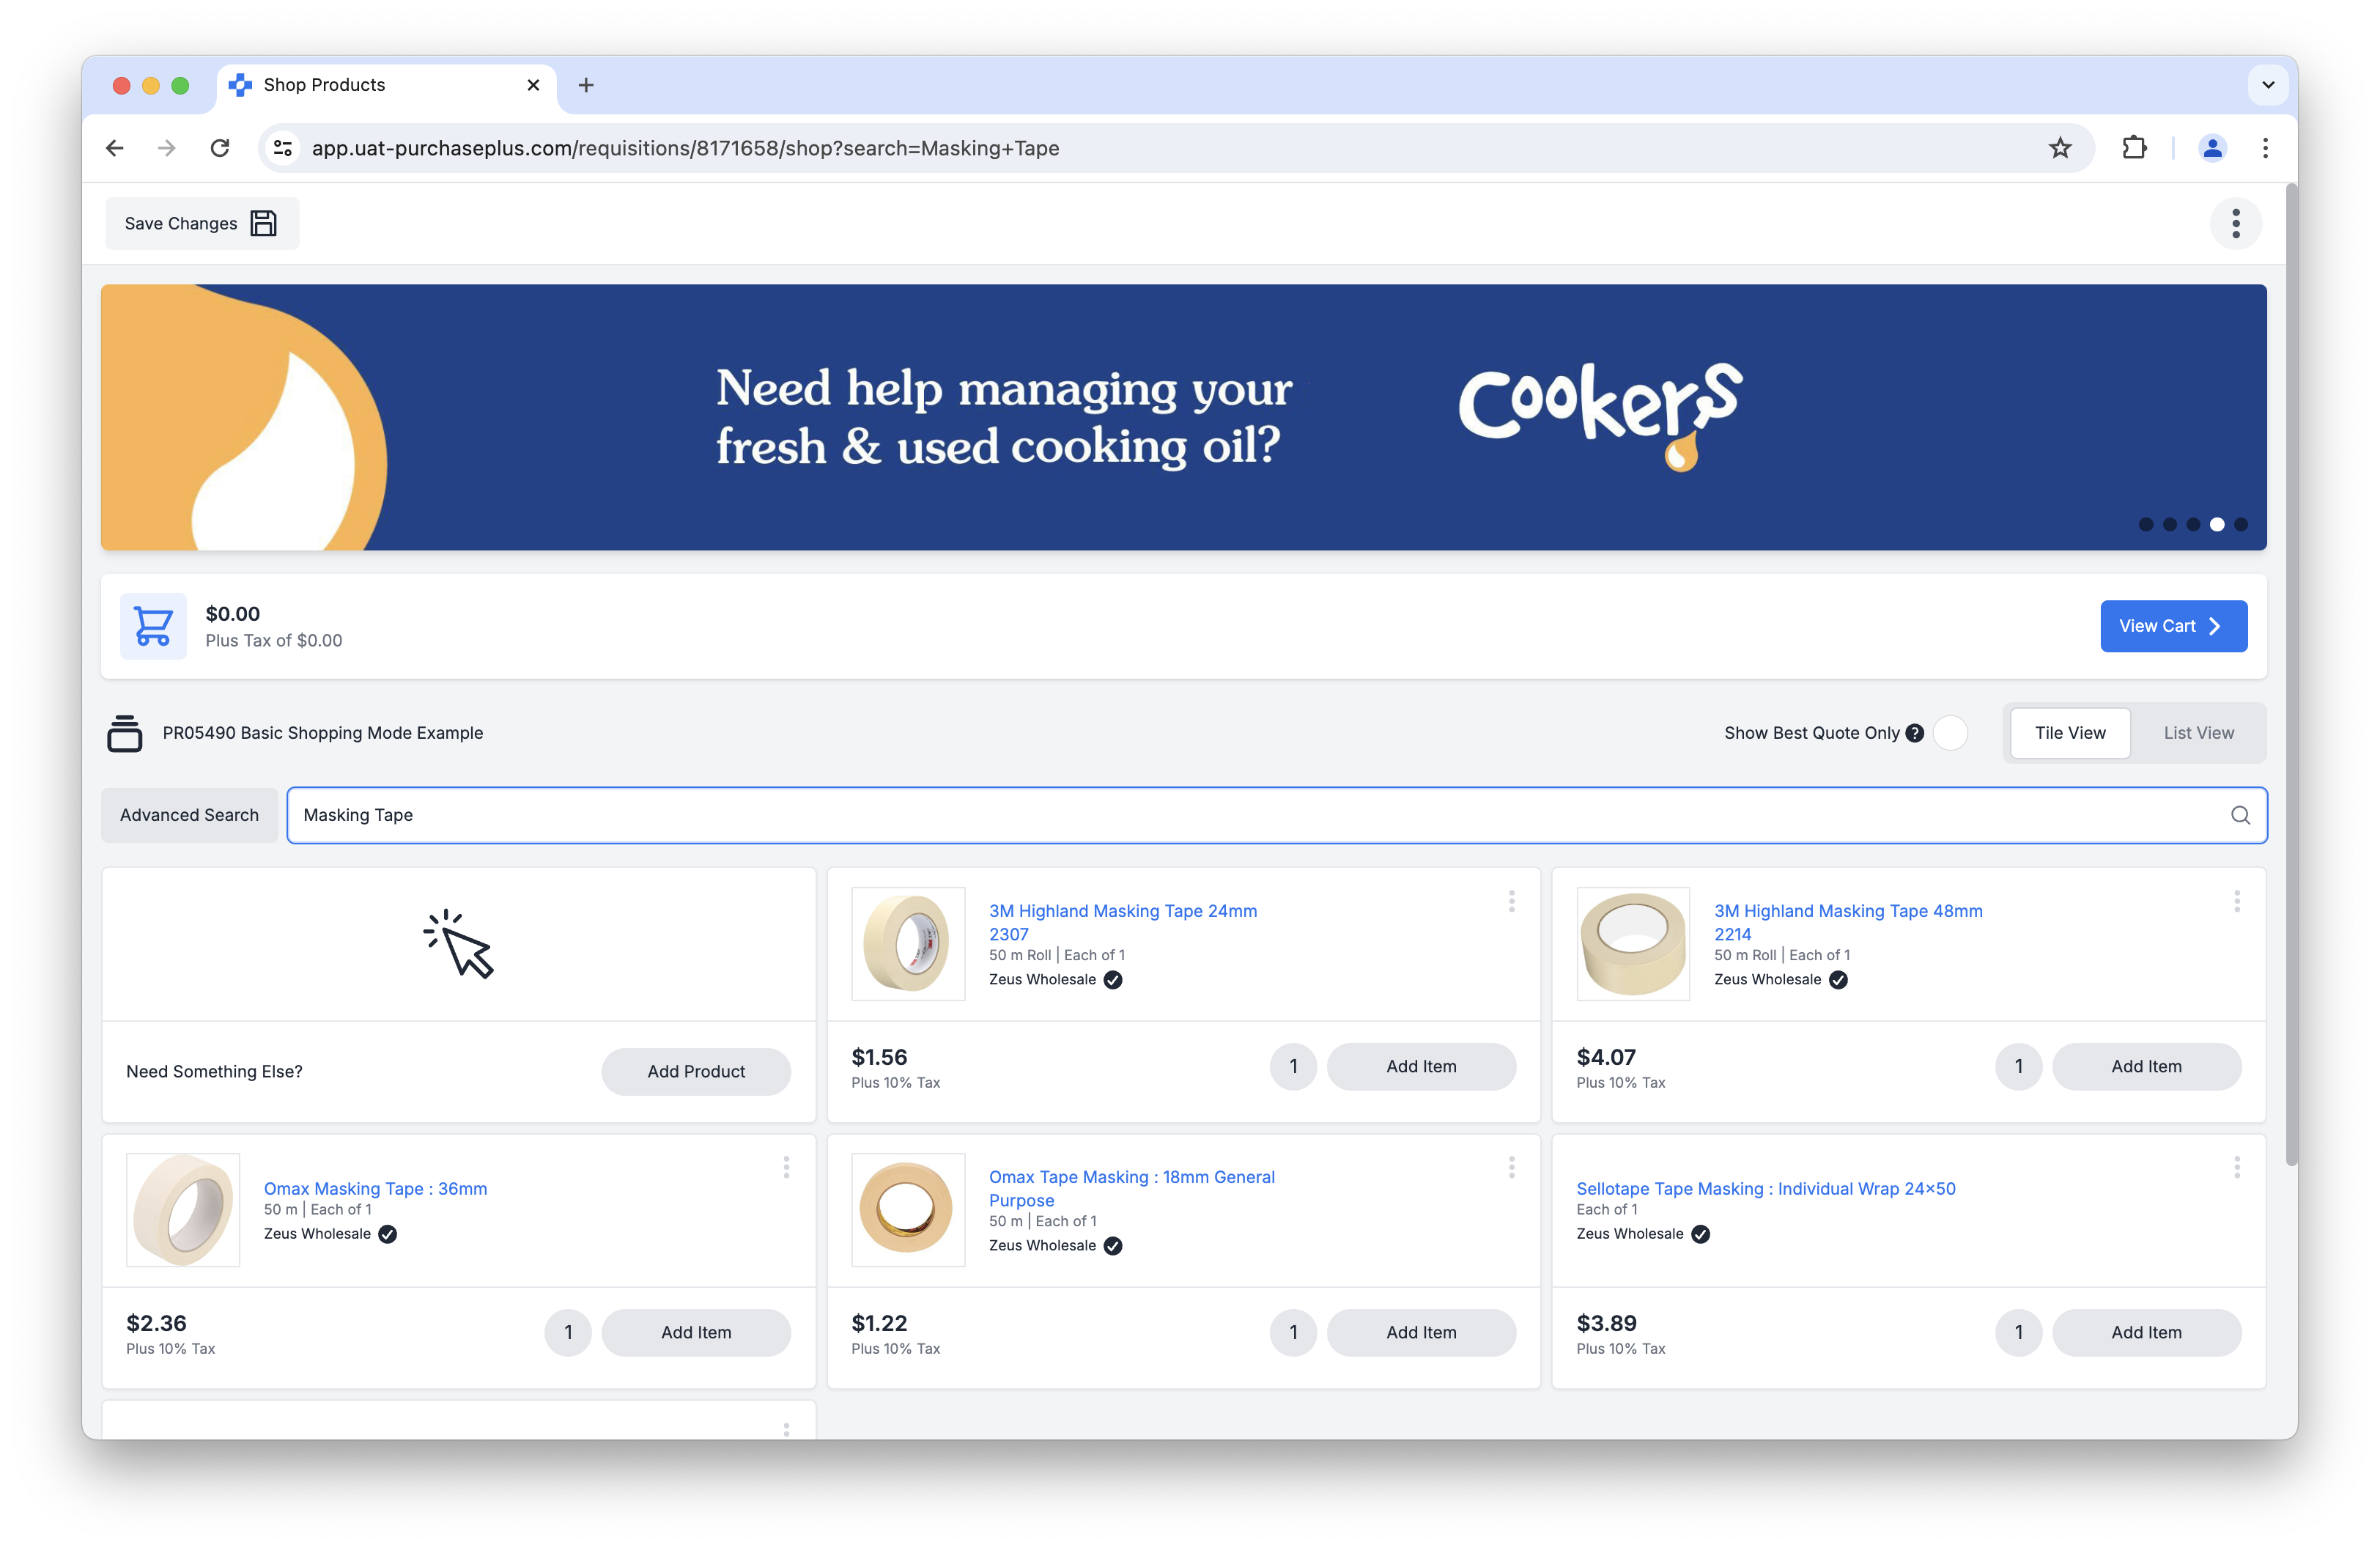
If you do not enable Advanced Shopping, you will be presented with our Basic Shopping Mode. You will be able to order Products from your Suppliers in a familiar online shopping experience, with a Shopping Cart that you can view before checking out:
Read on to learn about the functionality you can use while shopping in Basic Shopping mode.
Tile View vs List View
You can view Products in Tile View or List View, by clicking either [Tile View] or [List View] selector on the right side.
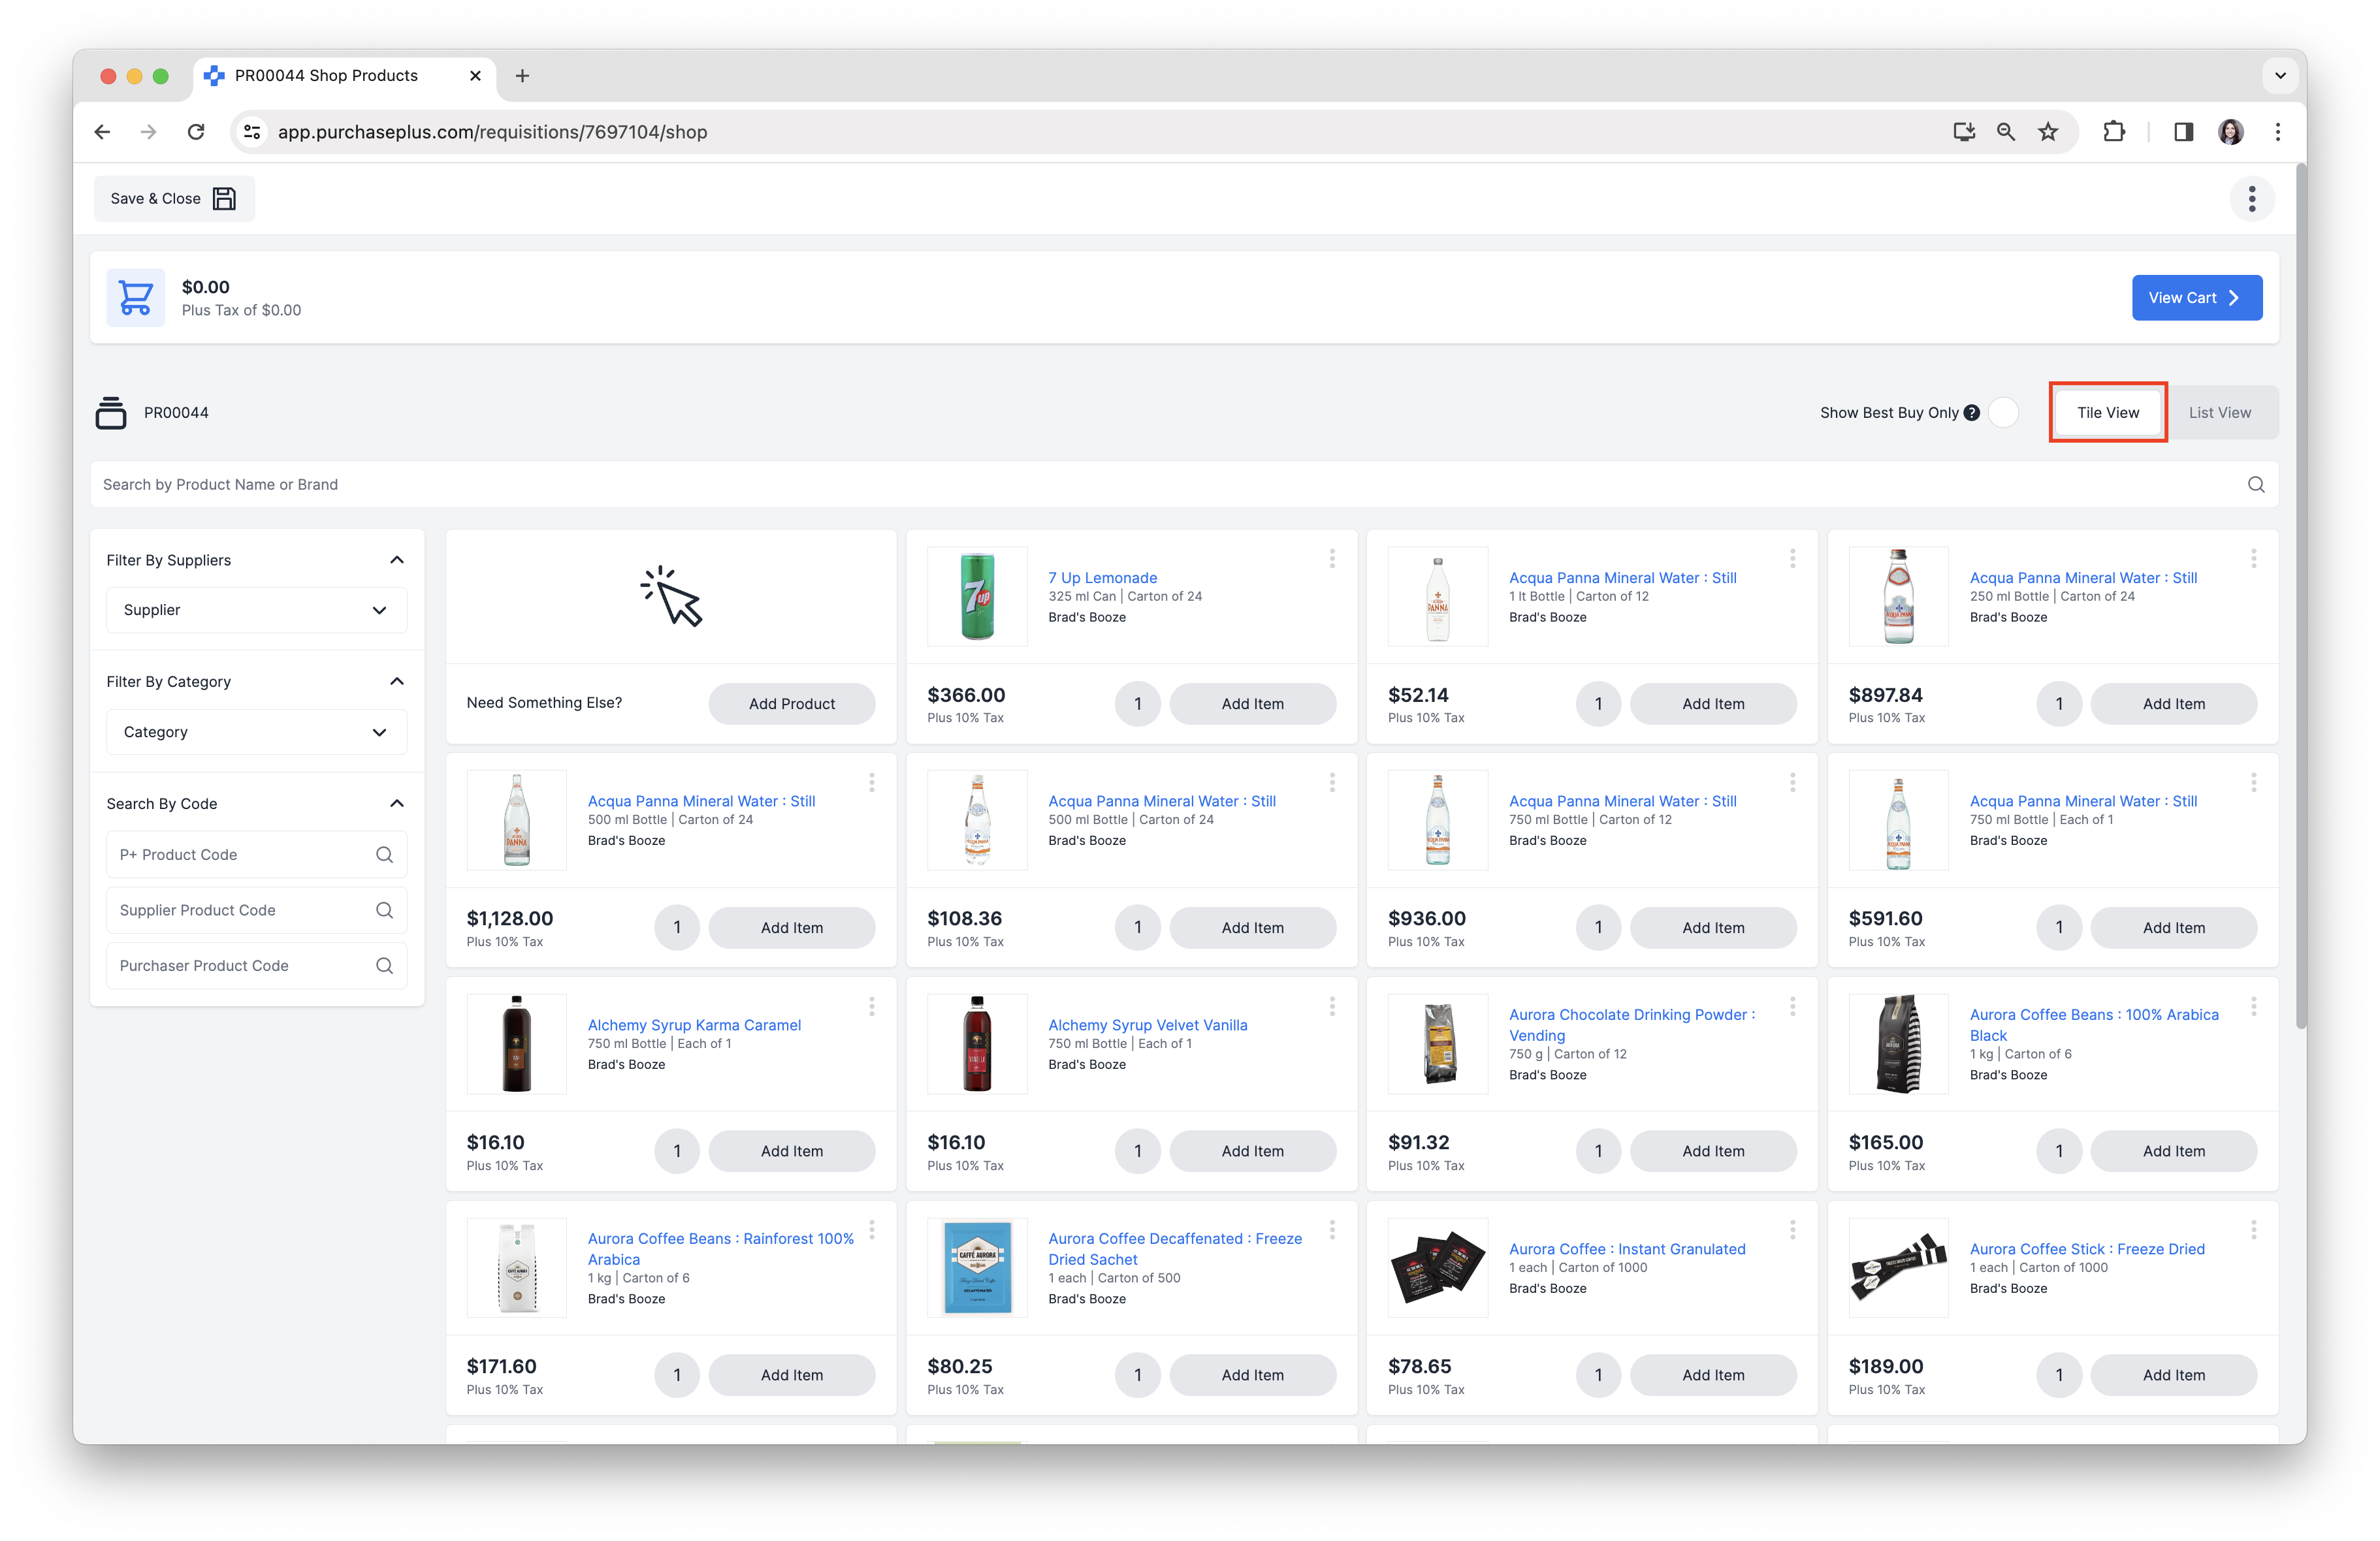

Tile View is the default, highly visual, familiar online shopping experience, whereas List View allows users to view more data about each quoted product available for purchase - minus some of the powerful functionality available in Advanced Shopping Mode.
'Best Quote Only' Mode
You can decide if you'd like to enable or disable [Best Quote Only Mode], by selecting/deselecting the checkbox at the top-right of the page:
![Enable [Best Quote Only Mode] in Basic Shopping](https://243325.fs1.hubspotusercontent-na1.net/hubfs/243325/Screenshot%202024-01-17%20at%2010.47.04%20am%20copy.png)
If enabled, PurchasePlus will only show the lowest-priced quote for a Product, and other (higher-priced) quotes for the same product will not be shown. If Best Quote is disabled, you will be able to view (and select from) multiple quotes for the exact same item.
Navigating Basic Shopping Mode
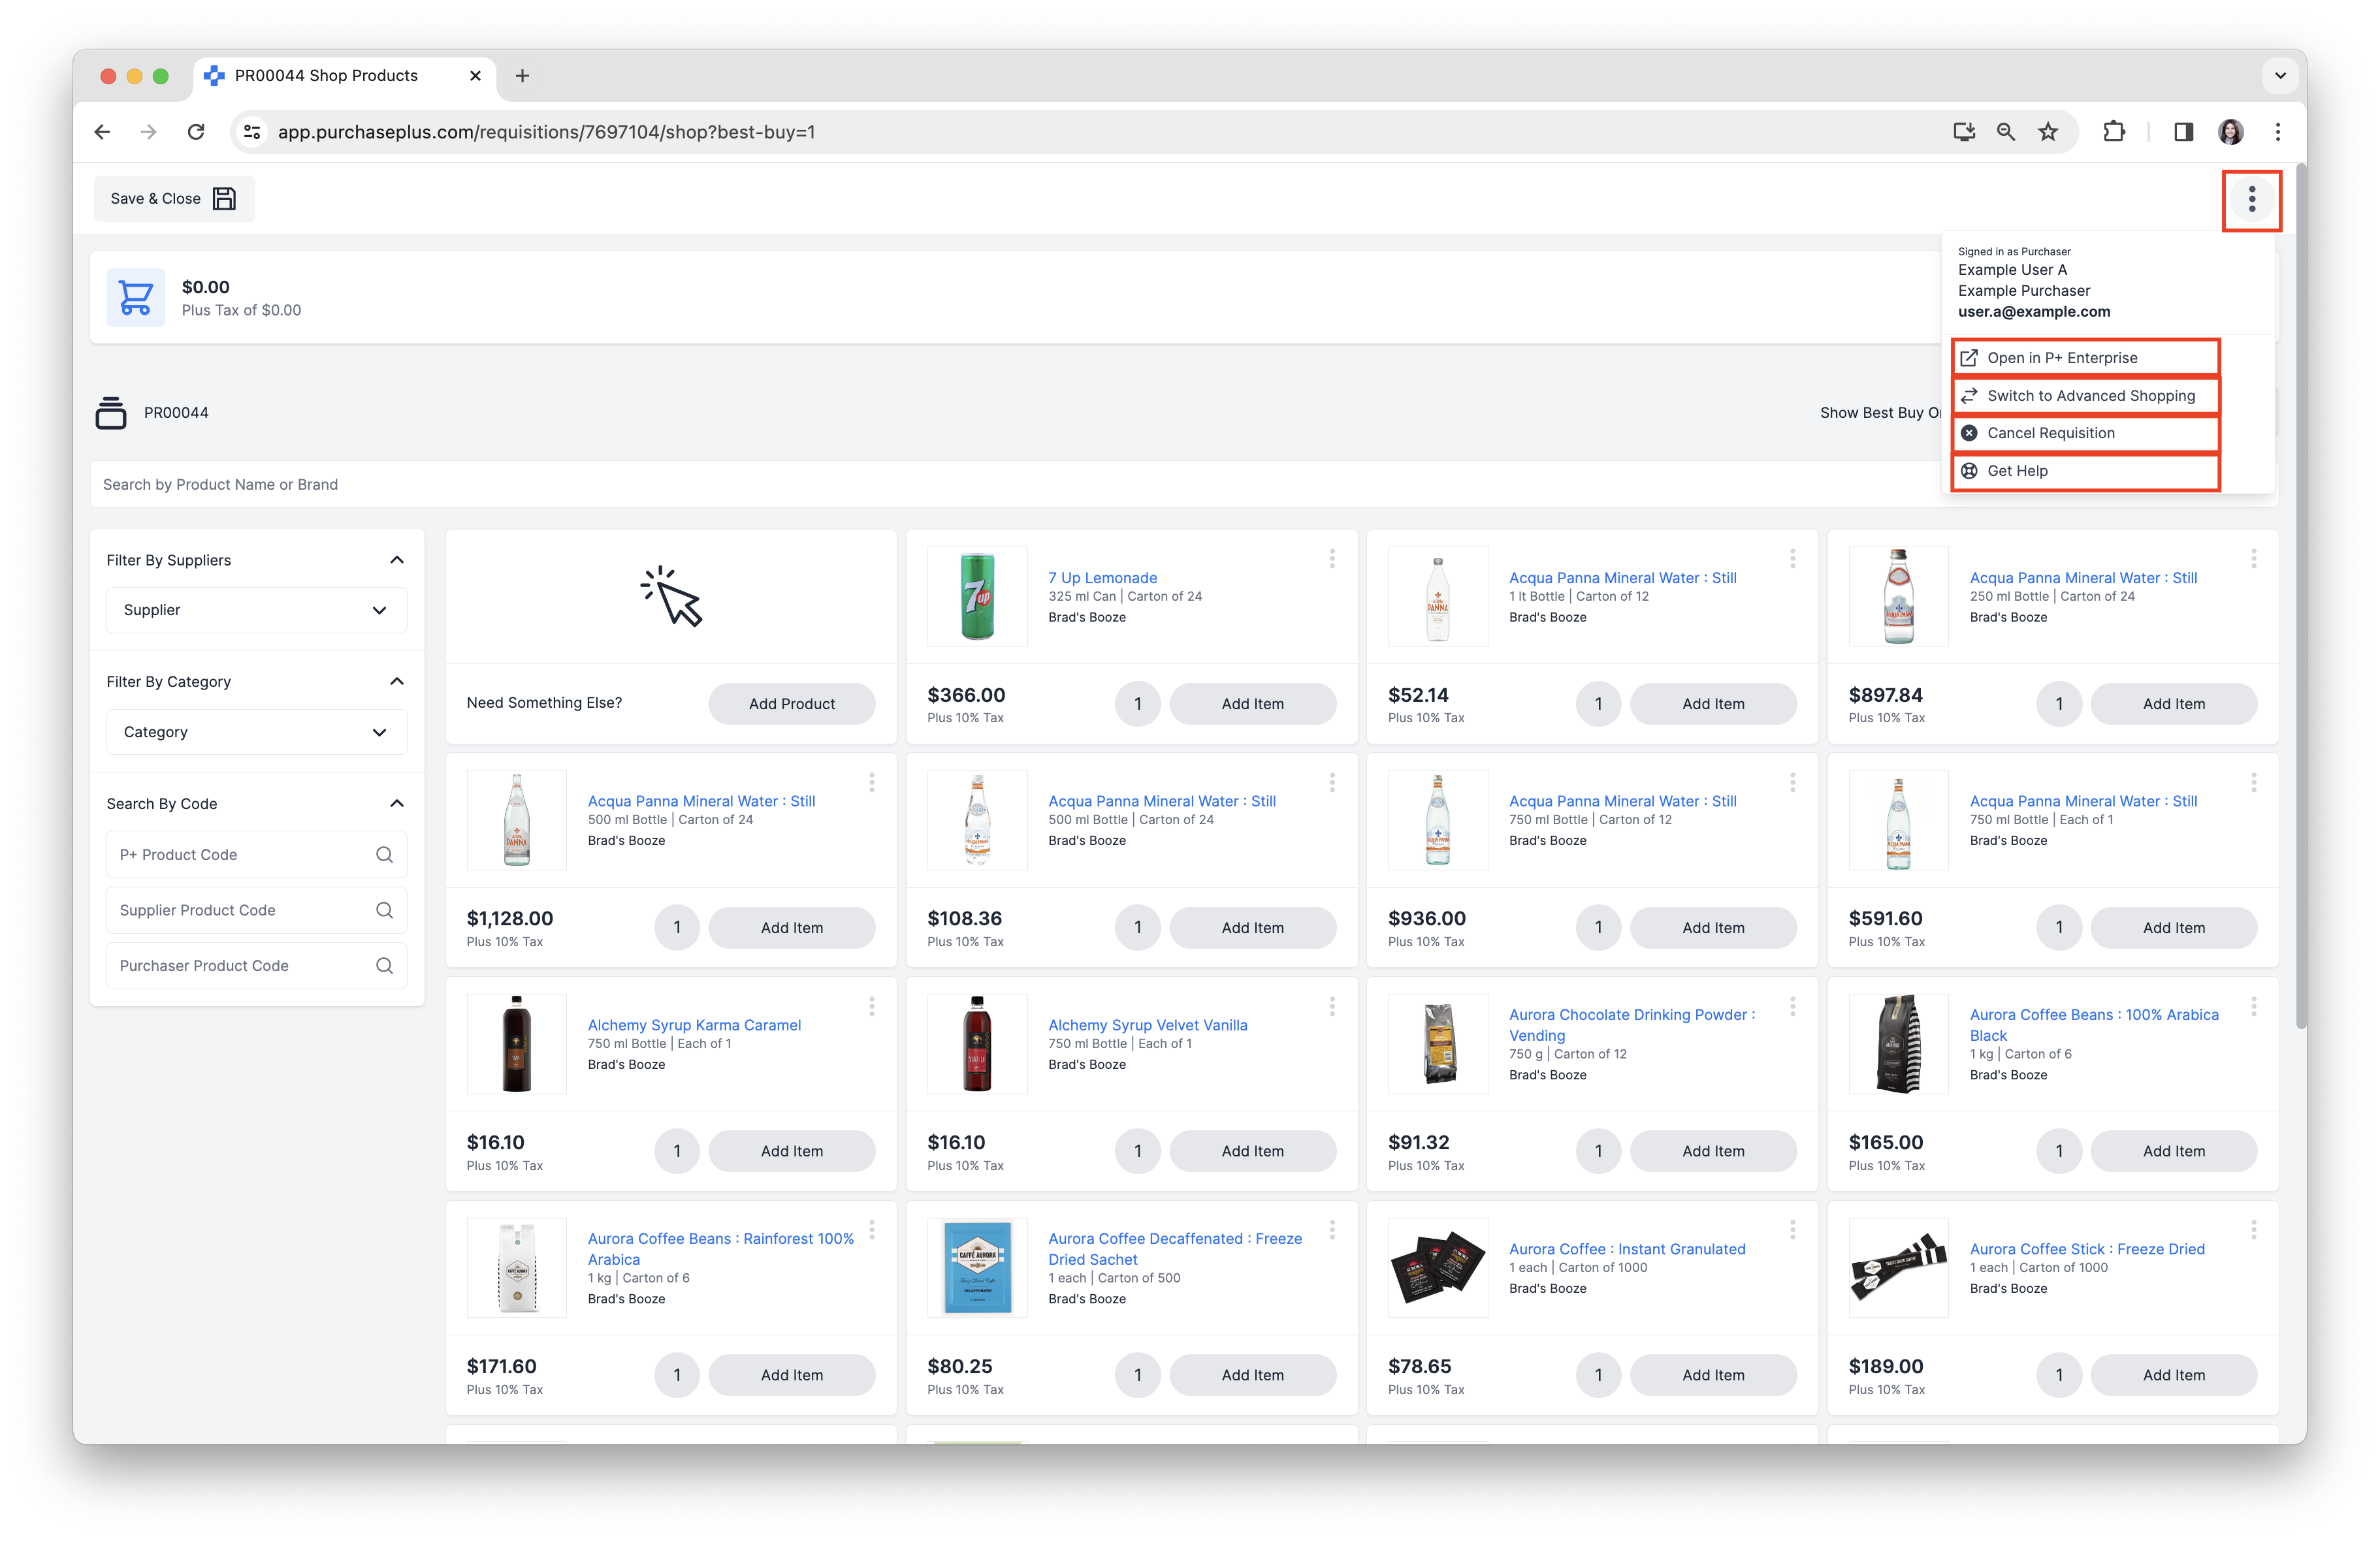
More Menu
Click the [More Menu] in the top right of your screen, to complete any of the following tasks:
- [Open the Requisition in Legacy PurchasePlus].
- [Switch to Advanced Shopping].
- [Cancel the Requisition].
- [Get Help] visit the Help Center.
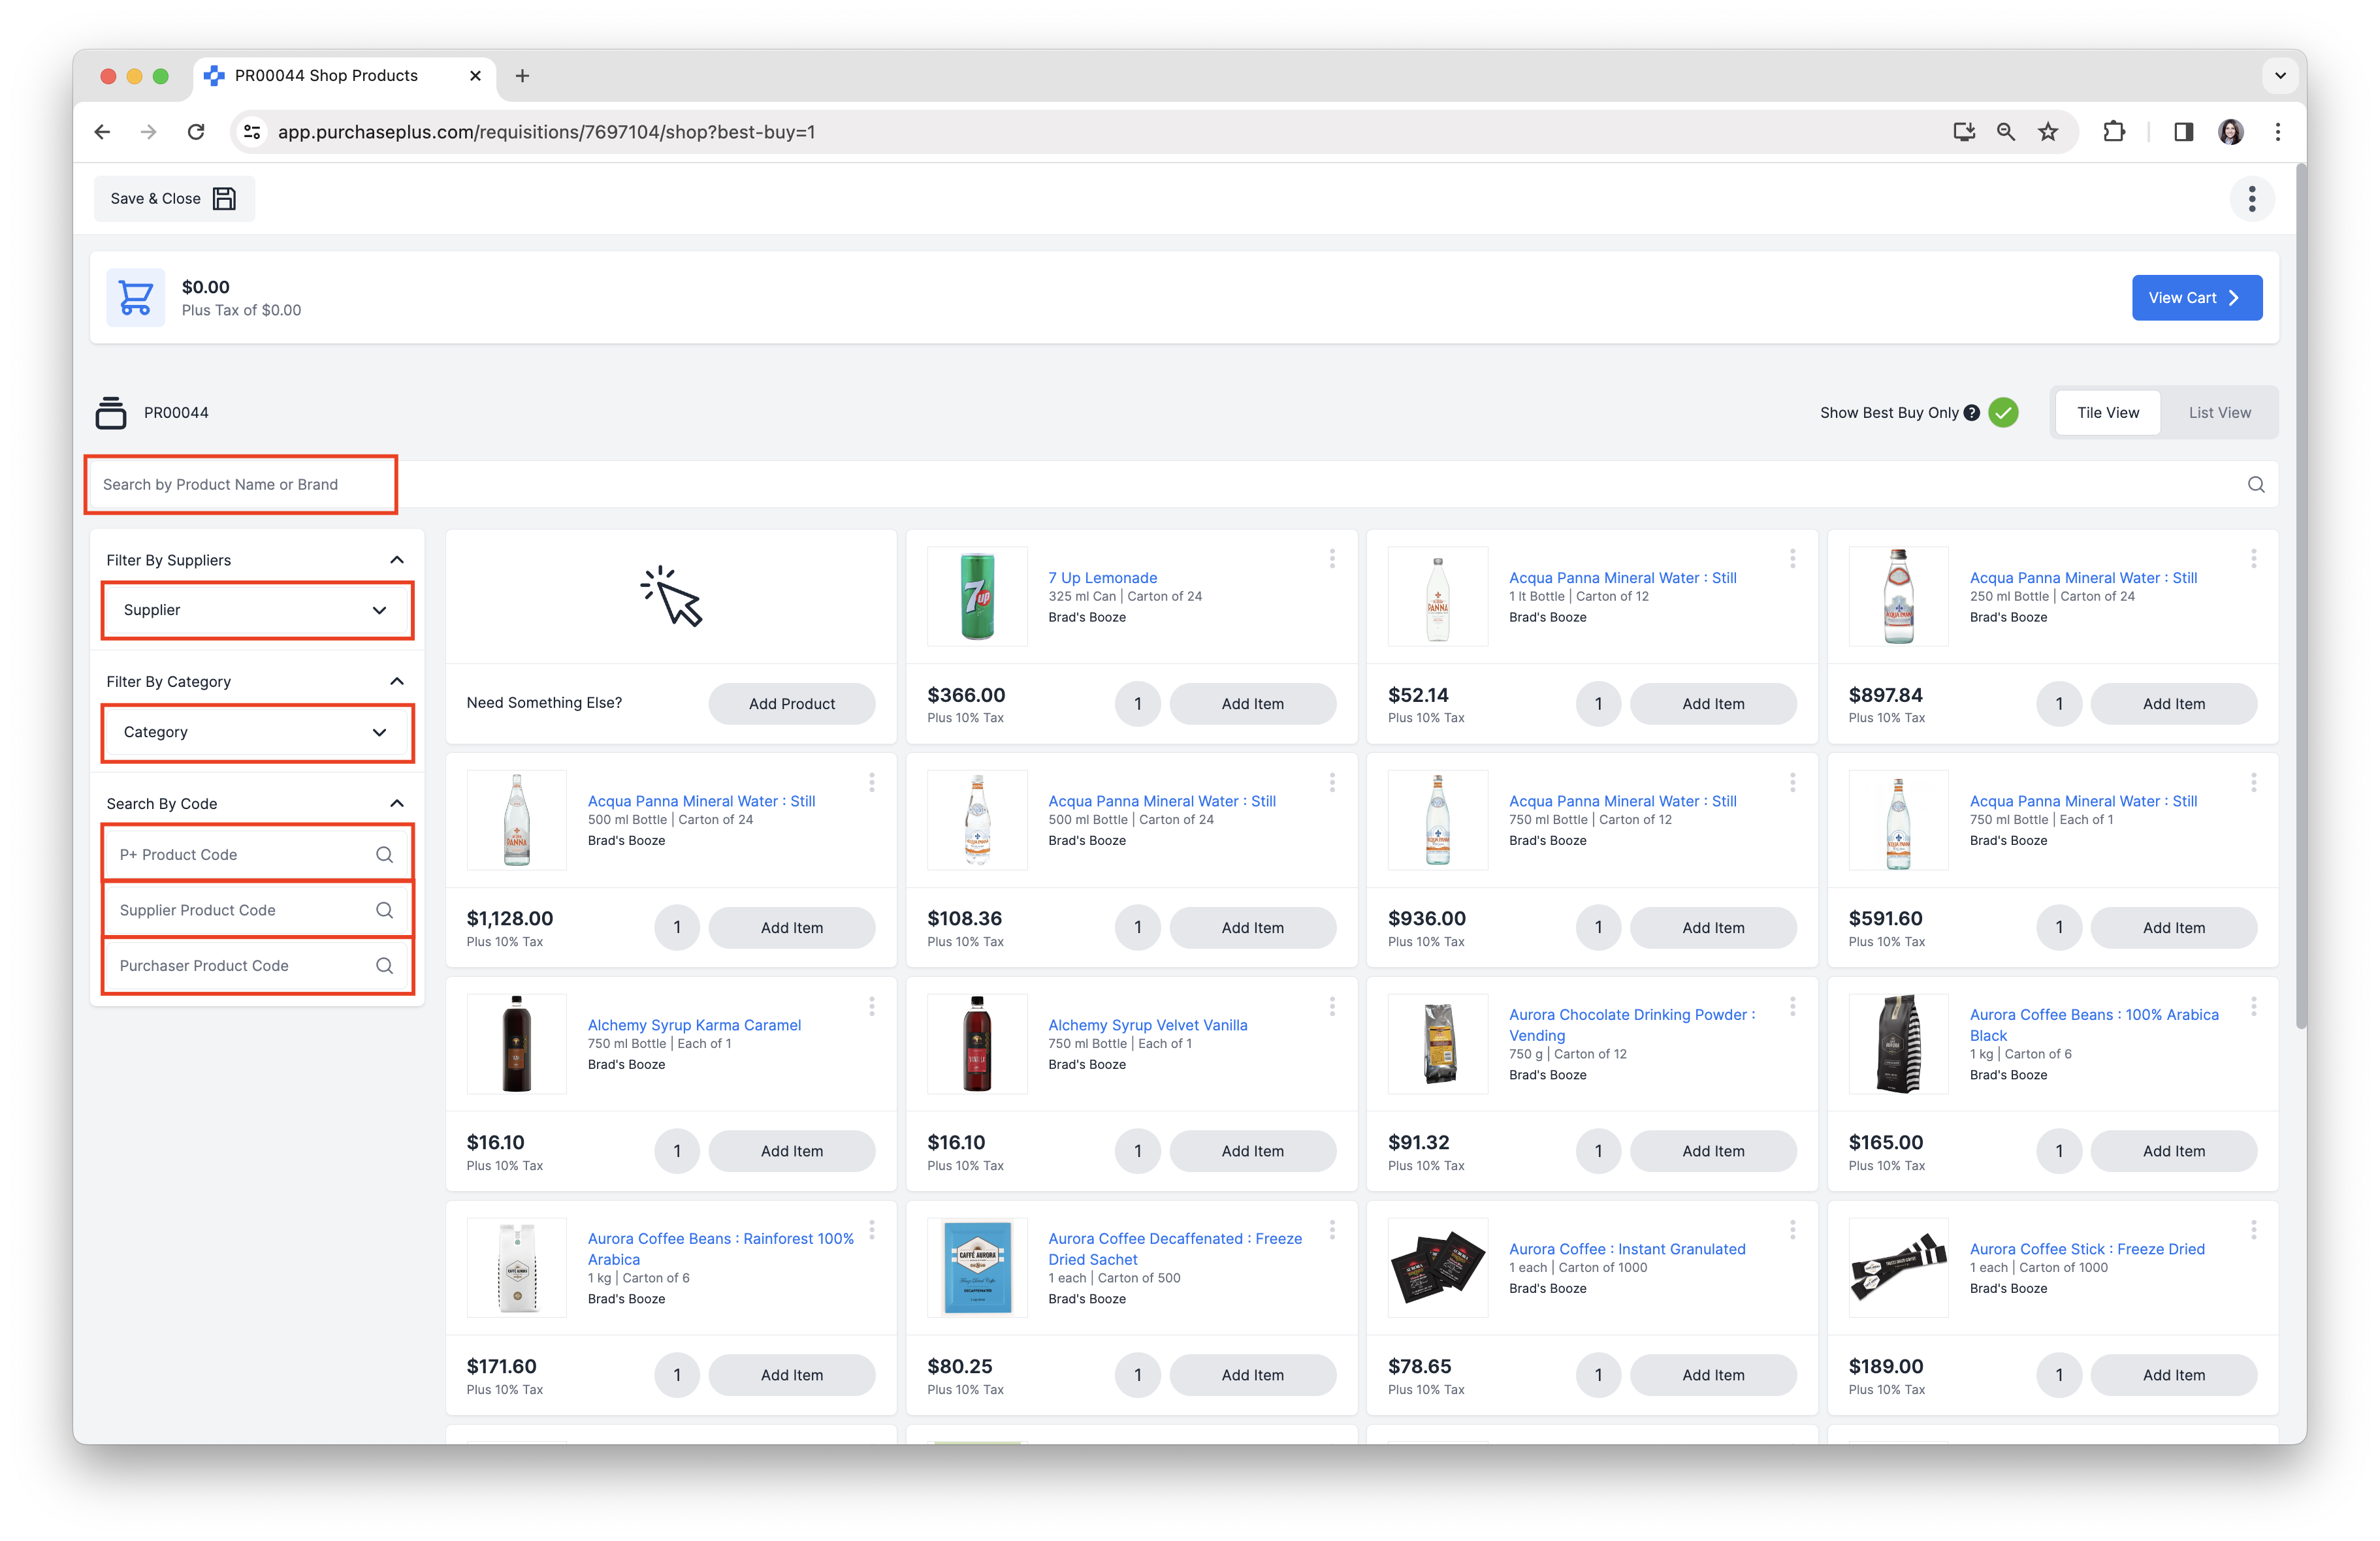
Search for Products
The following Search options are available:
- Search by Product Name or Brand, using the Search Bar.
- Filter By Suppliers: Find and add or remove Suppliers to your filter.
- Filter By Category: Find and add or remove categories and sub-categories to your filter.
- Search By P+ Product Code.
- Search By Supplier Product Code.
- Search By Purchaser Product Code.

See our Advanced Product Search article to learn more about searching.
 Note: On mobile, Advanced Search filters can be found next to the Search bar.
Viewing Product Details
1. Click on [Product Description] or [Product Image] to view:
a. [Product Details].
b. [Supplier Details].
c. [Delivery Fees].
d. [Barcodes].
2. Click [Manage Product] to access General Details and Barcode Settings of the Product.
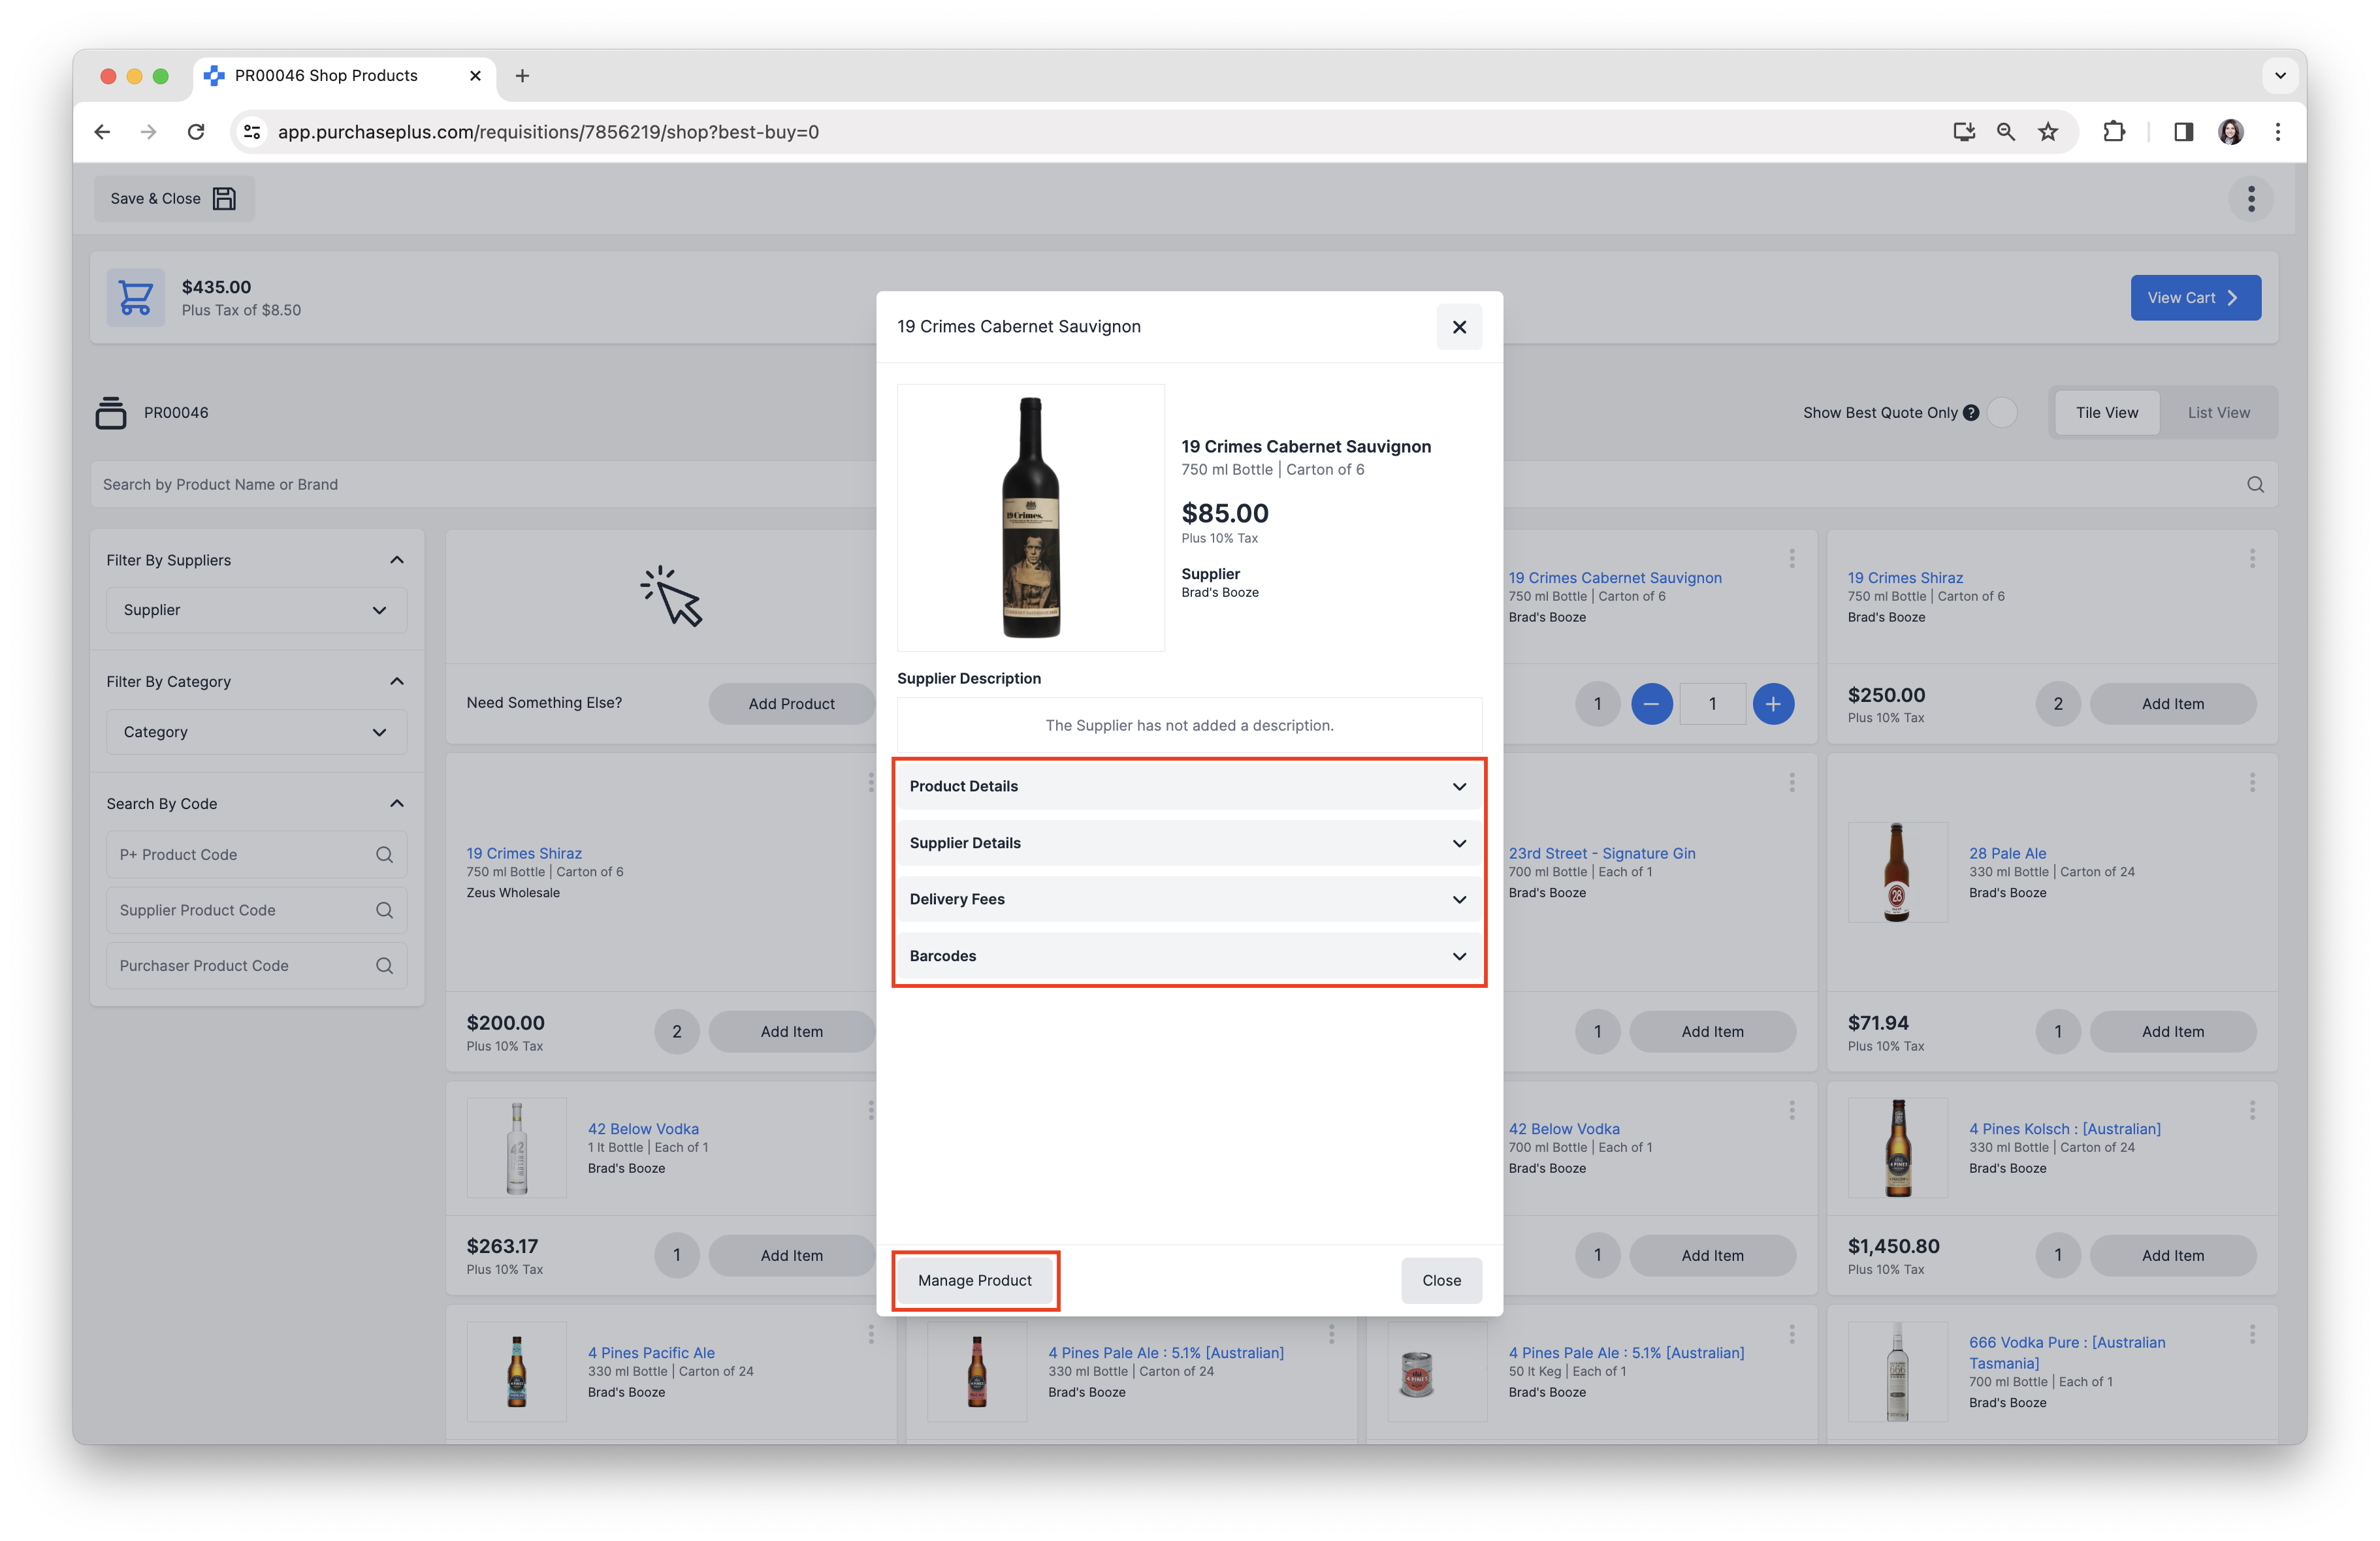
We're working hard to gather all of our Supplier's product images and keep them updated. Contact our friendly customer support team if you find Supplier products that don't have images.
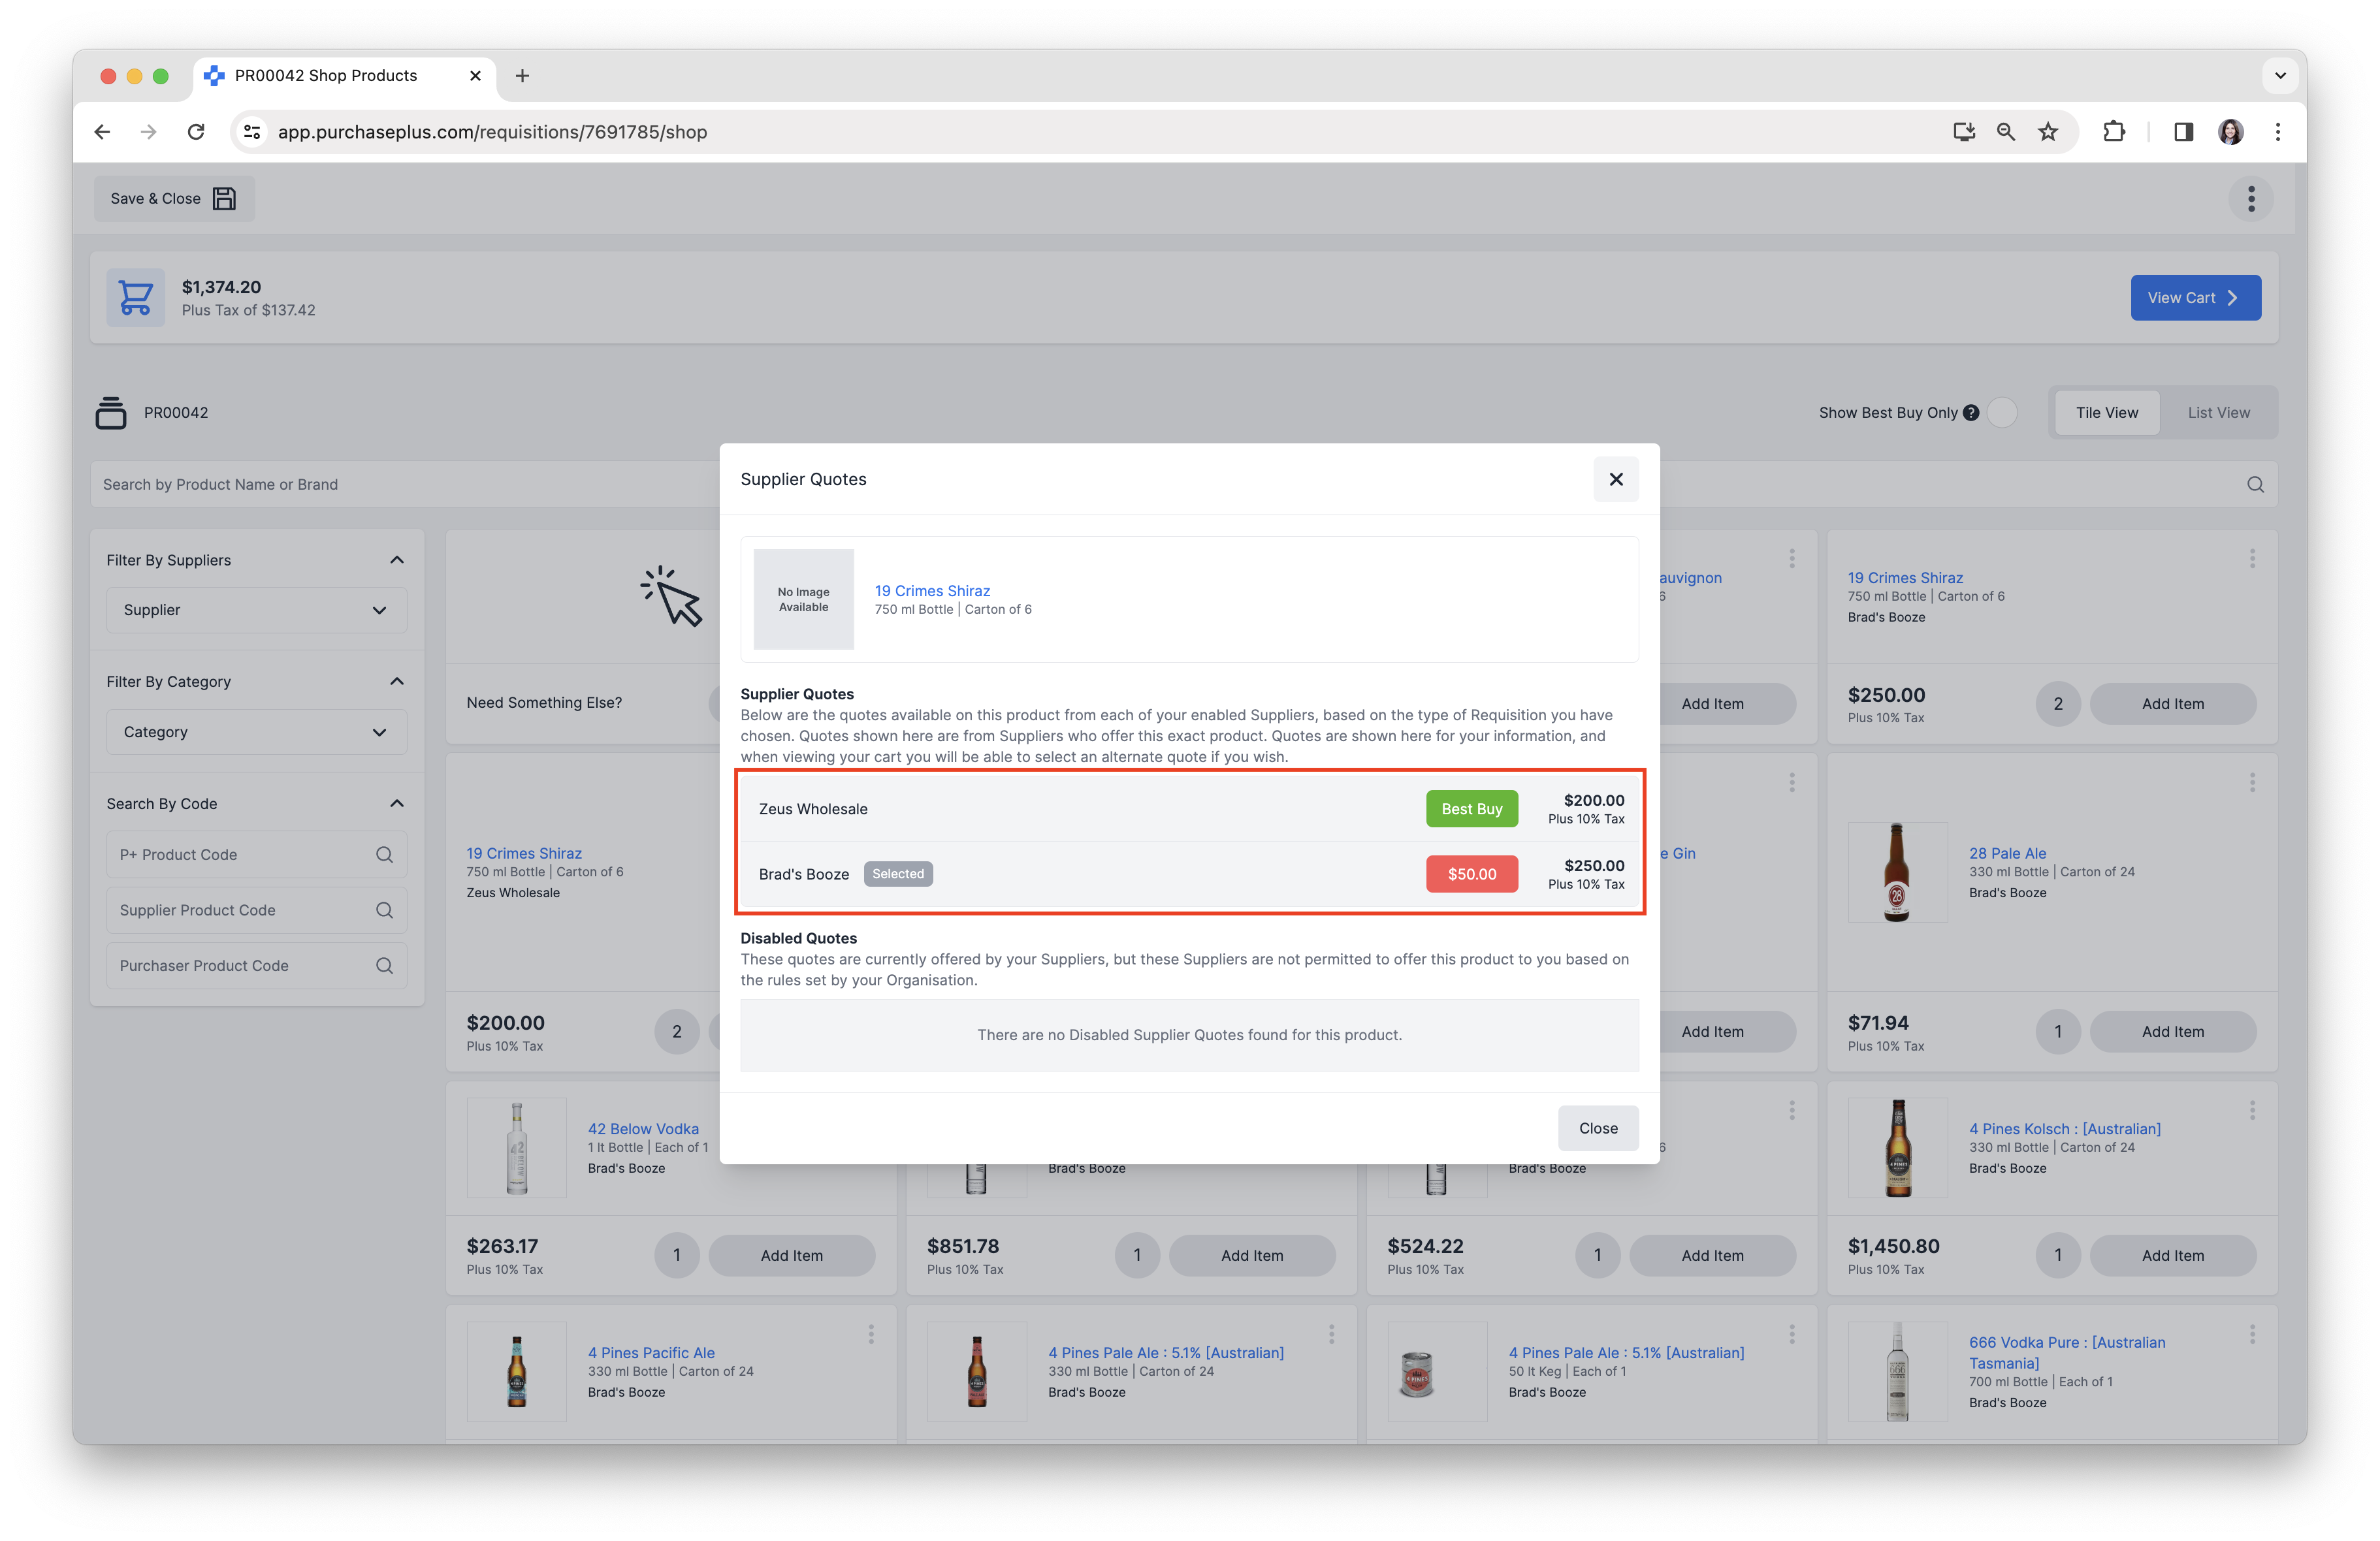
3. Click [Quote Count] next to the [Add Item] button, to view Quotes available on this Product in this Requisition. In Basic Shopping Mode, you can only select an alternate quote when viewing your Cart.
Add A Product to a Buy List
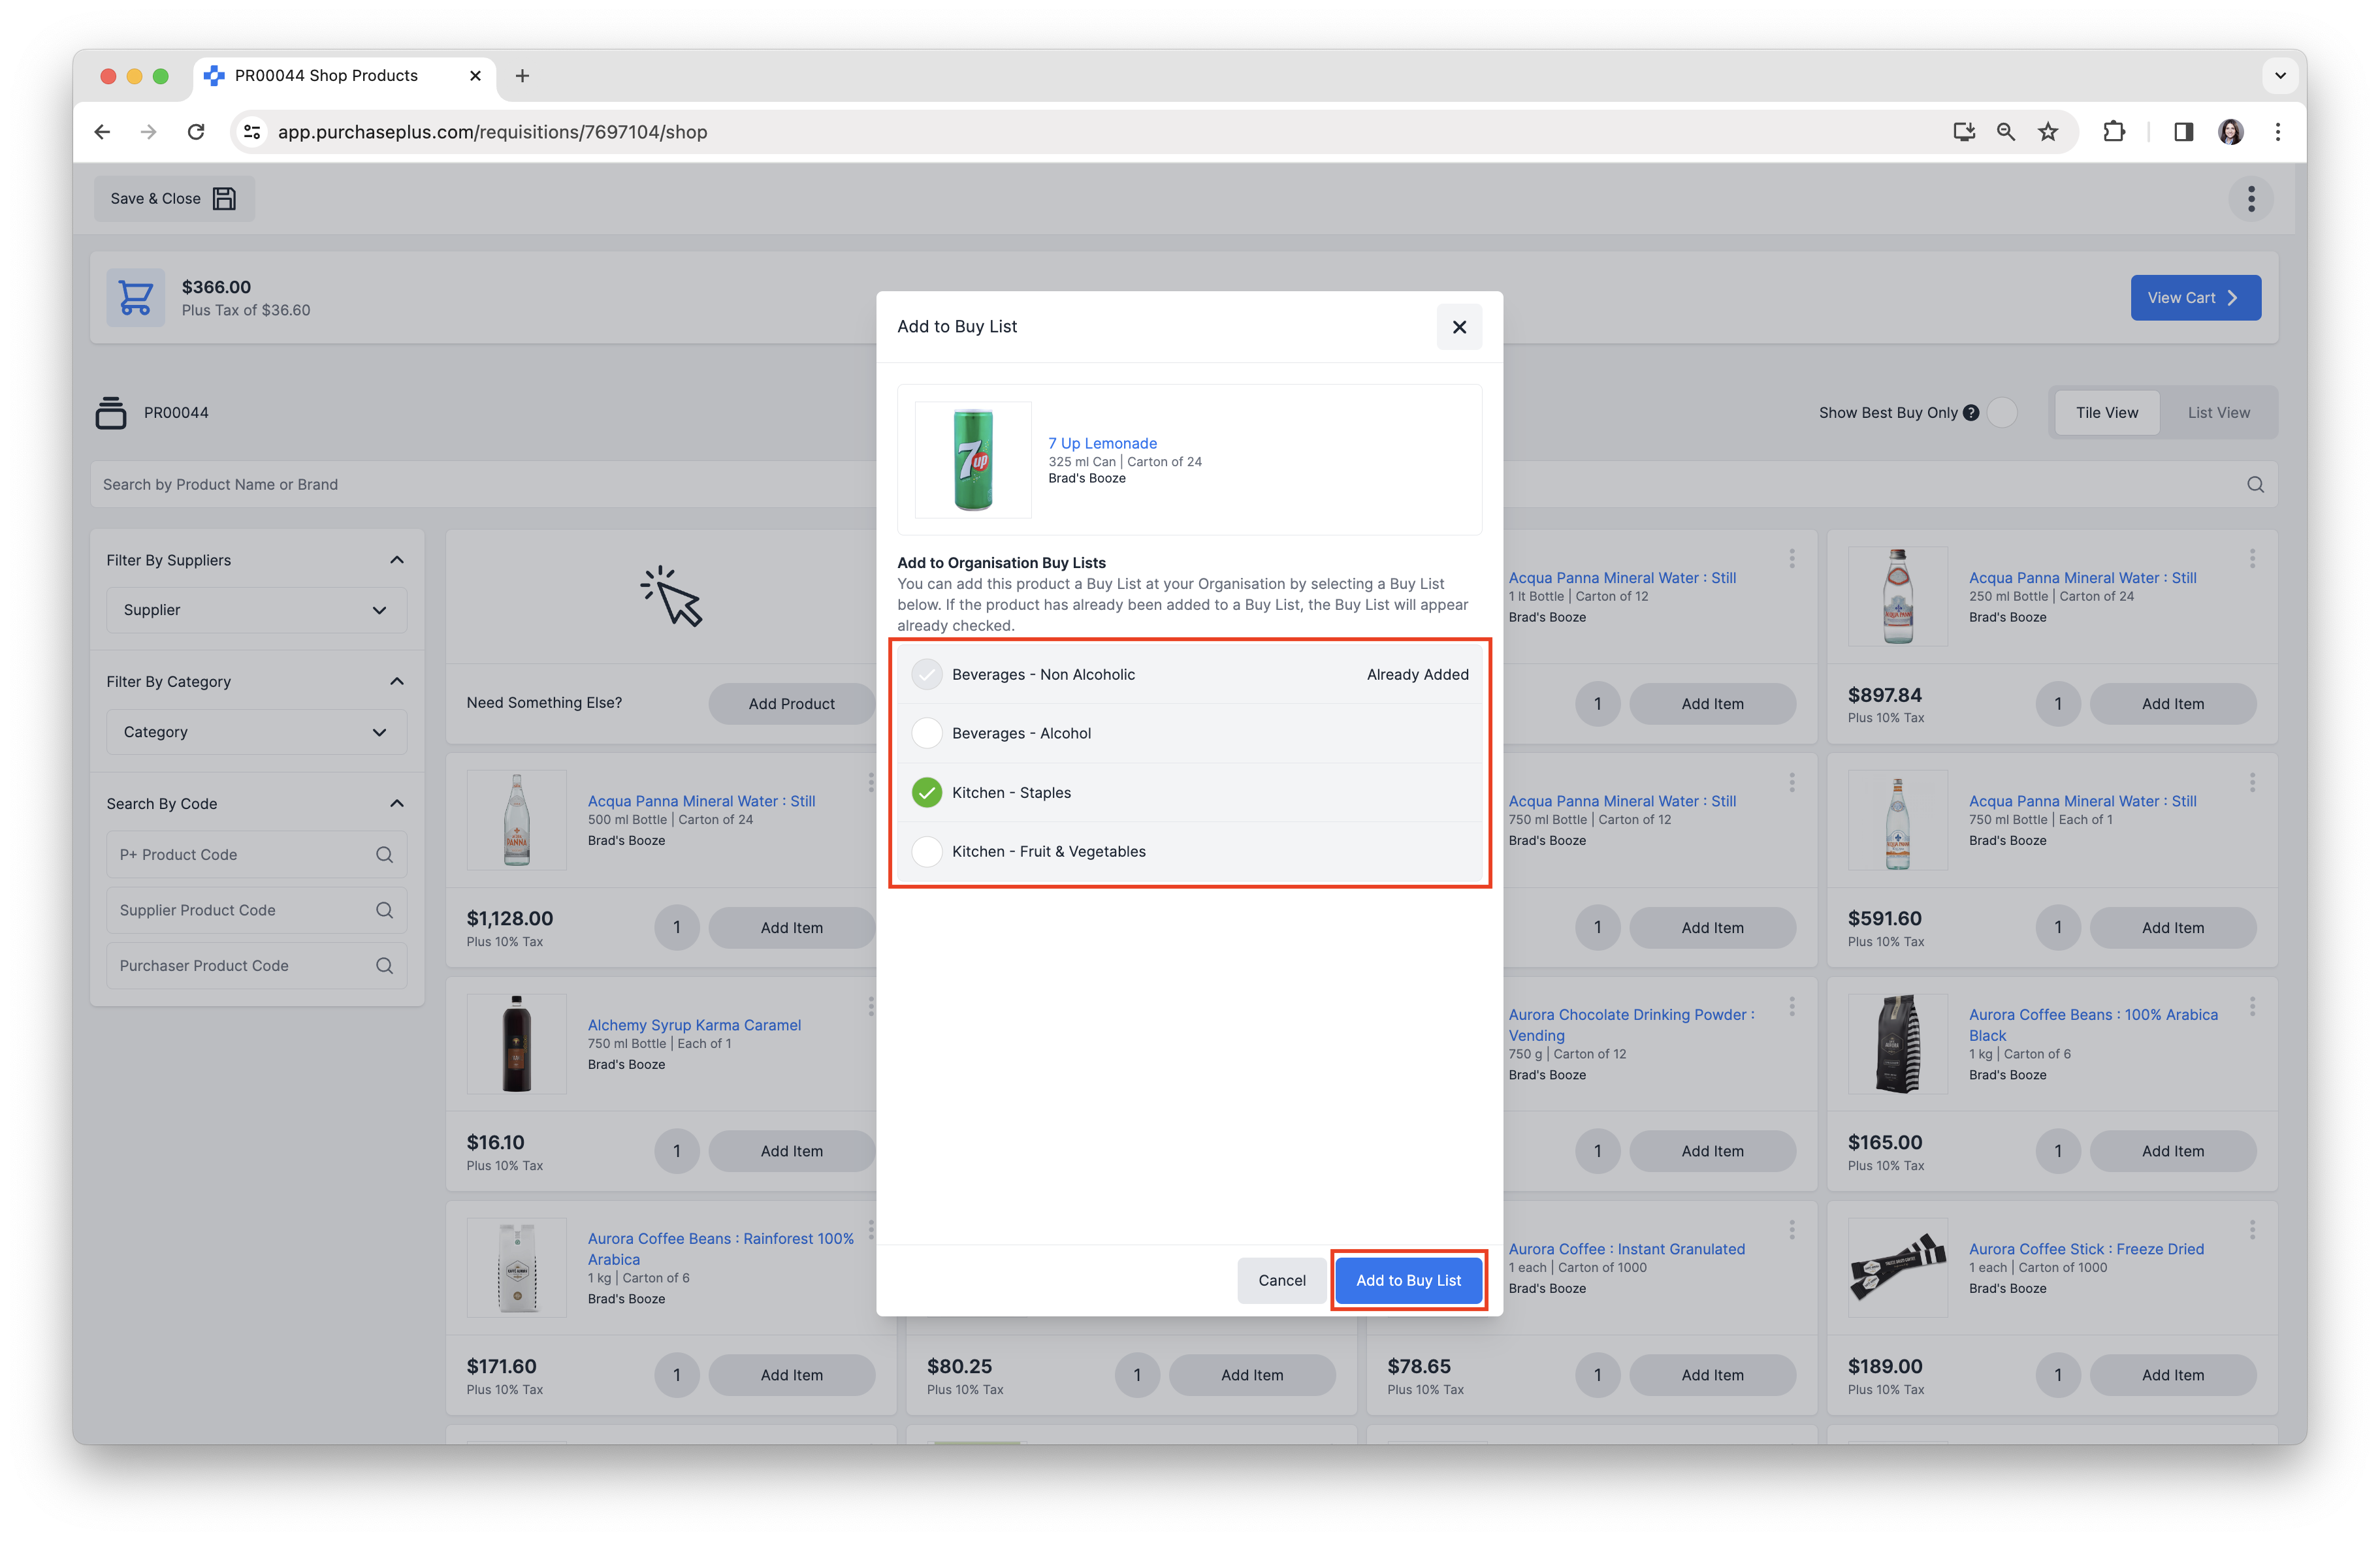
1. Click the [More Options] button on a specific Product, then click [Add to Buy List].
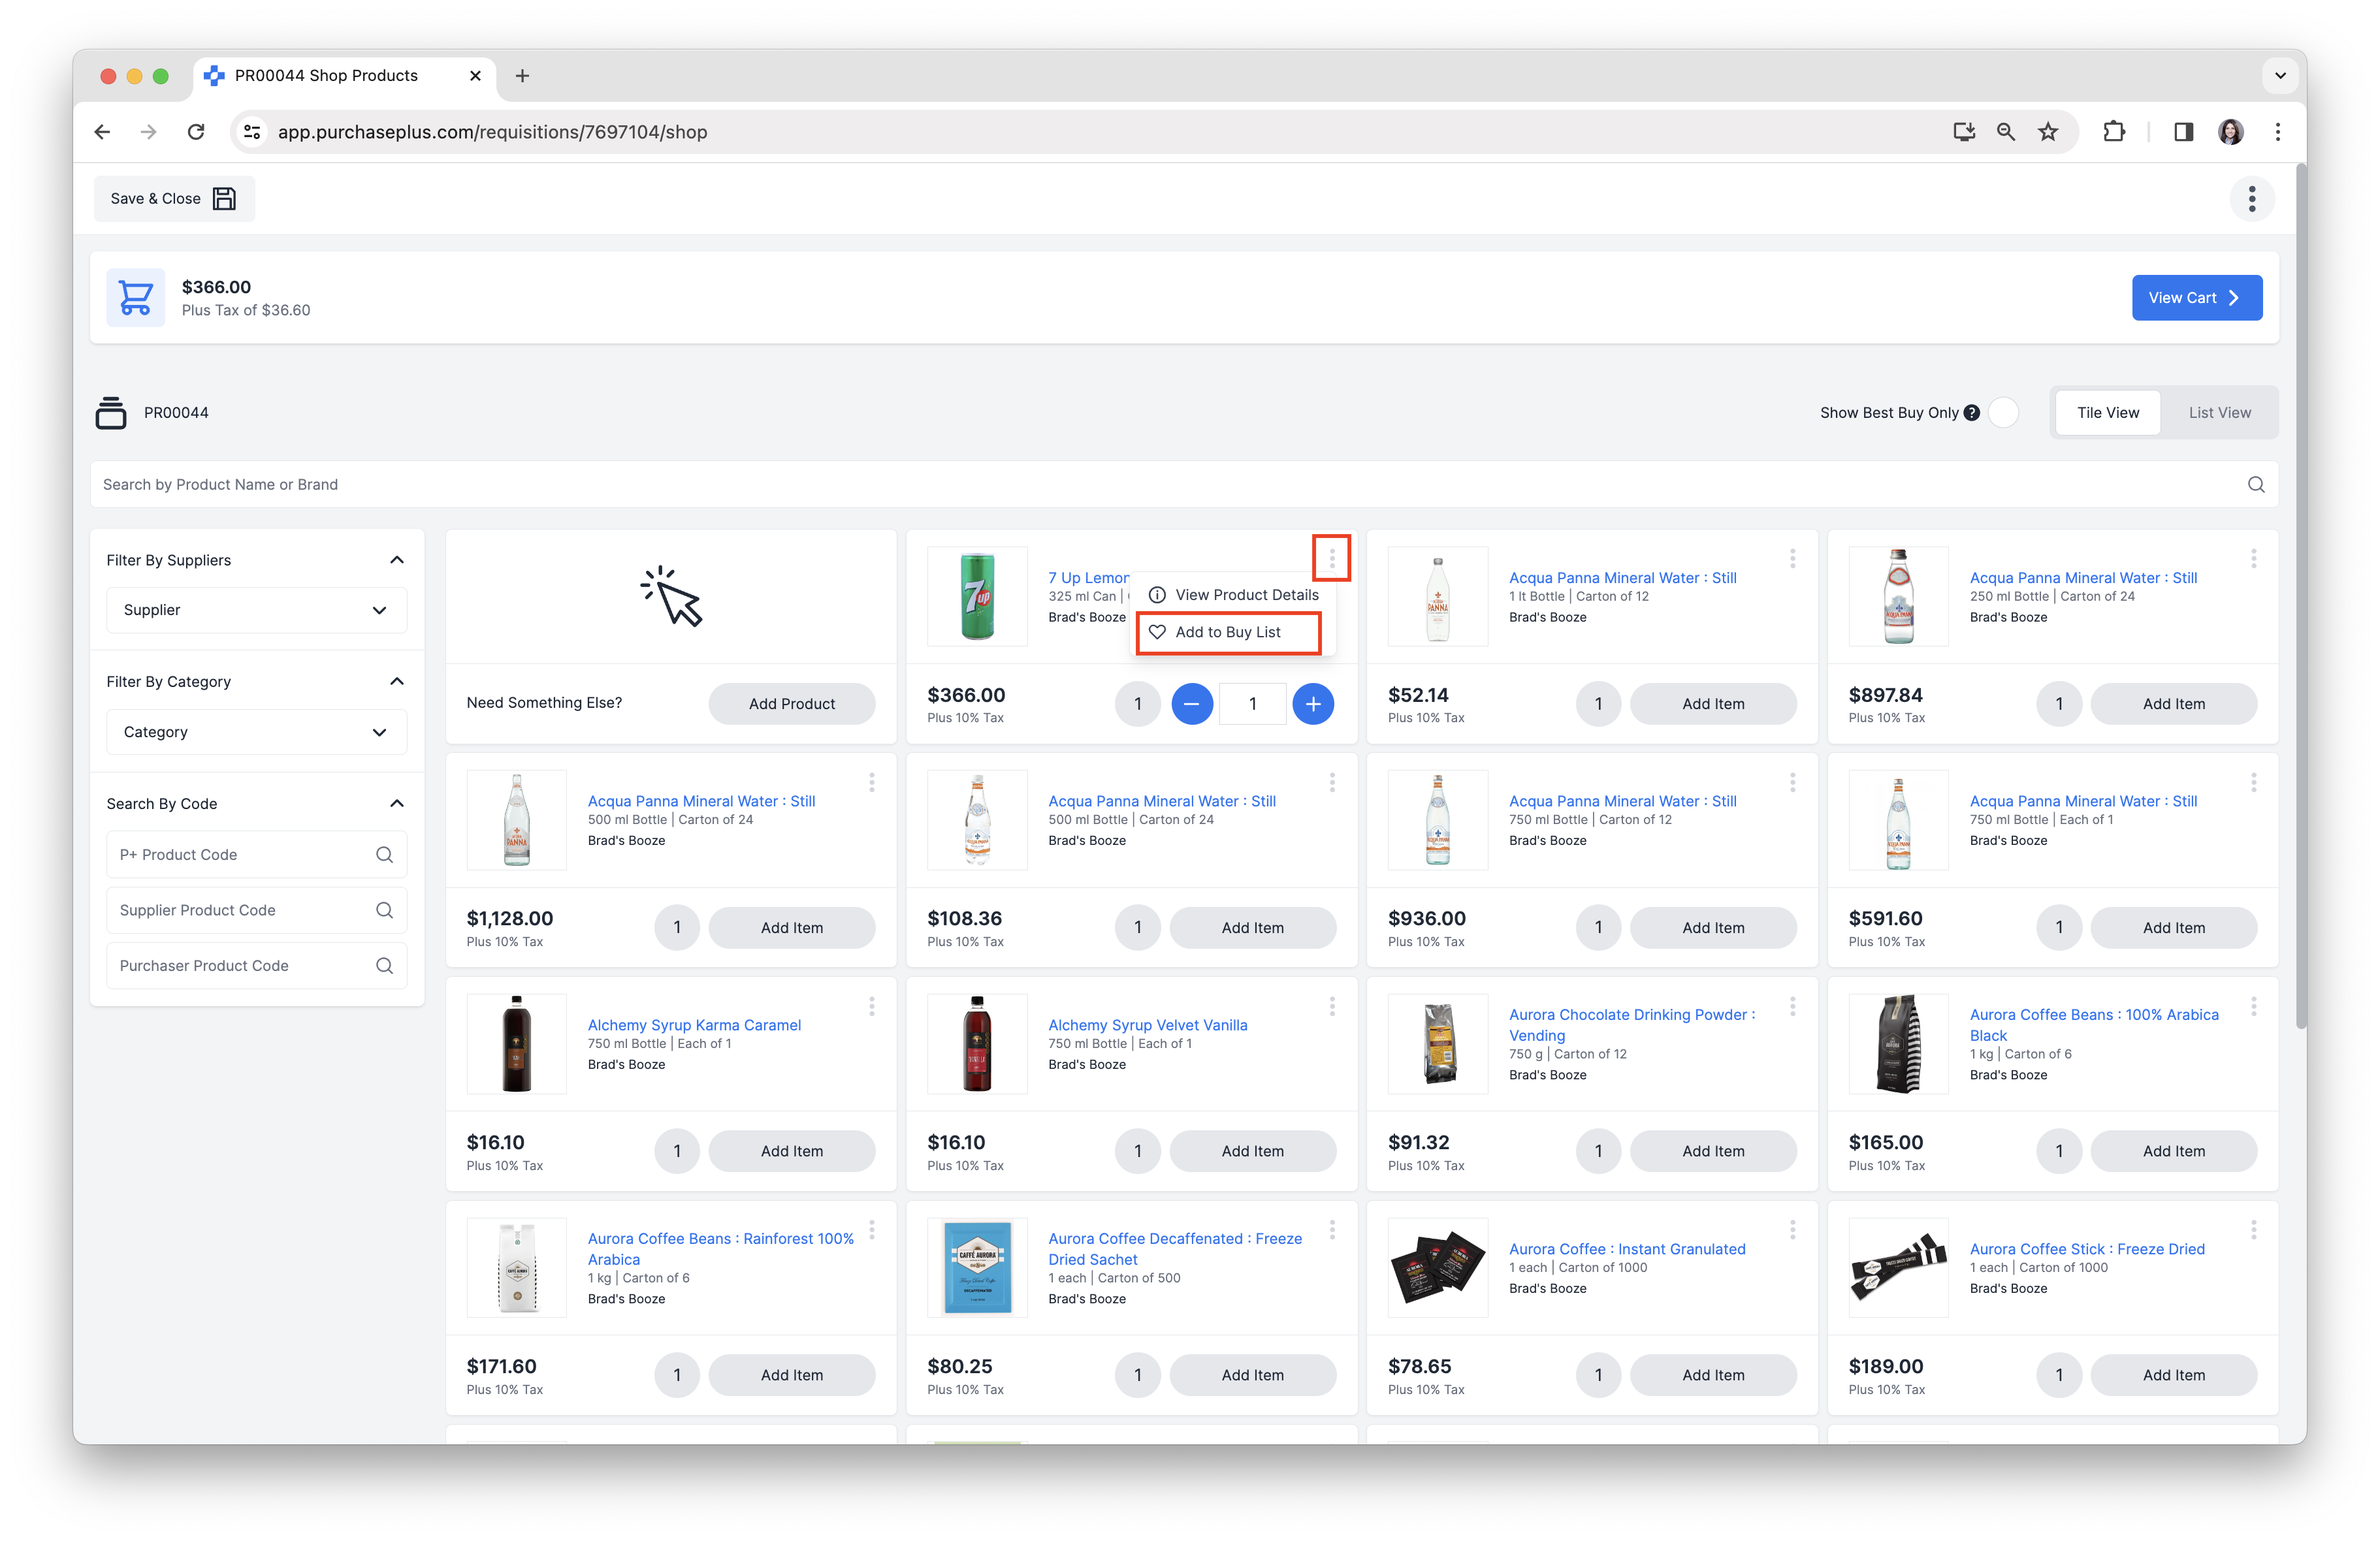
2. Select the Buy List that the Product will be added to. To confirm, click [Add to Buy List]. See our Create a New Buy List article and our Add Products to a Buy List article to learn more about Buy Lists.
Guide: Completing a Requisition in Basic Shopping Mode
Once you have created a Basic Shopping Mode Requisition, there are three steps required in order to 'Complete' the Requisition:
- Add Items to Your Cart
- Review Your Cart
- Submit the Requisition for Approval
1. Add Items To Your Cart
Click [Add Item] to add a product to your Cart. You can adjust the Quantity being ordered using the [-] or [+] buttons, or you can type a Quantity into the [Quantity] field. You can also type fractions of a whole number using decimal places, for example, 3.75.
Continue Adding Items to your Cart as required. When you have finished, you can click [View Cart] to view a summary of your selected Products.

2. Review Your Cart
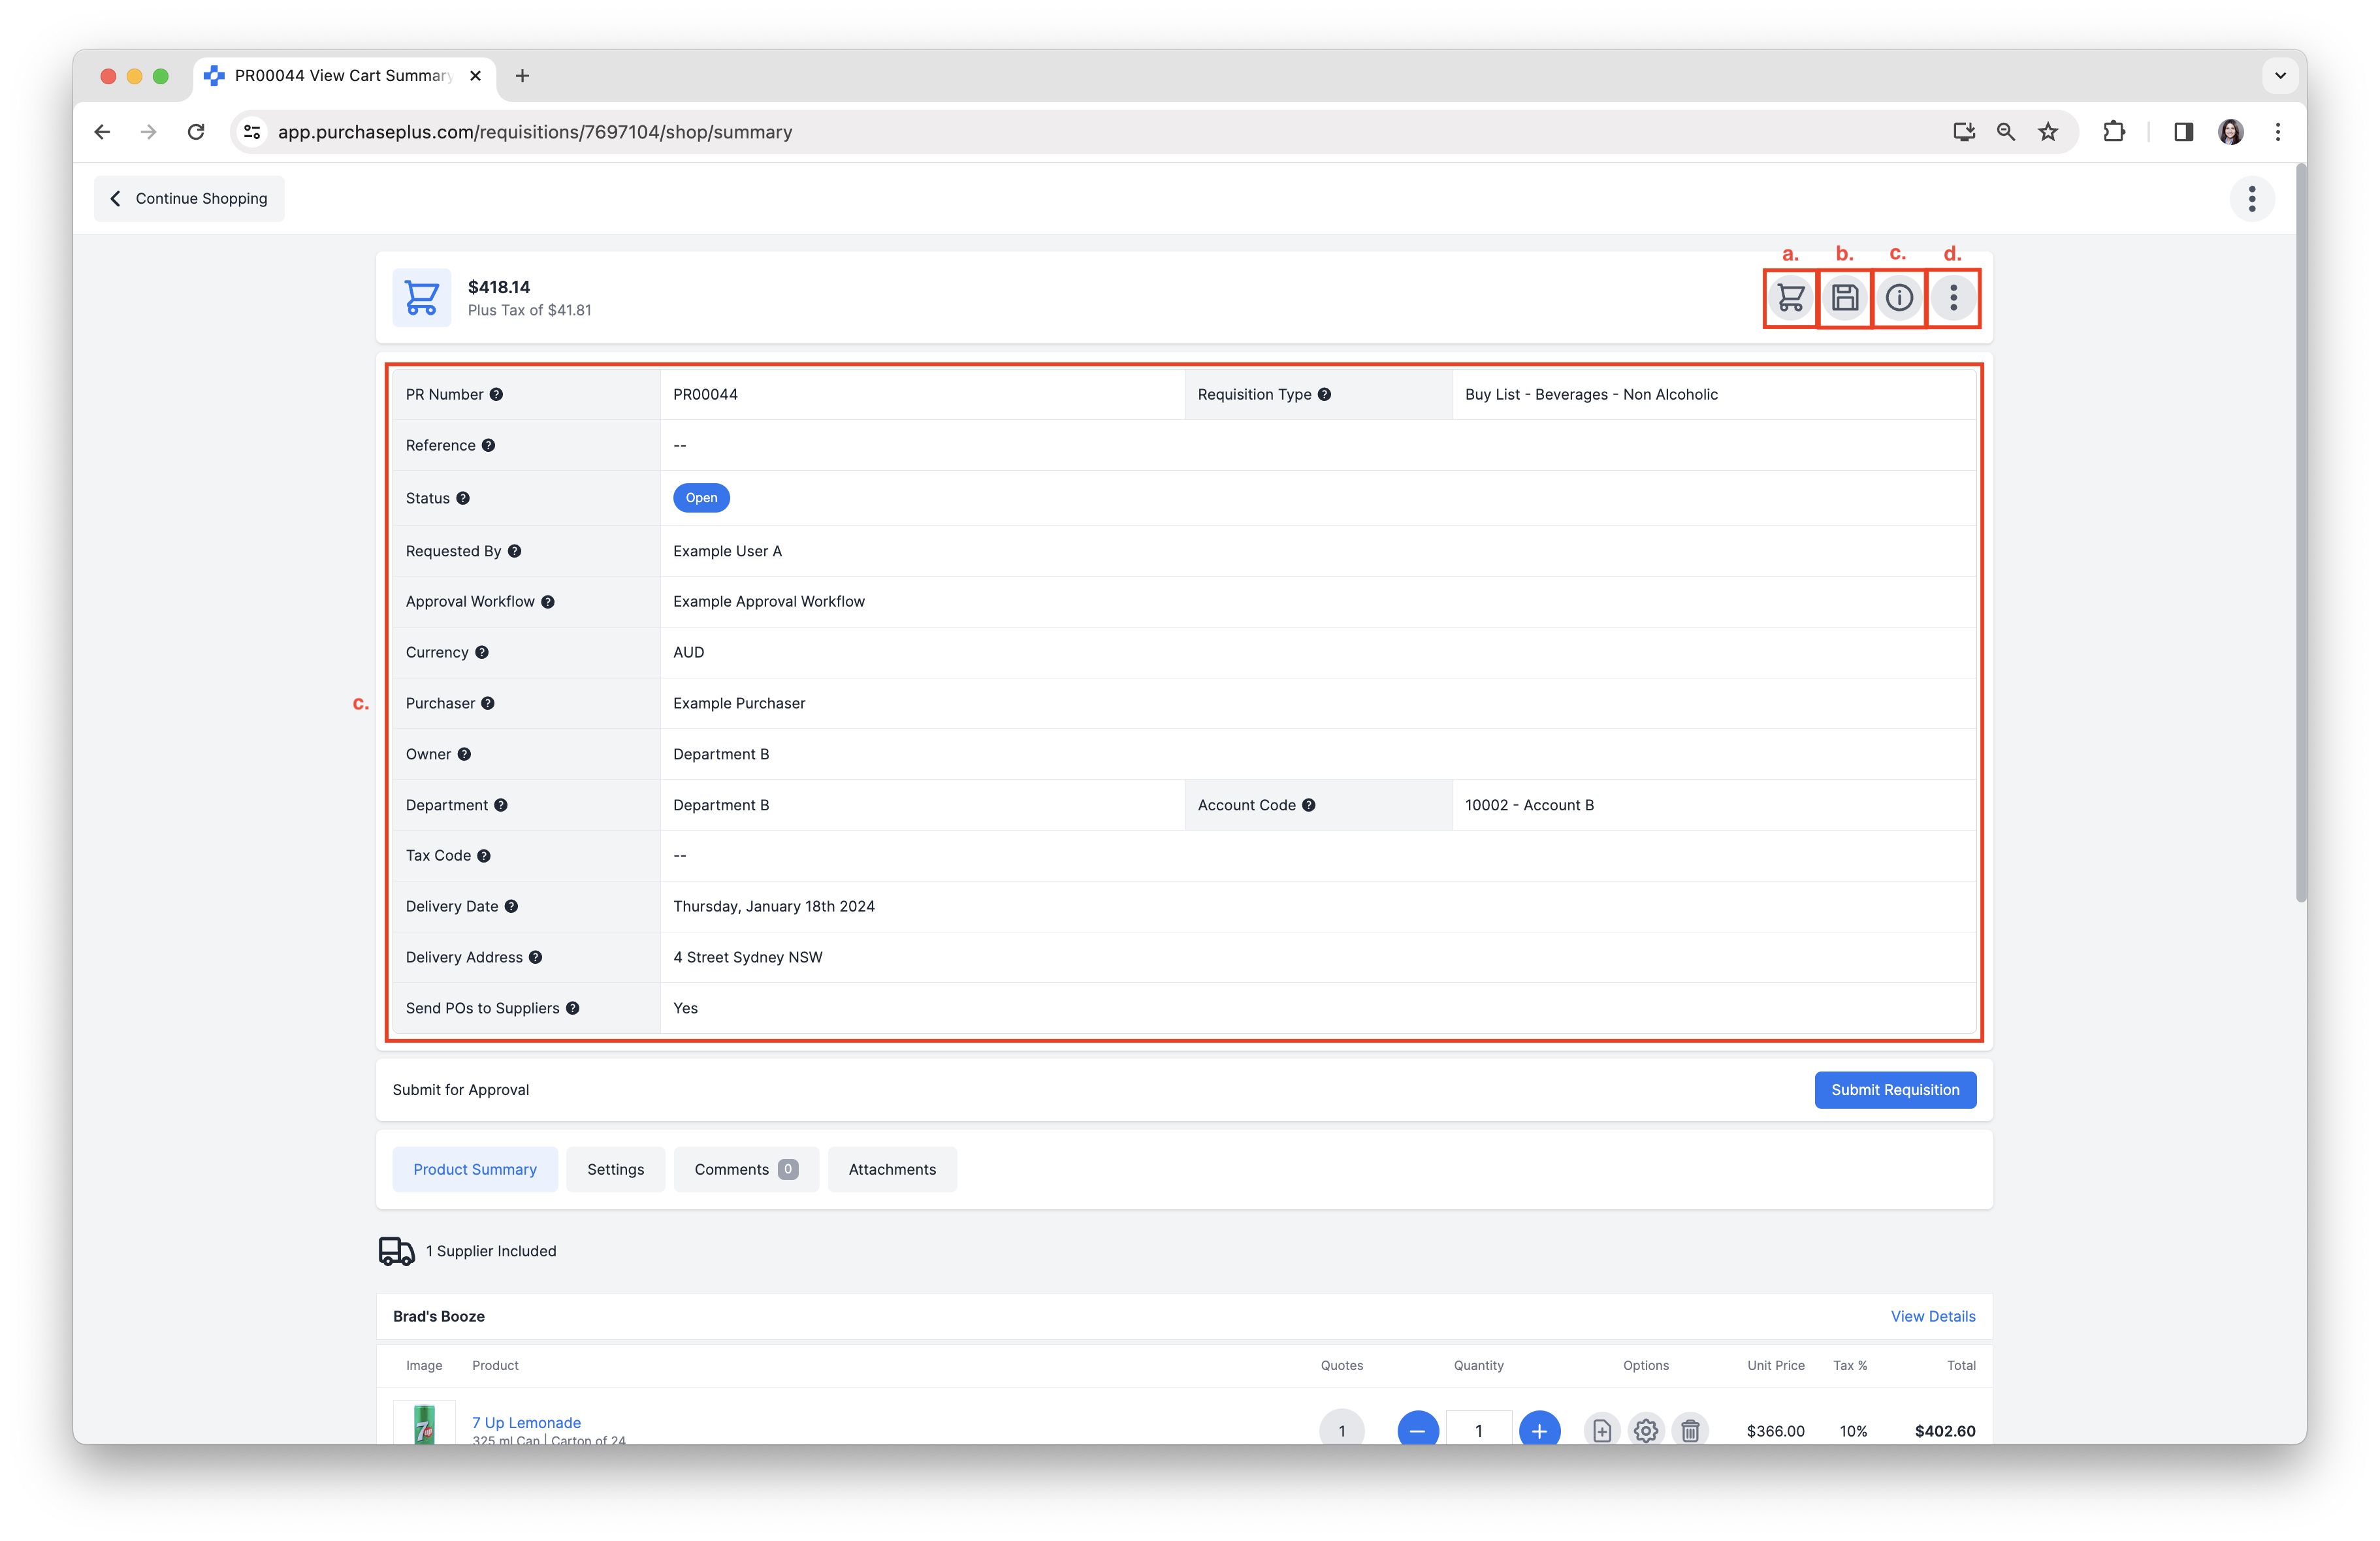
Quick Actions
The following Quick Actions are available from the Top-Right if required:
a. [Continue Shopping]. This will take you back to the product overview, where you can continue shopping if you need to add more Products to the Cart.
b. [Save and Close]. This will Save the Requisition in a Draft State, to be resumed at a later time.
c. [Show or Hide Details]. This displays detailed information about the Requisition, shown on screenshot below.
d. [More] → [Manage Columns] or [Get Help].
Review Product Summary
However, the primary purpose of Reviewing the Cart is usually to review the [Product Summary]: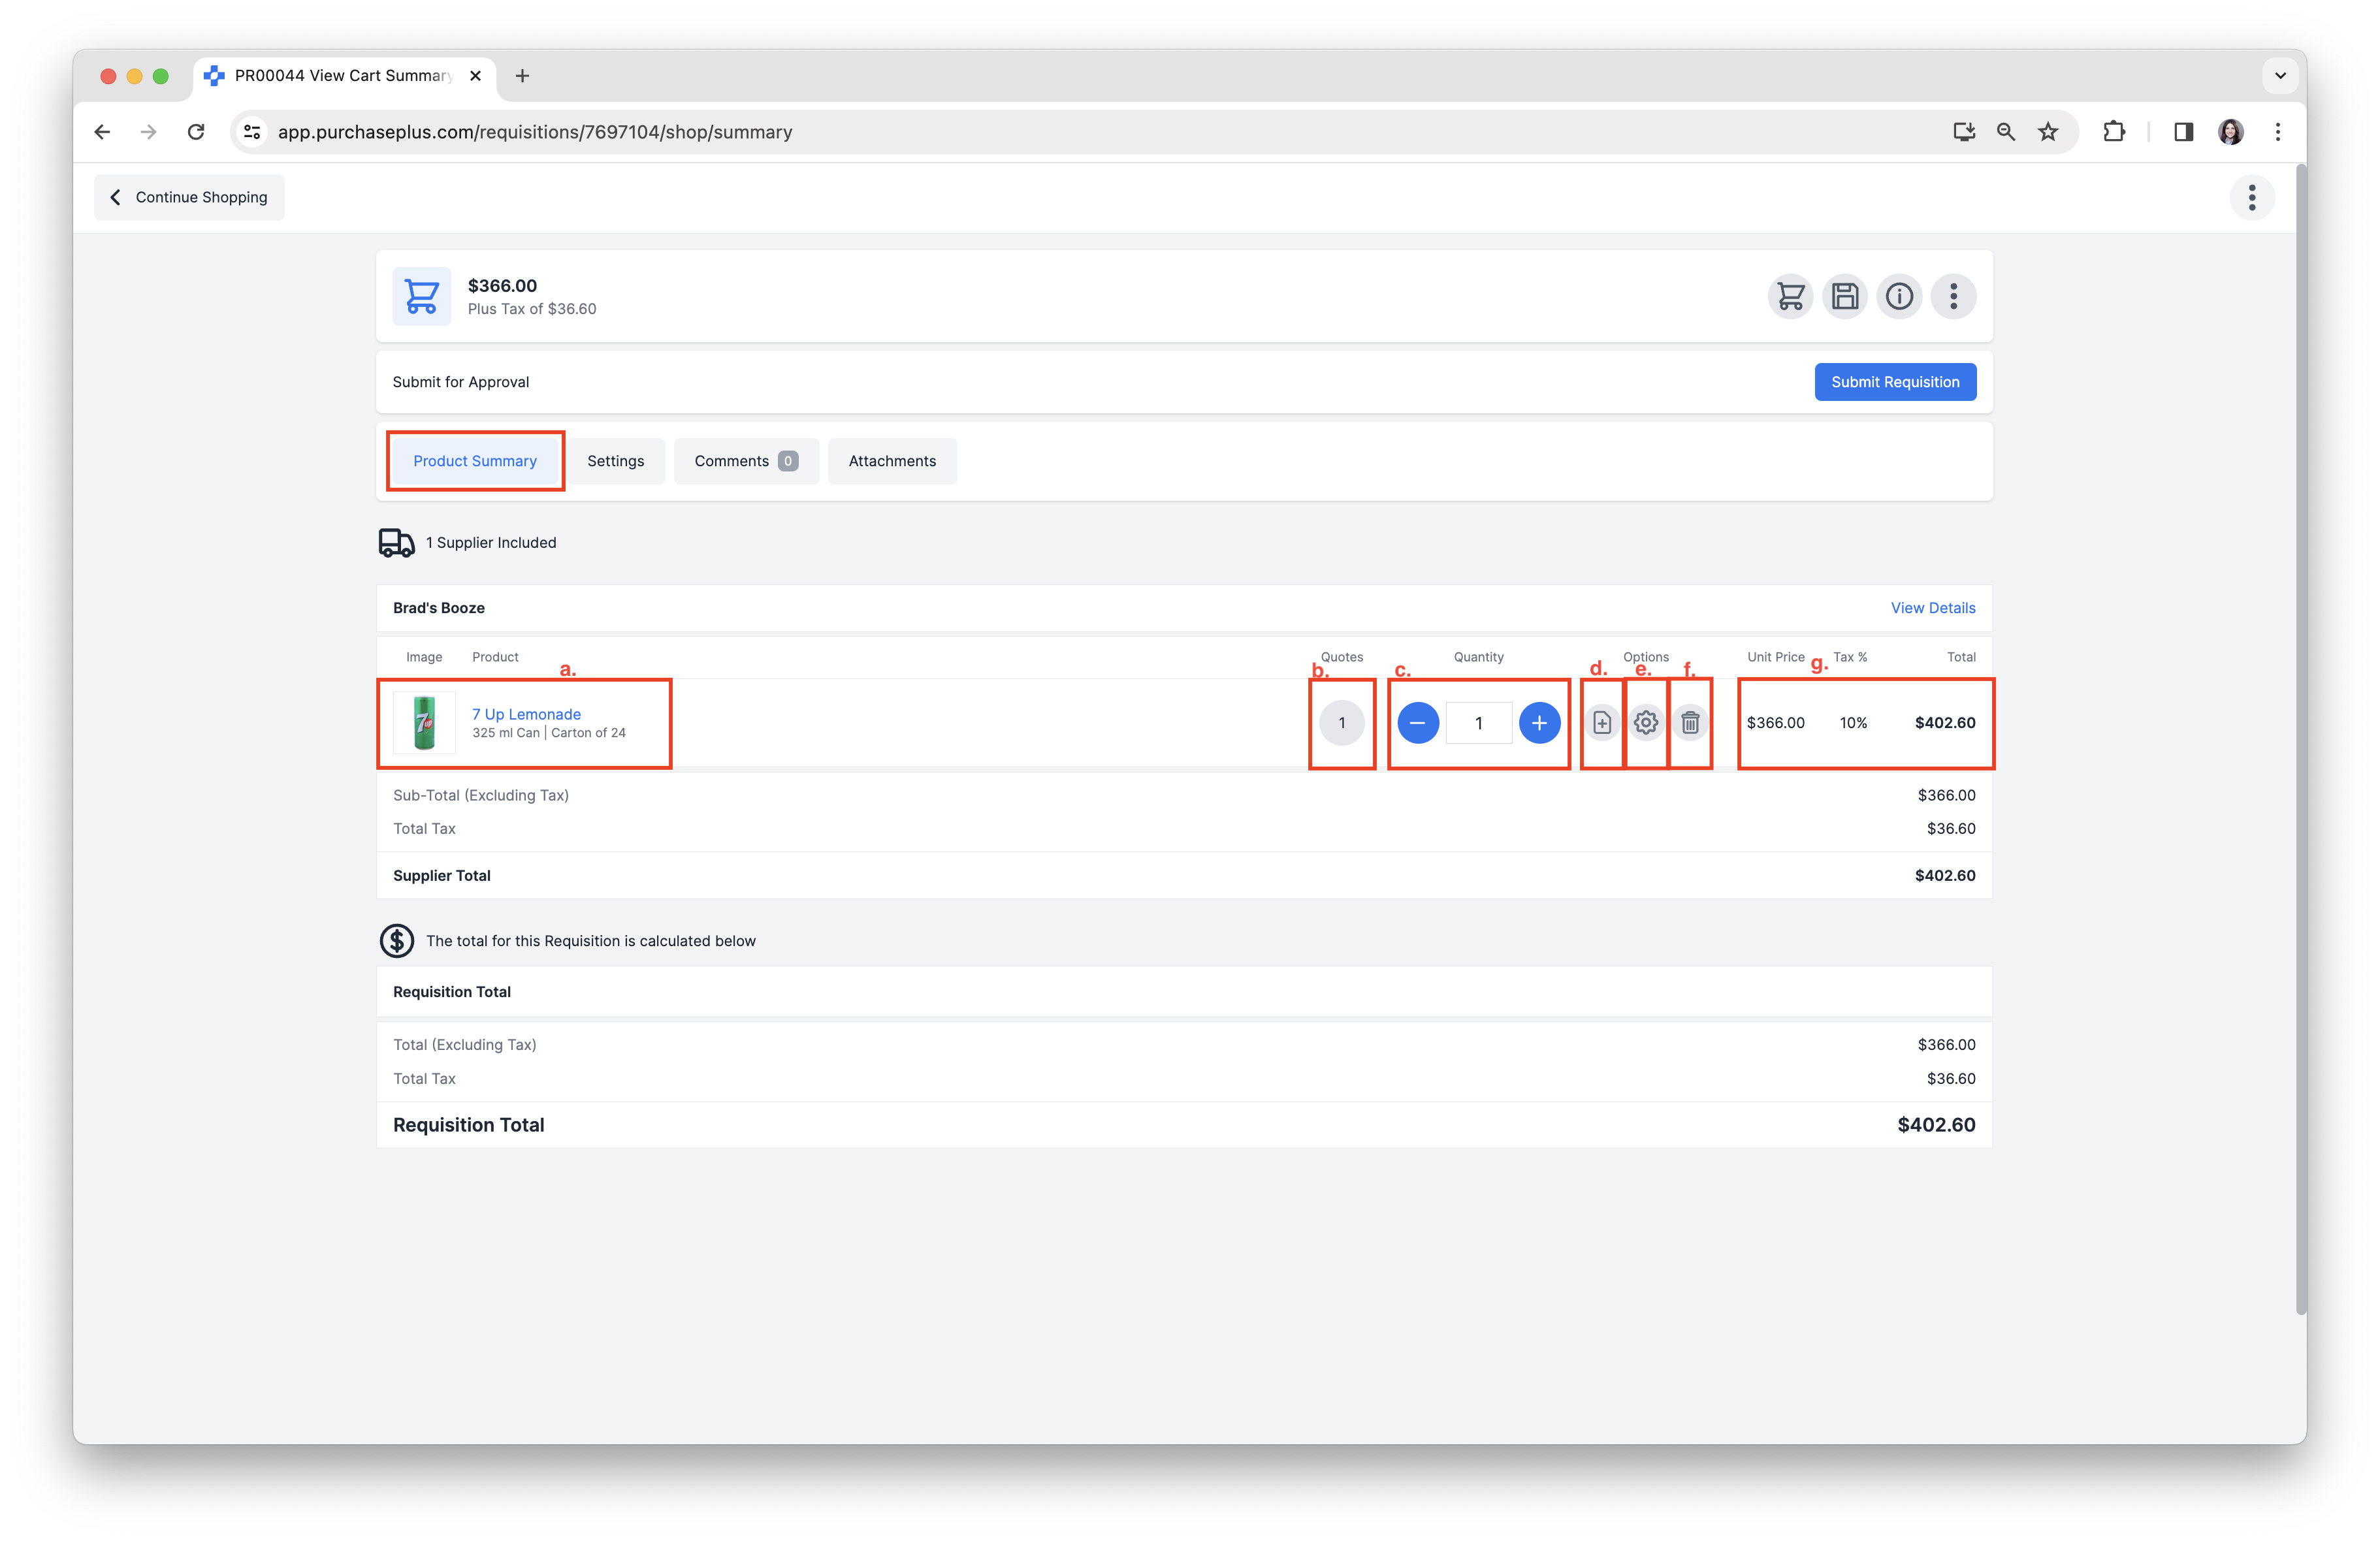
From this view, you can:
a. Review Products to be purchased, grouped per Supplier.
b. Review Quotes. If multiple quotes are available, you can select an alternate quote from another Supplier here and your cart will be updated to reflect your selection. If a quote has been selected that is not the best quote, a Premium Notification will be displayed to bring attention to the potential savings to be made.
c. Adjust the Quantity of the Products to be Purchased.
d. Add Order Instructions to a particular Product.
e. Assign a Department and Account Code to a particular Product. Your Organization may use this feature for recording expenses.
f. Remove a Product from the Requisition.
g. Review Prices & Totals.
Review Requisition Settings
You can additionally click [Settings] to review or make changes to the following Requisition attributes before submitting it for Approval: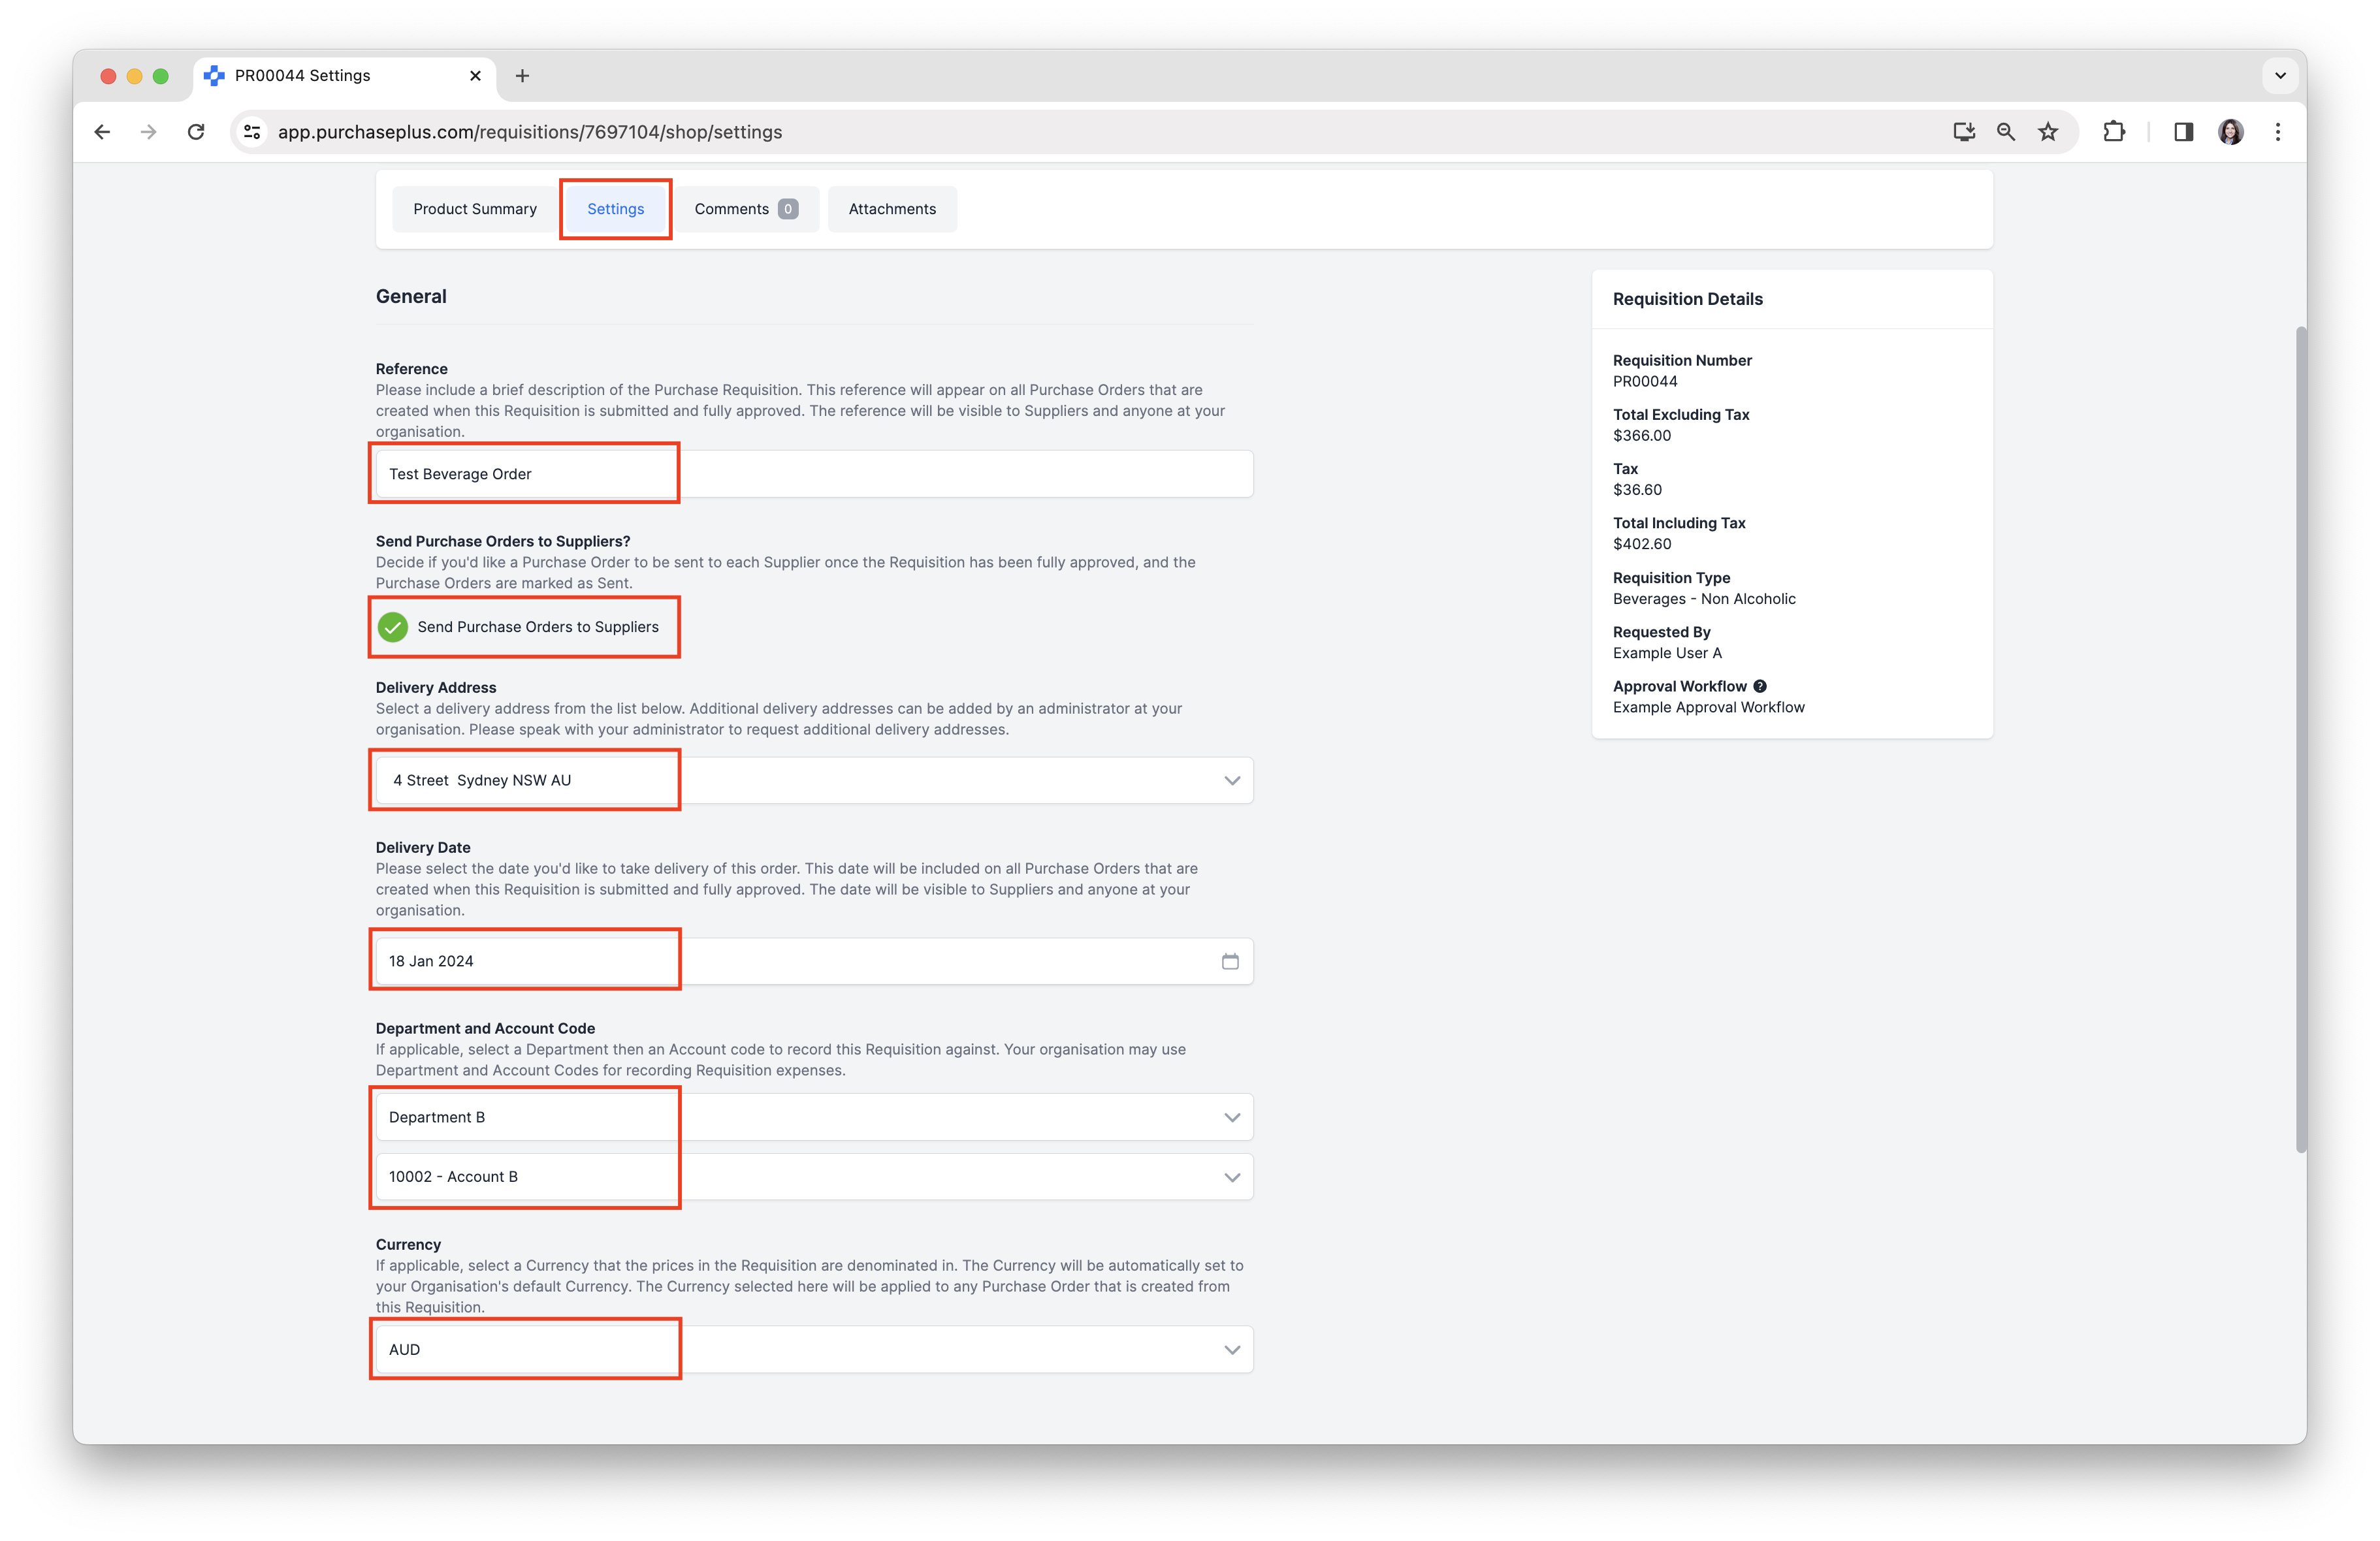
a. Requisition Reference.
b. Decide if you would like to send Purchase Orders to Suppliers.
c. Delivery Address.
d. Delivery Date.
e. Department and Account Code.
f. Set Currency, if applicable.
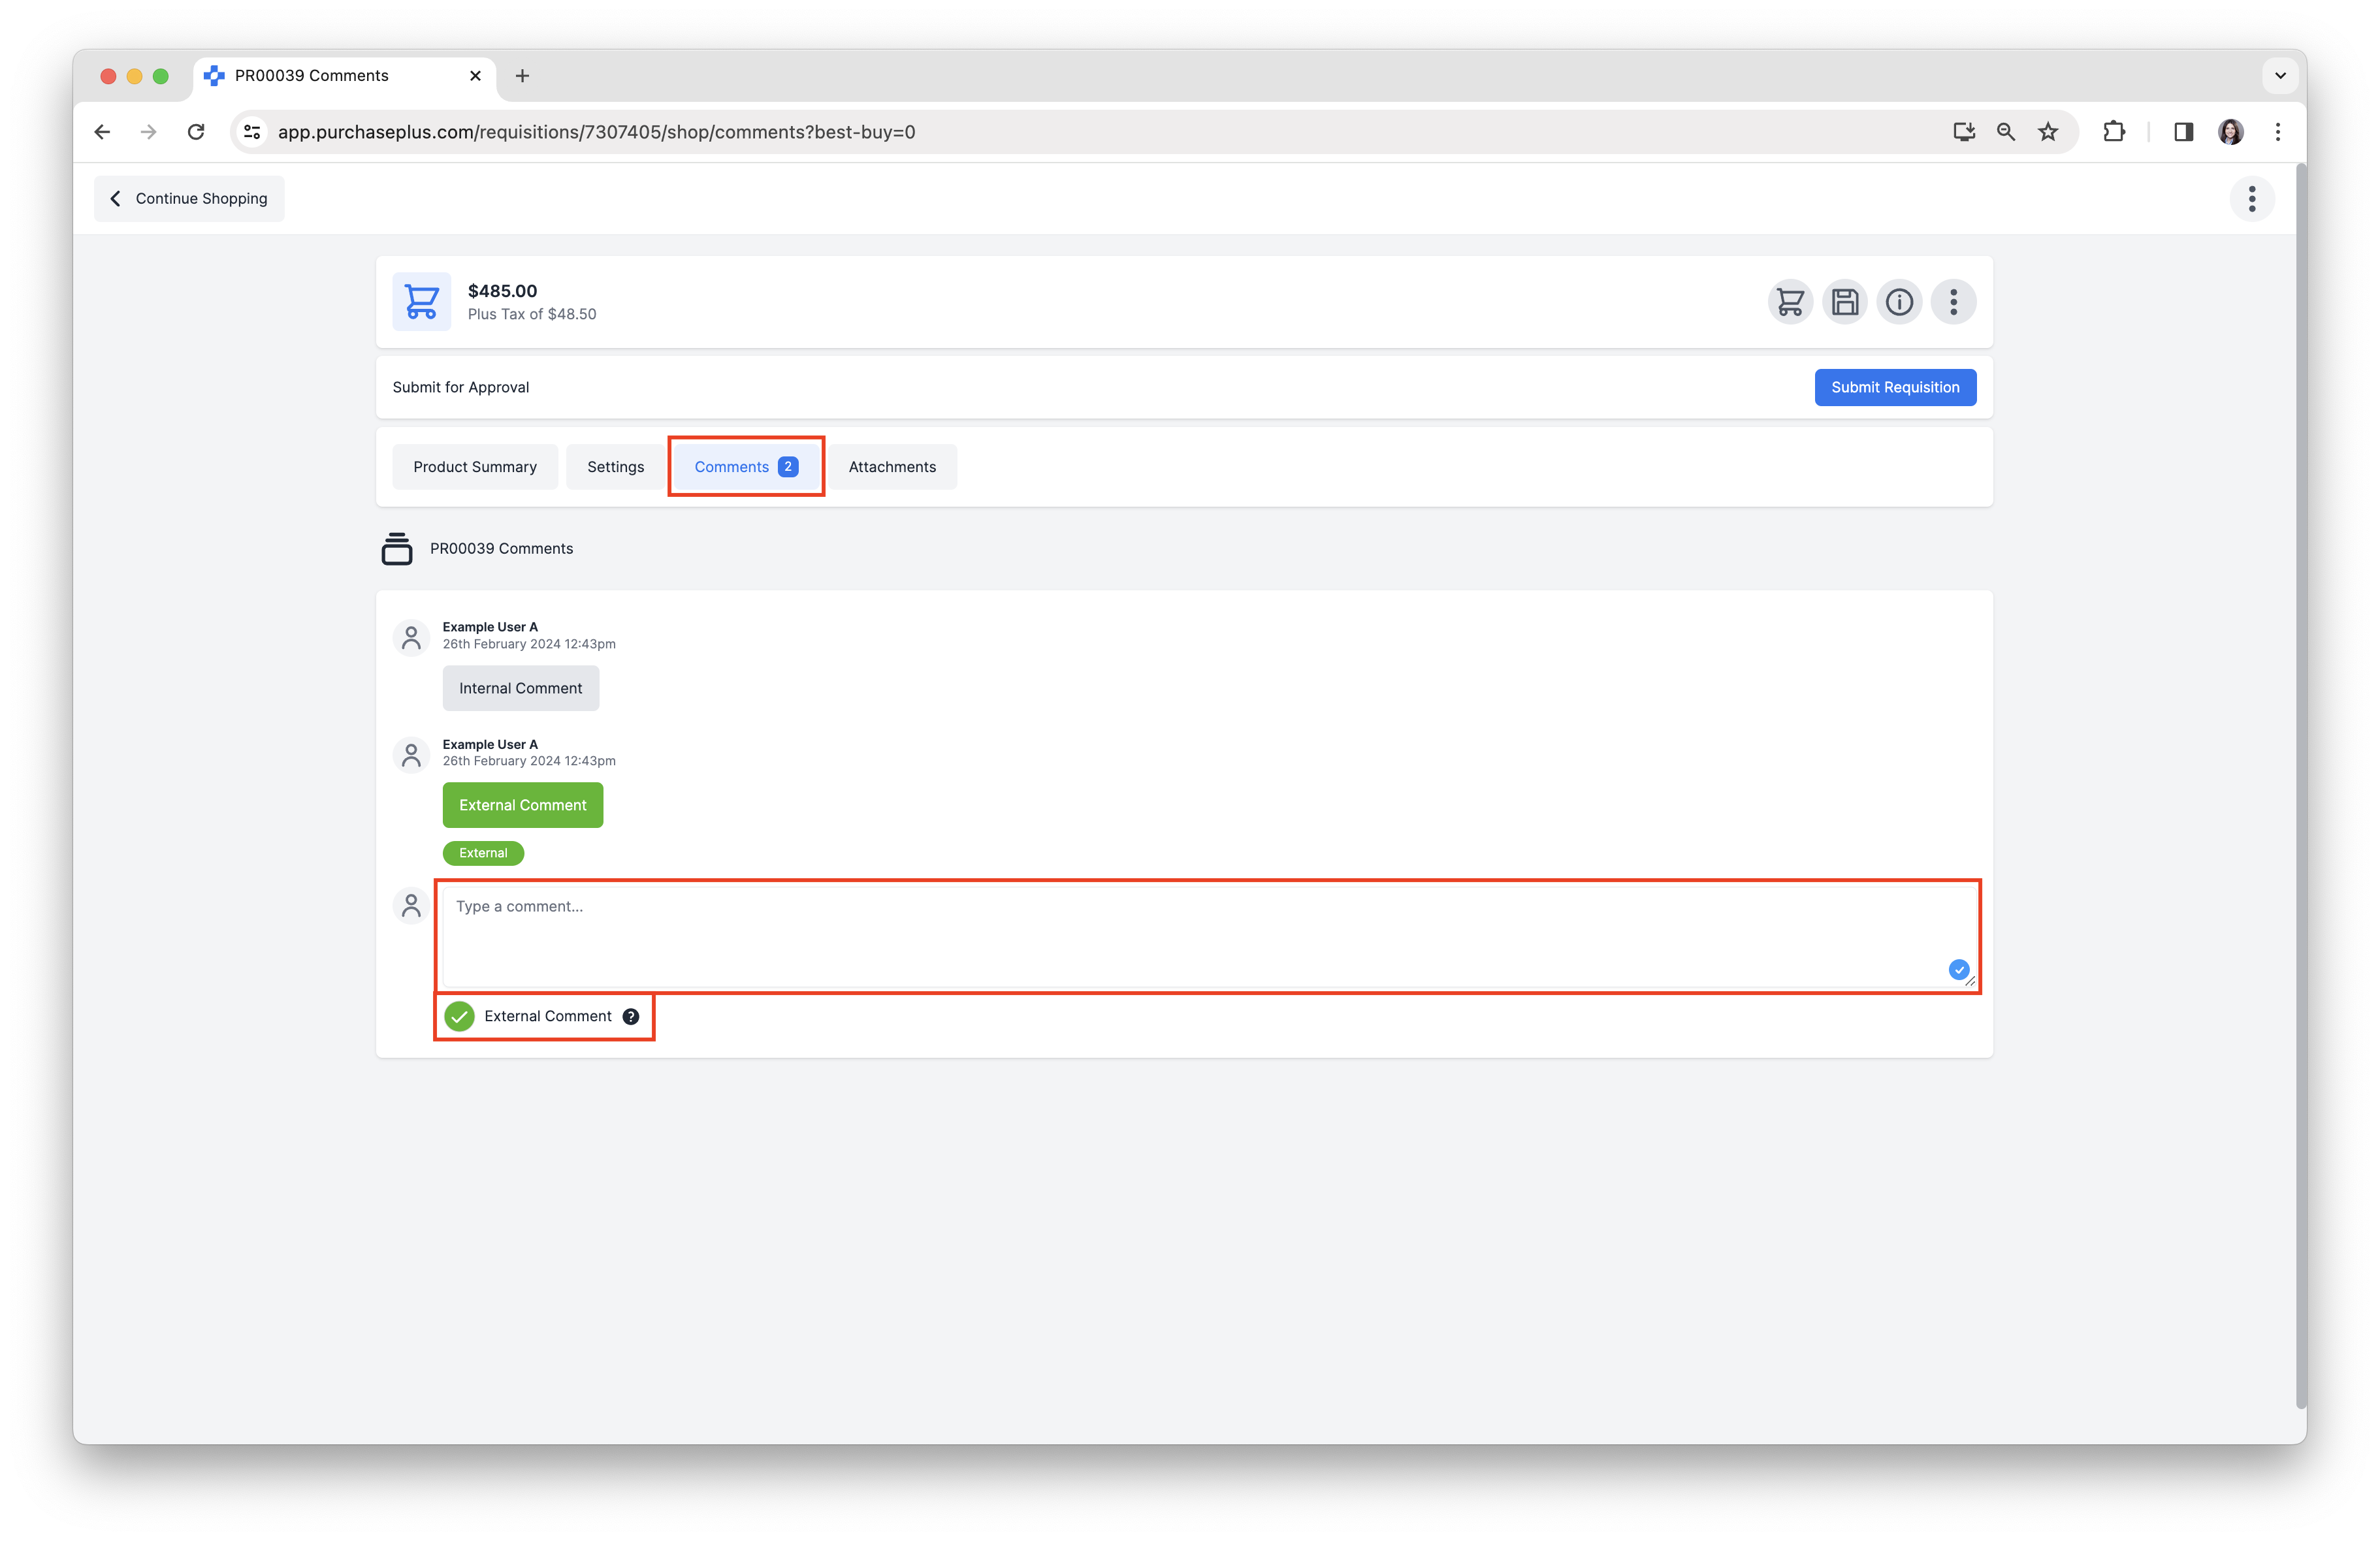
Leave a Comment
Click on [Comments] to:
a. Add an optional Comment that will be visible to your colleagues when they are Reviewing and/or Approving the Requisition.
b. You can also tick [External Comment] to add a comment that will be visible to the Supplier(s) on the generated Purchase Orders.
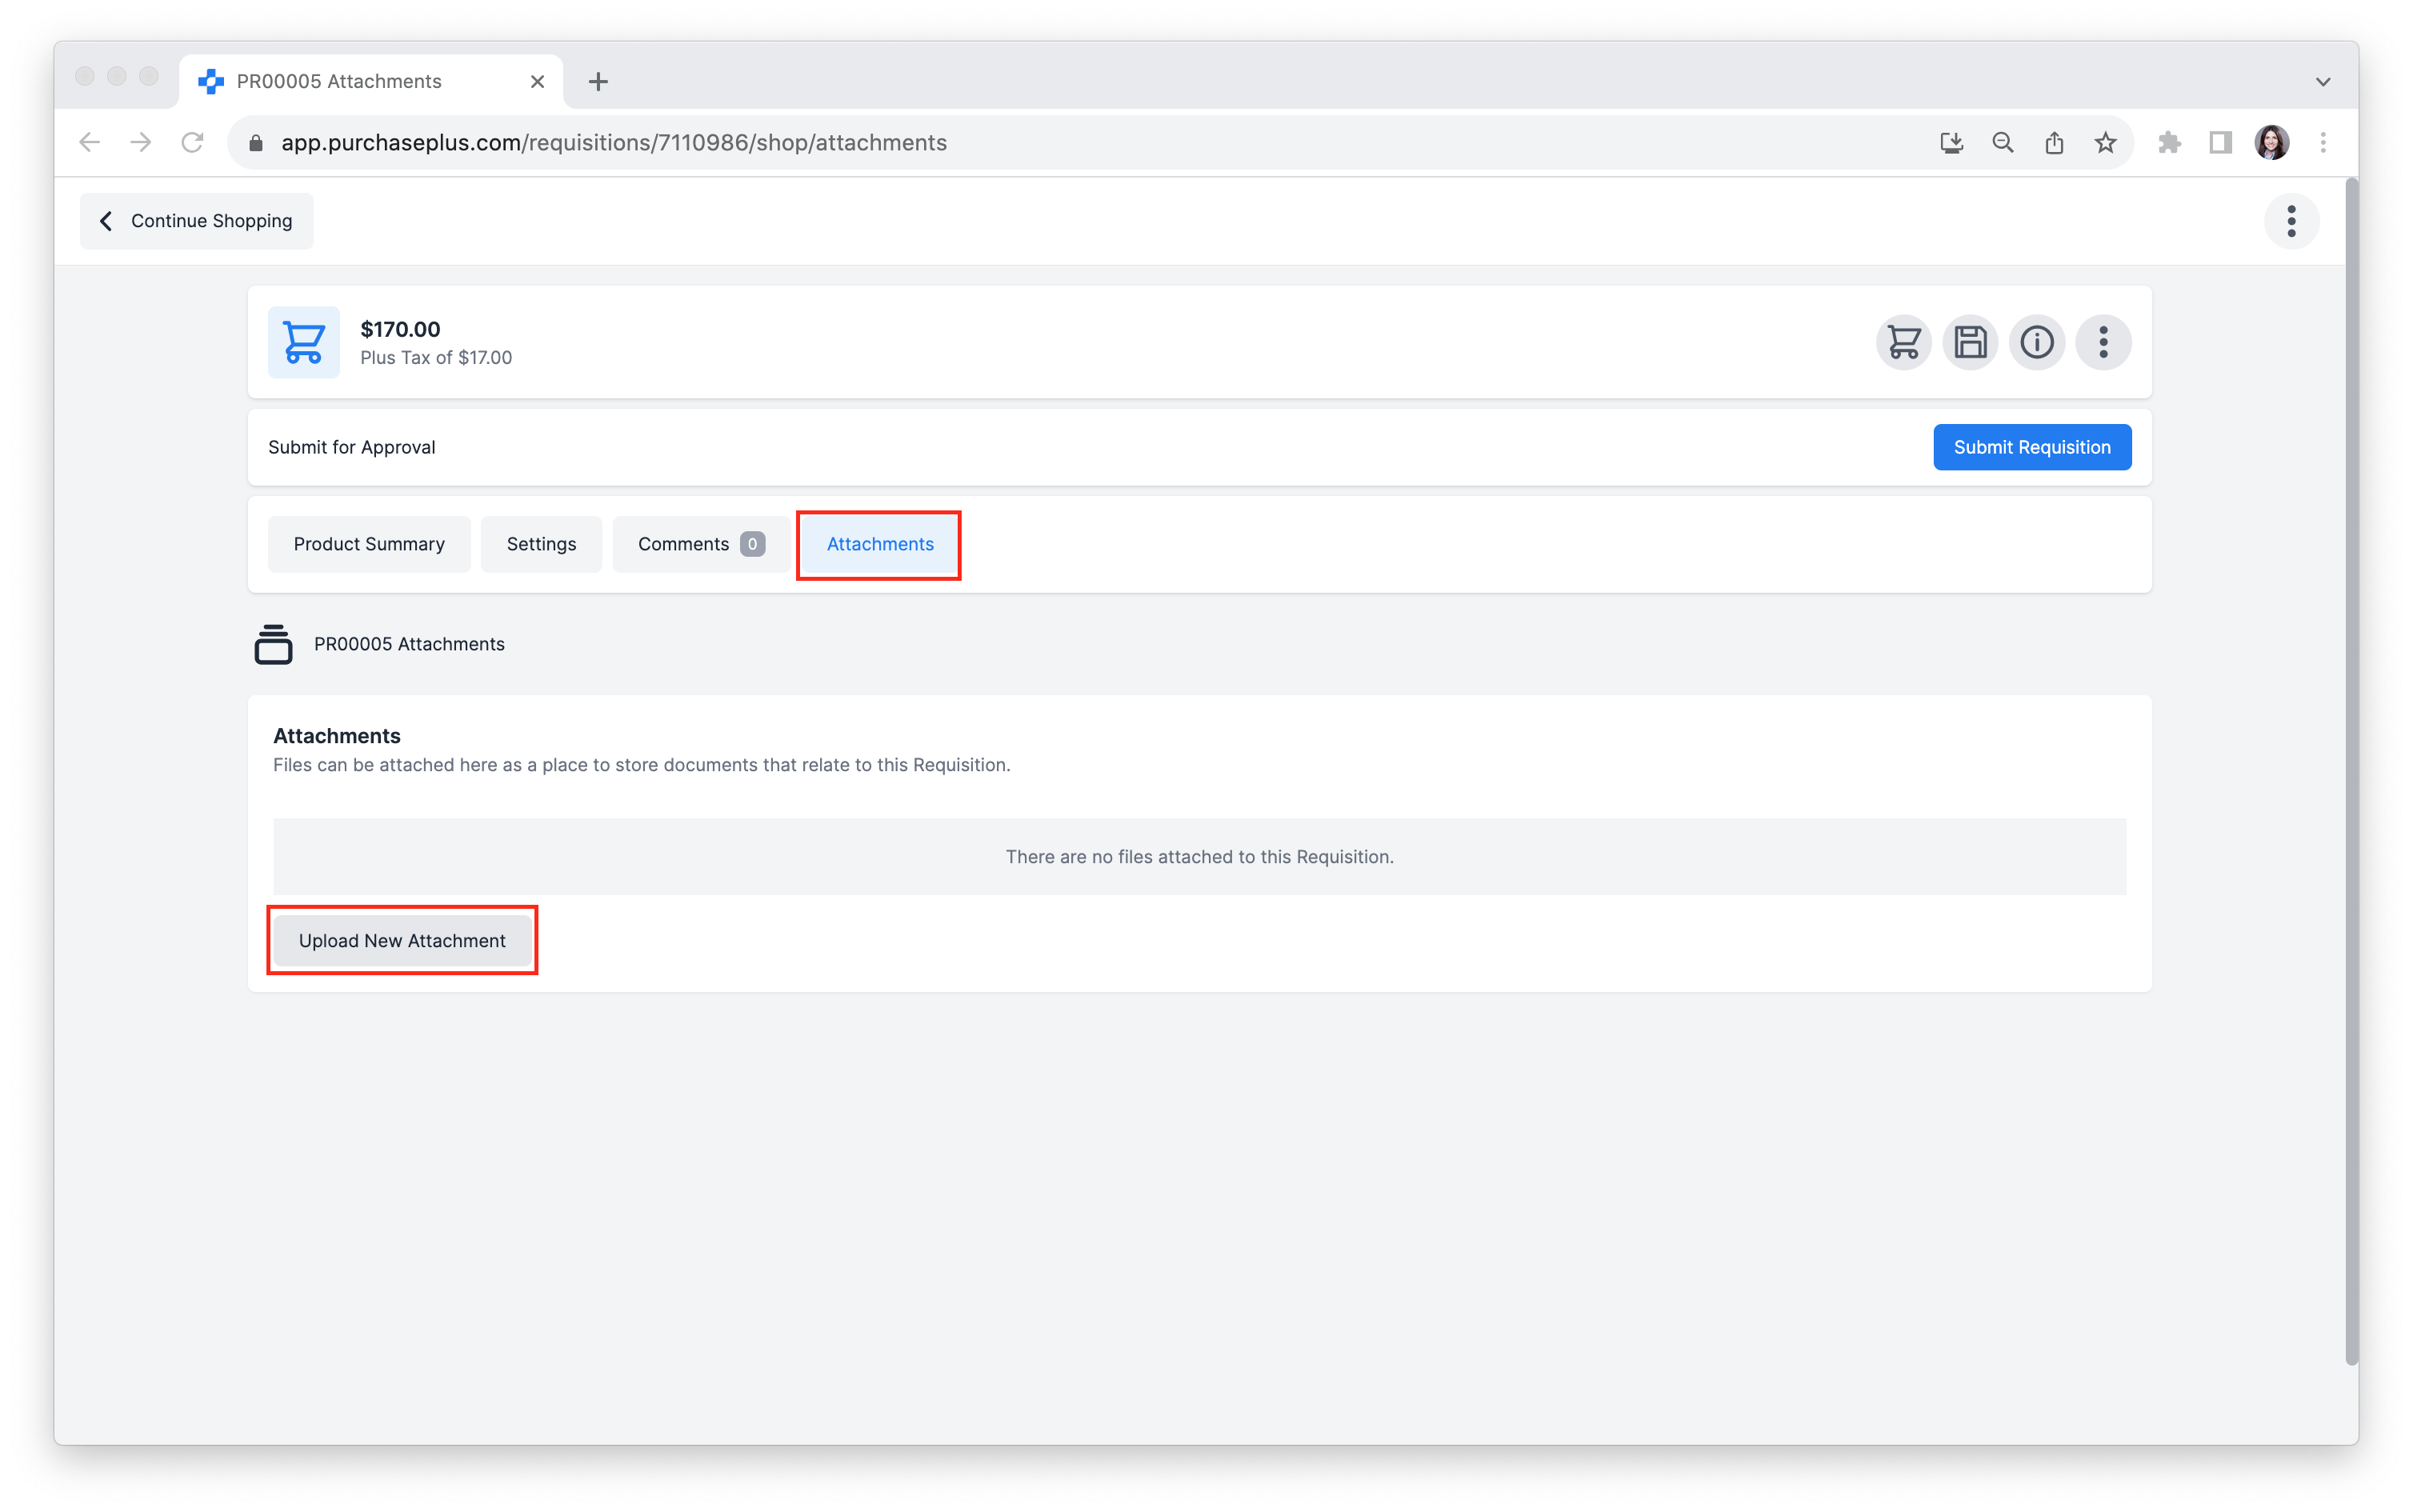
Add an Attachment
Click [Attachments] to optionally attach files related to this Requisition.
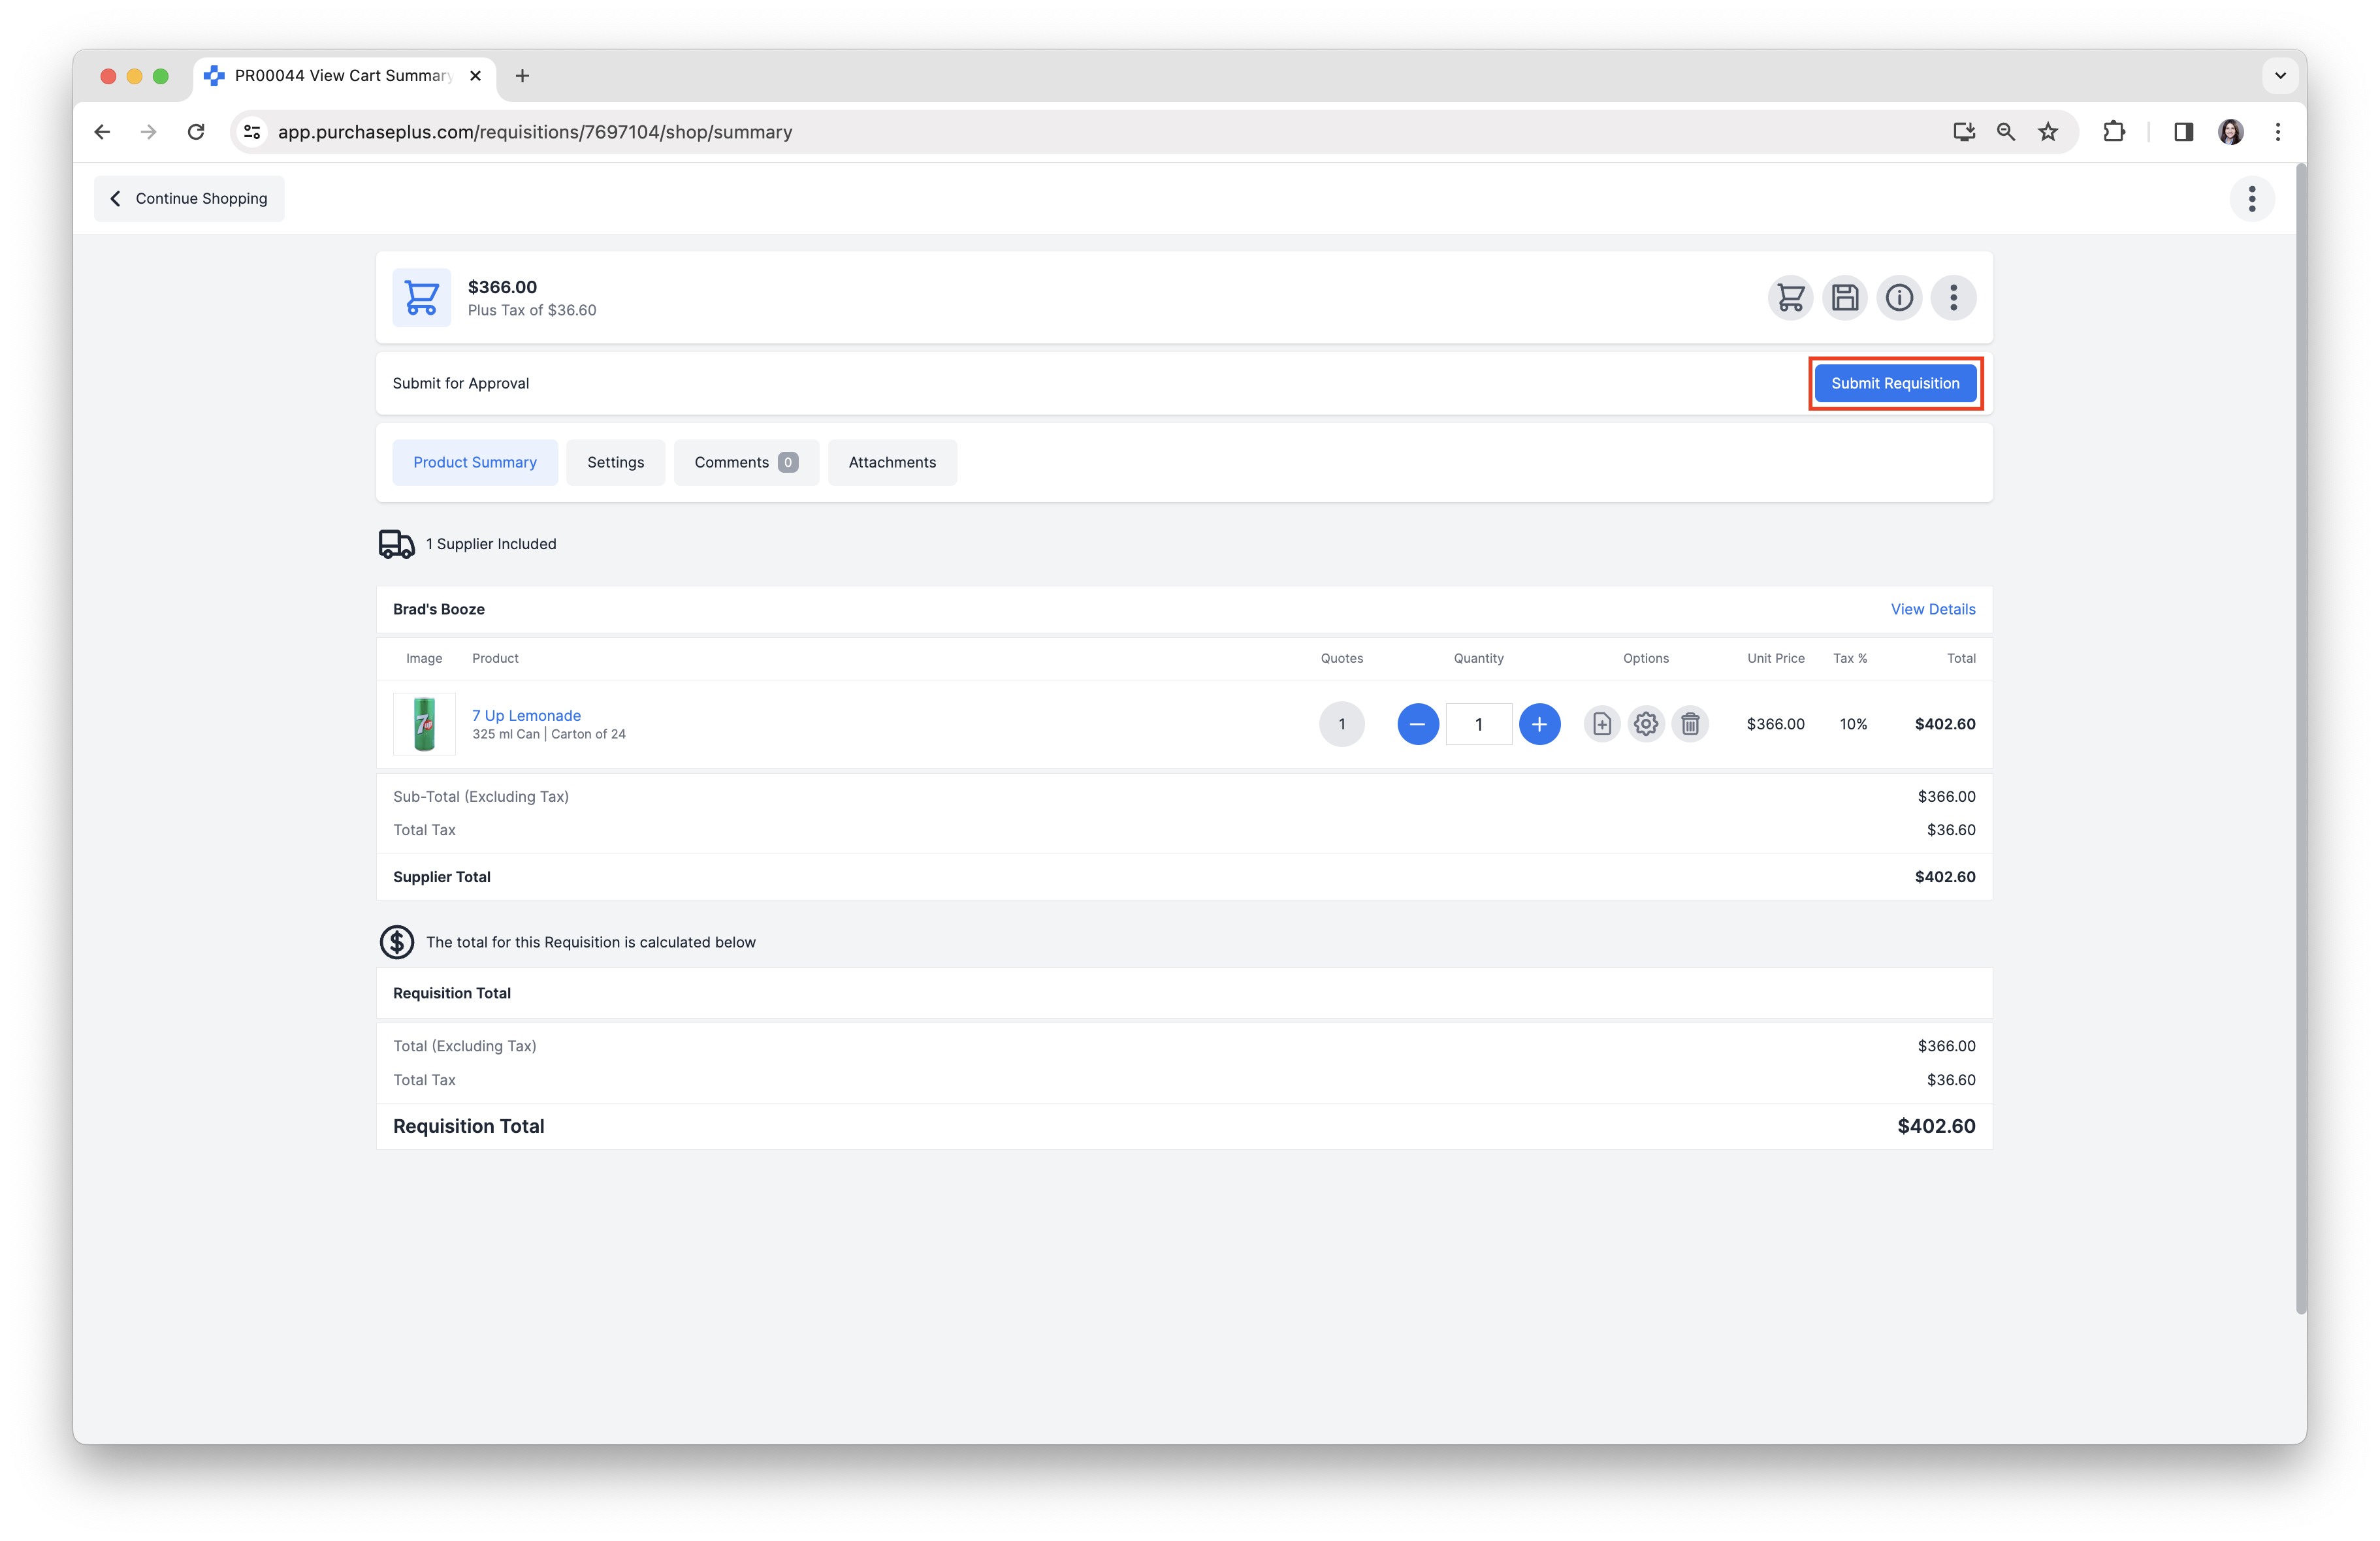
Submit Requisition for Approval
1. When you are happy with the Requisition and its Settings, click [Submit Requisition] to submit the Requisition for Approval:
2. Confirm your submission by reviewing the Requisition details and clicking [Submit for Approval] at the bottom of the page. Note: This step is skipped if you have enabled Expert Mode as a User Preference.
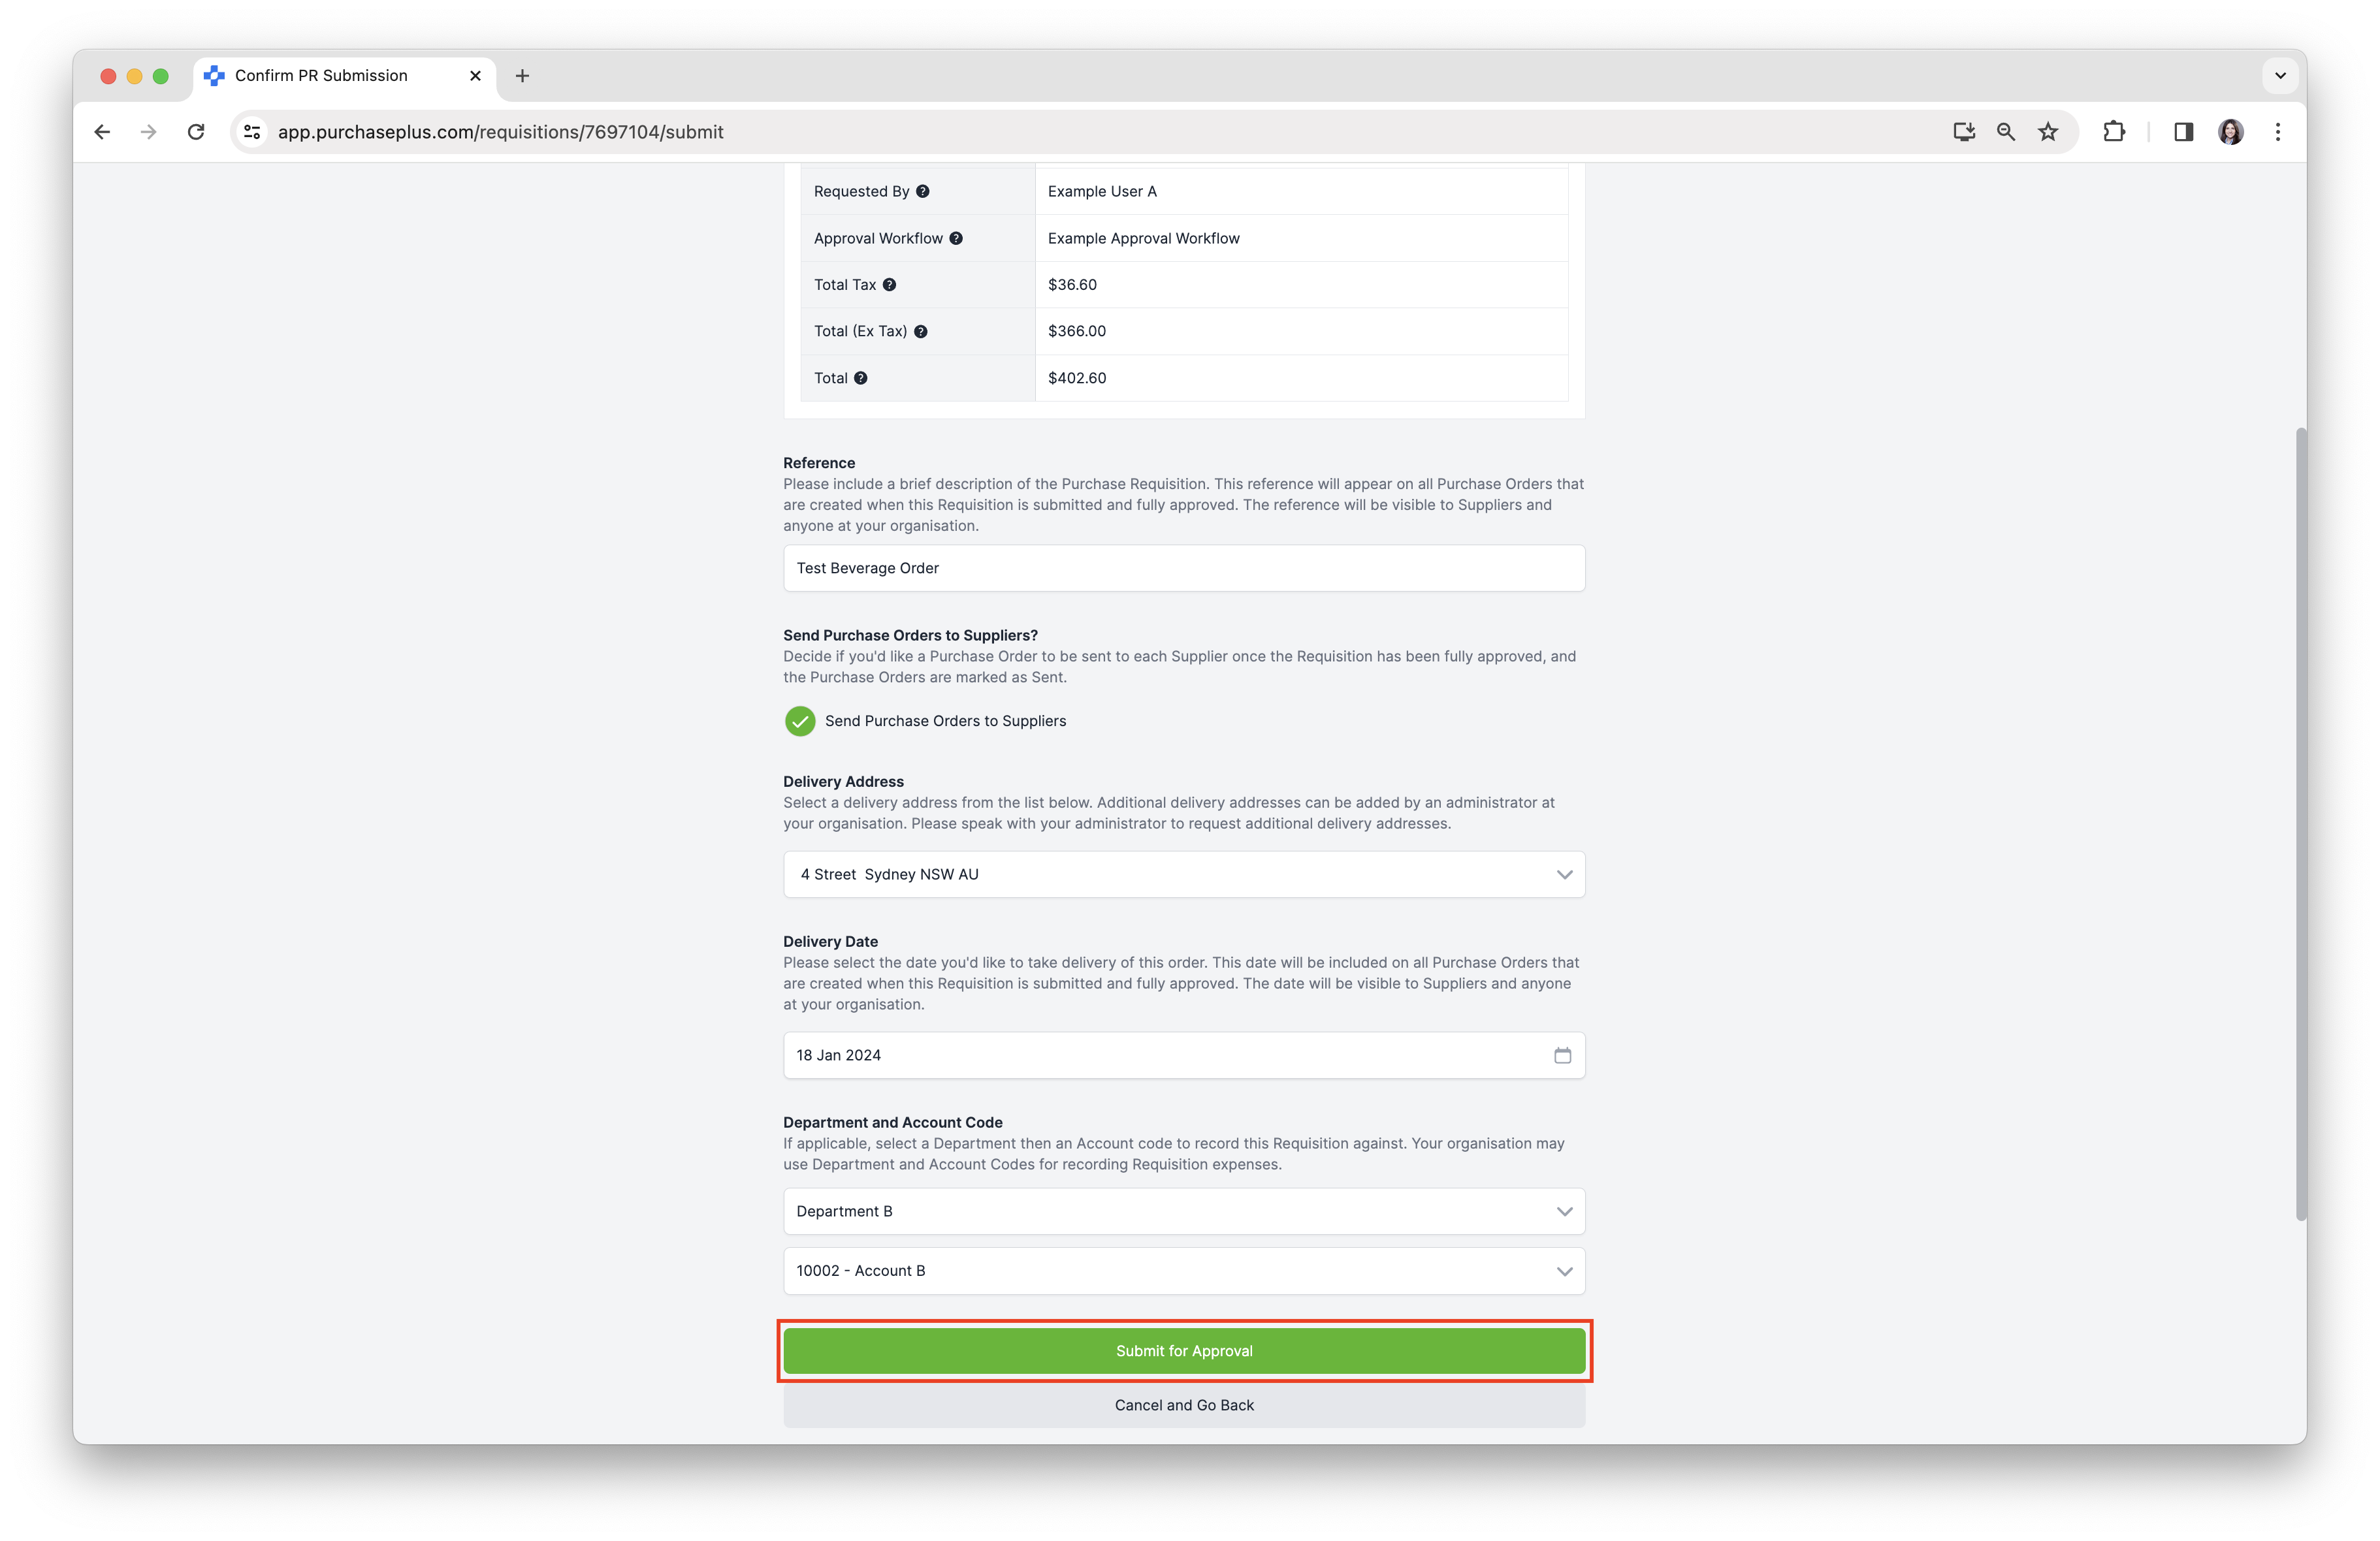
3. The Requisition will be submitted for Approval and will be progressed to the 'AWAITING APPROVAL' state. The Requisition will be placed into the Approval Workflow that applies to the Requisition, and the approving users in the first rank of the workflow will receive an email notification, informing them that the Requisition can be approved or declined.