Learn how to create and manage new Users in PurchasePlus.
A User is a Person with a PurchasePlus Account that uses our software in the daily duties of their jobs.
If you have the 'Manage Users' Permission, there are a number of extra, Administrator-type functionality that you have access to.
Skip to:
- Creating New Users
- Managing User General Settings
- Managing User Preferences
- Managing User Permissions
- Managing a User's Departments or Organizations
Creating New Users
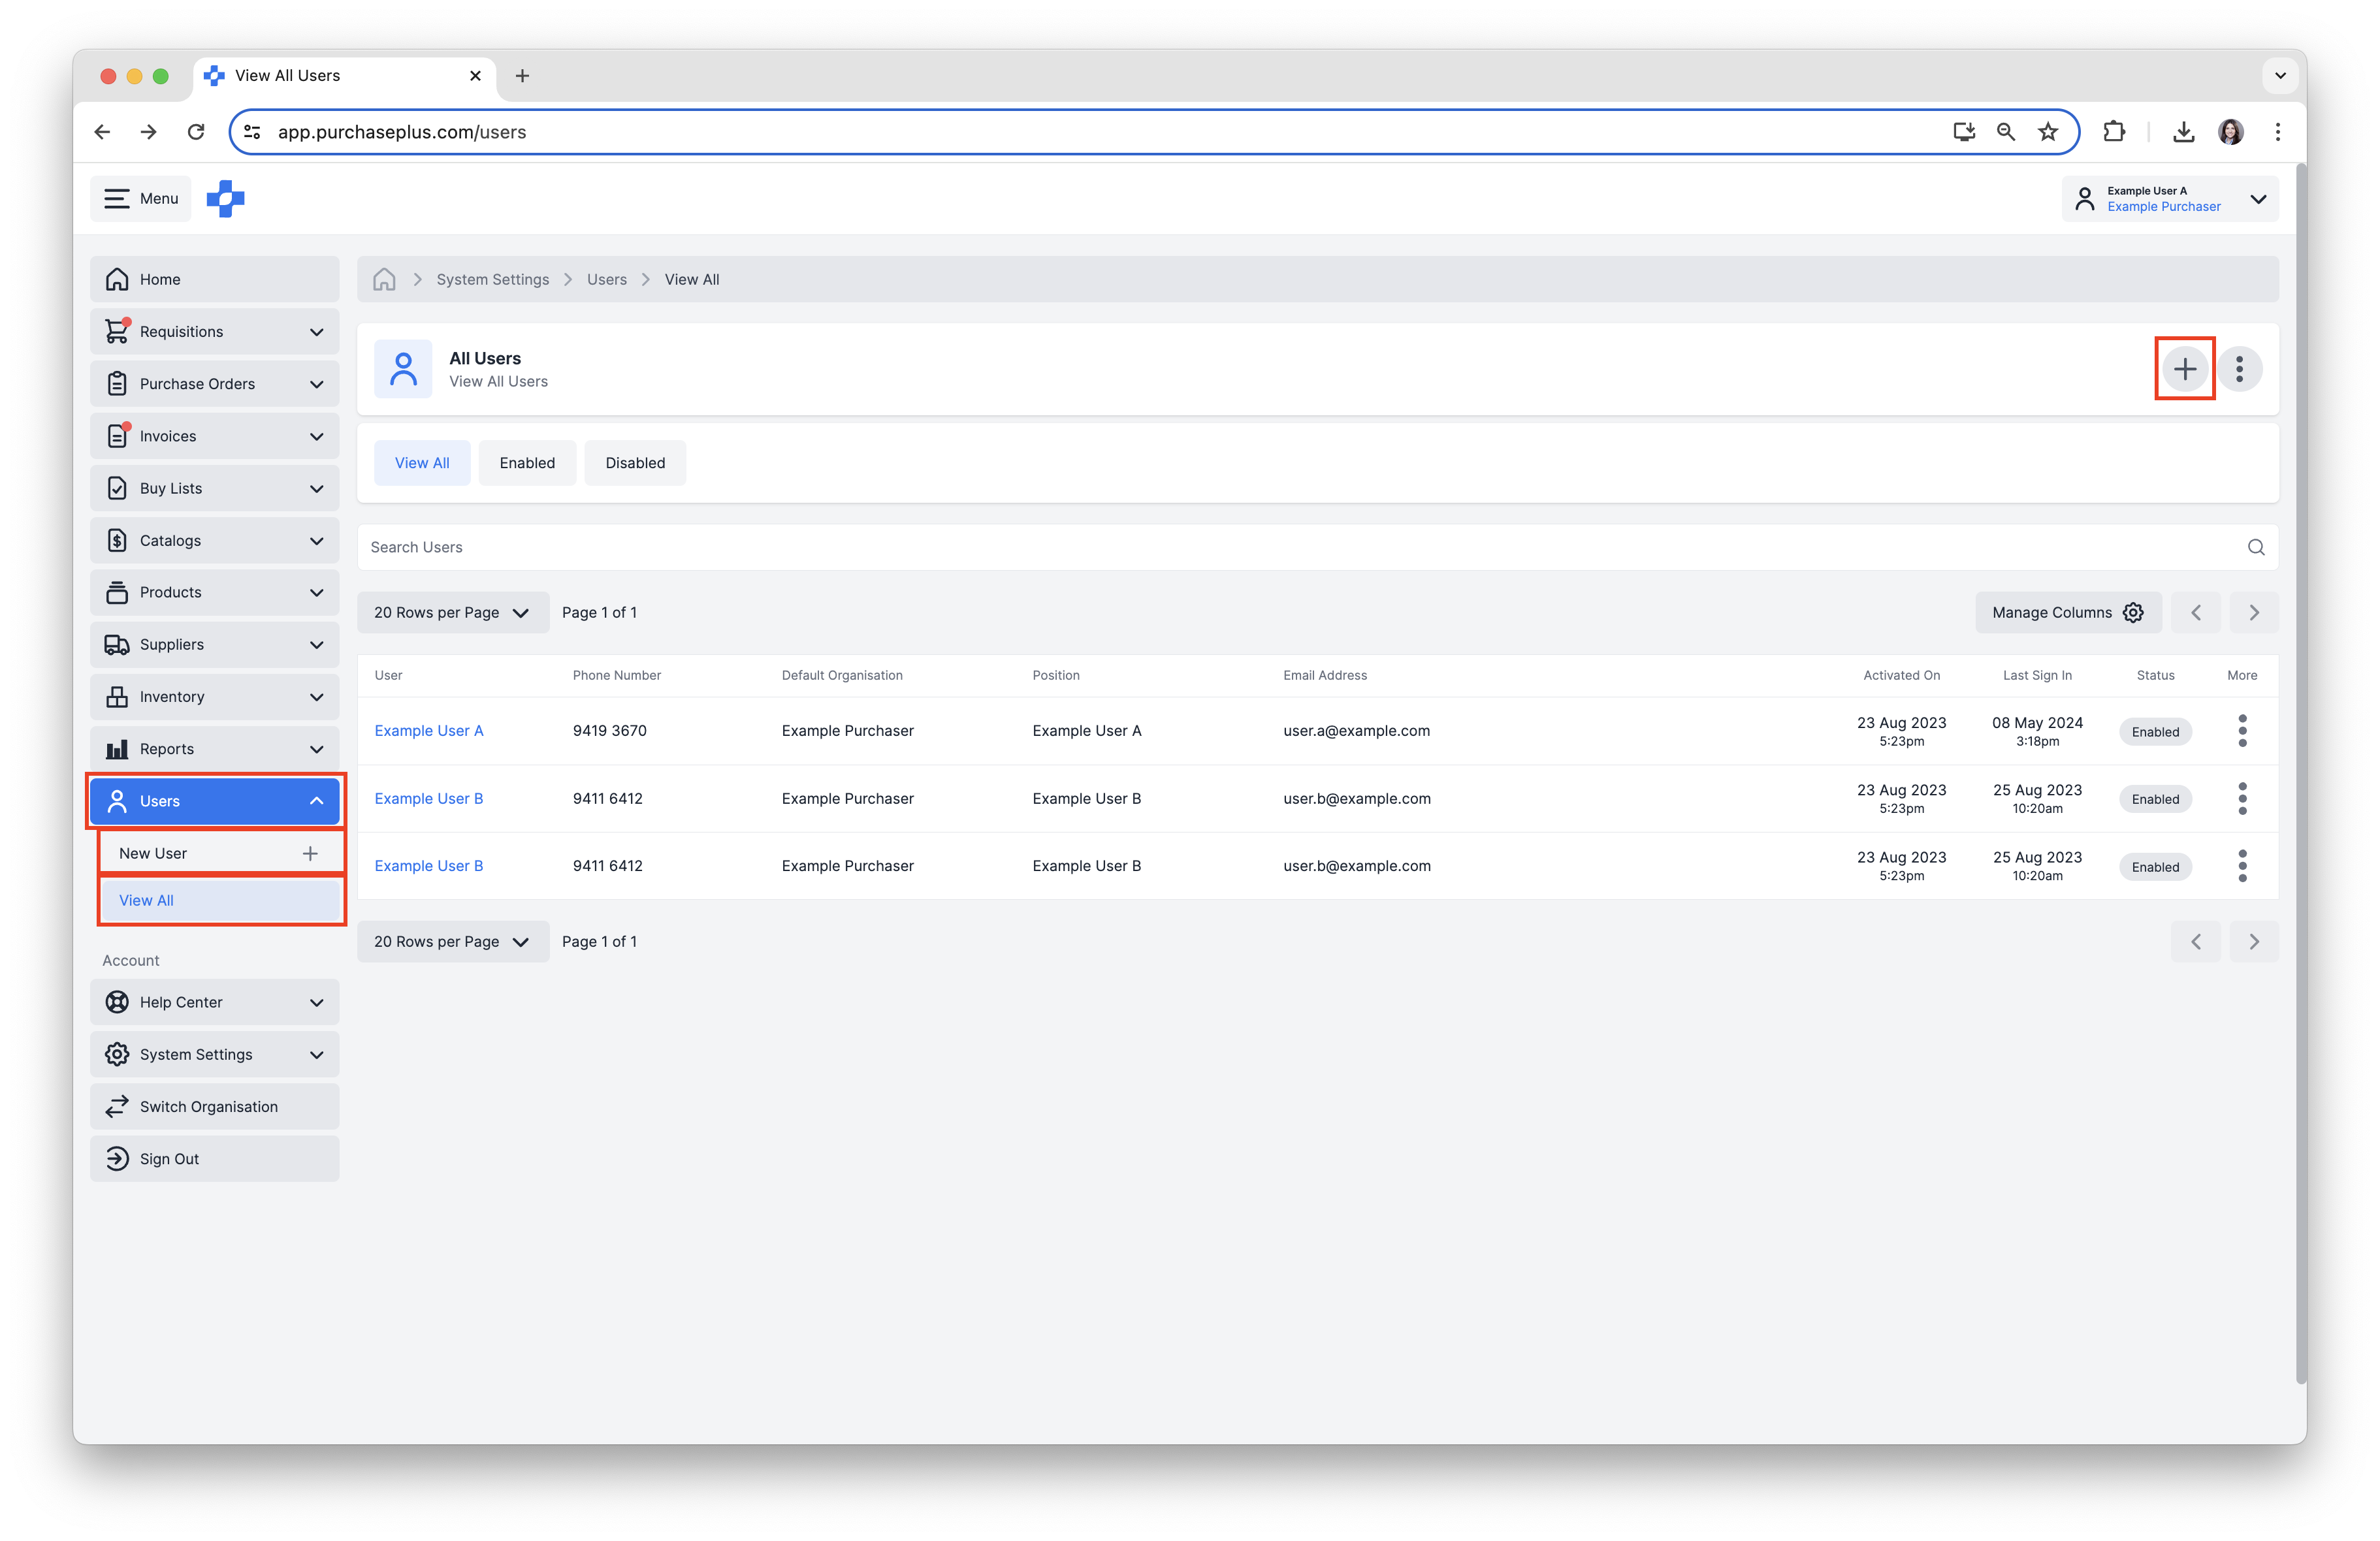
1. Select [Users] → [New User] from the side navigation bar.
2. Alternatively, select [Users] → [View All], then click on the [+] in the top right corner to create a new User.
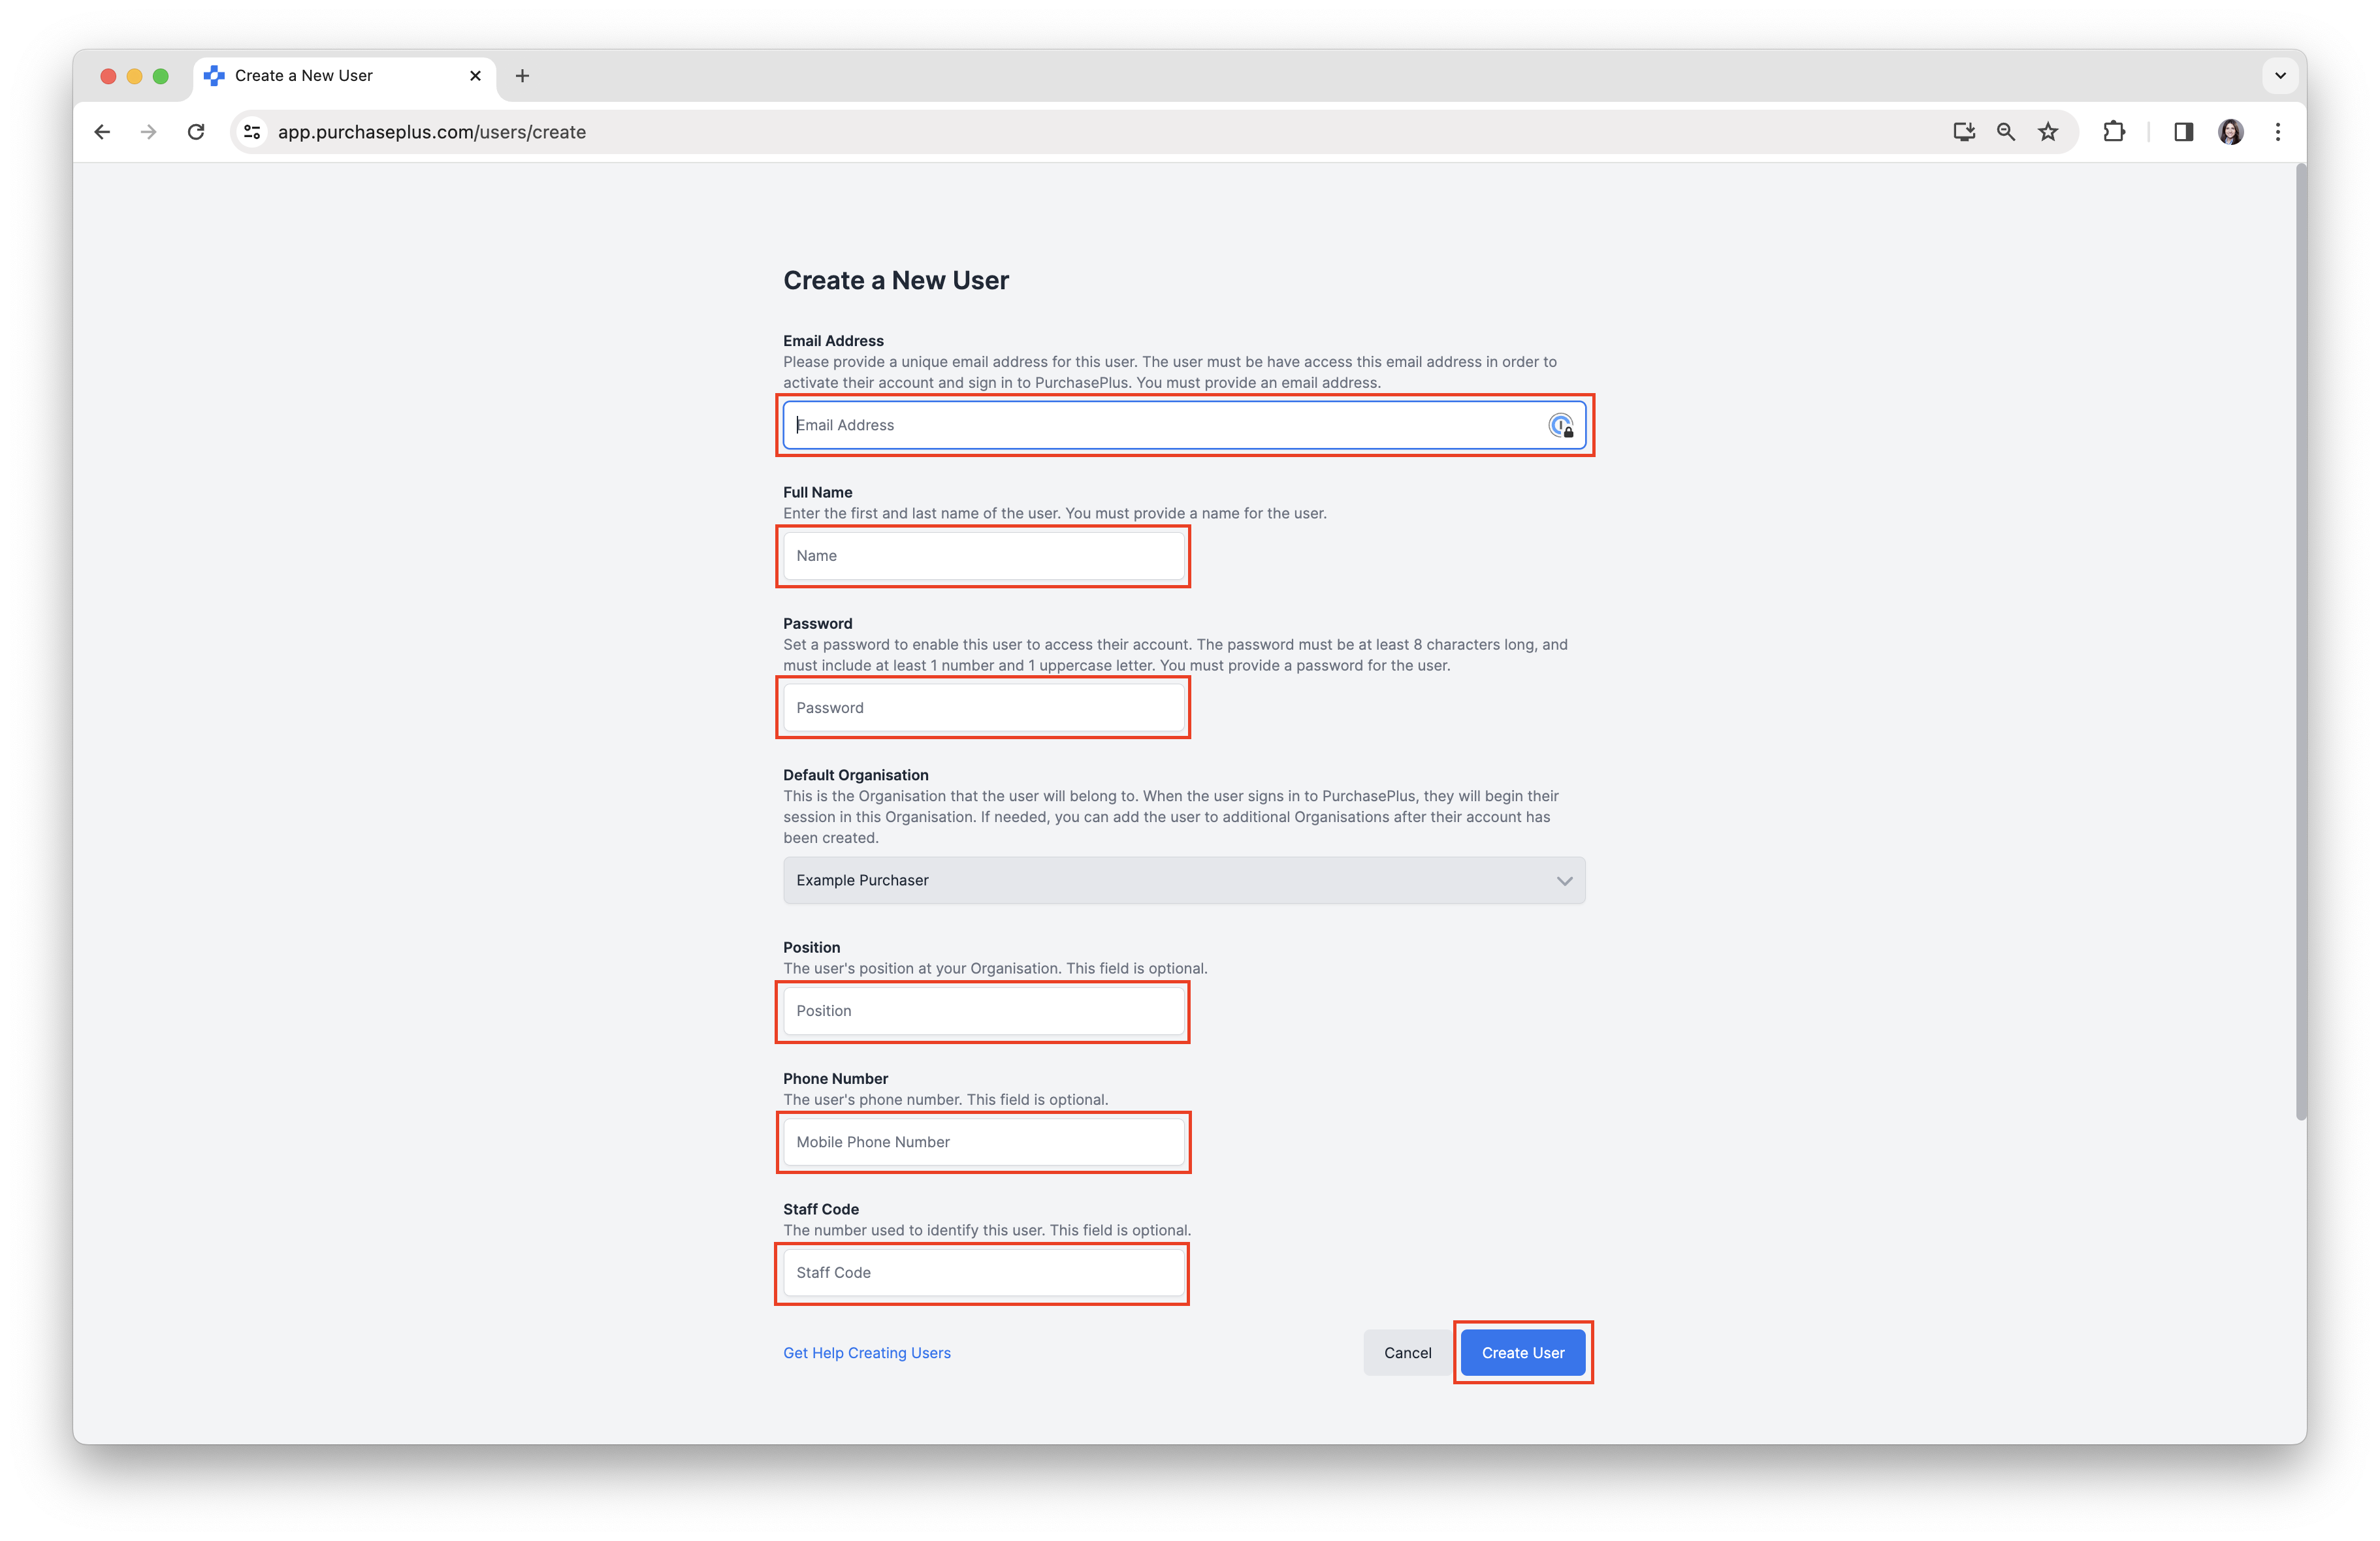
 3. Complete the 'Create a New User' form.
a. Enter the [Email] and [Full Name]. The email address entered will be the email addressed used to sign in to PurchasePlus. These fields are mandatory.
b. Create a [Password]. This field is also mandatory. A valid password must contain:
-
-
- Minimum eight characters in length.
- One upper case letter.
- One number.
-
Note - Users will be required to reset their passwords before signing in to PurchasePlus. Users to follow Help Articles: Sign In to PurchasePlus.
c. Position, Phone Number and Staff Code are optional fields, and can be used to help identify the User in certain places in the system and generated documents.
4. Click [Create User].
Managing User General Settings
There are a number of settings that users with the 'Manage Users' permission enabled can update, with regards to existing users.
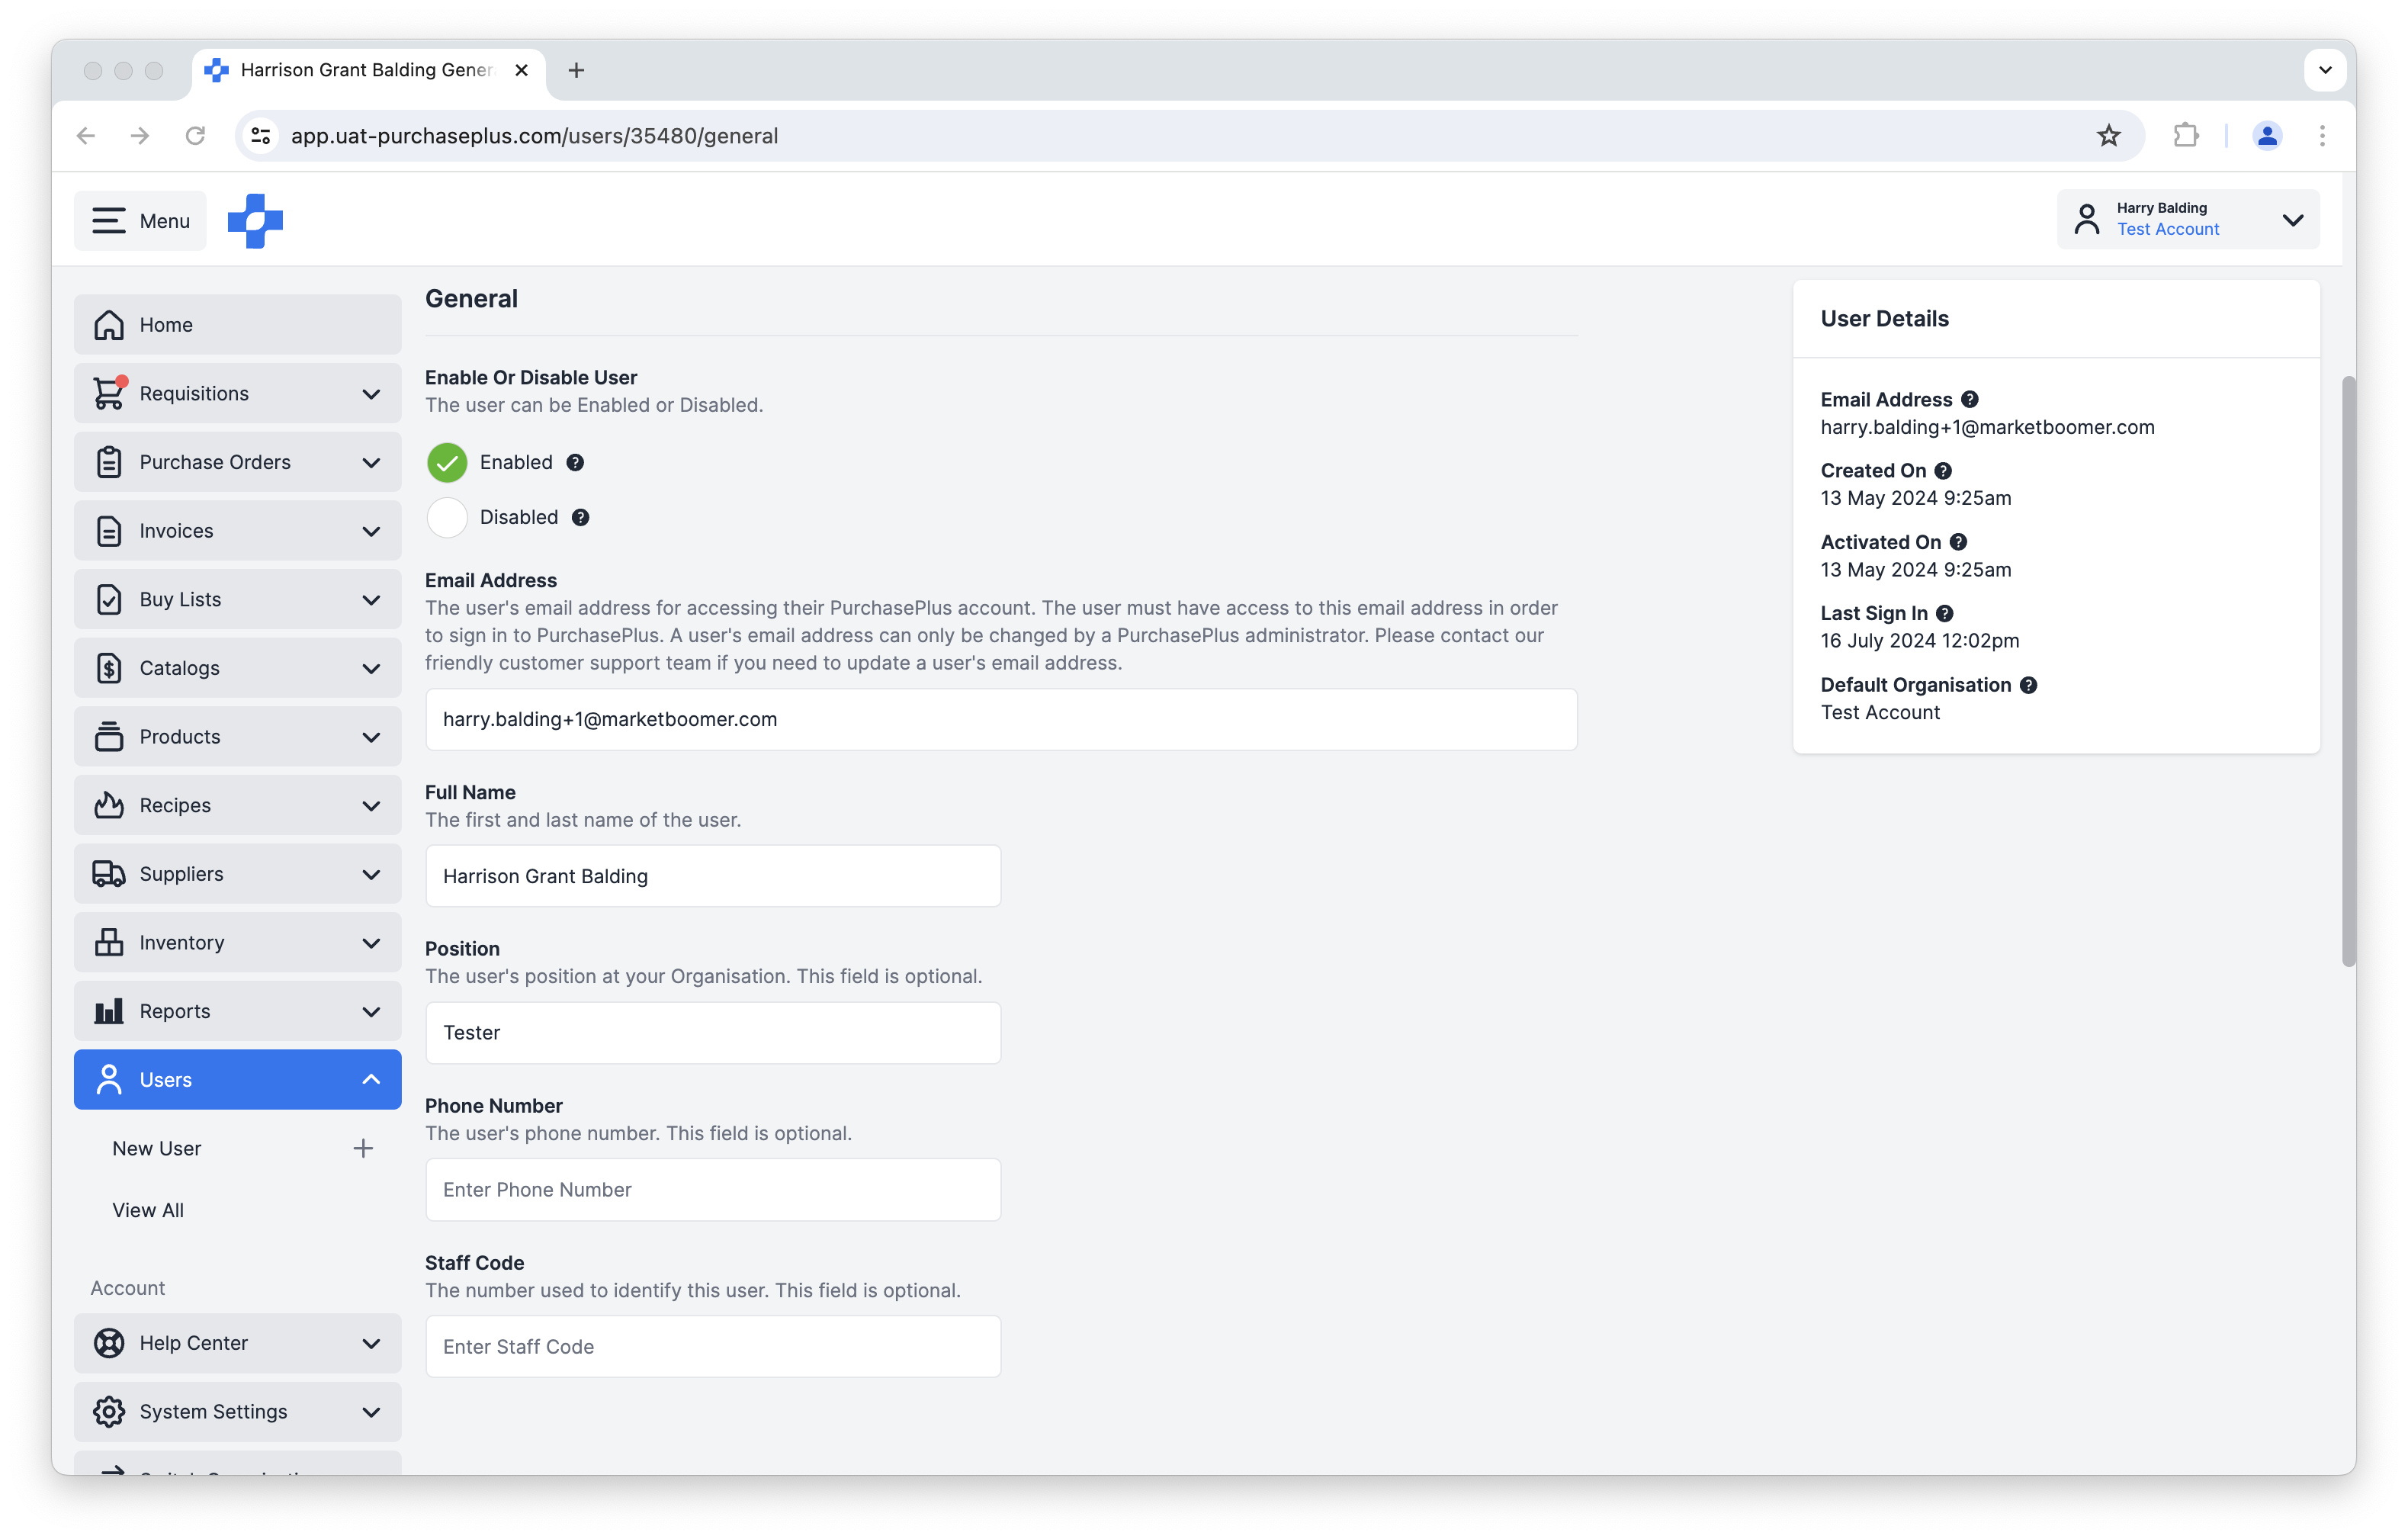
To edit a user's General Settings:
1. Select [Users] → [View All] from the side navigation bar.
2. [Search] for the User, then click the [User], to open the User's settings.
You can:
- Enable or Disable the User.
- An Enabled user will be able to sign in to PurchasePlus and use PurchasePlus on behalf of their Organisation, in accordance with their Permissions. An Enabled user can be Disabled at any time in the future.
- A Disabled user will not be able to sign in to PurchasePlus and will no longer receive communications from PurchasePlus. A Disabled user can be Enabled at any time in the future.
- Full Name,
- Position,
- Phone Number,
- Staff Code.
Managing User Preferences
1. Select [Users] → [View All] from the side navigation bar.
2. [Search] for the User, then click the [User], to open the User's settings.
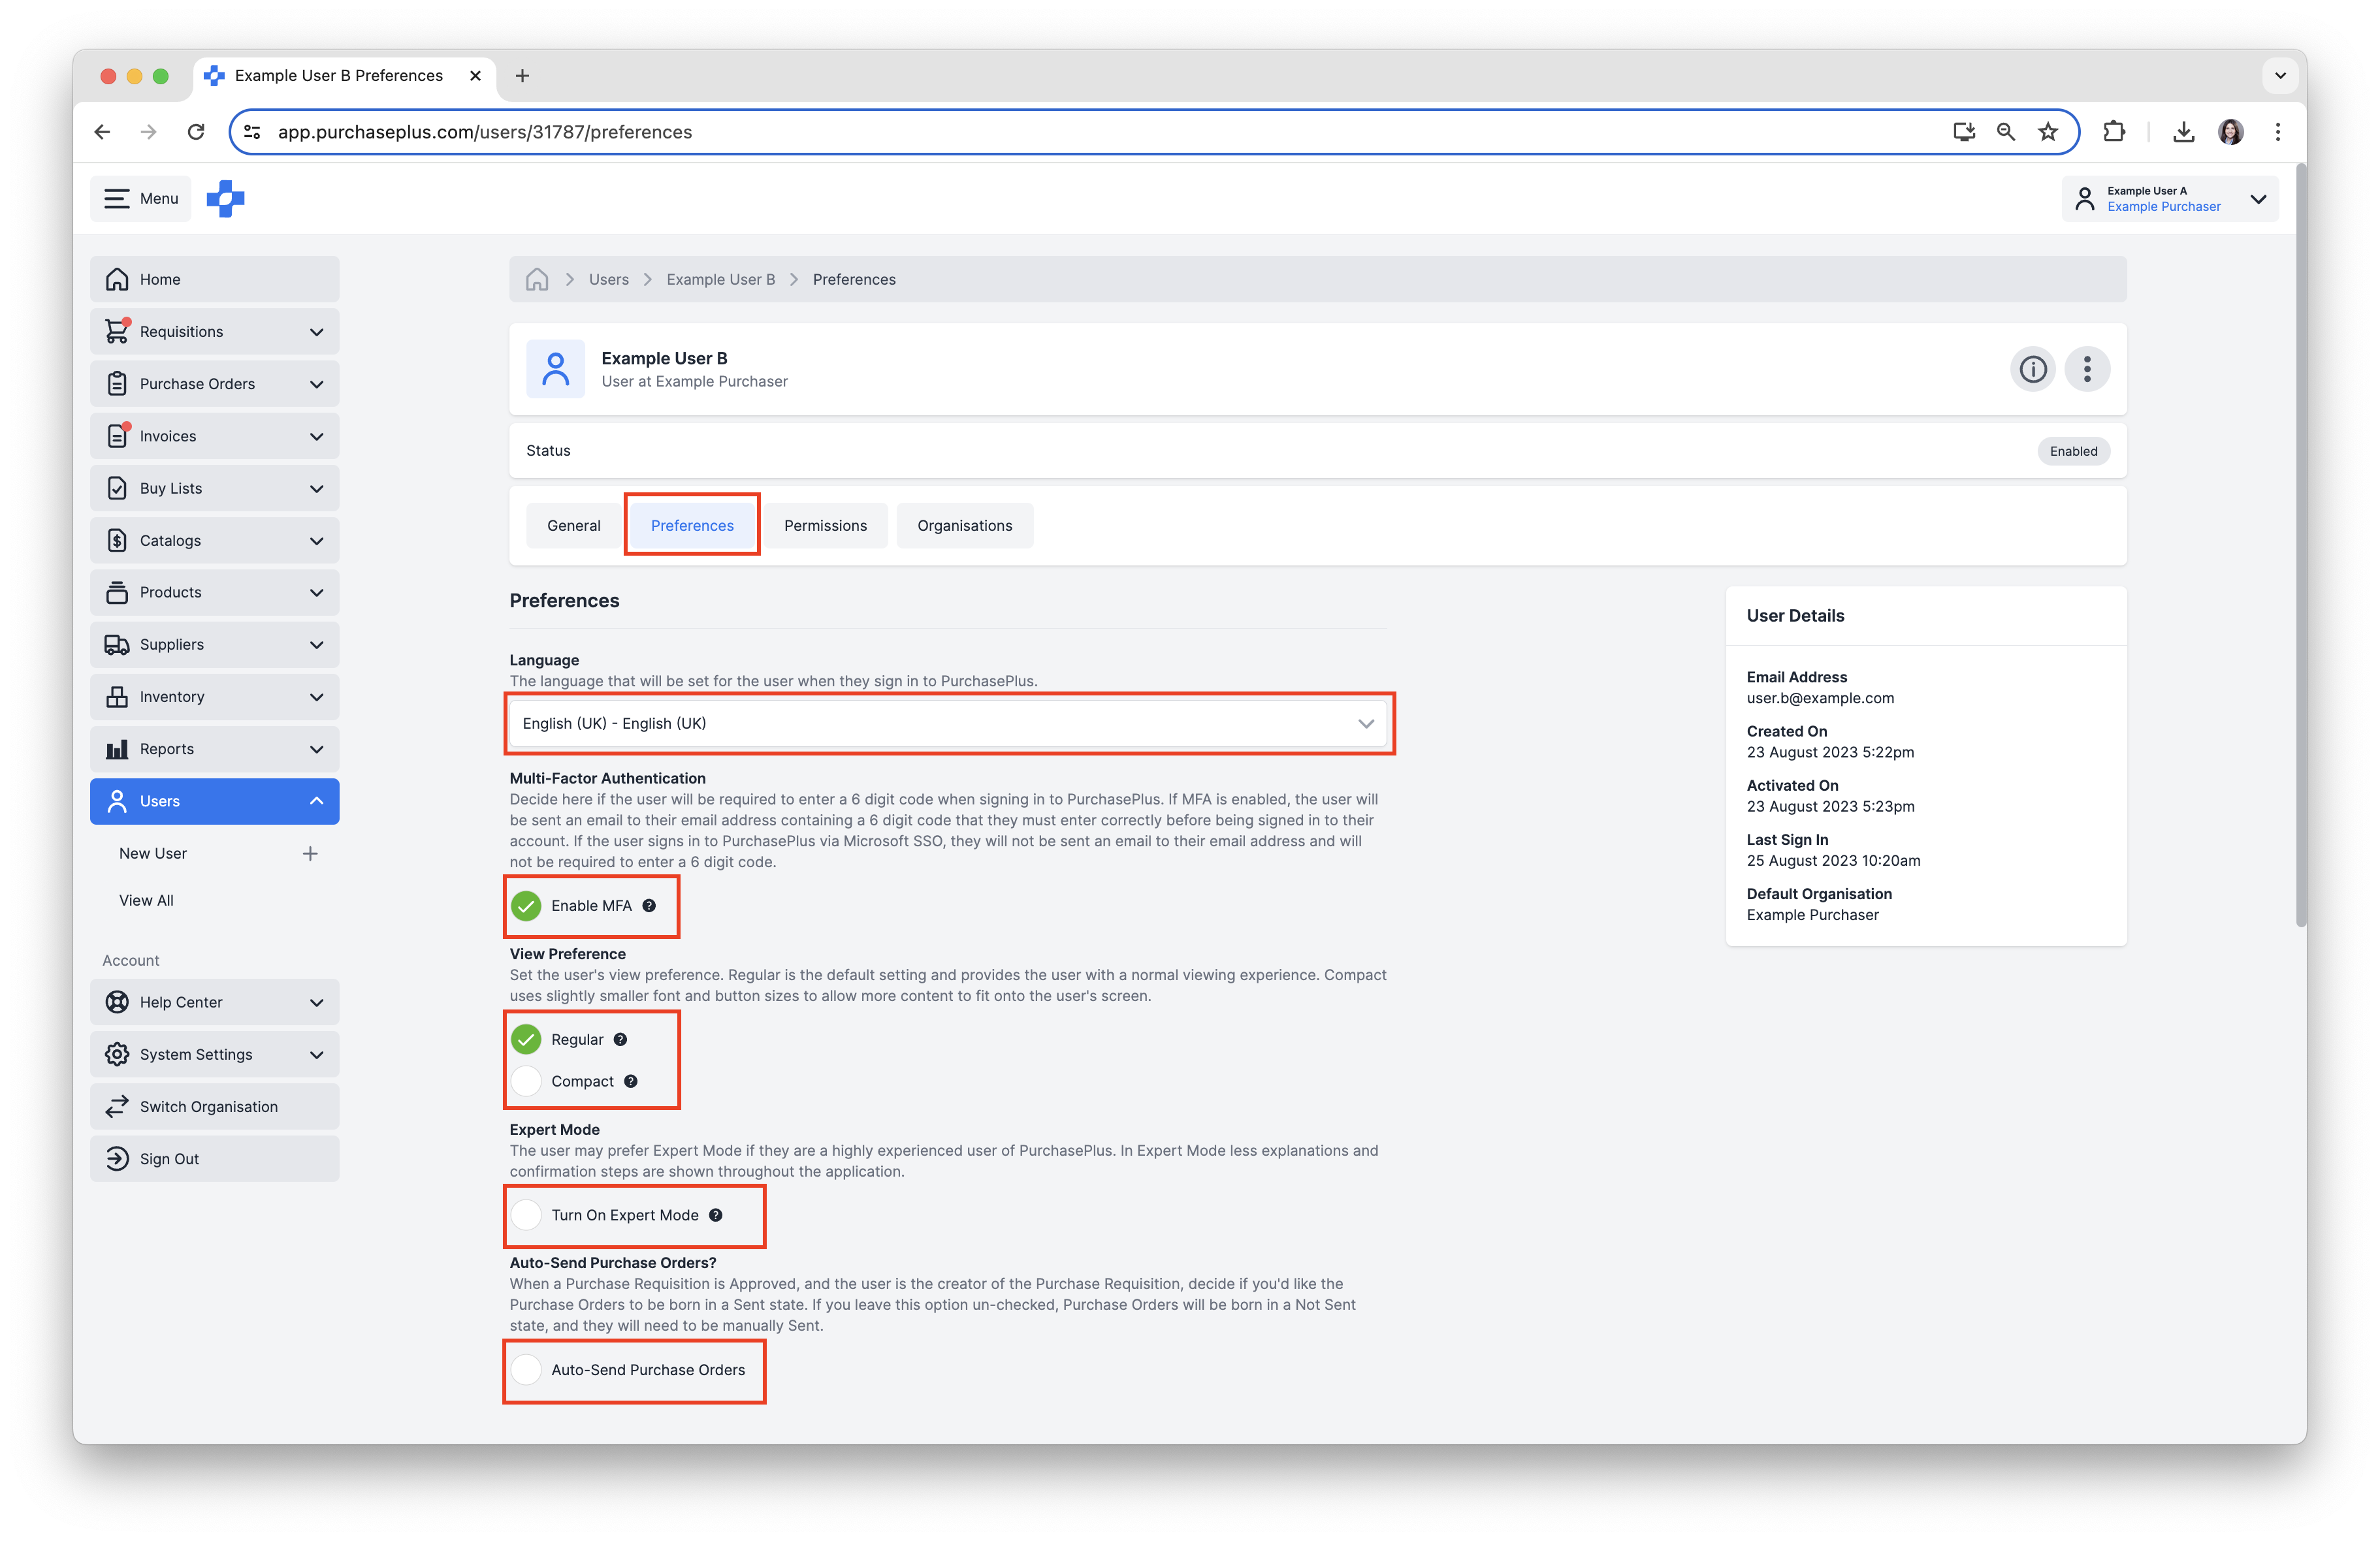
3. Select the [Preferences] tab. You can manage the following User Preferences:
a. Select the [Language] that the User prefers to use. Recommendation: If you are creating a user and you are not sure of the user’s preferred language but you do know their organisation’s country, set the Language to the official language of the country.
b. Decide if you would like to [Enable MFA]. Note - If the user signs in to PurchasePlus via Microsoft SSO, Multi-Factor Authentication will not be available.
c. Select View Preference [Regular] or [Compact]. Recommendation: leave the preference set to its default - 'Regular' - and allow the user to change this themself.
d. Decide if you would like to [Turn On Expert Mode] for the User. Recommendation: leave the preference set to its default - ‘Off’ - and allow the user to change this themself.
e. Select [Auto-Send Purchase Orders], if applicable. Recommendation: leave the preference set to its default - ‘Off’ - and allow the user (or a permitted Admin at their Organisation) to change this themself.
Managing User Permissions
Note - Download our PurchasePlus Recommended User Permissions by User Group, to learn more about each individual Permission.
1. Select the User's [Permissions] tab. You have two options to set Permissions:
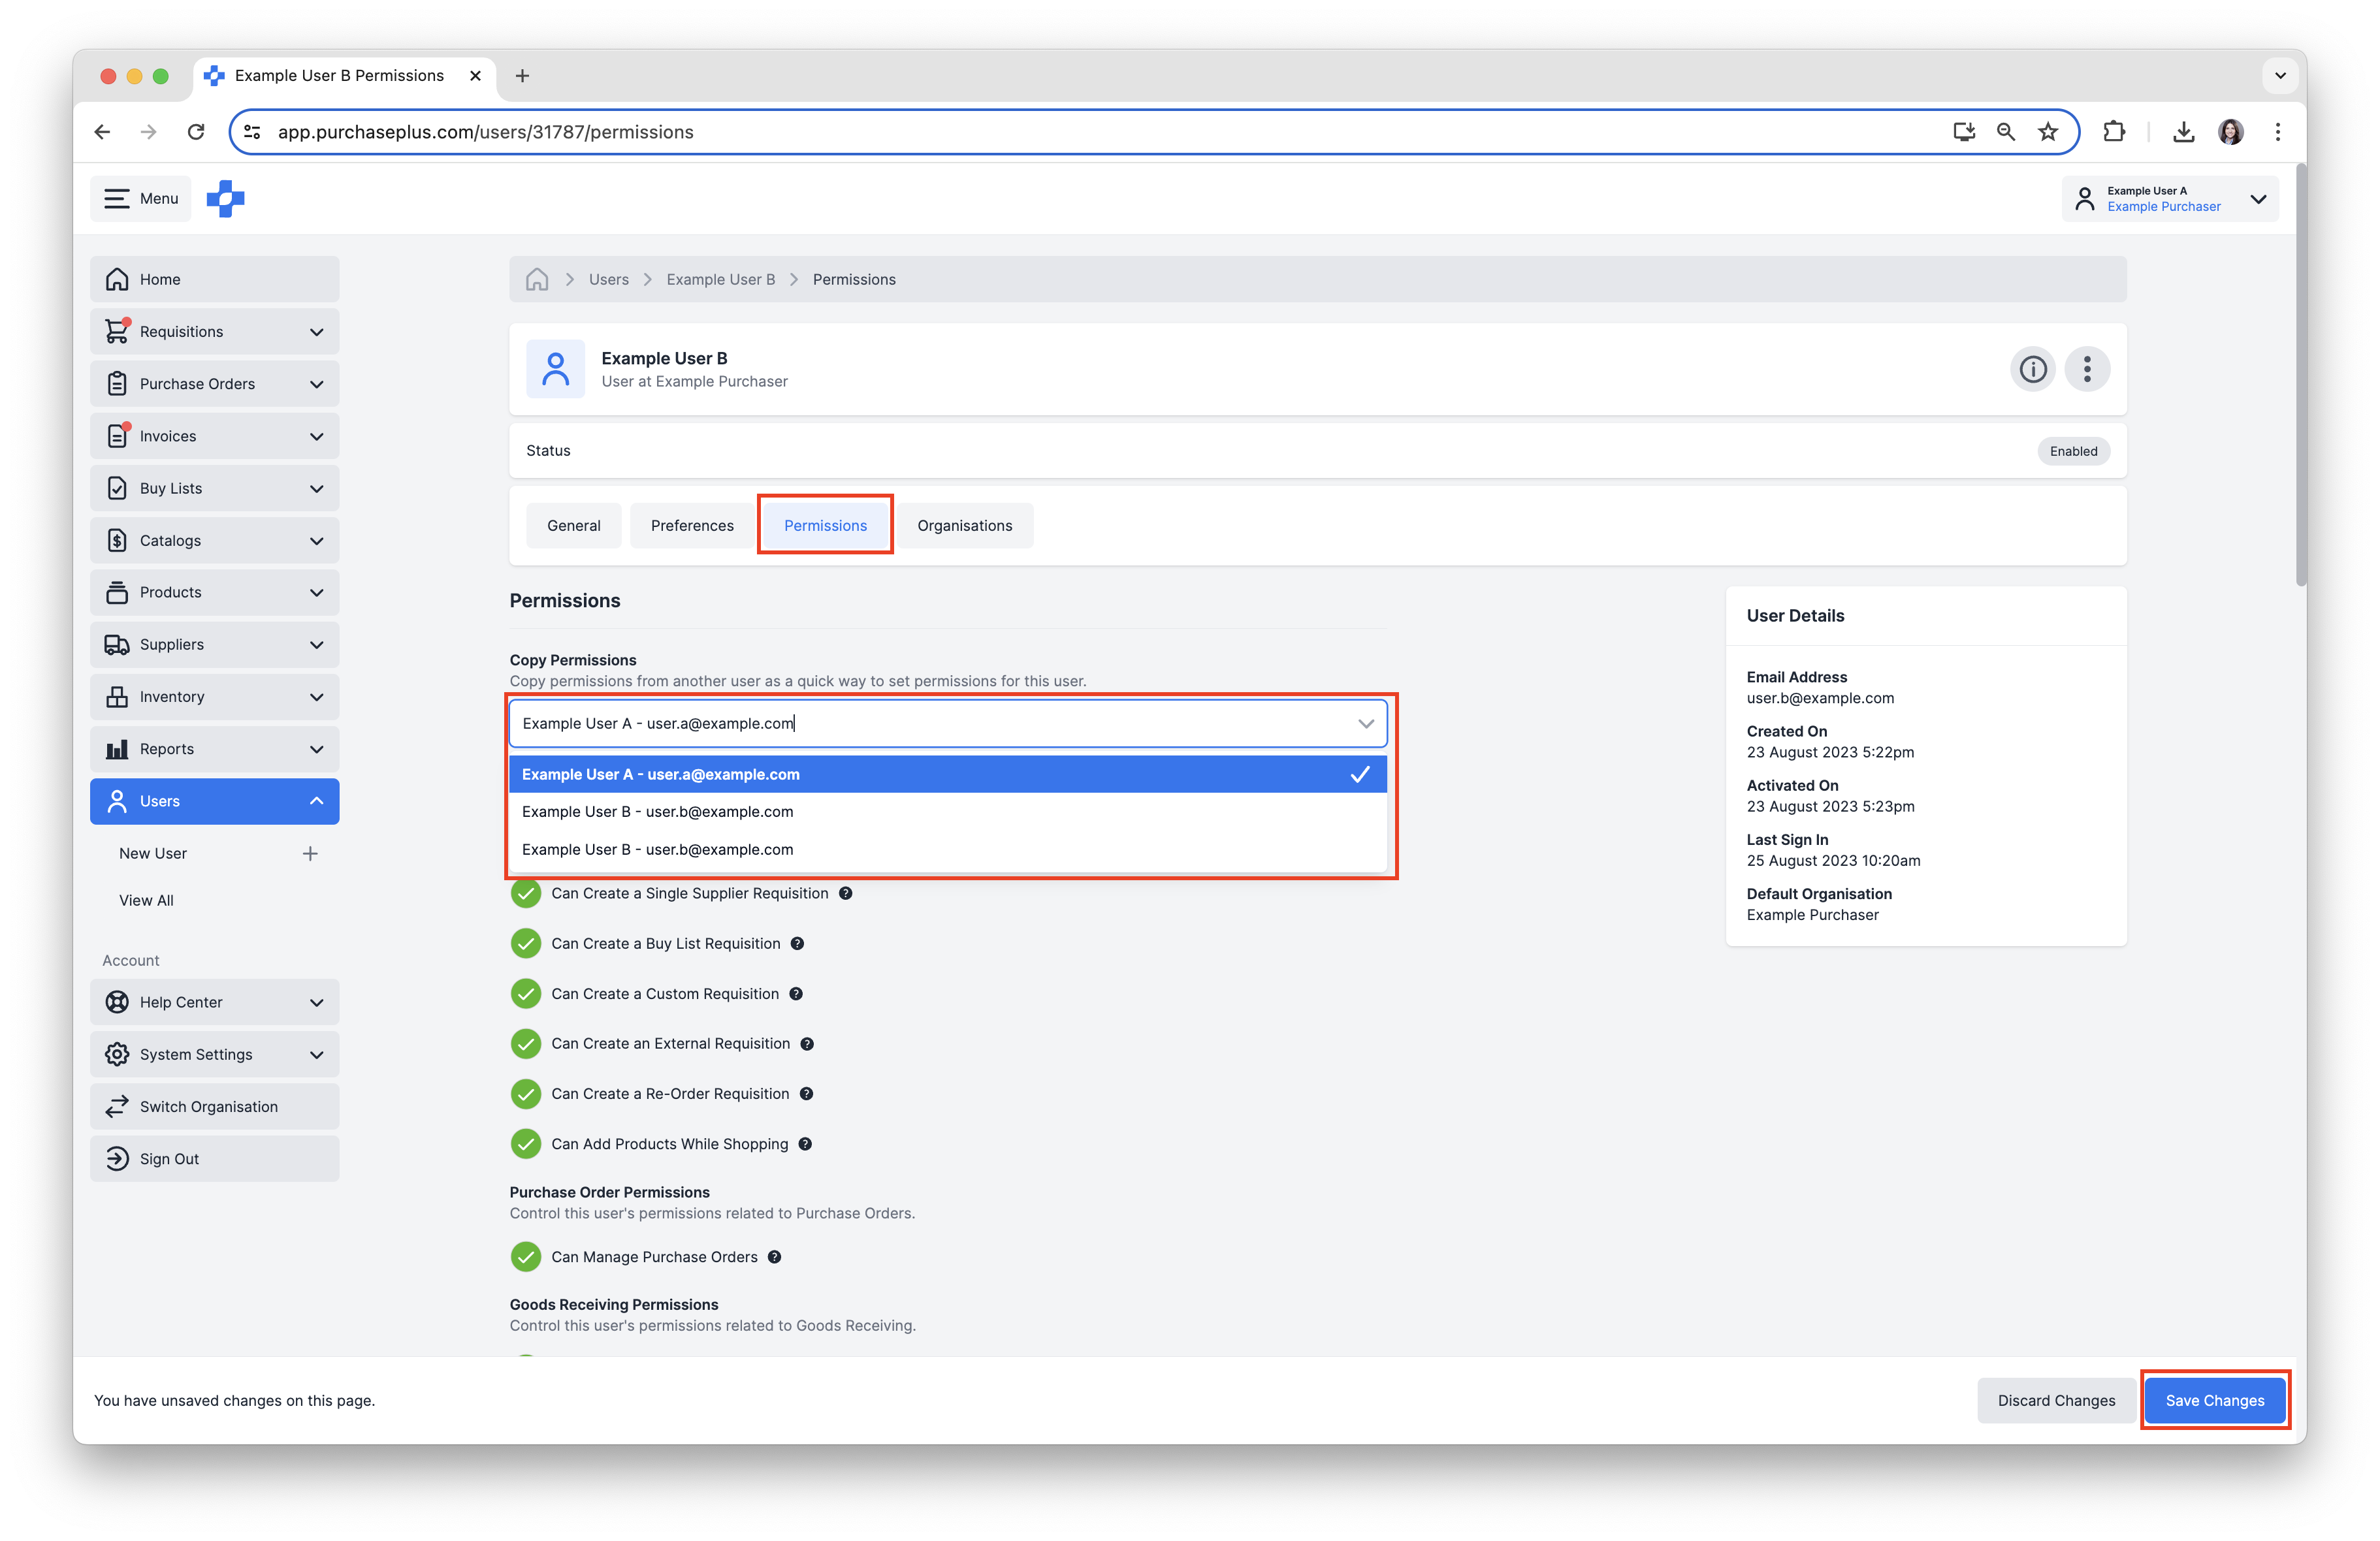
a. Copy Permissions from an existing User
1. Click [Select a User...] from the dropdown menu under 'Copy Permissions'.
2. Click [Save Changes]. This will copy the Permissions from the selected User. If the [Save Changes] option does not appear, this is due to the Permissions being identical to what has already been set for this User.
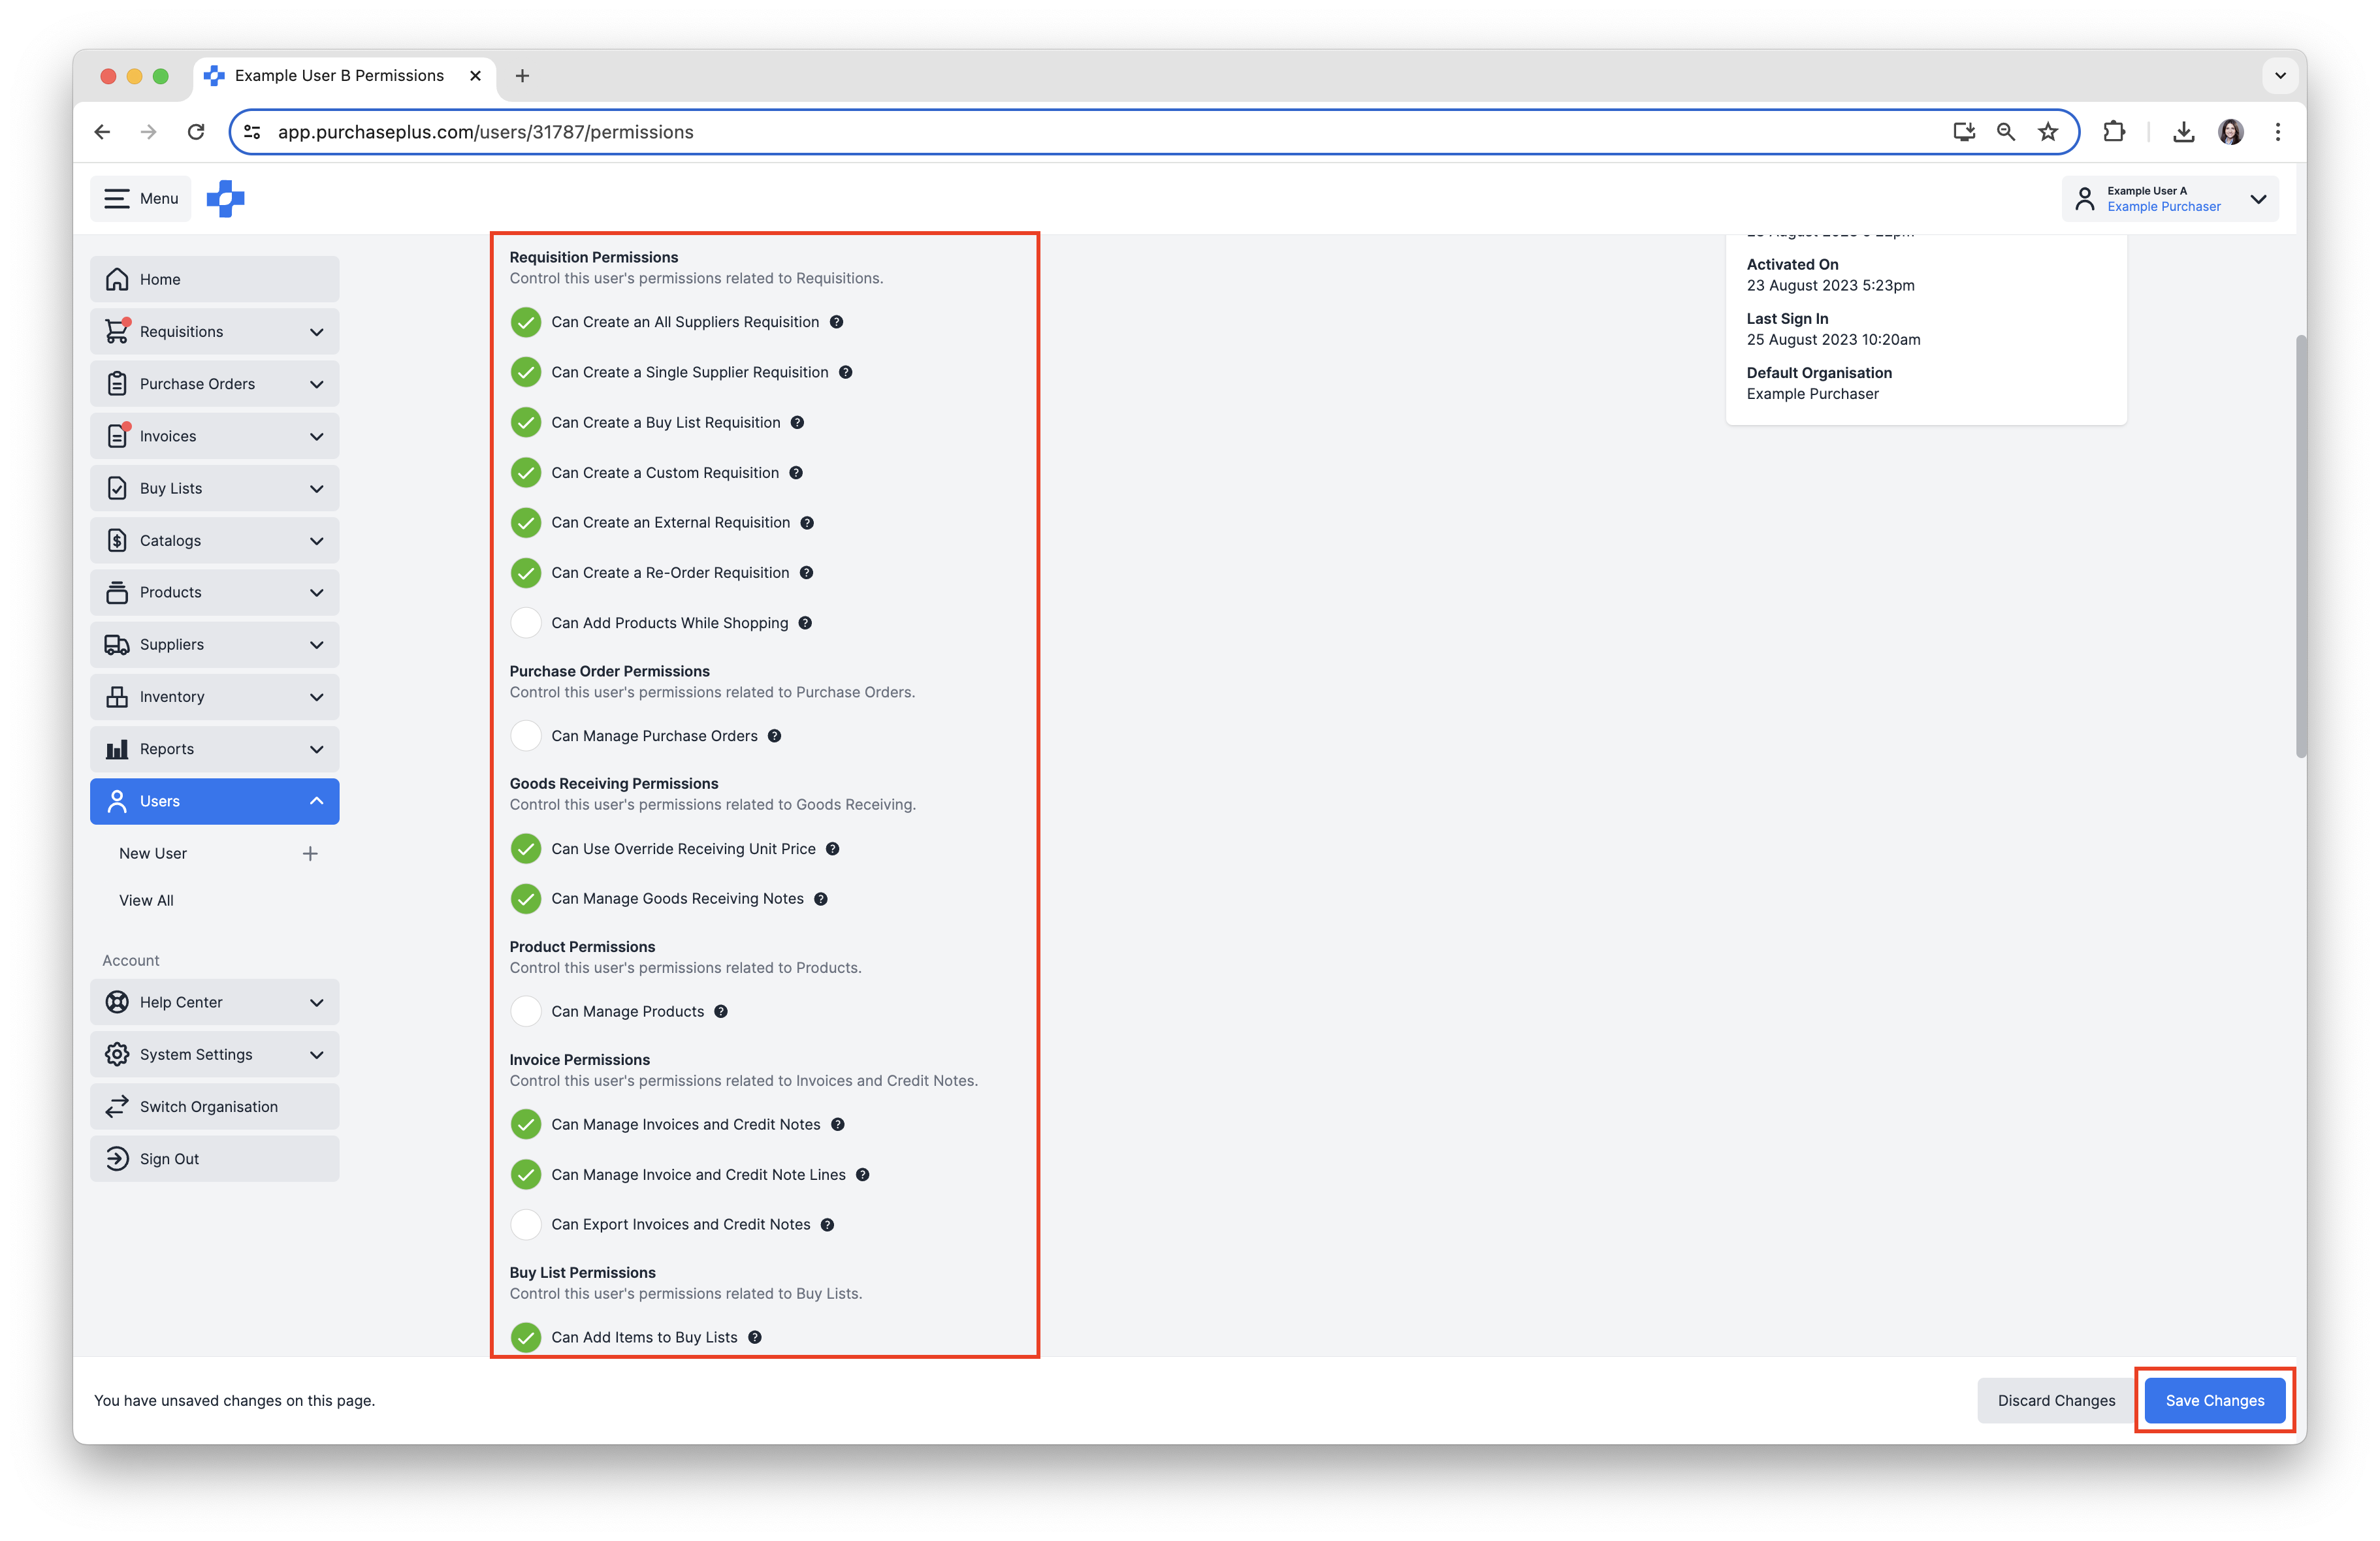
b. Set the Permissions individually
1. Select [Permissions] you would like to assign to the User.
2. Deselect any [Permissions] you would not like to assign to the User.
3. Click [Save Changes] once all Permissions have been assigned correctly.
Managing a User's Departments or Organizations
When a user is a member of an Organization, they automatically have access to every Organization Level that is nested beneath that Organization in the hierarchy. Assuming you have the correct permission, you can add the user to any Organization of which you are a member, or any Organization that is nested beneath any Organization of which you are a member.
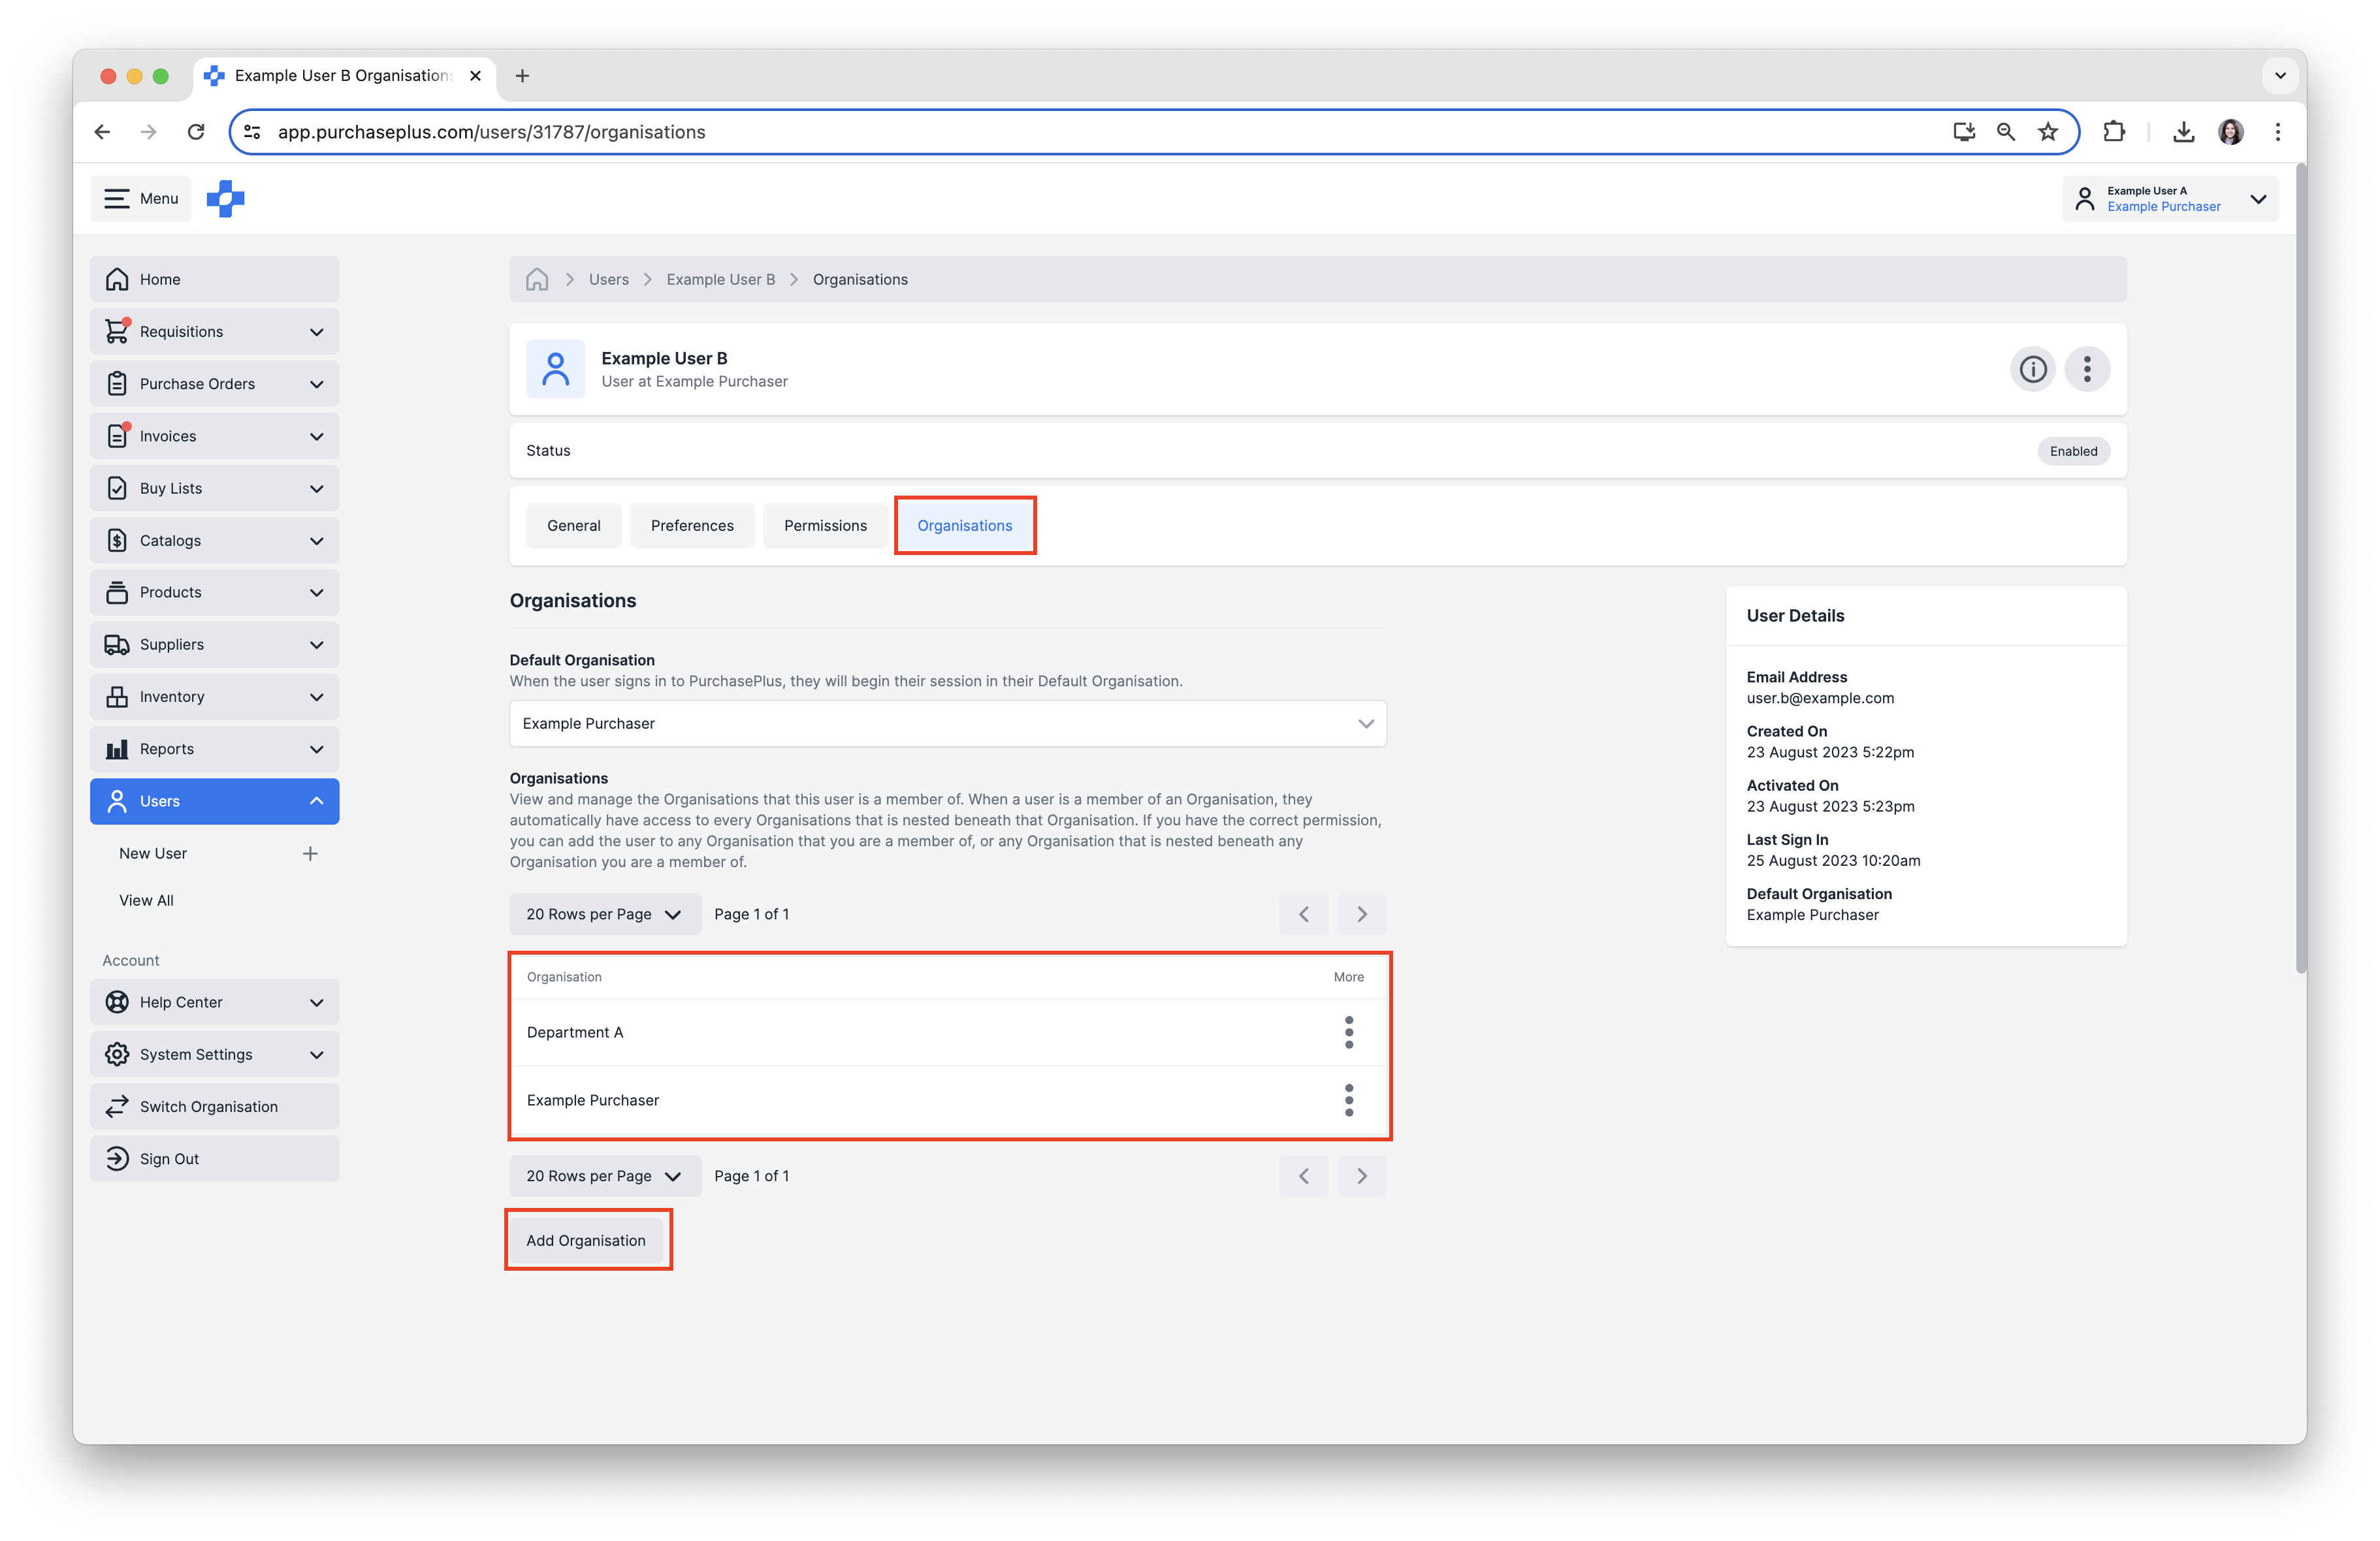
1. Select the [Organisations] tab. You can view the Departments or Organizations the User already has access to.
2. Click [Add Organisation].
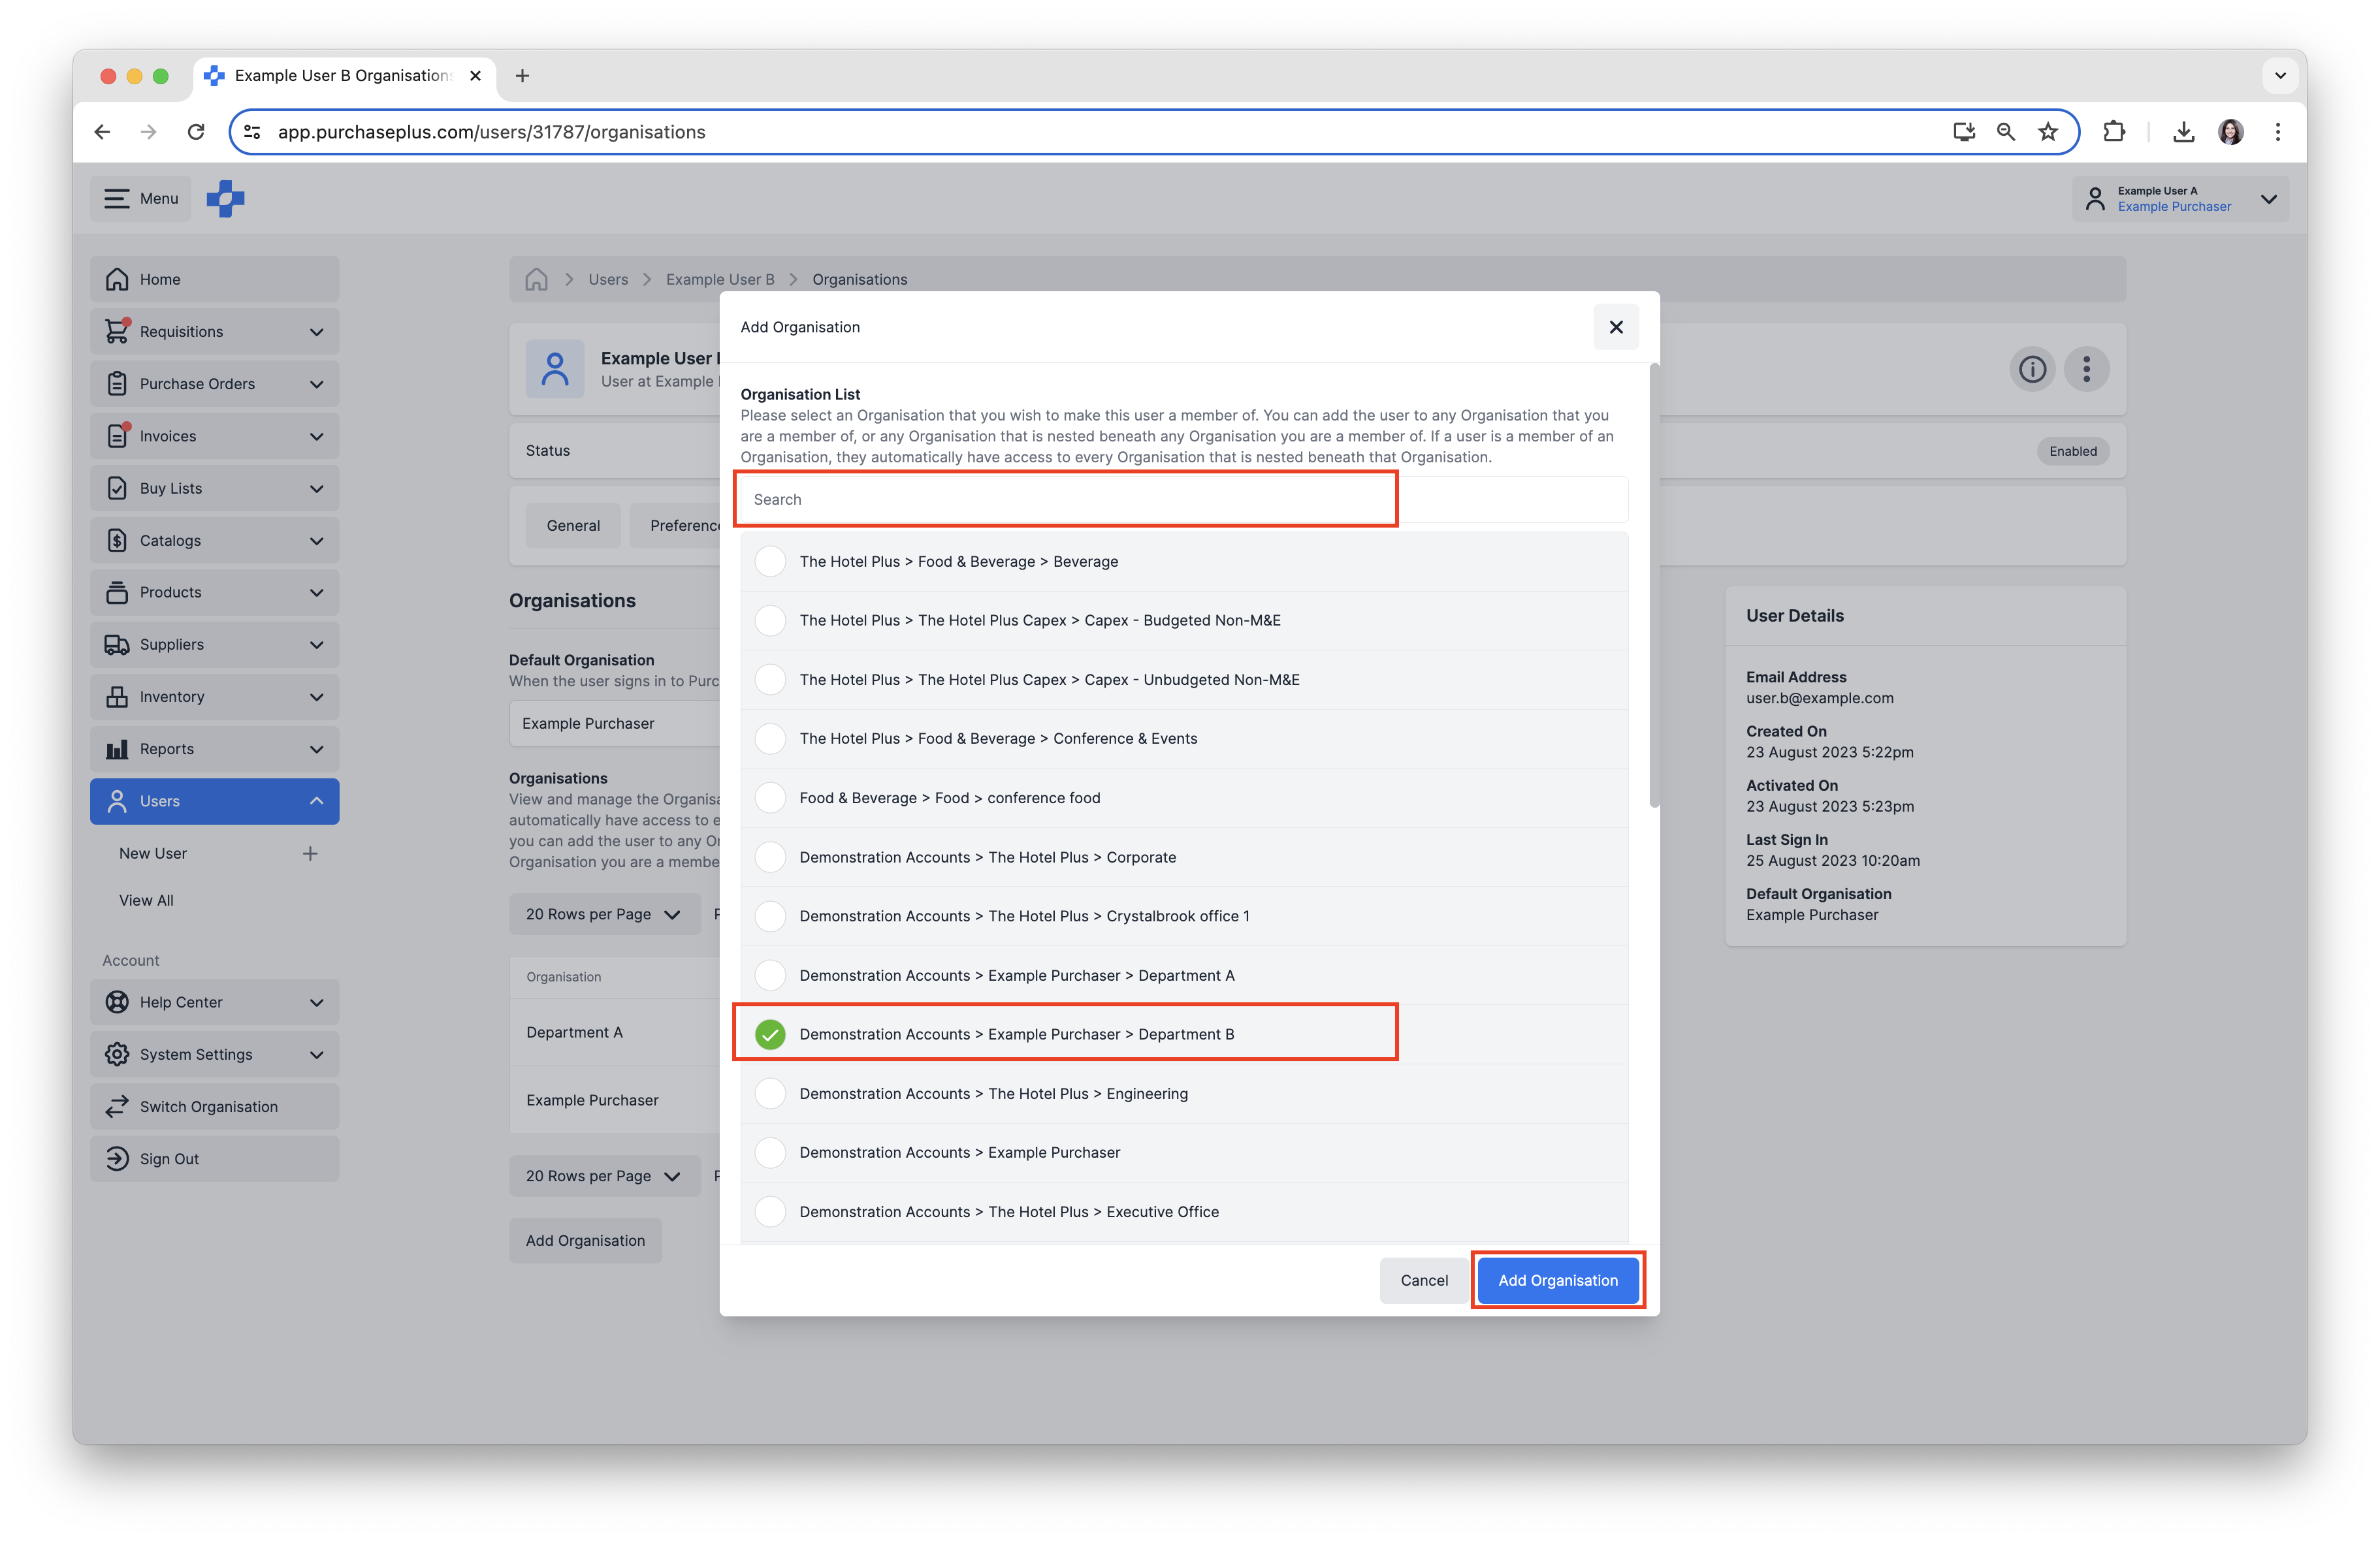
3. [Search] and [select] the additional Department or Organization you would like to add. Then click [Add Organization].
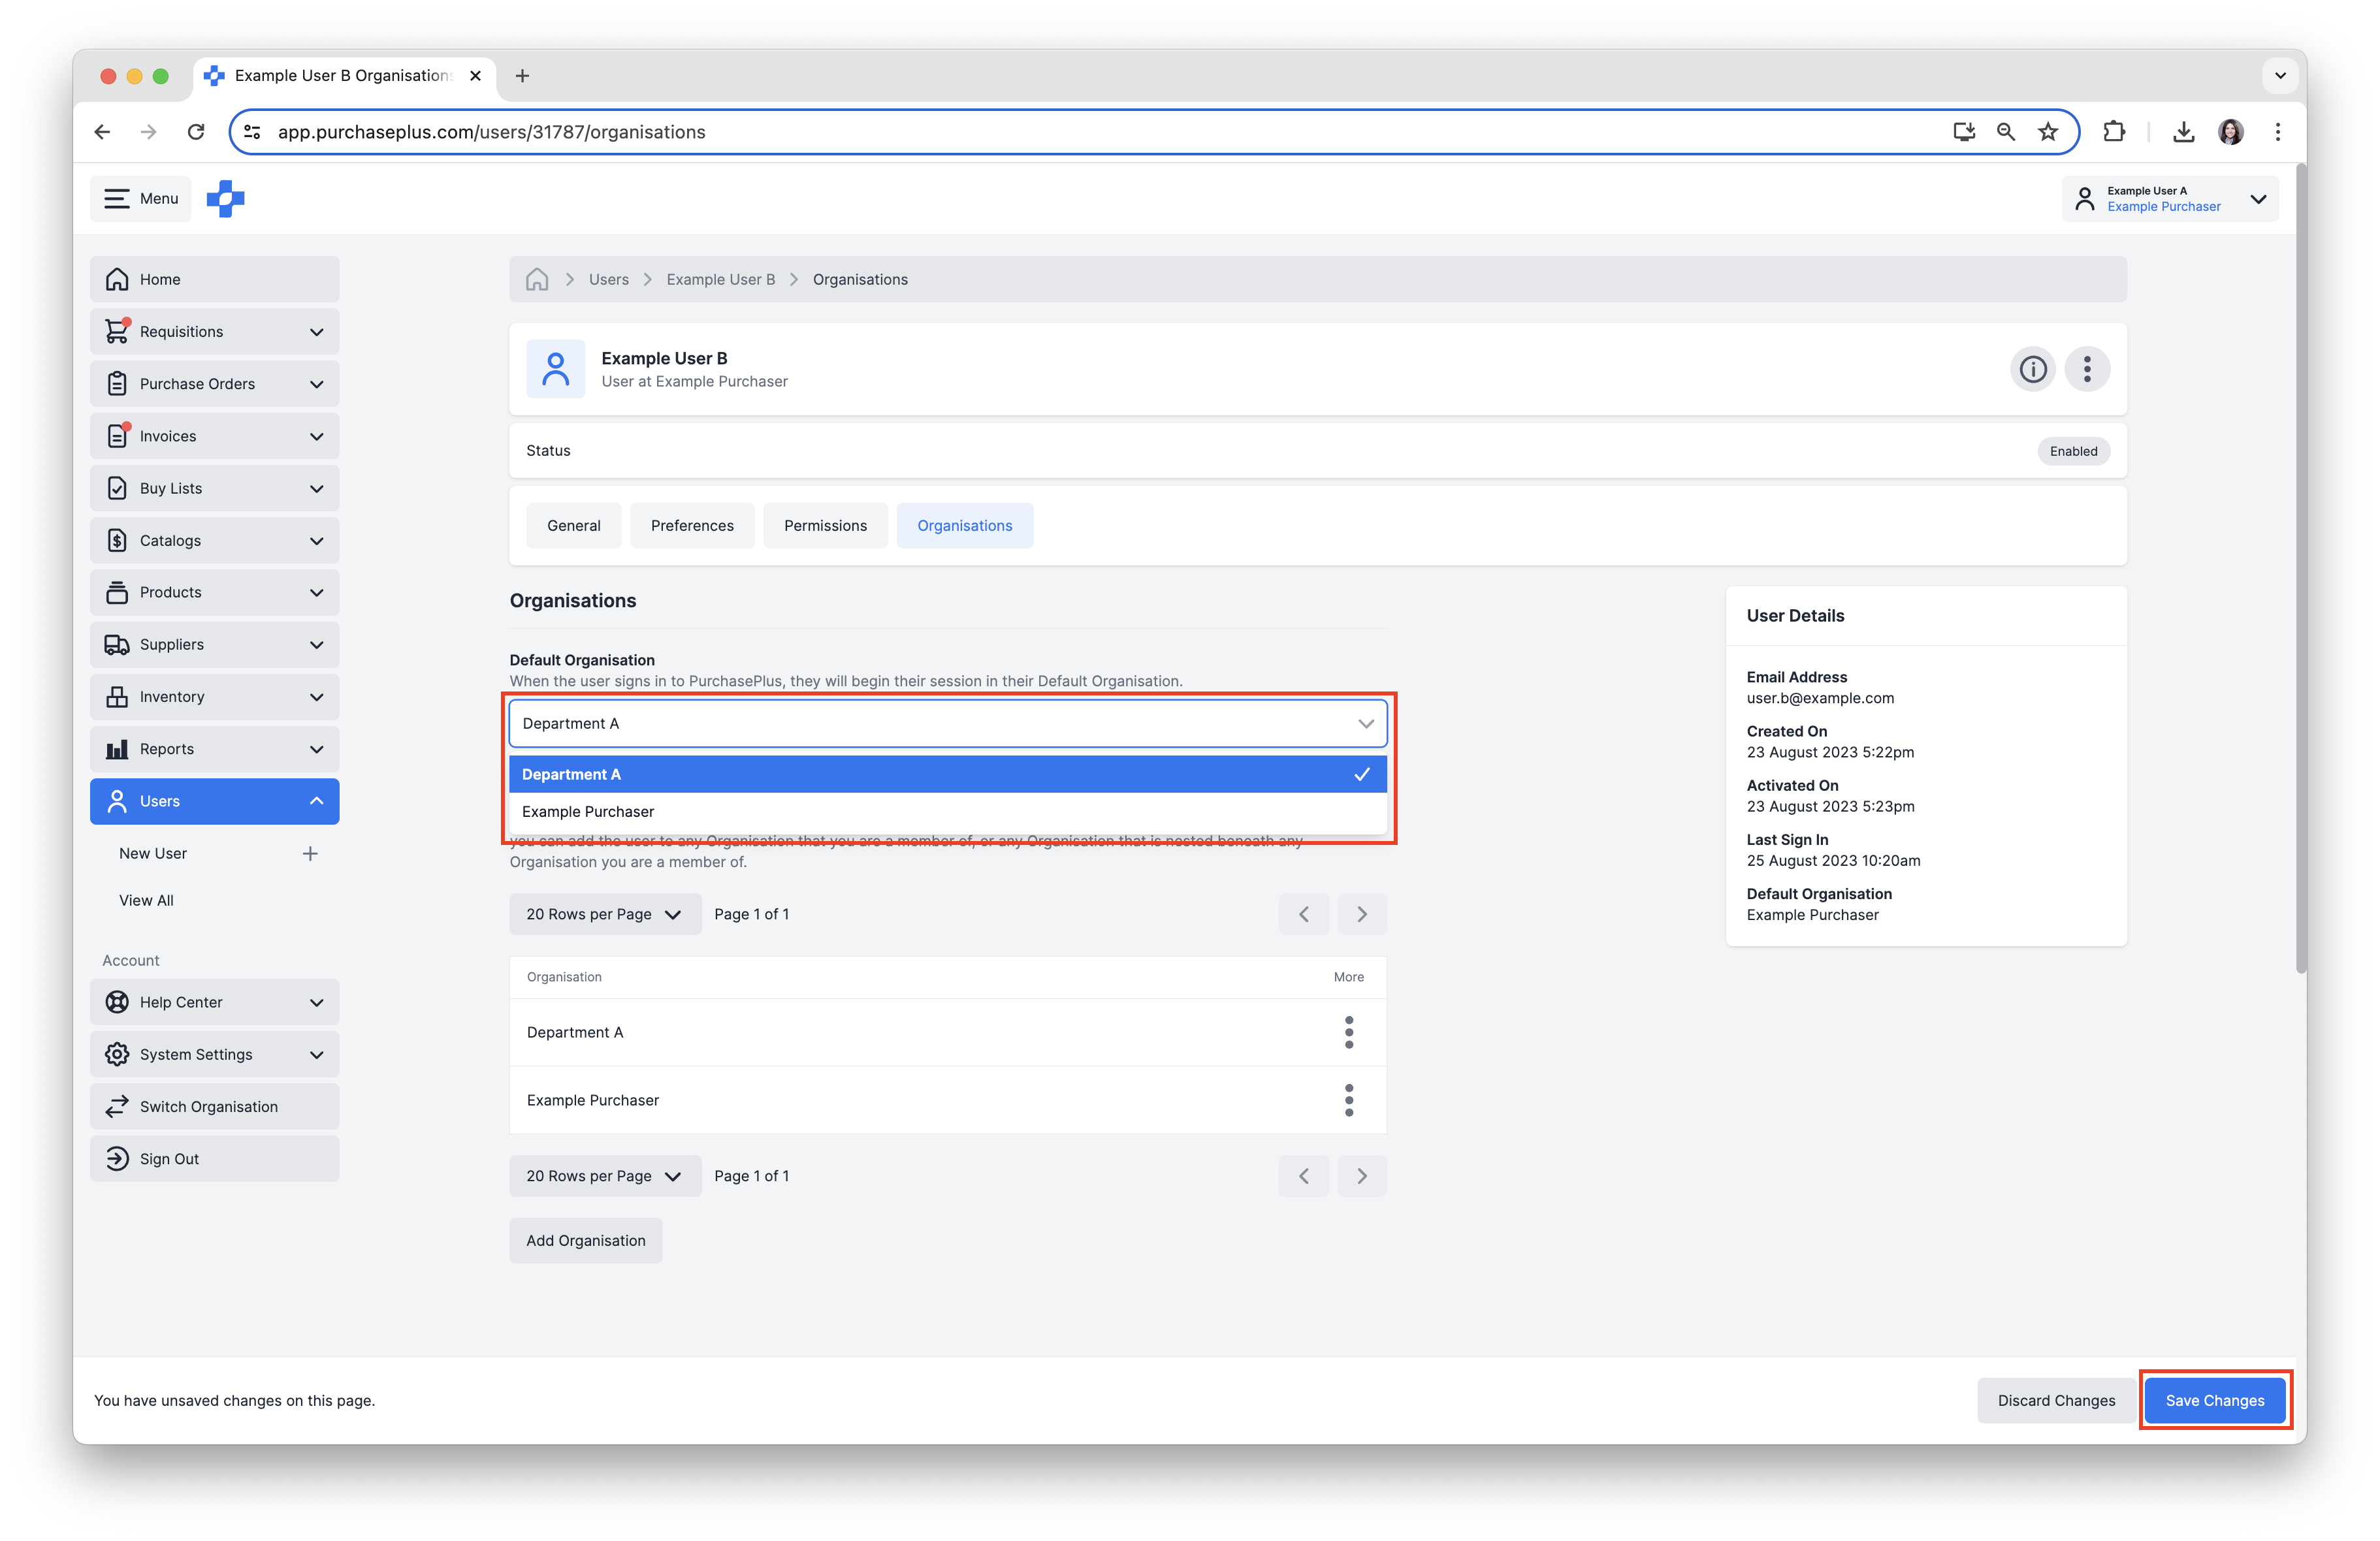
Update the Default Organization
Default Organizations define the Organization to which the User belongs when they Sign in to PurchasePlus.
1. Click [Default Organisation] and select the required Default Organization from the dropdown menu.
3. Click [Save Changes].
If you require further assistance with Creating and Managing Users, please contact our friendly Customer Support Team at PurchasePlus.