Learn how to create a batch Invoice and Credit Note Export File to use in your External Accounting System.
Depending on how your Organization has been configured, you may Export Invoices and Credit Notes individually (Type A), or via a Batch Export File (Type B).
In this article, we will be explaining the Type B scenario, where Invoices and Credit Notes are marked as 'Export Ready' to be included in a Batch Export File.
If your Organization exports Invoices and Credit Notes individually (Type A), see our Export an Invoice or Credit Note article.
Create an Export File
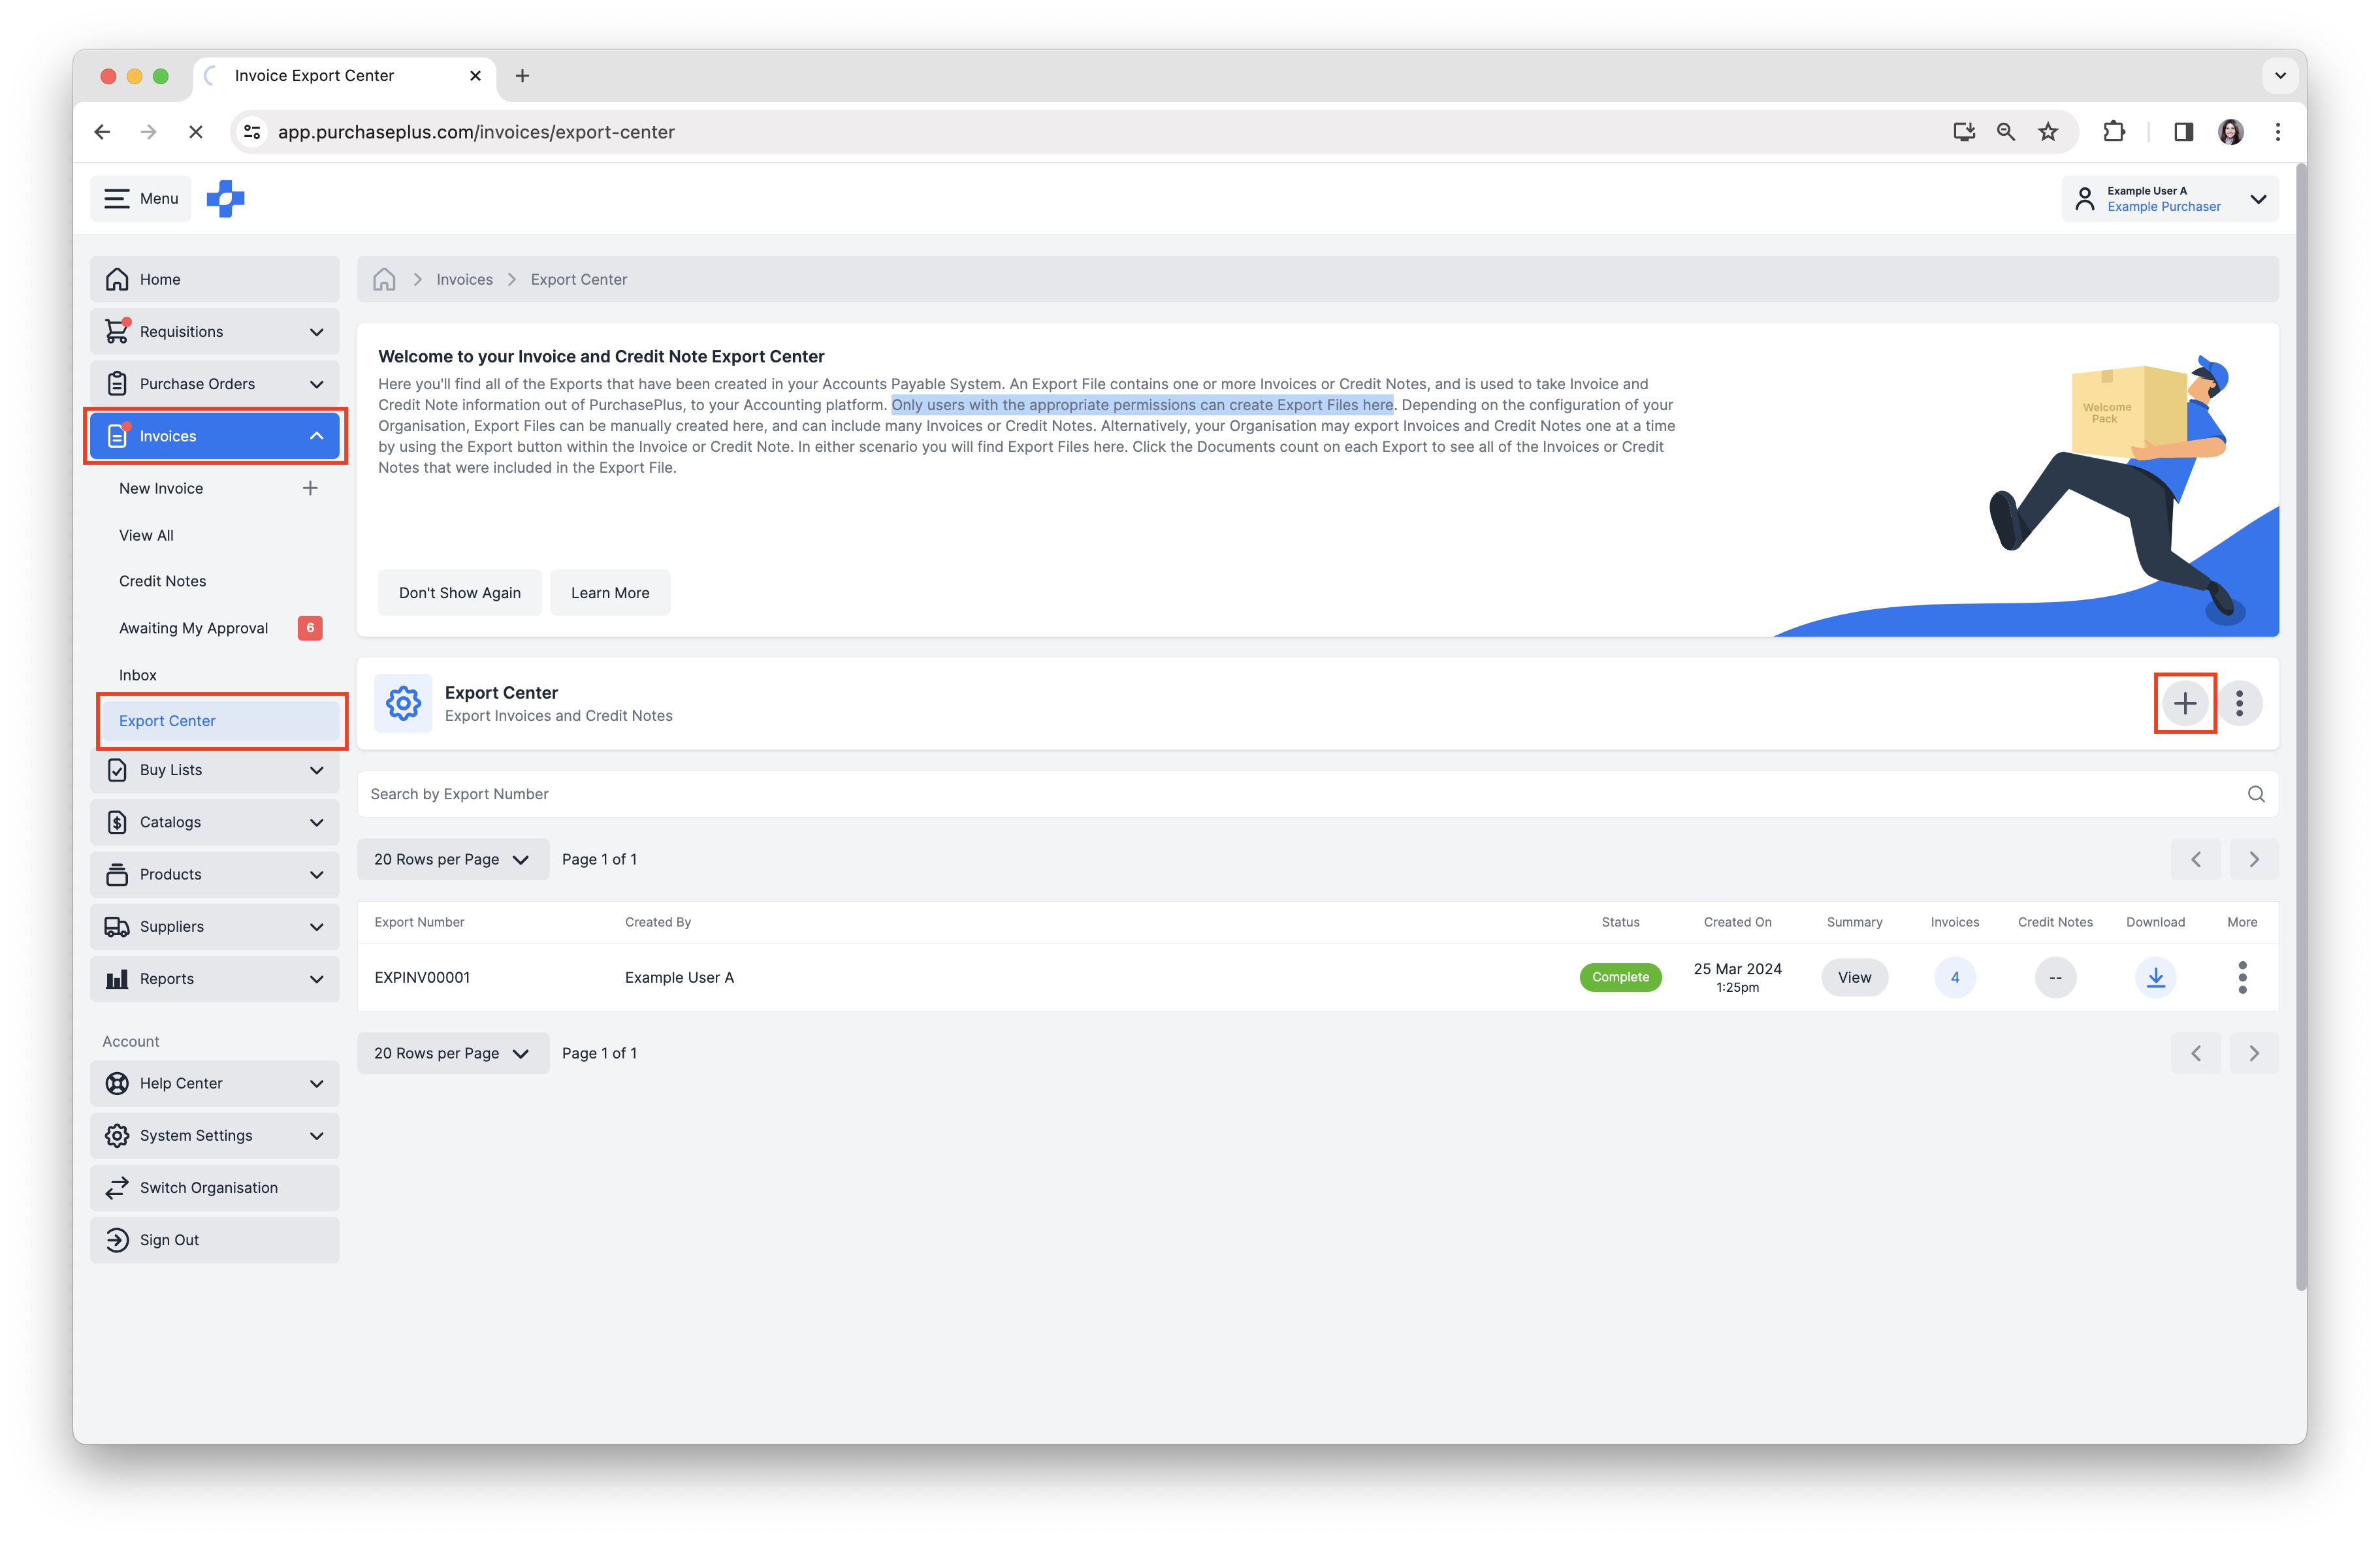
1. Select [Invoices] → [Export Center] from the side navigation bar.
2. Click [Create New Export File]. Please note: only users with the appropriate permissions can create Export Files.
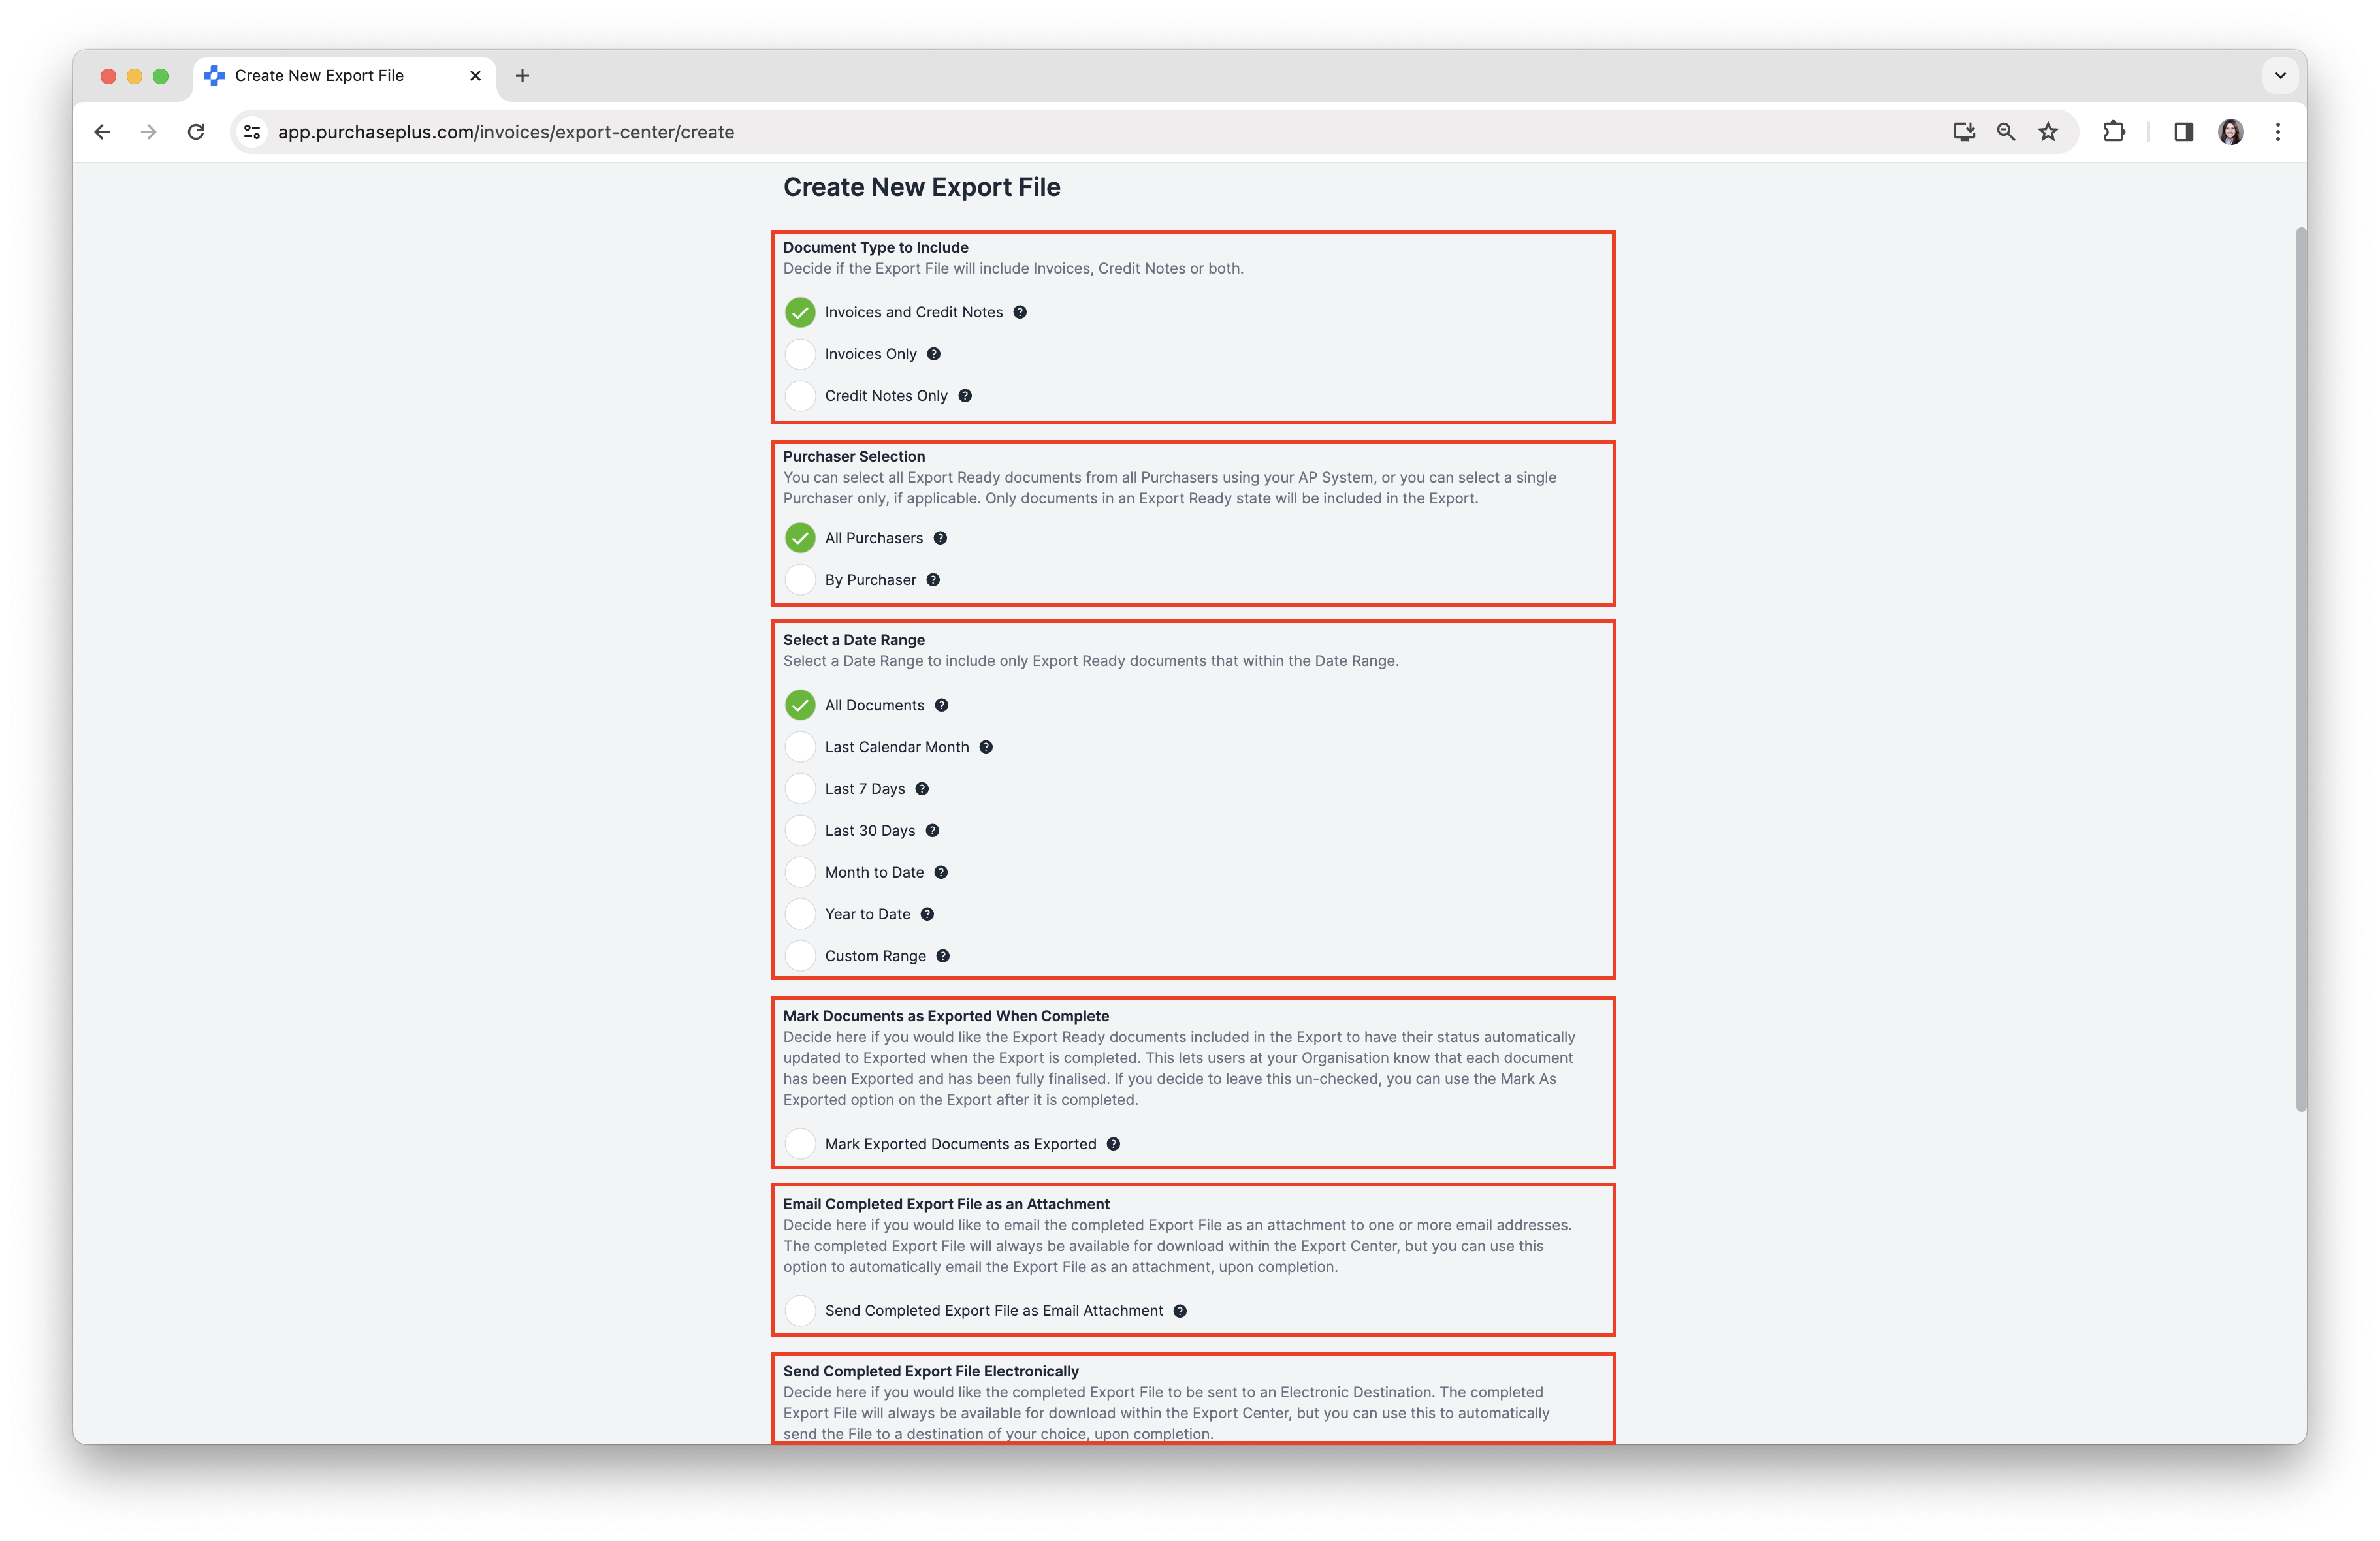
3. Complete all fields as required.
a. Decide on the [Document Types to Include]. You can include just Invoices, just Credit Notes, or both Invoices and Credit Notes.
b. [Purchaser Selection] to select which Purchasers are included. This selection is only applicable if multiple Purchasing Organizations are using the same Accounts Payable System in PurchasePlus.
c. [Select a Date Range].
d. Decide if you would like to automatically [Mark Documents as Exported When Completed]. This is an important step, as this update the status of any Invoice or Credit Note included in the Export file to `Exported` automatically, upon successful creation of the Export File.
e. [Email Completed Export File as an Attachment]. This is an optional step that enables you to send the completed Export File as an attachment to one or many email addresses. Please note that if the size of the Export File being attached to the email becomes very large, the email sending may not succeed. In this case, you will still be able to manually download the Export File from within PurchasePlus.
f. [Send Completed Export File Electronically]. If your Organization has been configured with Electronic Destinations for Exporting, then each Destination will be available here. If applicable, you can select a Destination that the Export File will be electronically sent to, upon successful creation of the Export File. Please contact our friendly customer support team if you wish to send your Export Files to an Electronic Destination such as a FTP Server, or API Endpoint.
4. Click [Create Export File] at the base of the form.
5. You will be taken back to the Export Center, and the Export File you actioned will appear at the top of the list of Export Files. The Export file will initially be in a 'Processing' state, and will automatically update to 'Complete' once the Export File is ready to be downloaded. Click [Download] to access and save the file on your device. The file will be formatted according to the settings applied to your Organization in PurchasePlus. You may now manually import the file into your external accounting platform.

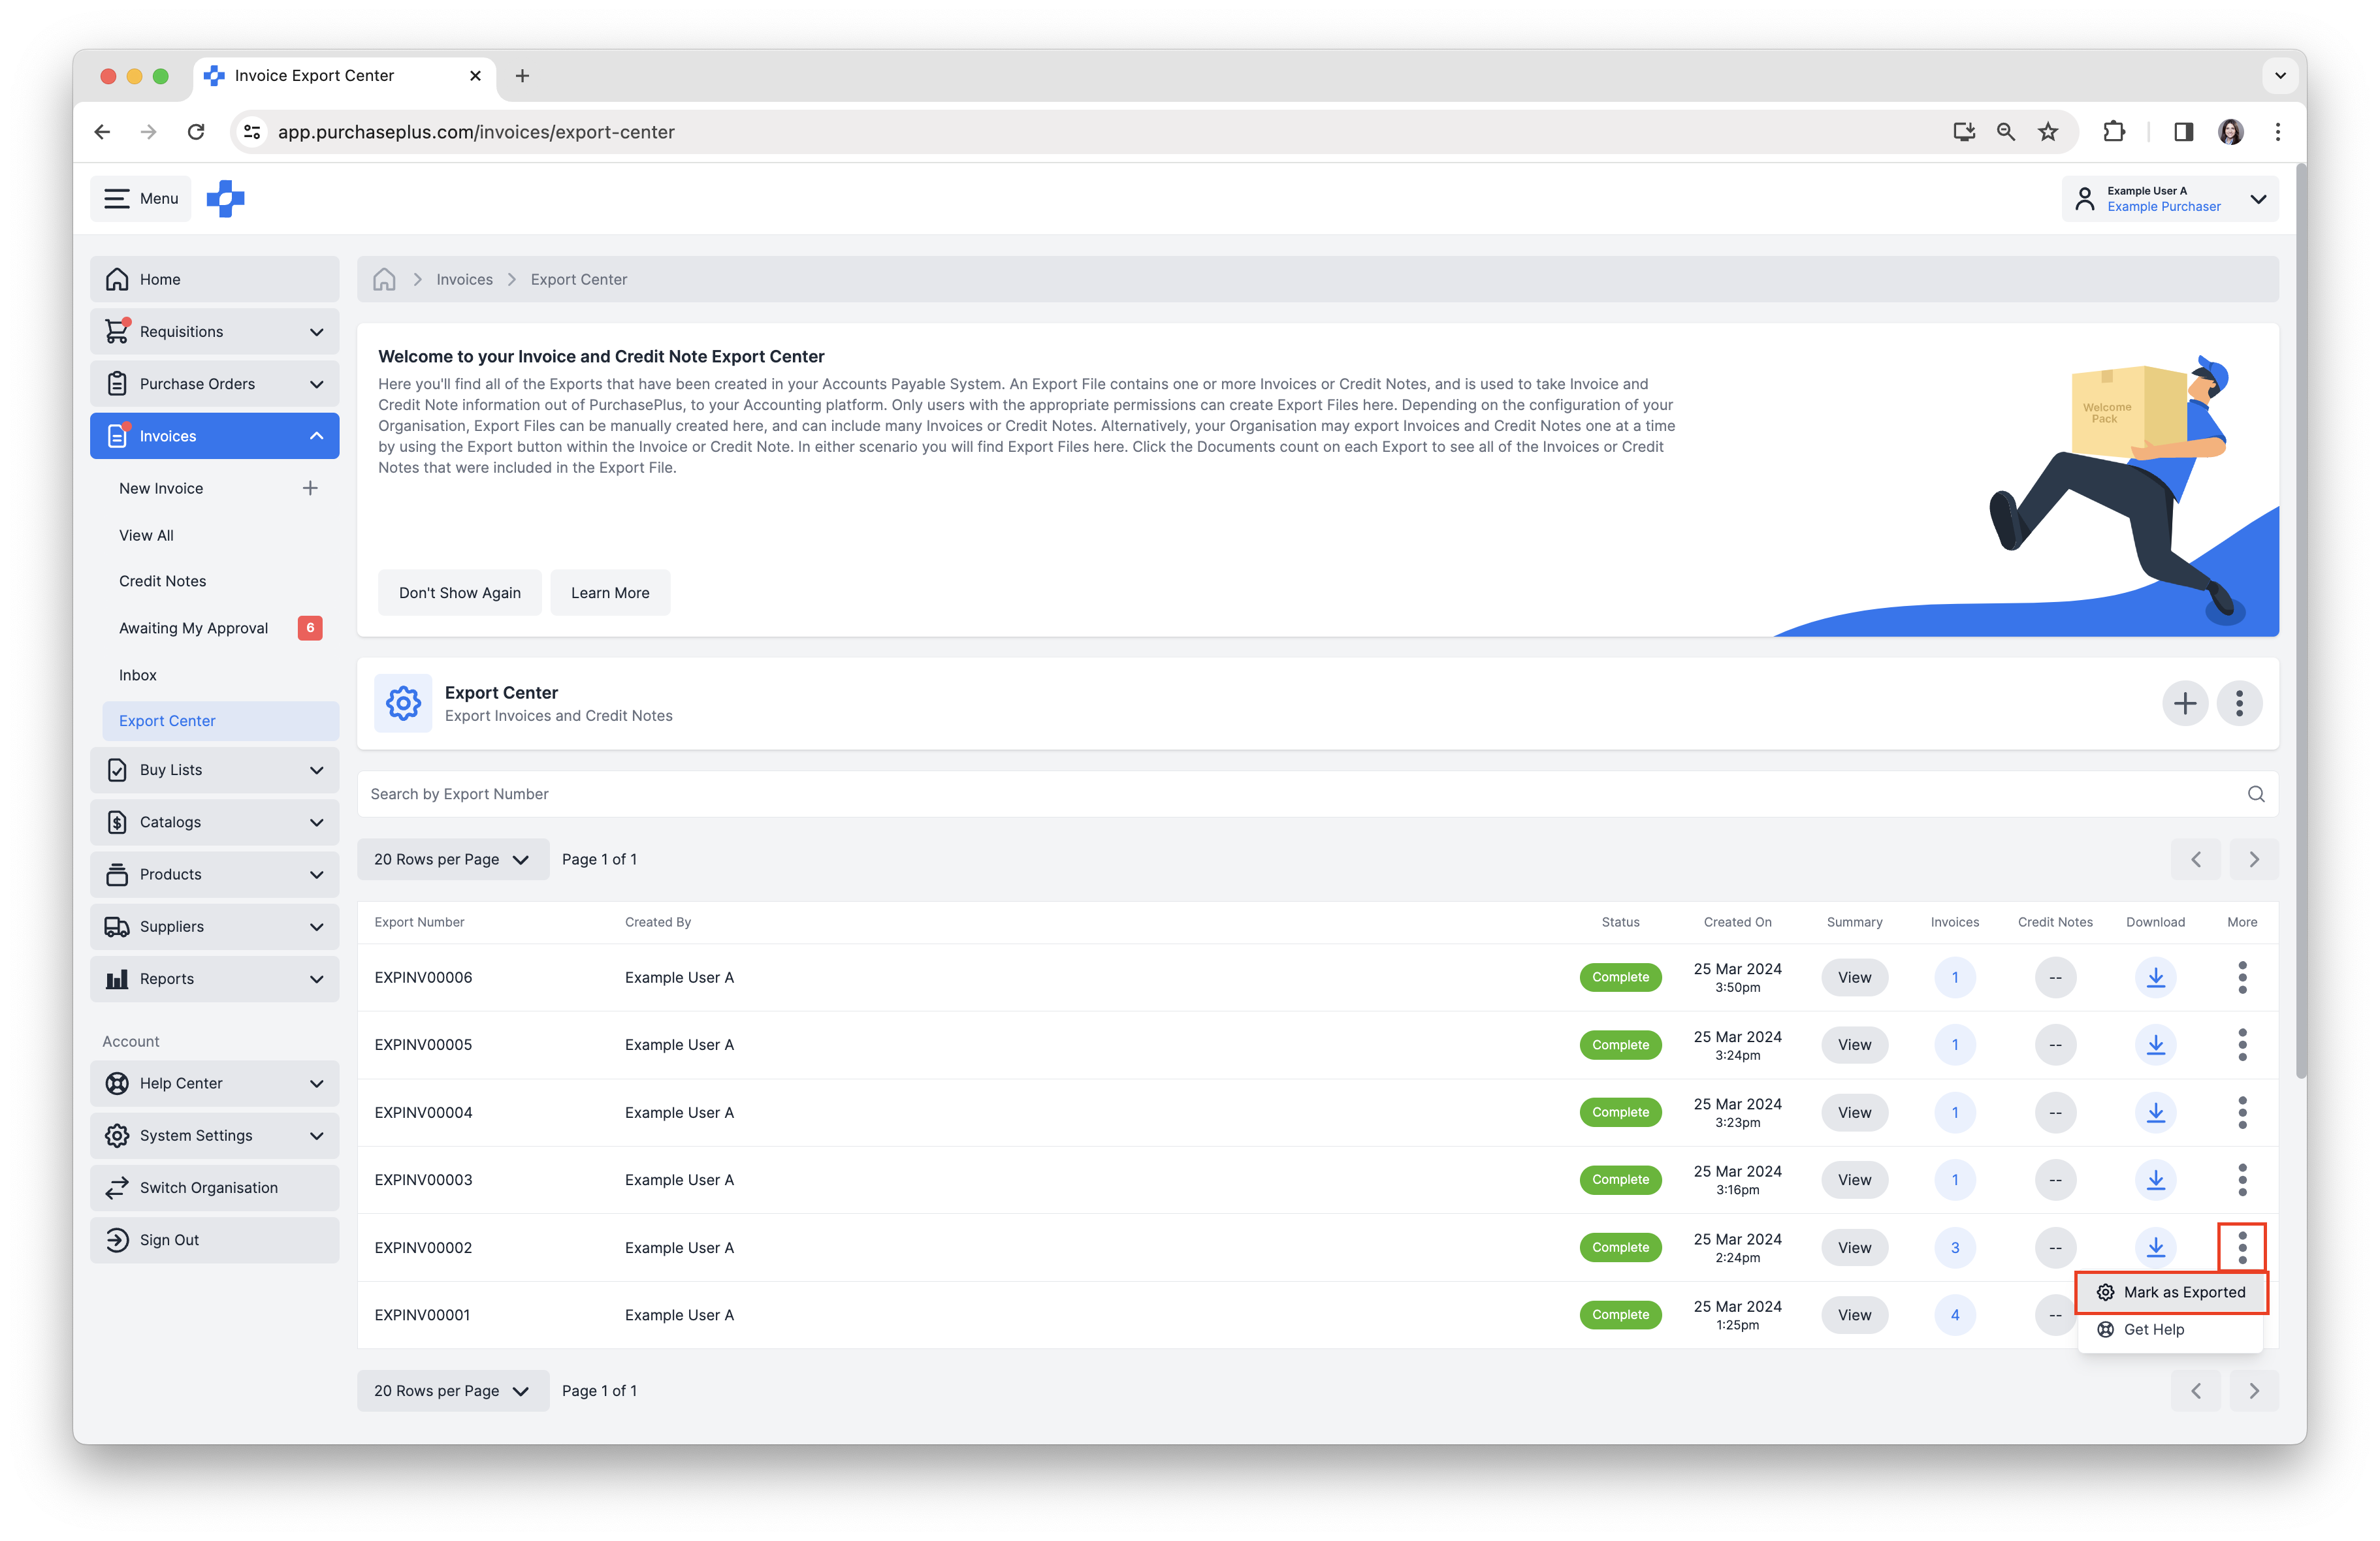
6. When creating the Export File, if you did not select 'Mark Documents as Exported When Completed', you will find that the Invoices and Credit Notes included in the Export File will still be in an 'Export Ready' state. This is common practice, as you may wish to wait until the Export File is successfully imported into your external accounting system, prior to marking the documents as Exported in PurchasePlus.
When you are ready to do so, to progress all the Invoices and Credit Notes to the 'Exported' state, click [More] → [Mark as Exported]. The Invoices and Credit Notes will be updated to 'Exported'.
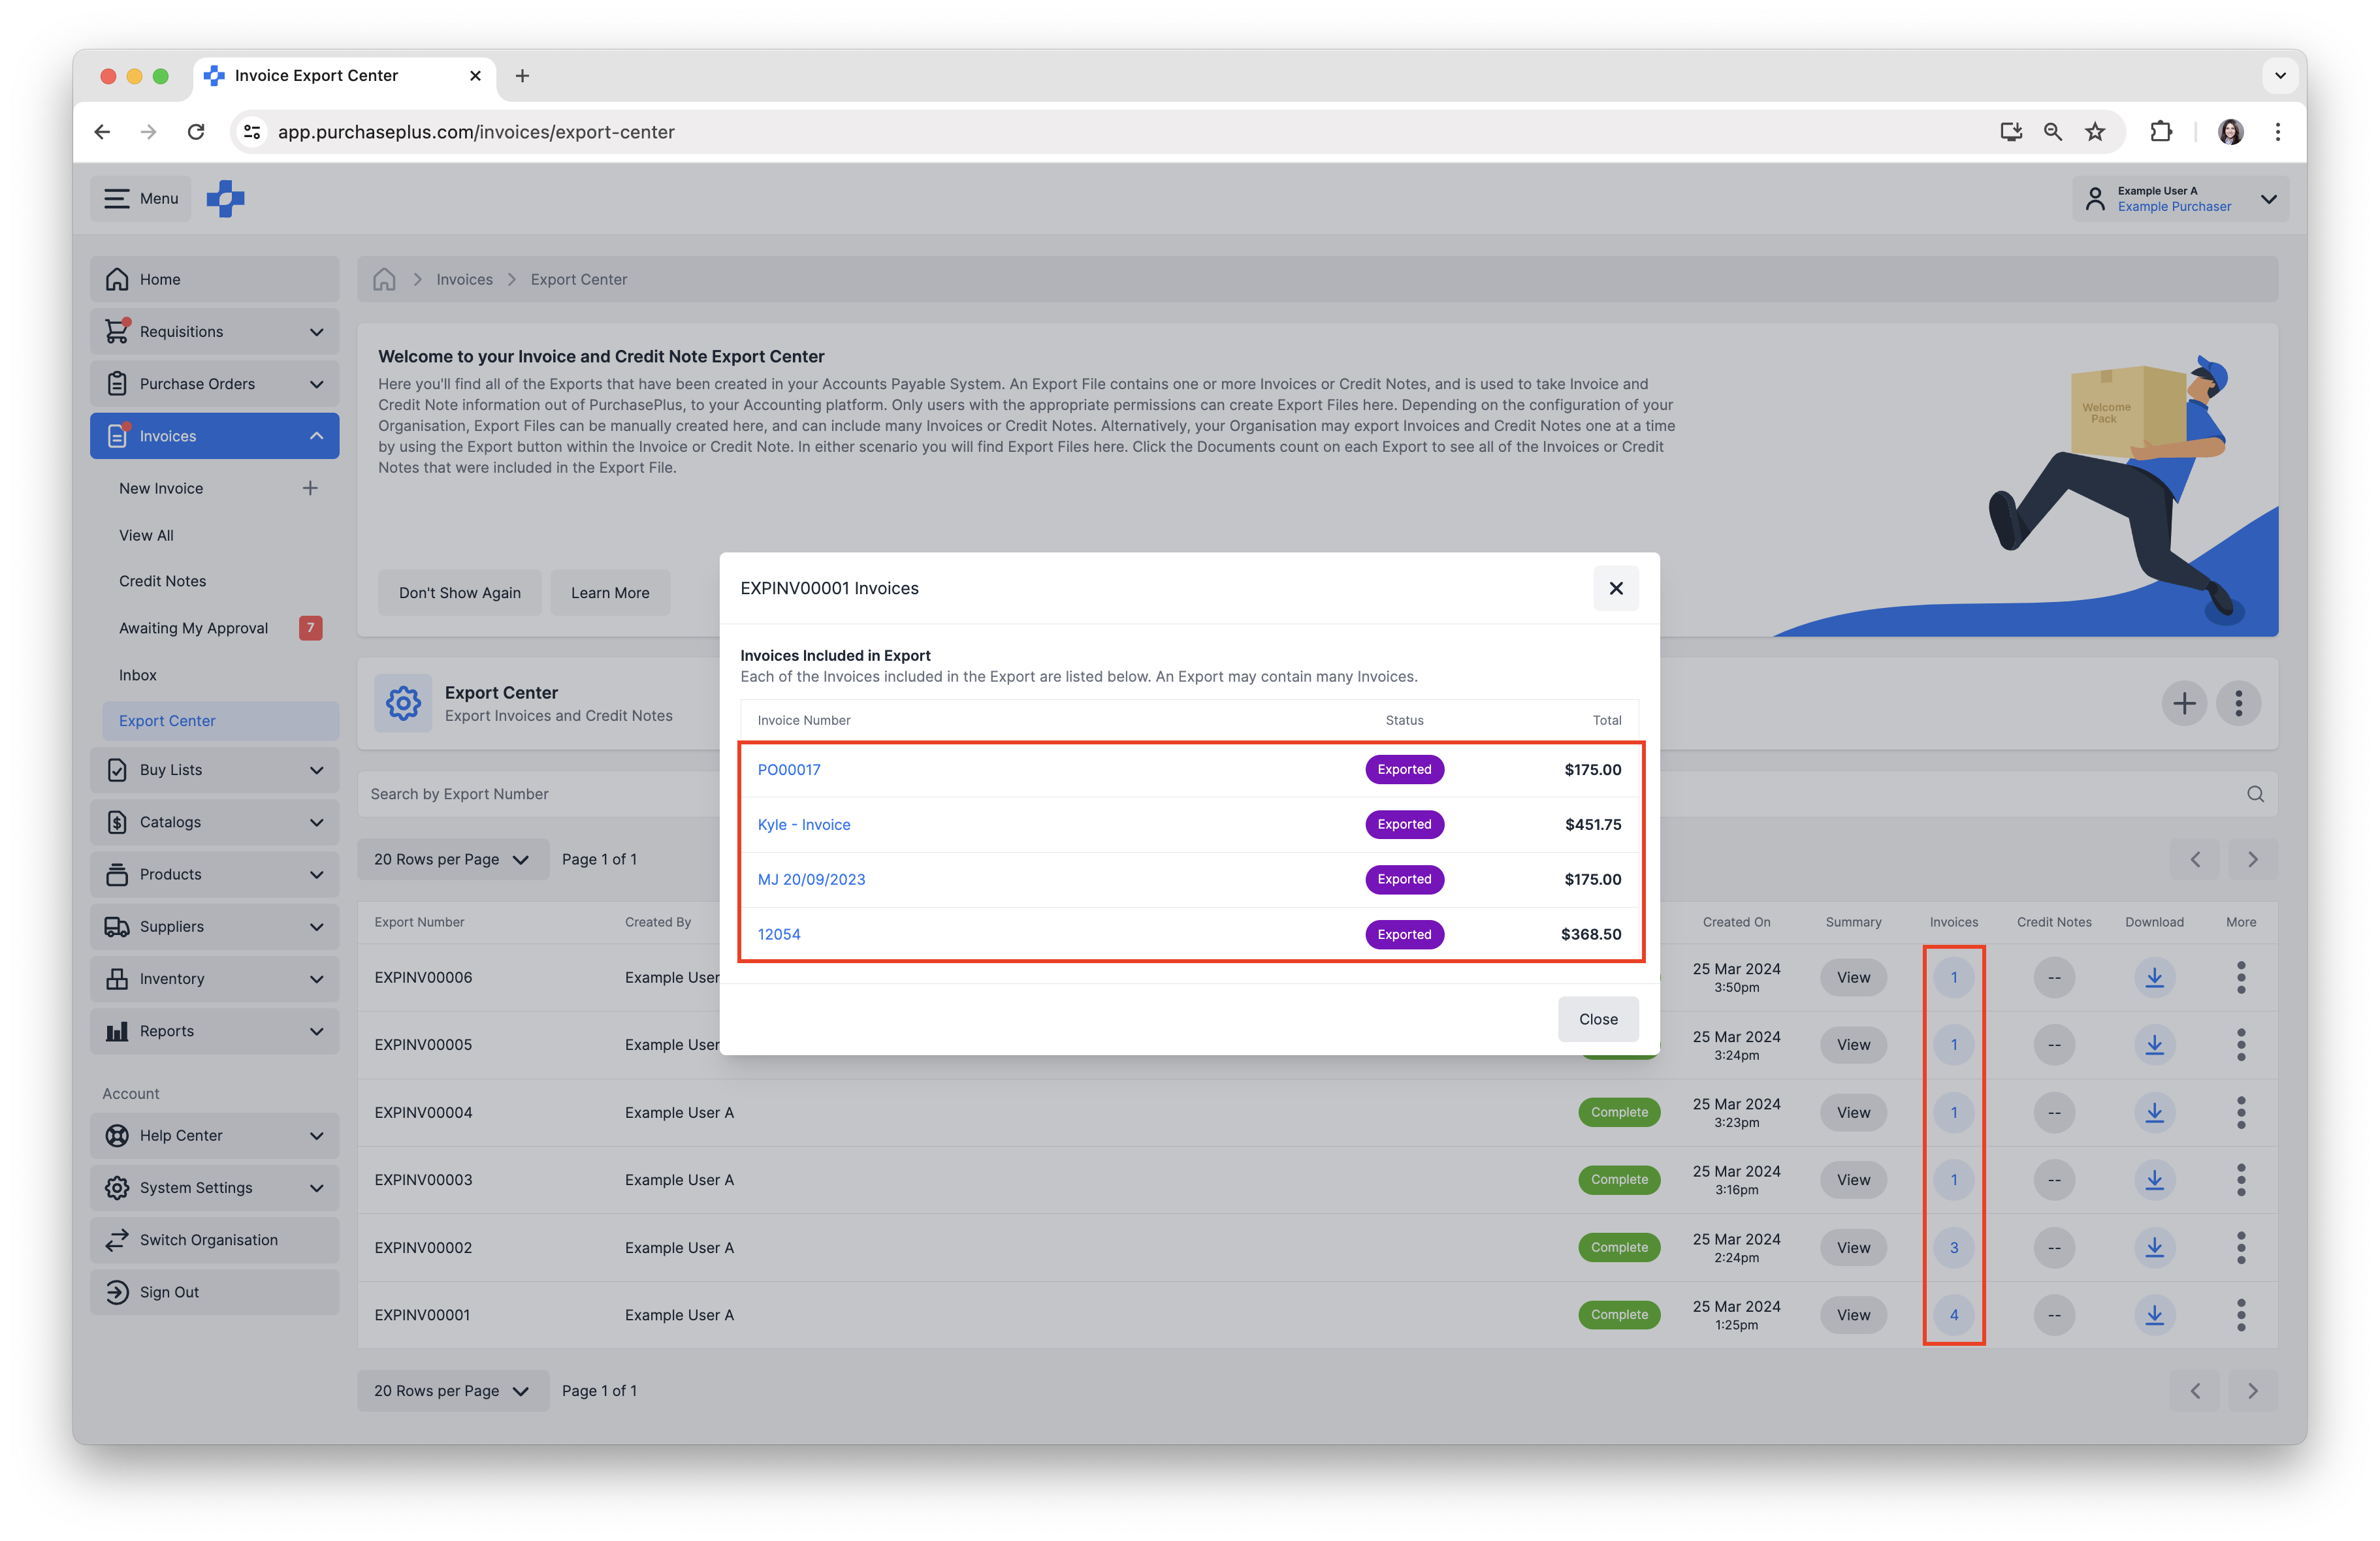
7. To view invoices included in an Export, click [Number] in the Invoices column. A pop-up window will open, listing all Invoices included in the Export.
8. Alternatively, you click on the Export Number to see the CSV Export Data as a table, as well as a list of the Invoice(s) or Credit Note(s) included in the Export File.