Learn how to create or update individual Invoice Lines and their Sub-Lines. This is helpful to view and manage extra information about each Invoice Line, such as custom references and split expenses.
In PurchasePlus, Invoice Lines can be viewed in Advanced Mode to reveal all the additional information for each Invoice Line. An Invoice Line can have one or many Sub-Lines. Sub-Lines are used to apportion the Invoice Line across many different Department and Account Codes, if needed.
Enable Advanced View
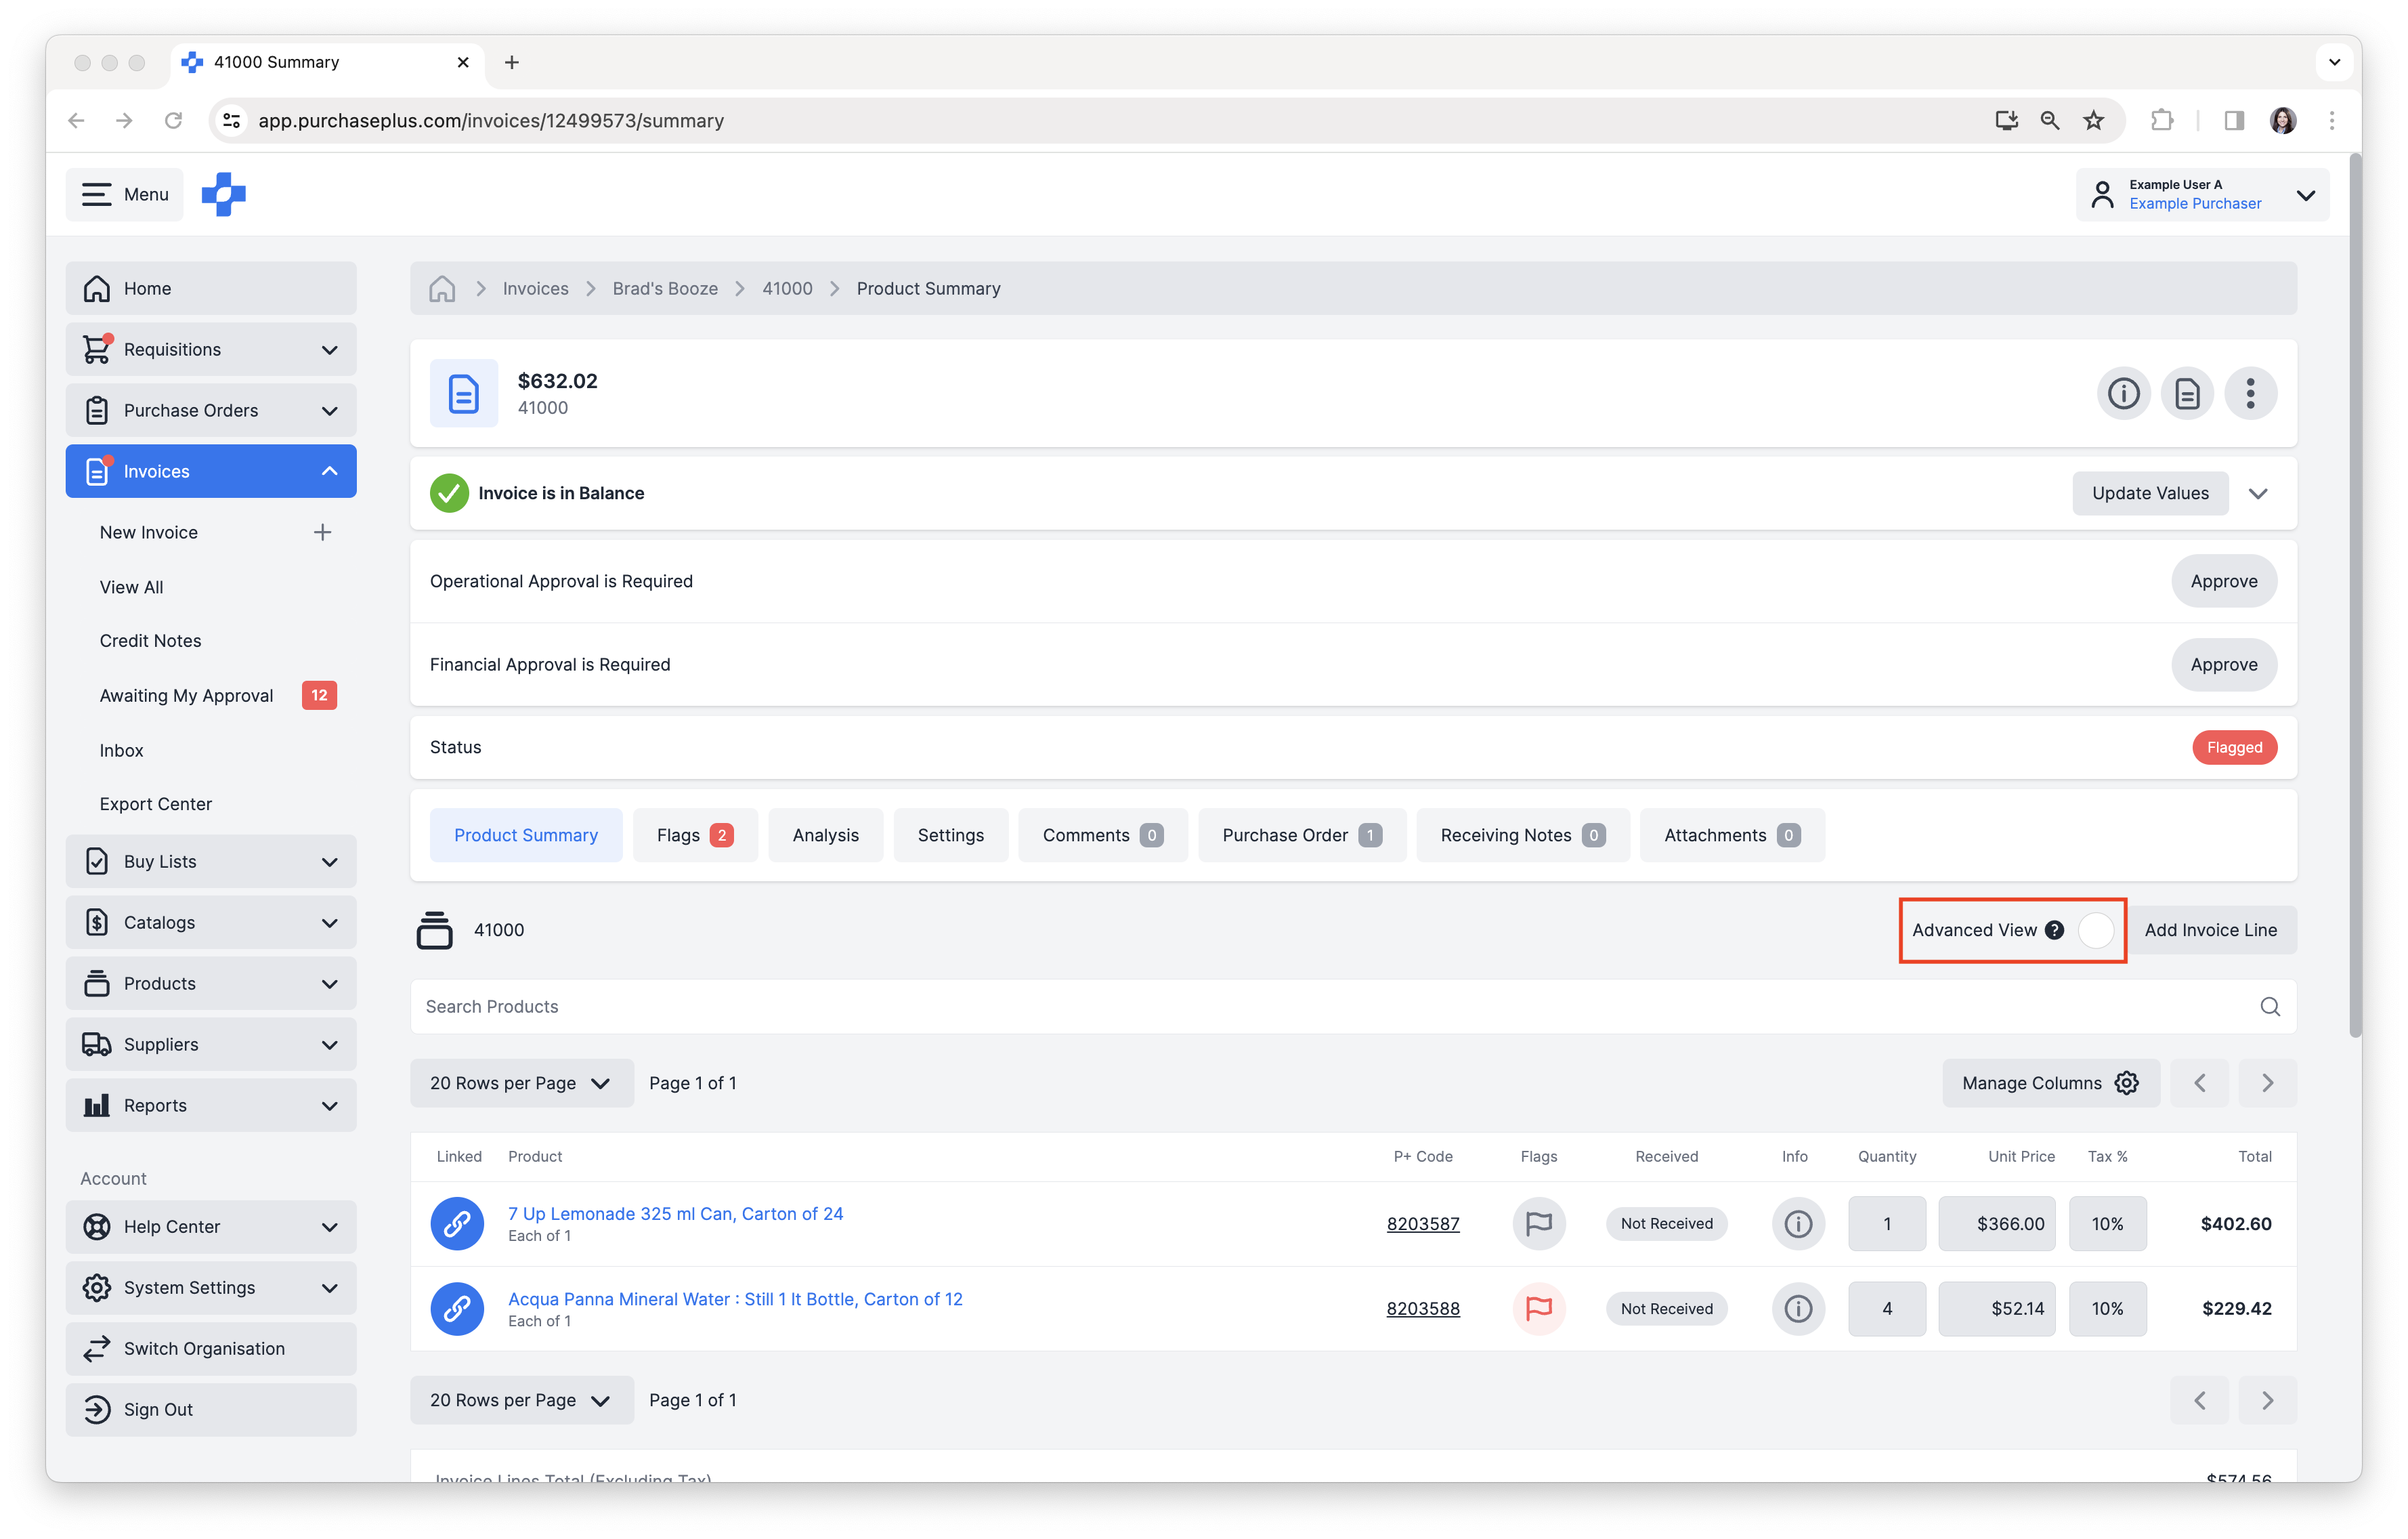
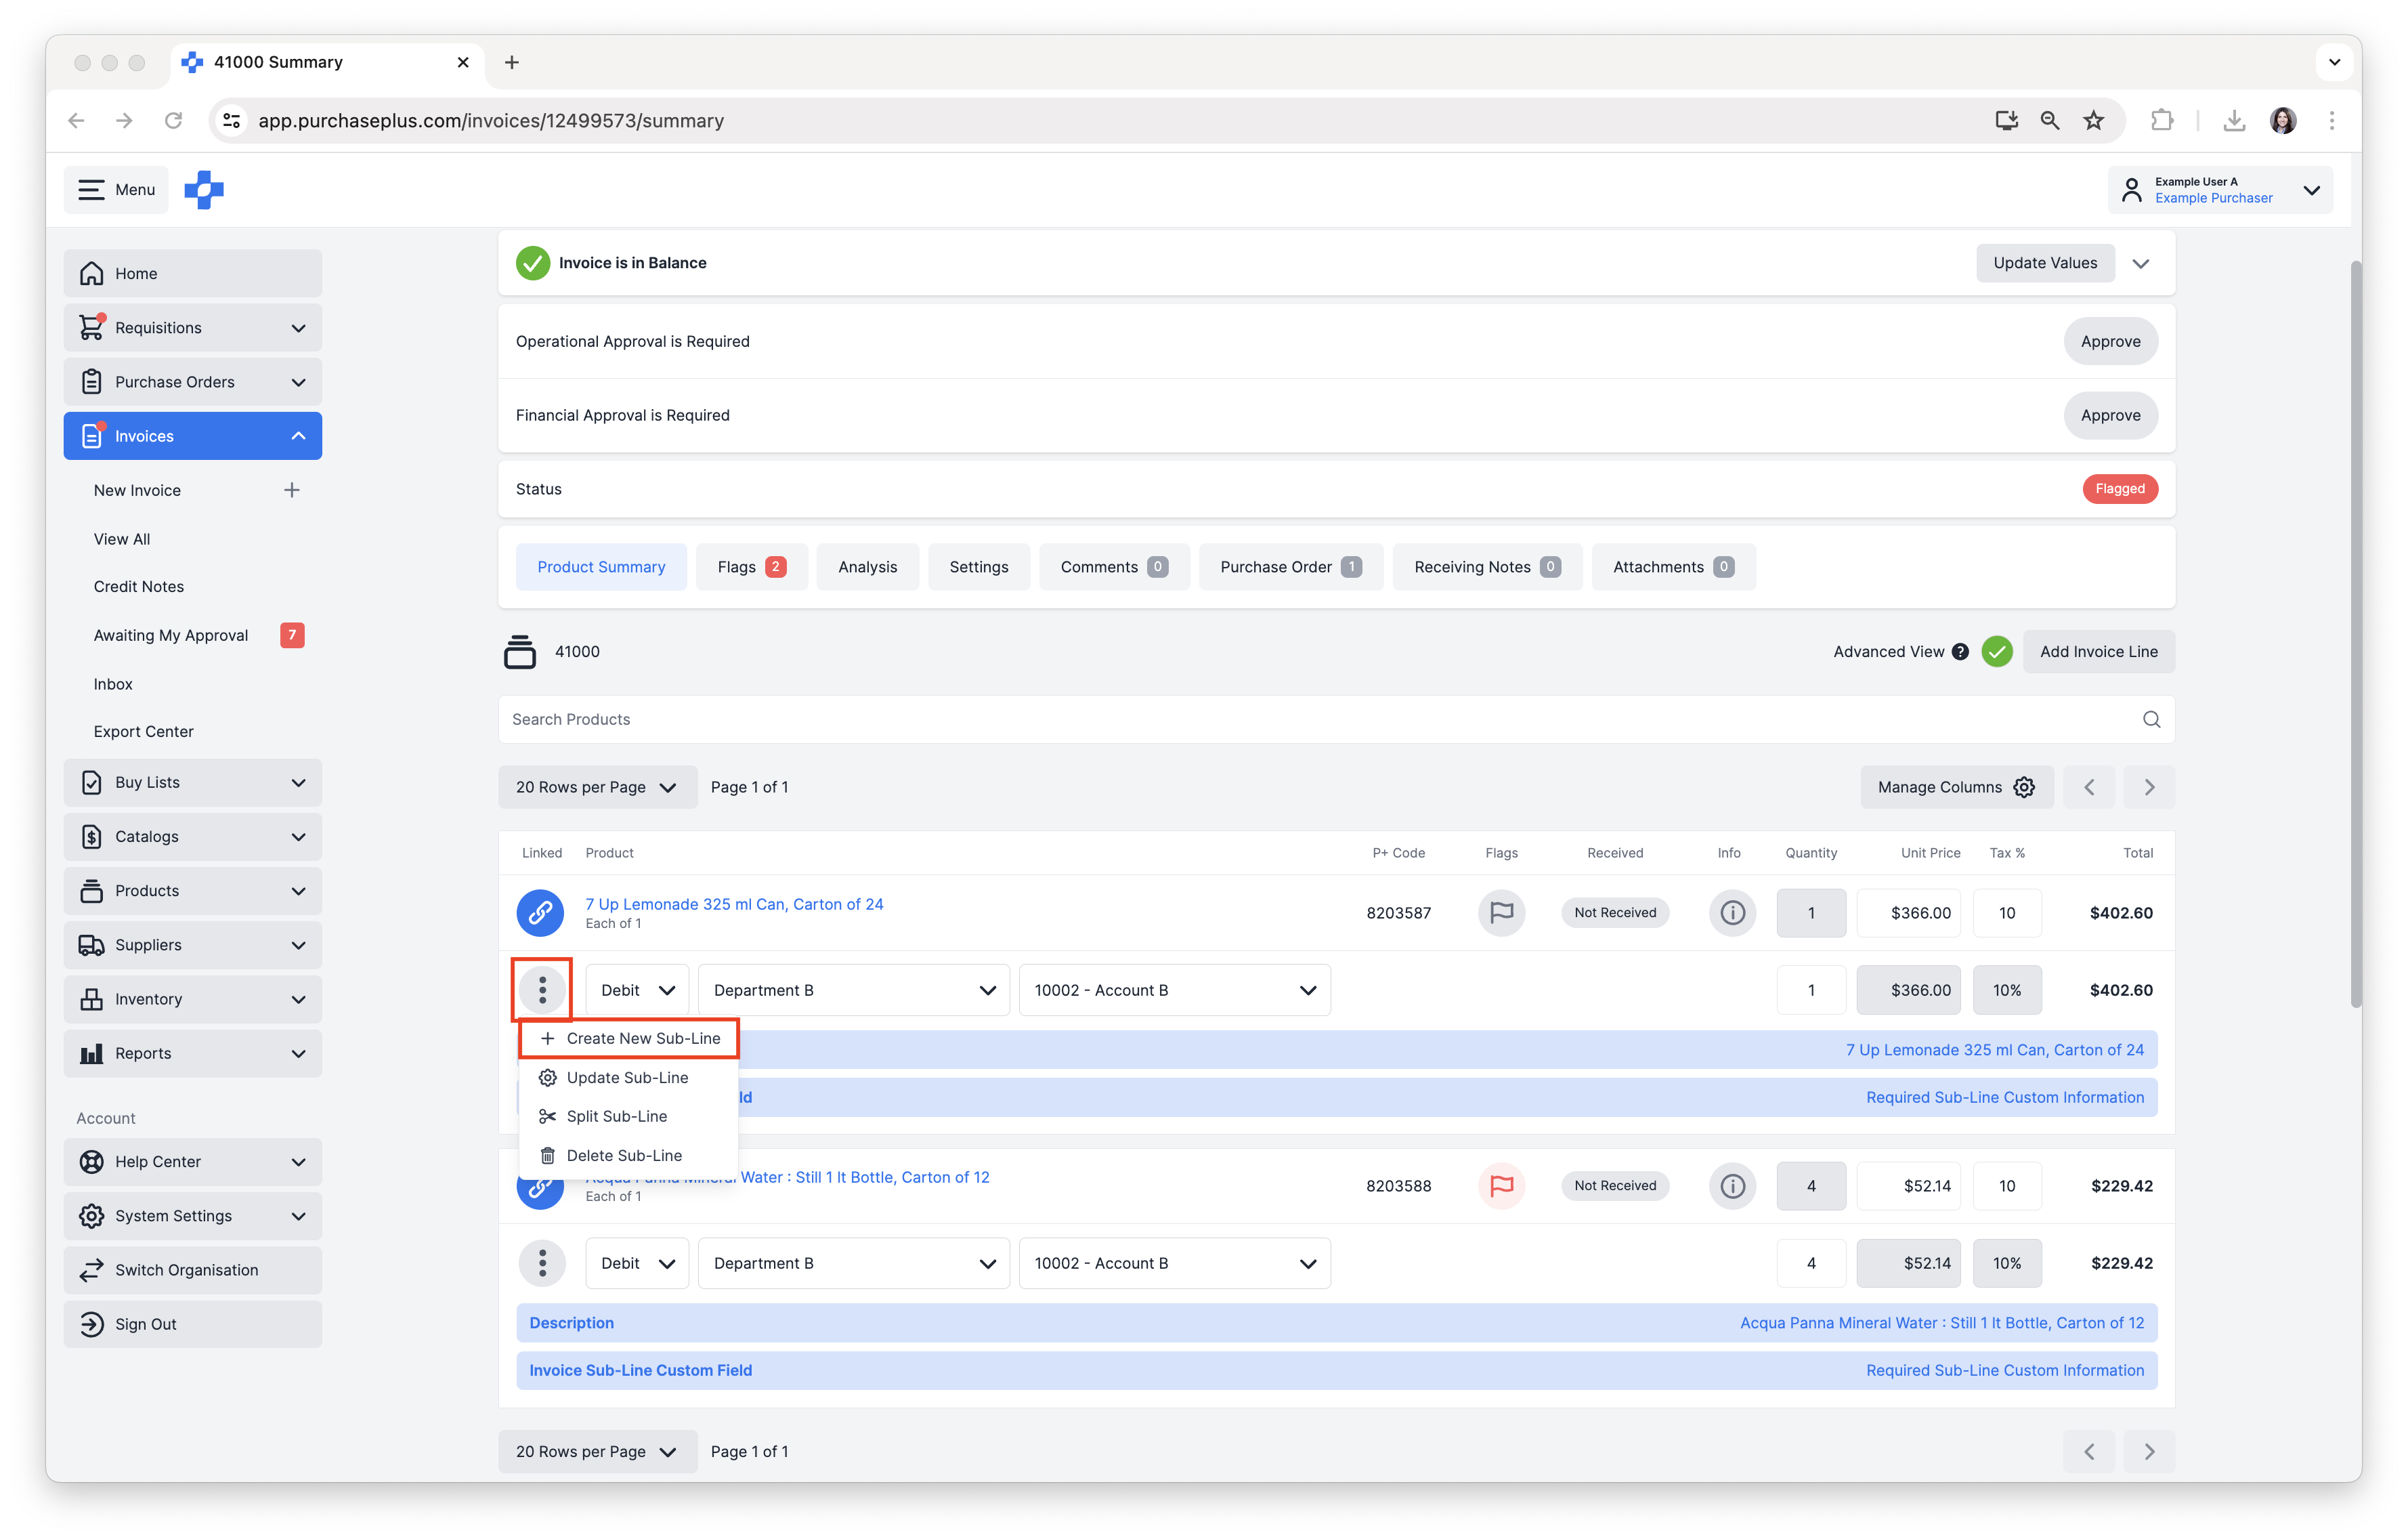
1. After opening the relevant Invoice, select [Advanced View] to reveal additional information for each Invoice Line. Each Invoice Line must have at least one Sub-Line belonging to it, and additional Sub-Lines can be created, in order to apportion
2. If the Invoice is in an 'Open' or 'Flagged' state, and you have the appropriate permissions, you we be able to undertake the following actions:
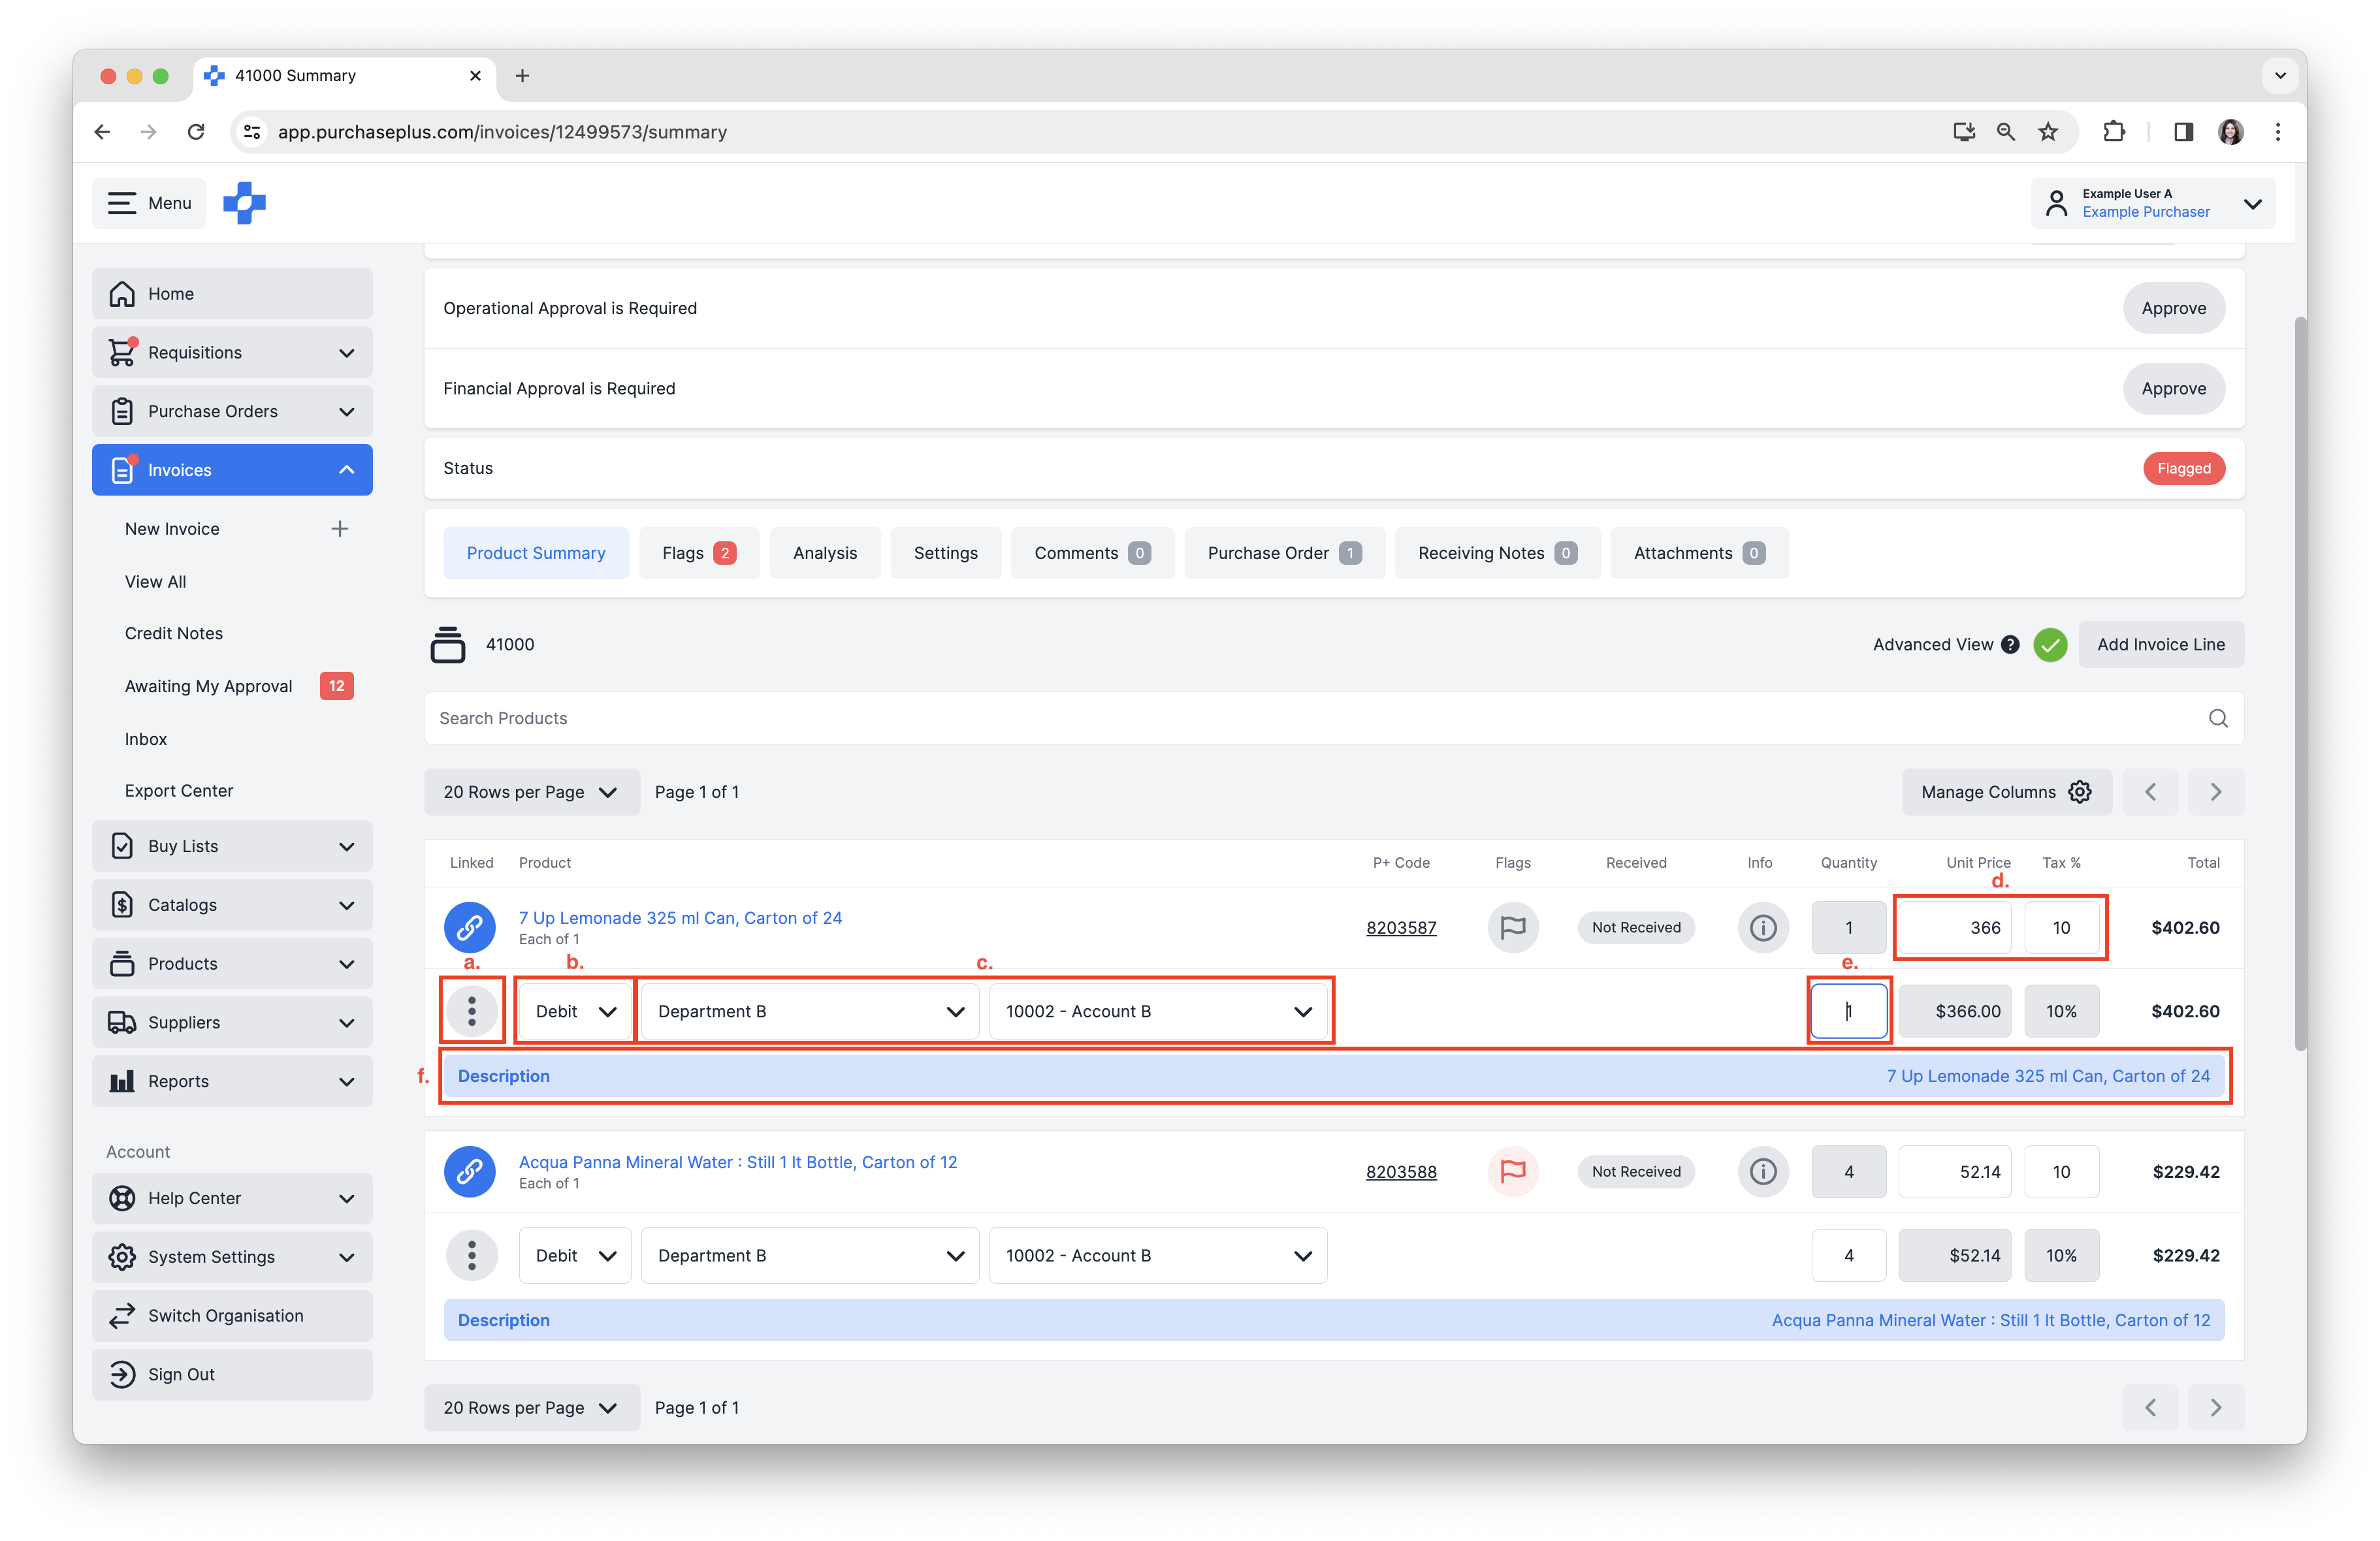
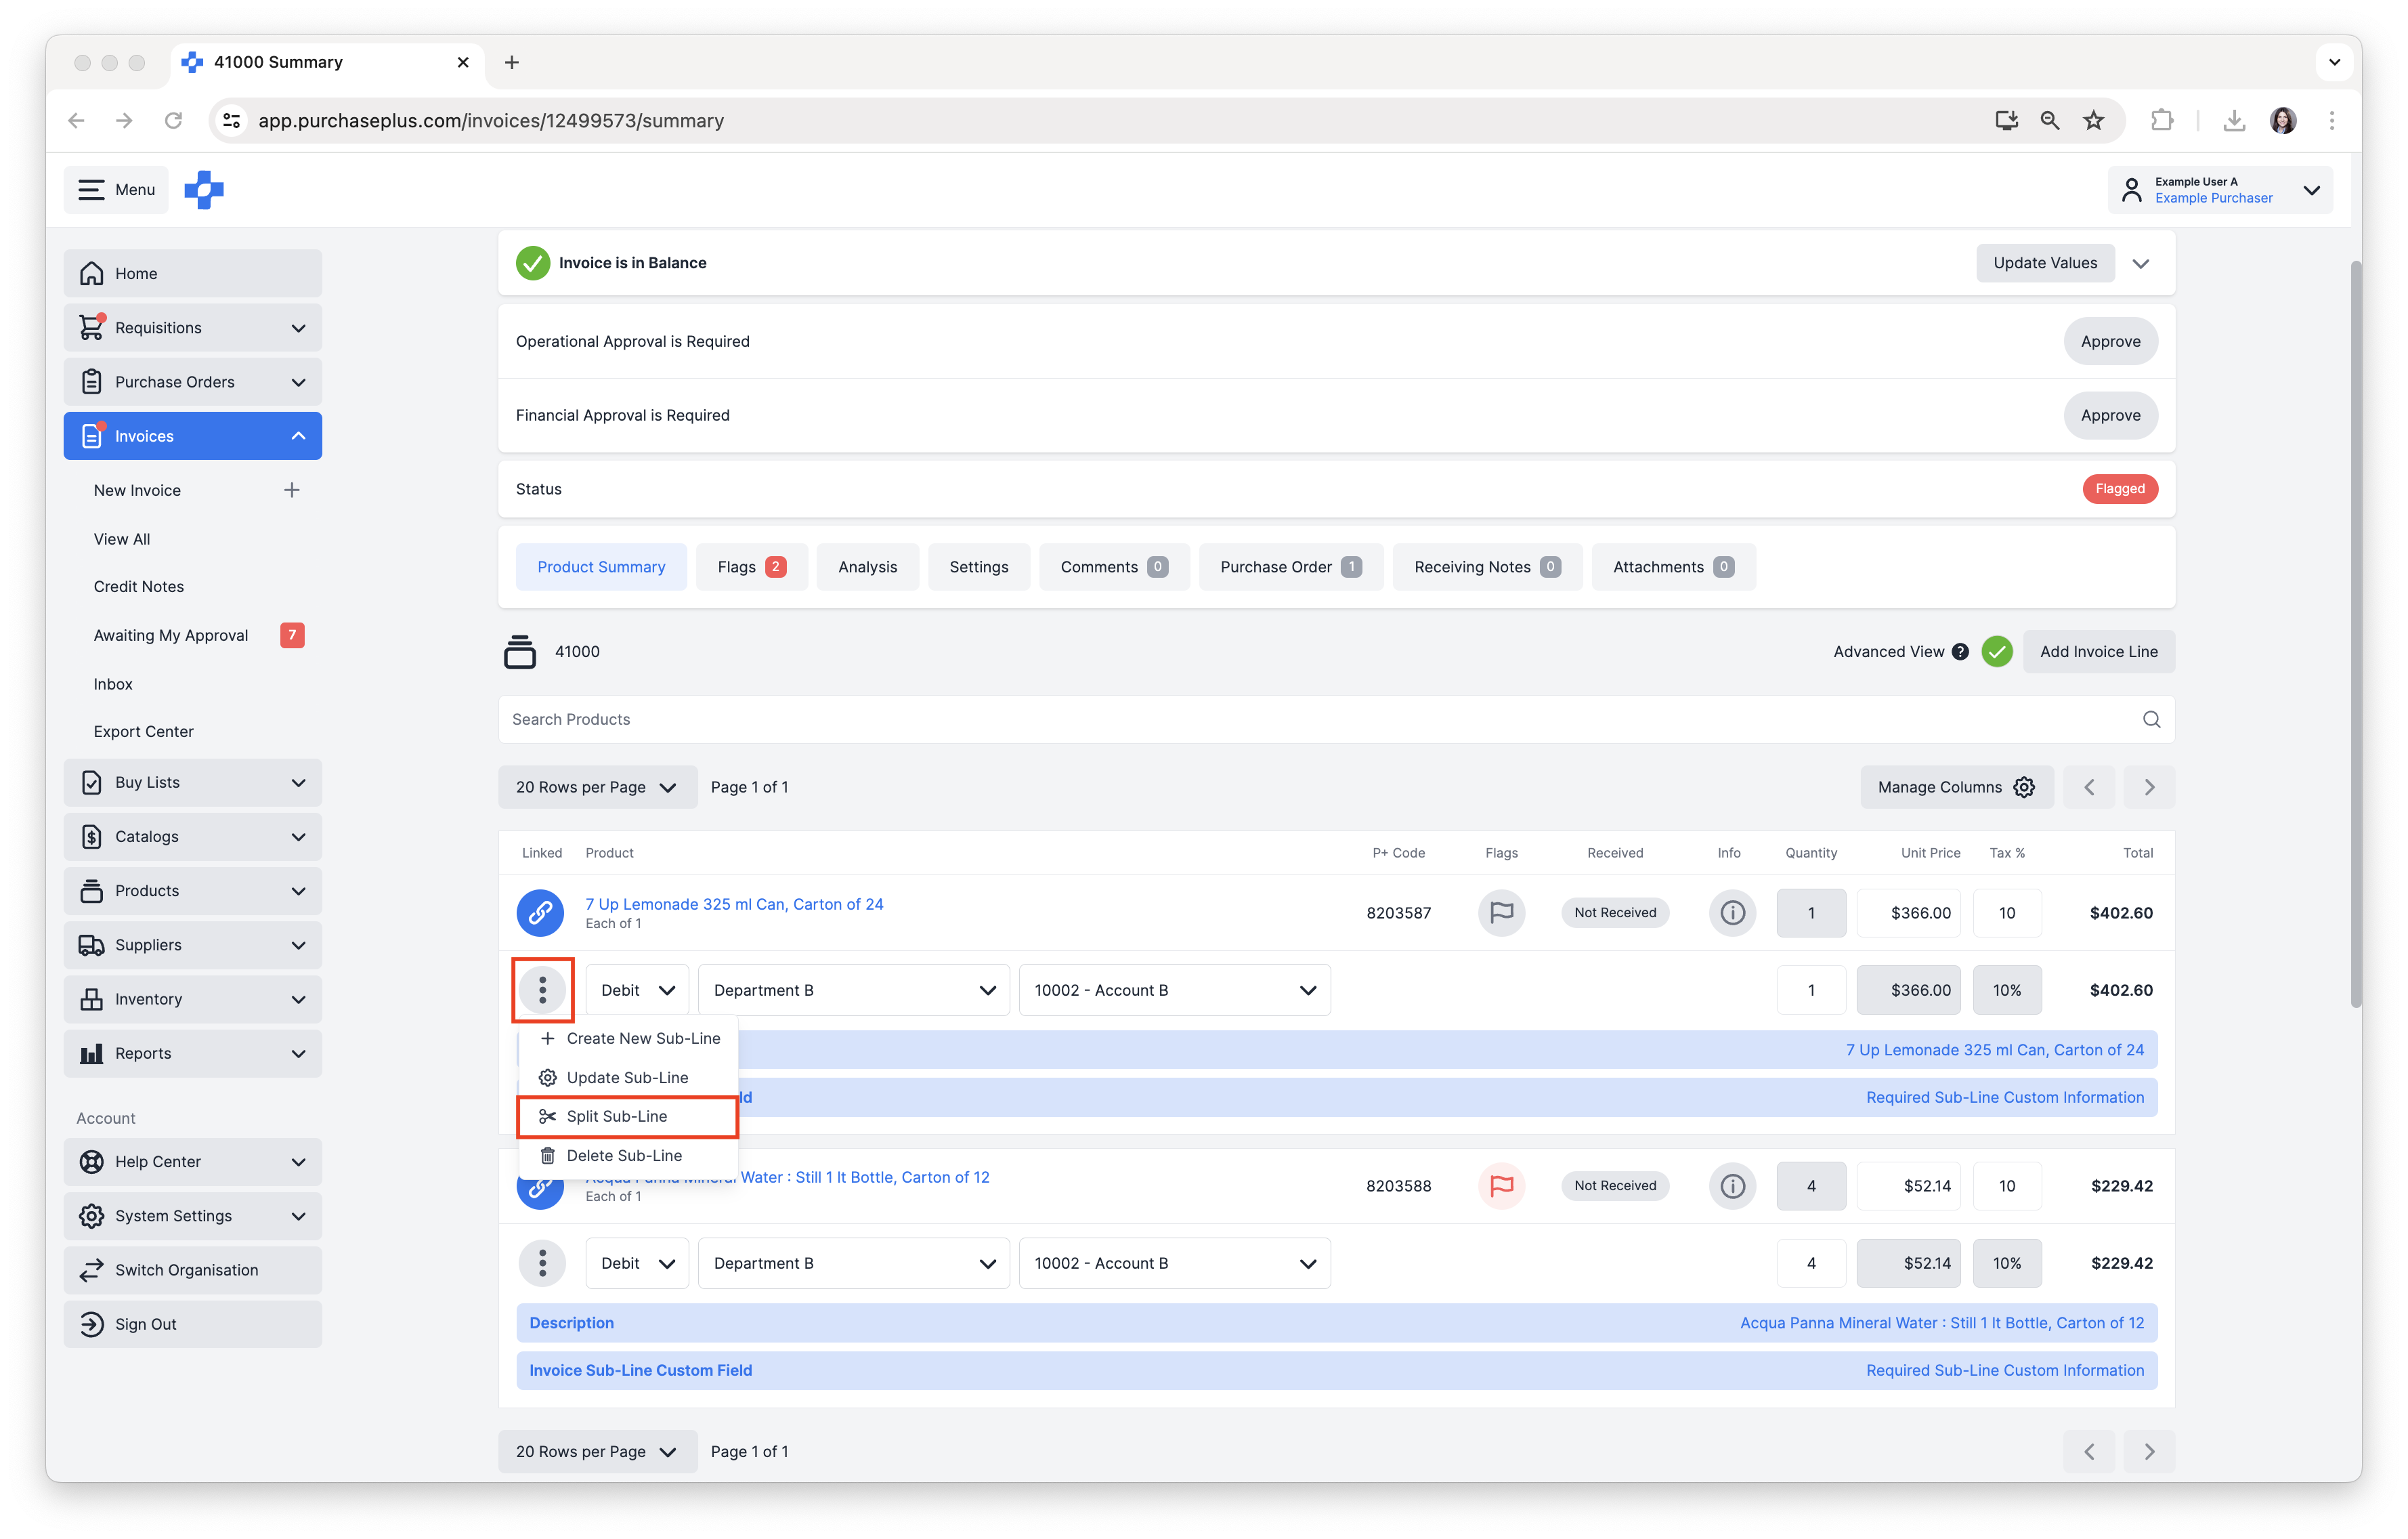
a. Click into the [More] menu on a Sub-Line to [Create New Sub-Line], [Update Sub-Line], [Split Sub-Line], or [Delete Sub-Line]. These actions are used to manage how the Invoice Line should be apportioned, if it is to be apportioned across many Department and Account Codes. If your Invoice Line has a single Sub-Line that you wish to apportion across many Department and Account Codes, use the Split Sub-Line feature to achieve this.
b. Click [Debit] to update line to Debit or Credit. An Invoice Sub-Line set to 'Debit' will have a positive total, implying that this amount is payable to the Supplier. An Invoice Sub-Line set to 'Credit' will have a negative total, implying that this amount is credited to you from the Supplier.
c. Click [Department] and [Account Code] to apportion the Sub-Line to the appropriate Department and Account Code. Note that if the Invoice Line is matched to a Purchase Order Line, the Sub-Lines of the Invoice Line should update automatically to match the Department and Account Codes set on the Linked Purchase Order Line.
d. Update [Unit Price] & [Tax %]. The Unit Price and Tax Percentage are set on the Invoice Line, and automatically apply down to all Sub-Lines of the Invoice Line.
e. Update [Quantity]. Quantity is defined separately on each Sub-Line. The Quantity of the Invoice Line is automatically calculated from the sum of the Quantity of each Sub-Line belonging to the Invoice Line.
f. Click [Description] to update the Description of the Invoice Line. You can also use the More menu of the Sub-Line to add a Reference to each Sub-Line, if applicable.
Split Sub-Lines to Split Expenses
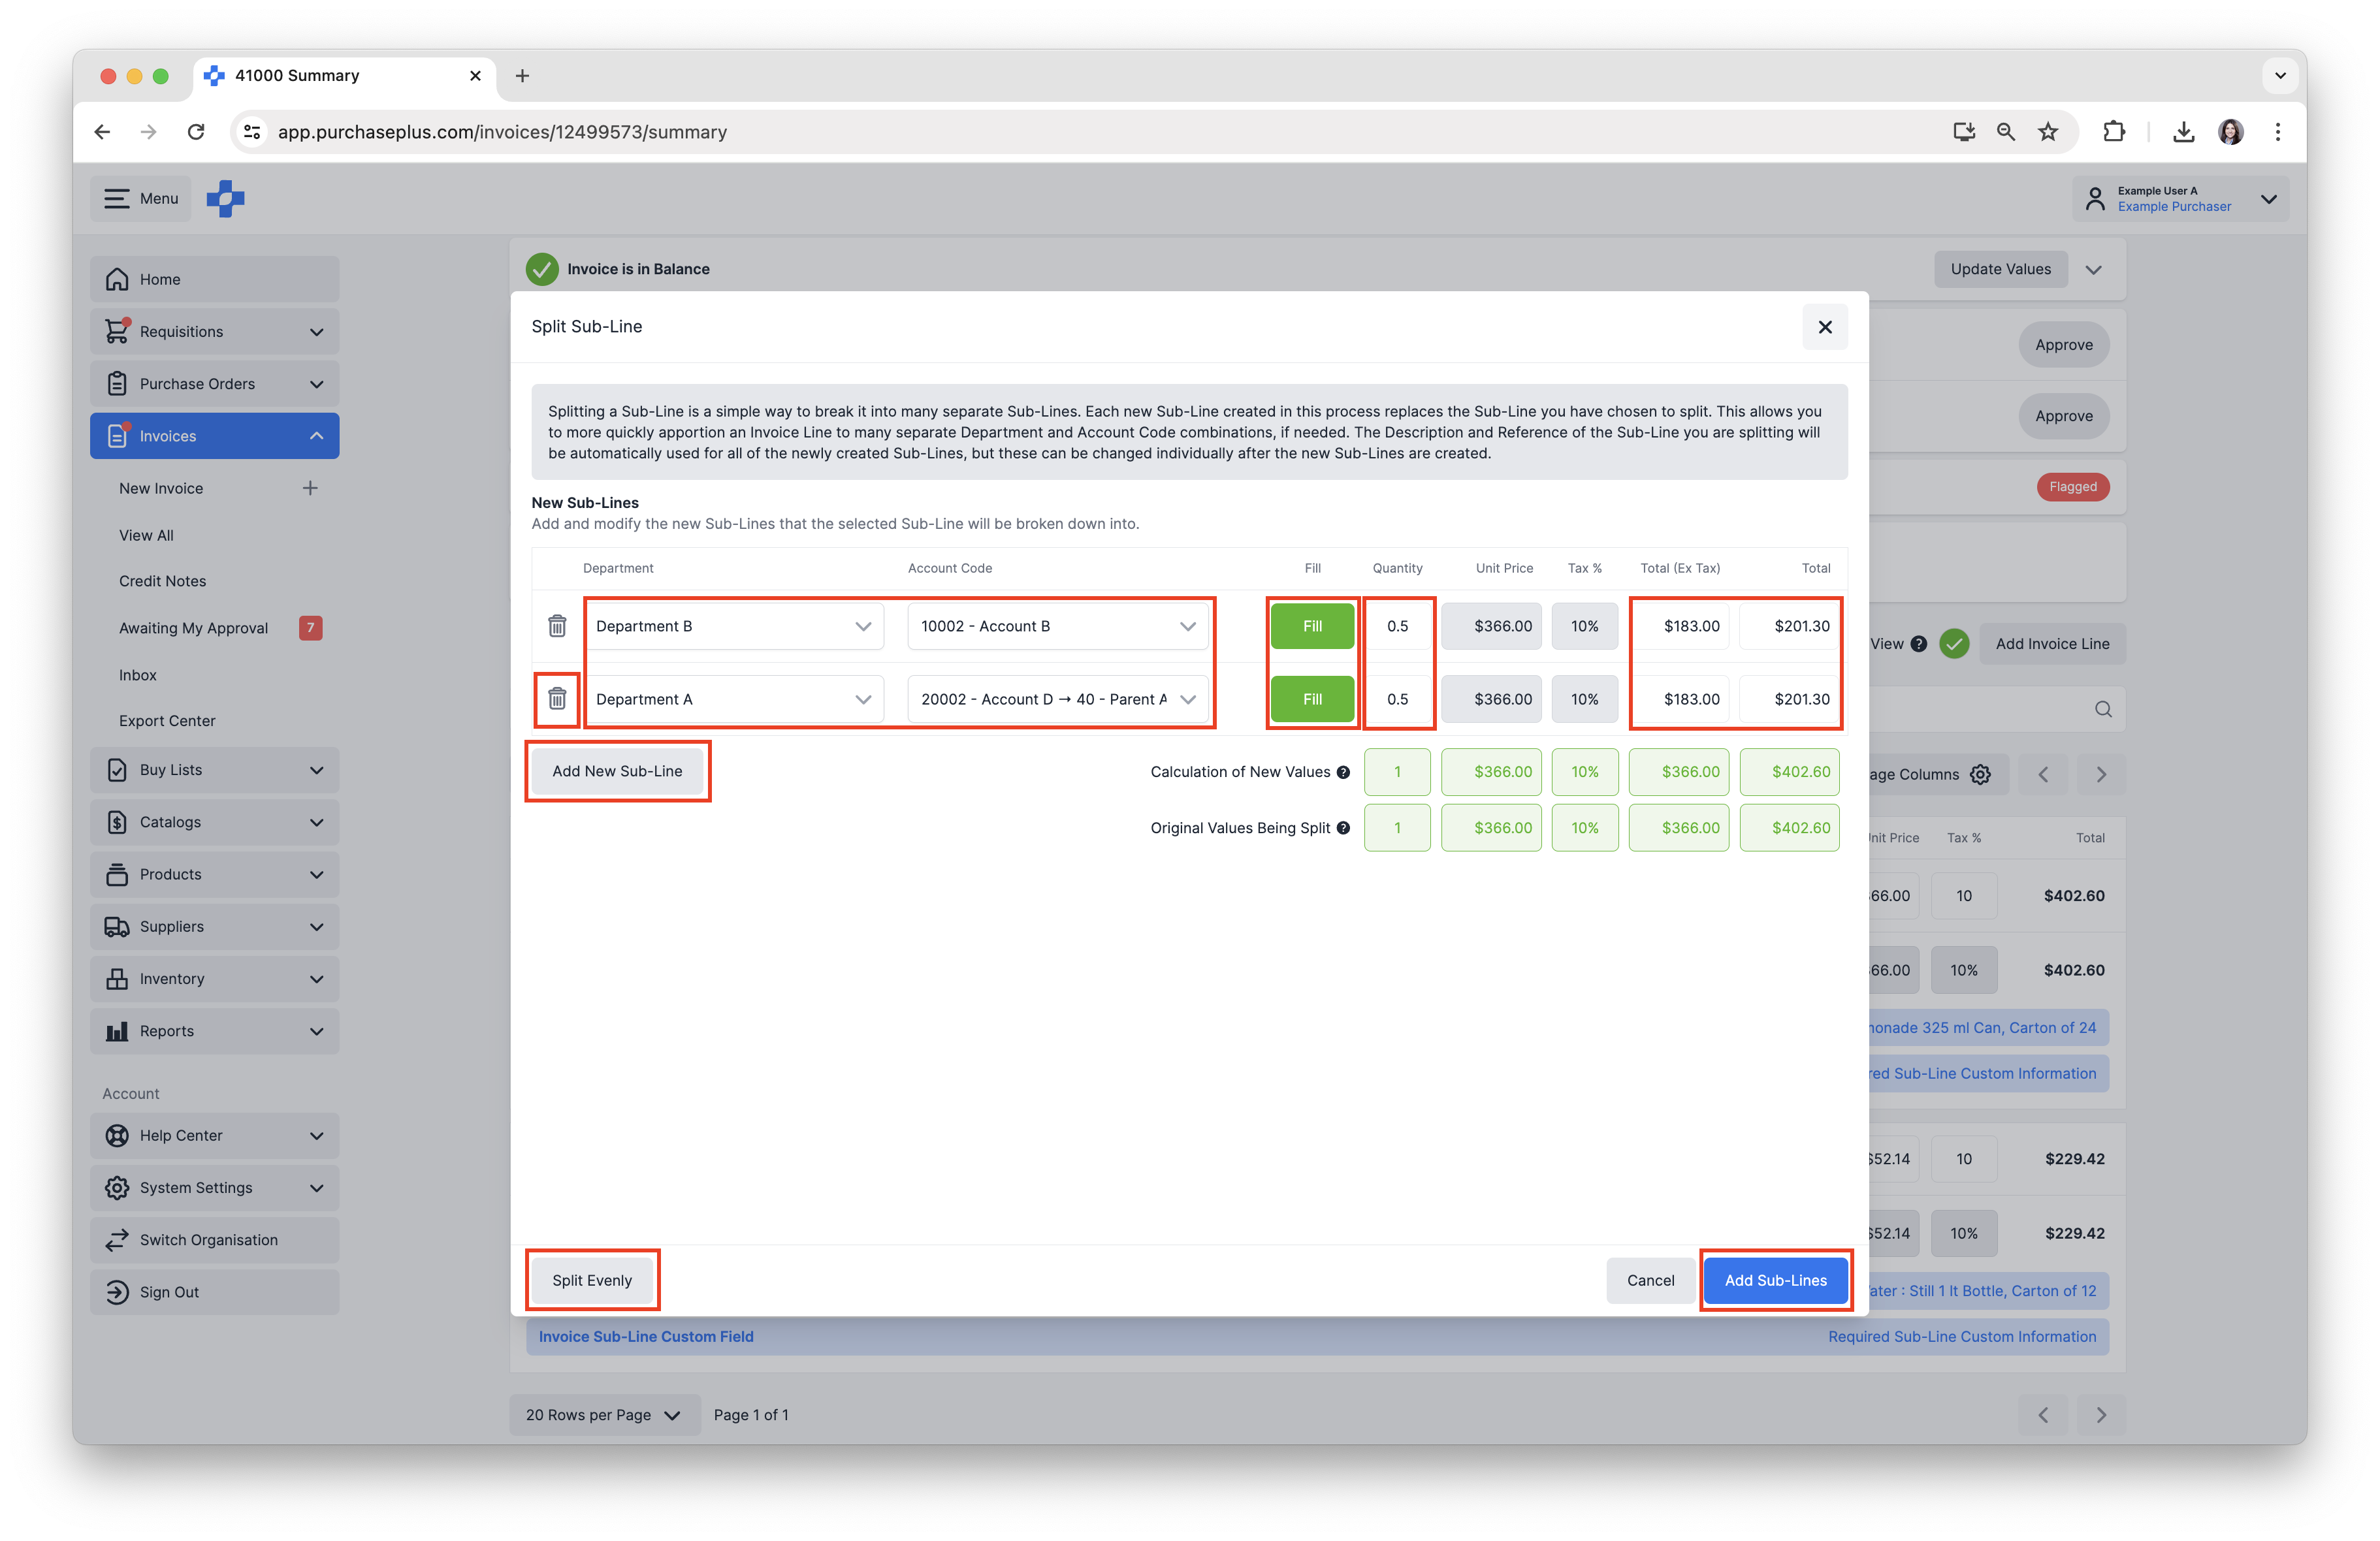
Splitting a Sub-Line is a simple way to break it into many separate Sub-Lines. Each new Sub-Line created in this process replaces the Sub-Line you have chosen to split. This allows you to more quickly apportion an Invoice Line to many separate Department and Account Code combinations, if needed. The Description and Reference of the Sub-Line you are splitting will be automatically used for all the newly created Sub-Lines, but these can be changed individually after the new Sub-Lines are created.
1. Click [More] → [Split Sub-Line], on the Invoice Sub-Line you wish to split.
 2. You are able to undertake the following actions:
a. Select the [Department] and [Account Code] you wish to assign.
b. Enter a [Quantity] to split by Quantity.
c. Enter [Total (Ex Tax)] or [Total] to split by Value.
d. Click [Fill] to auto-calculate remaining Quantity & Value.
e. Click [Split Evenly] to auto-calculate an even split to all Sub-Lines.
f. [Add New Sub-Line] to add another Sub-Line.
g. Click the Trash icon to [Remove a Sub-Line].
h. Click [Add Sub-Lines] to action the splitting and replace the original Sub-Line with the newly created Sub-Lines is has been split into.
Add New Sub-Lines to Split Expenses
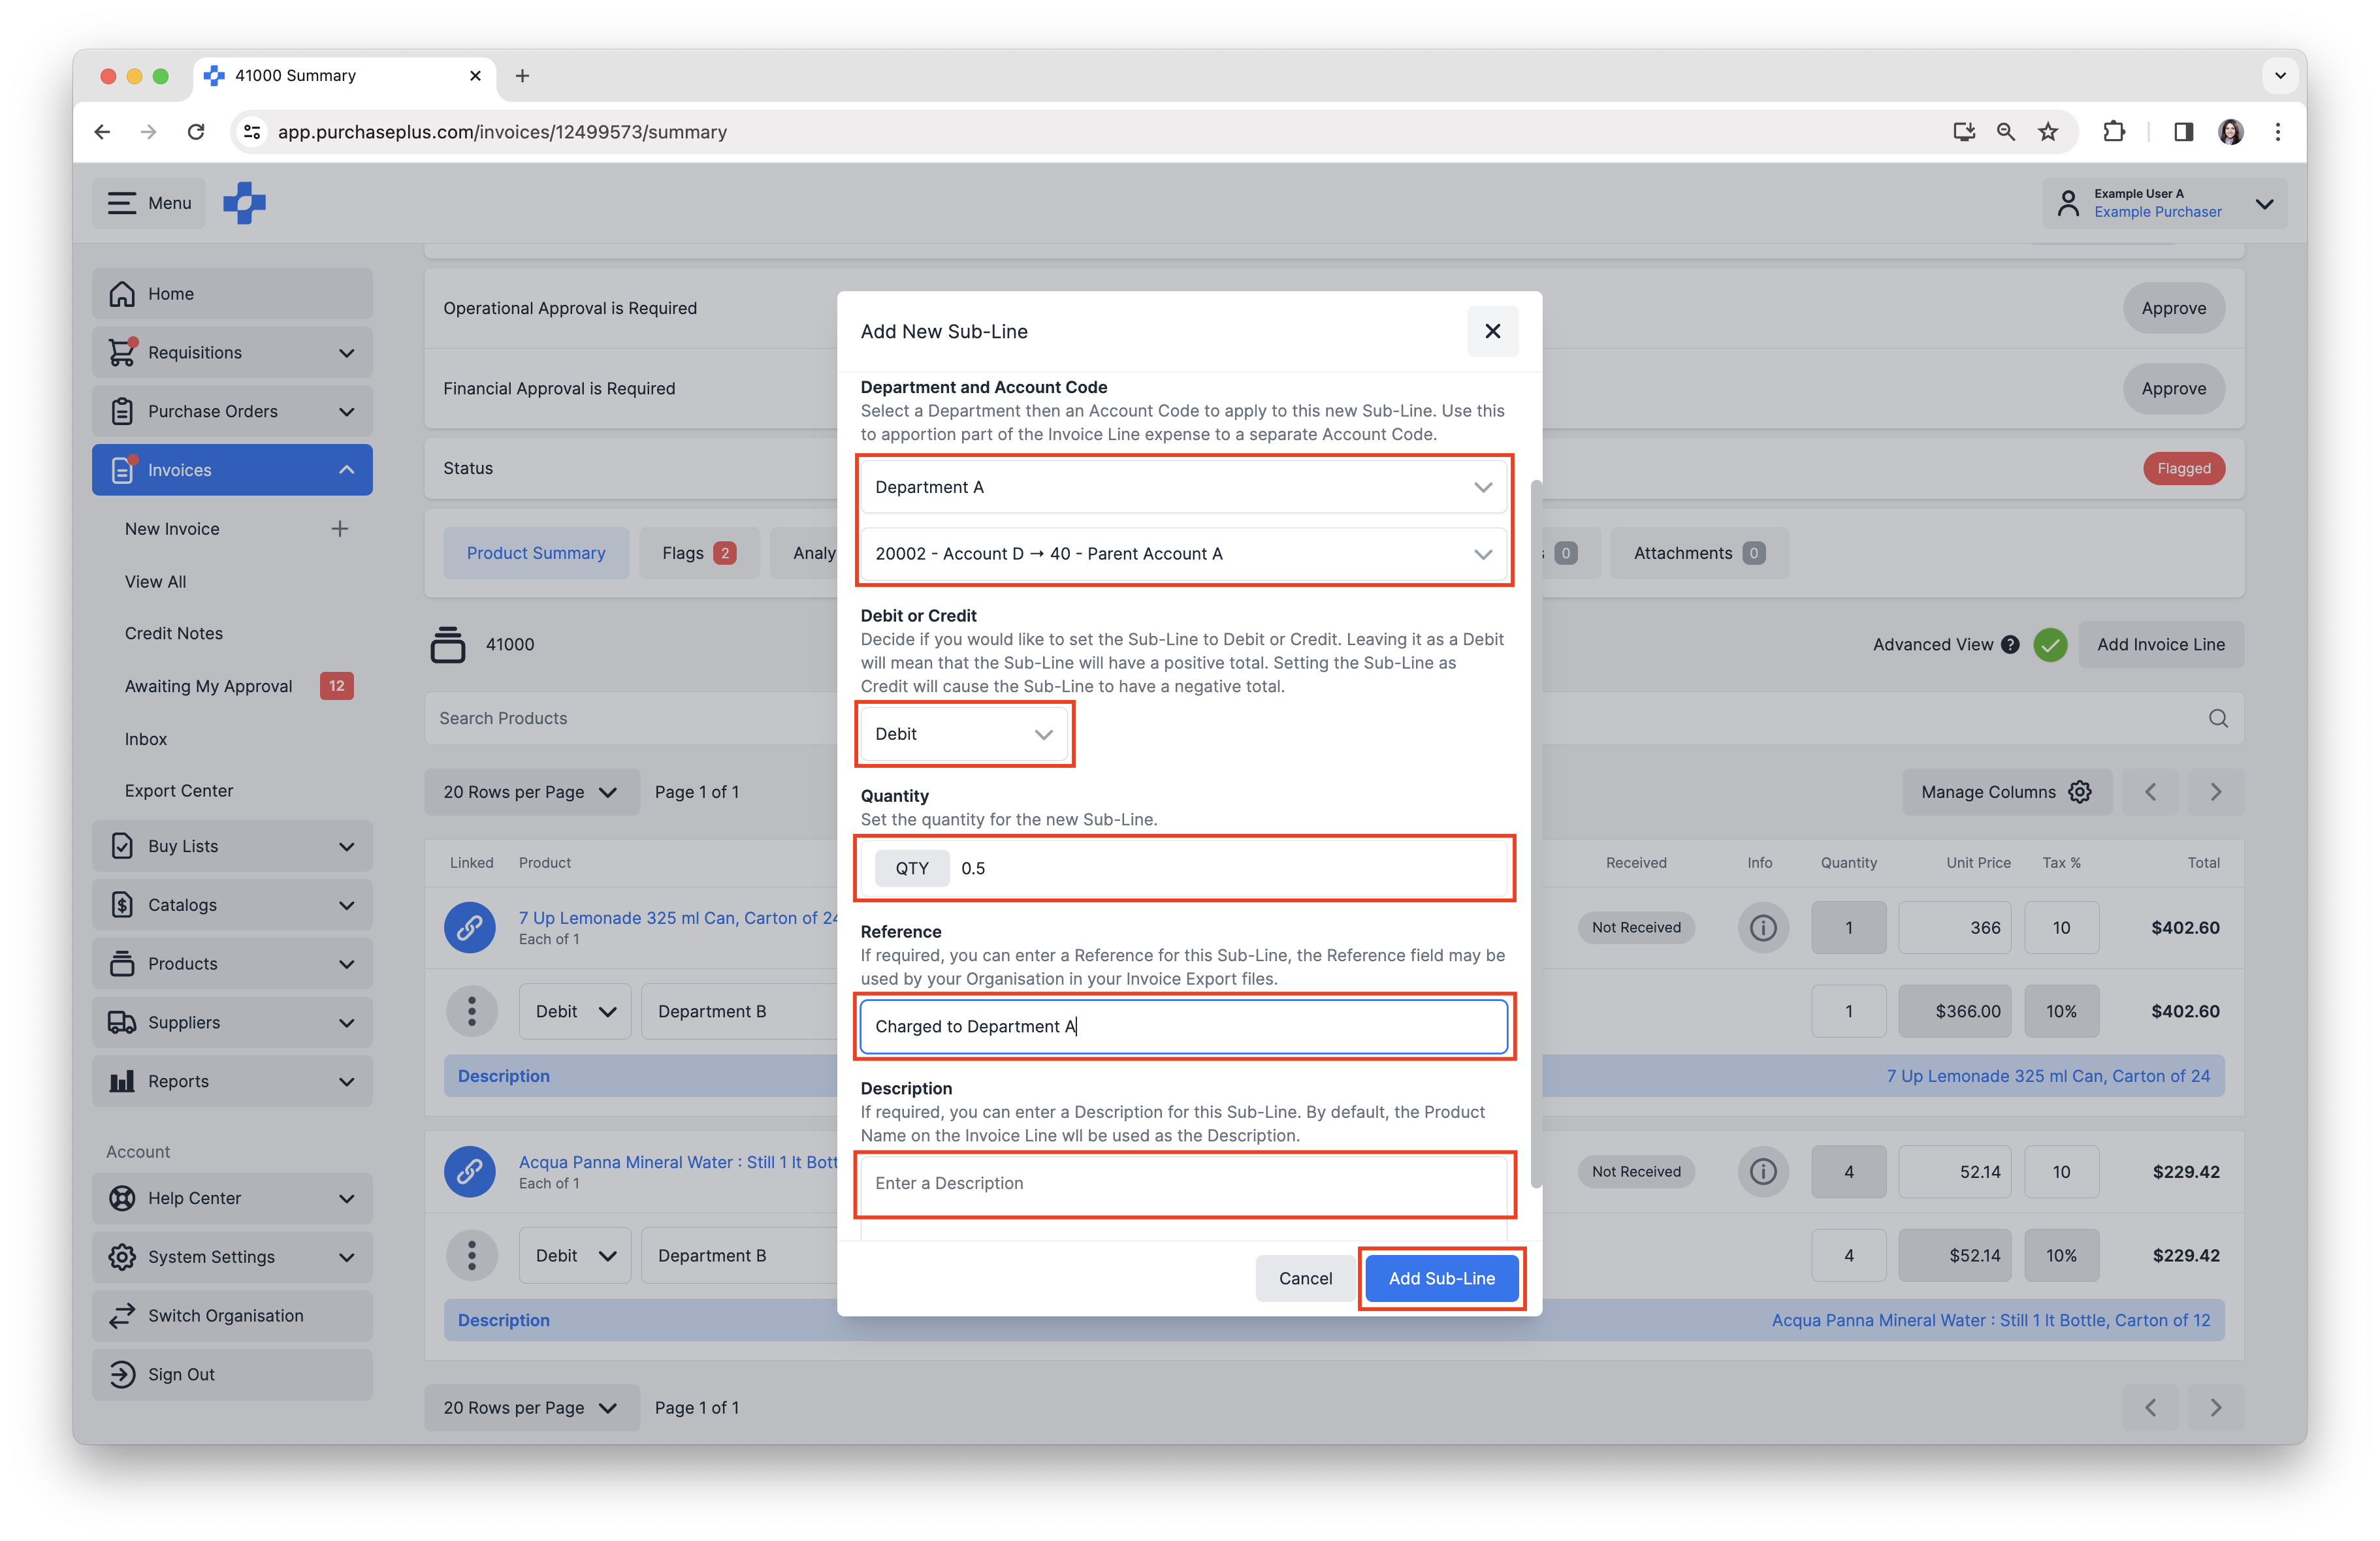
An addition to the Split Sub-Line feature discussed above, you also have the option to add a new Sub-Line to an Invoice Line, in order to apportion some of the Invoice Line to a separate Department and Account Code, if needed.
1. Click [More] → [Create New Sub-Line].
 2. Complete fields as required, then click [Add Sub-Line].
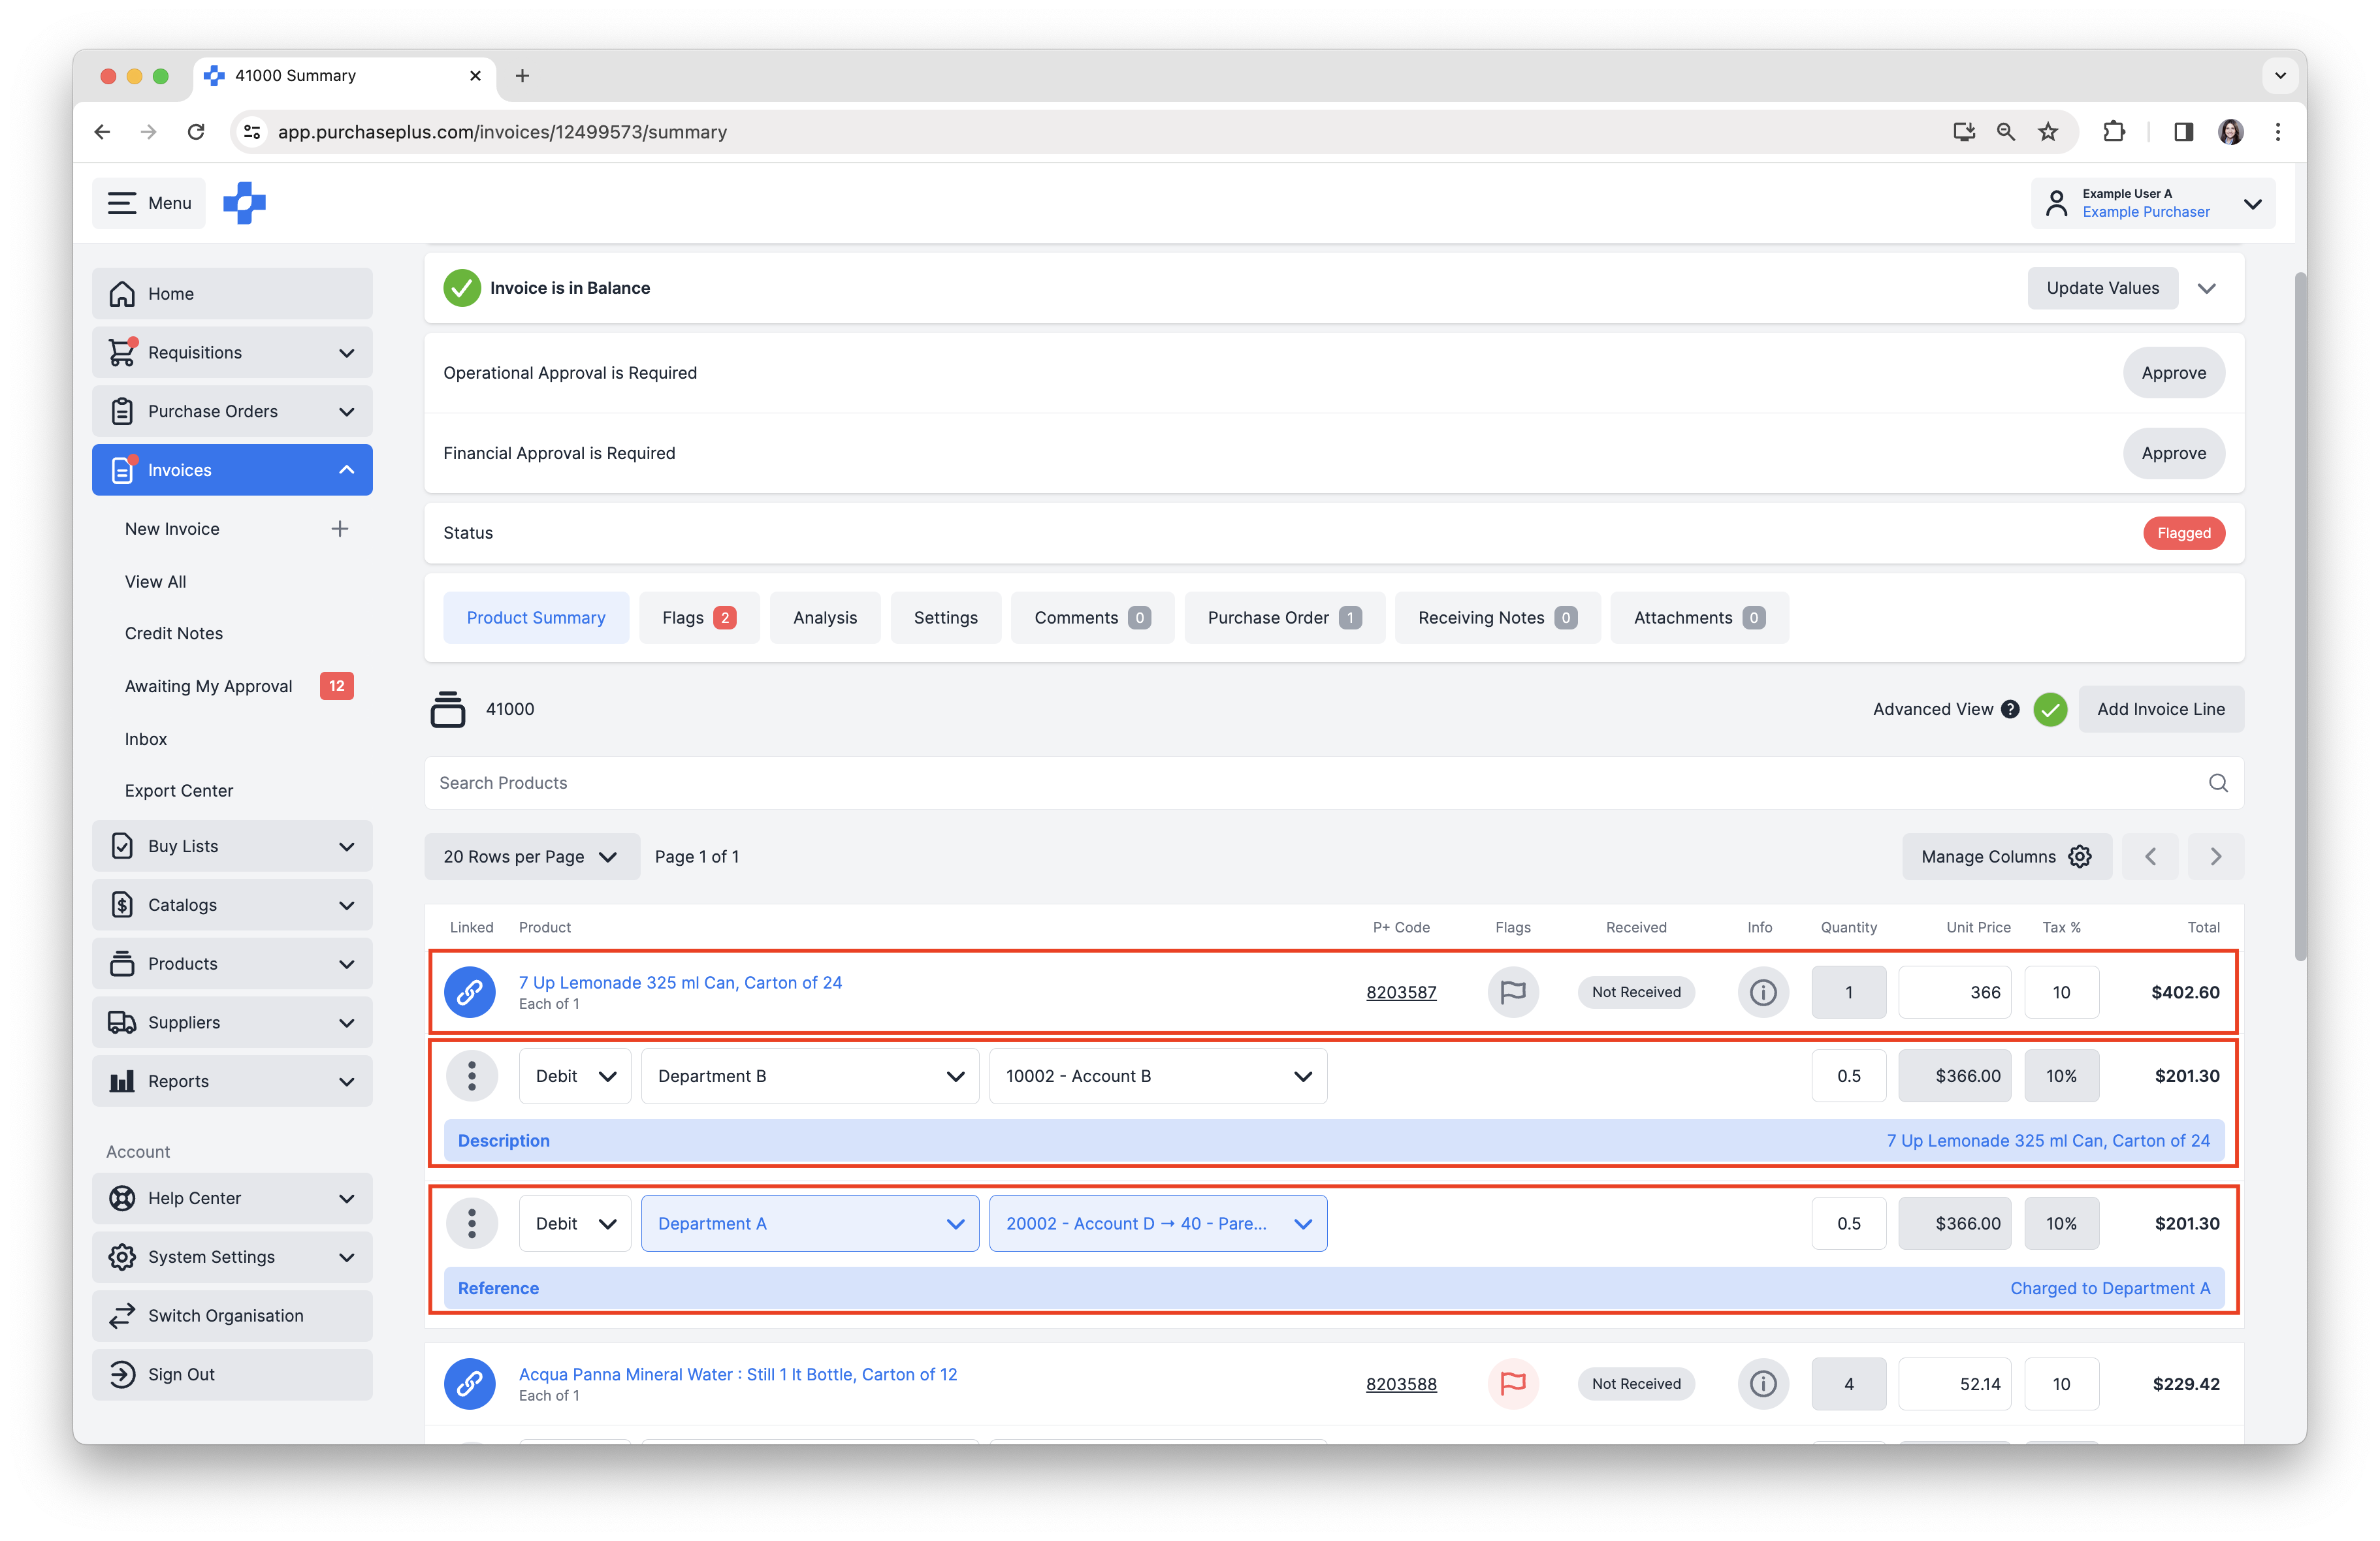
 3. The Quantity of the newly added Sub-Line will now be added to the overall [Quantity] of the Invoice Line, and this can now be rectified to restore the Invoice Line to the original Quantity prior to adding the new Sub-Line. For this reason, the [Split Sub-Line] feature is a more user-friendly method of splitting an Individual Sub-Line into many separate parts.
Complete Sub-Line Custom Fields
Your Organization might use Sub-Line Custom Fields to add additional information about each Sub-Line, based on the requirements of your external accounting platform. Please speak with an Administrator at your Organization about your specific Sub-Line Custom Field requirements, or contact our friendly customer support team for assistance.
If they are in use by your Organization, Sub-Line Custom Fields will be available in each Sub-Line within an Invoice or Credit Note, and allow users to enter data into each custom field.
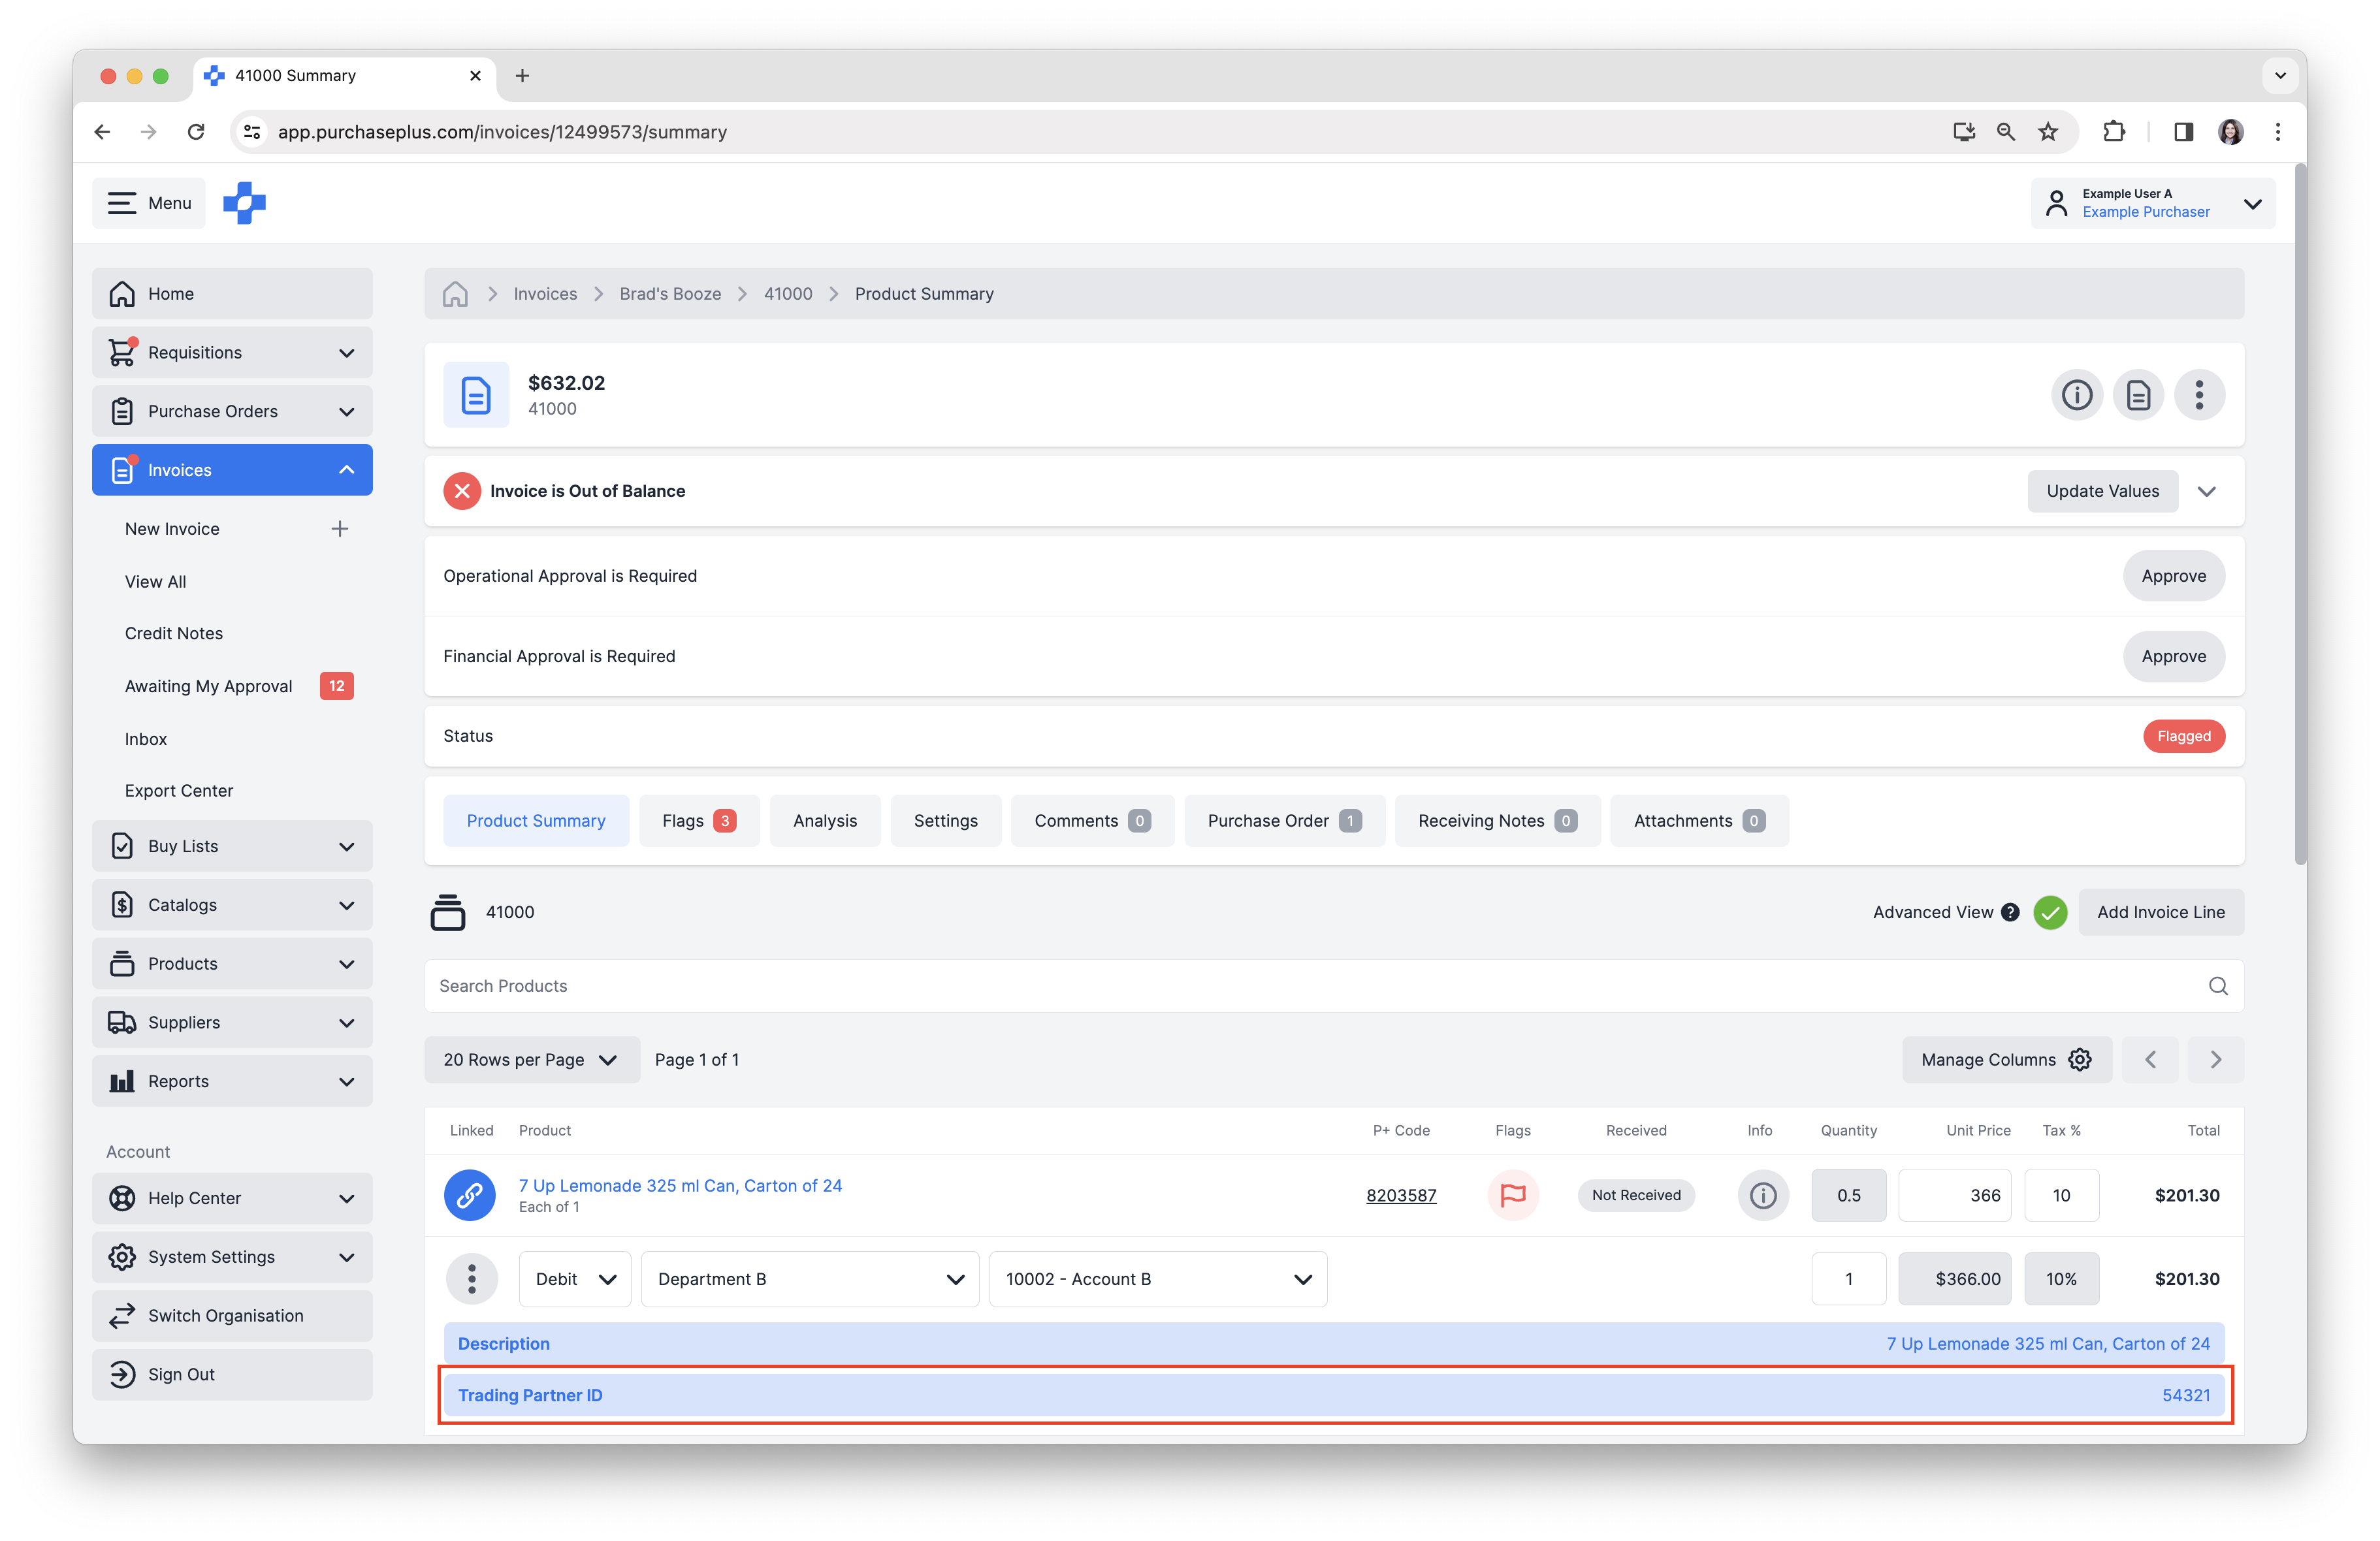
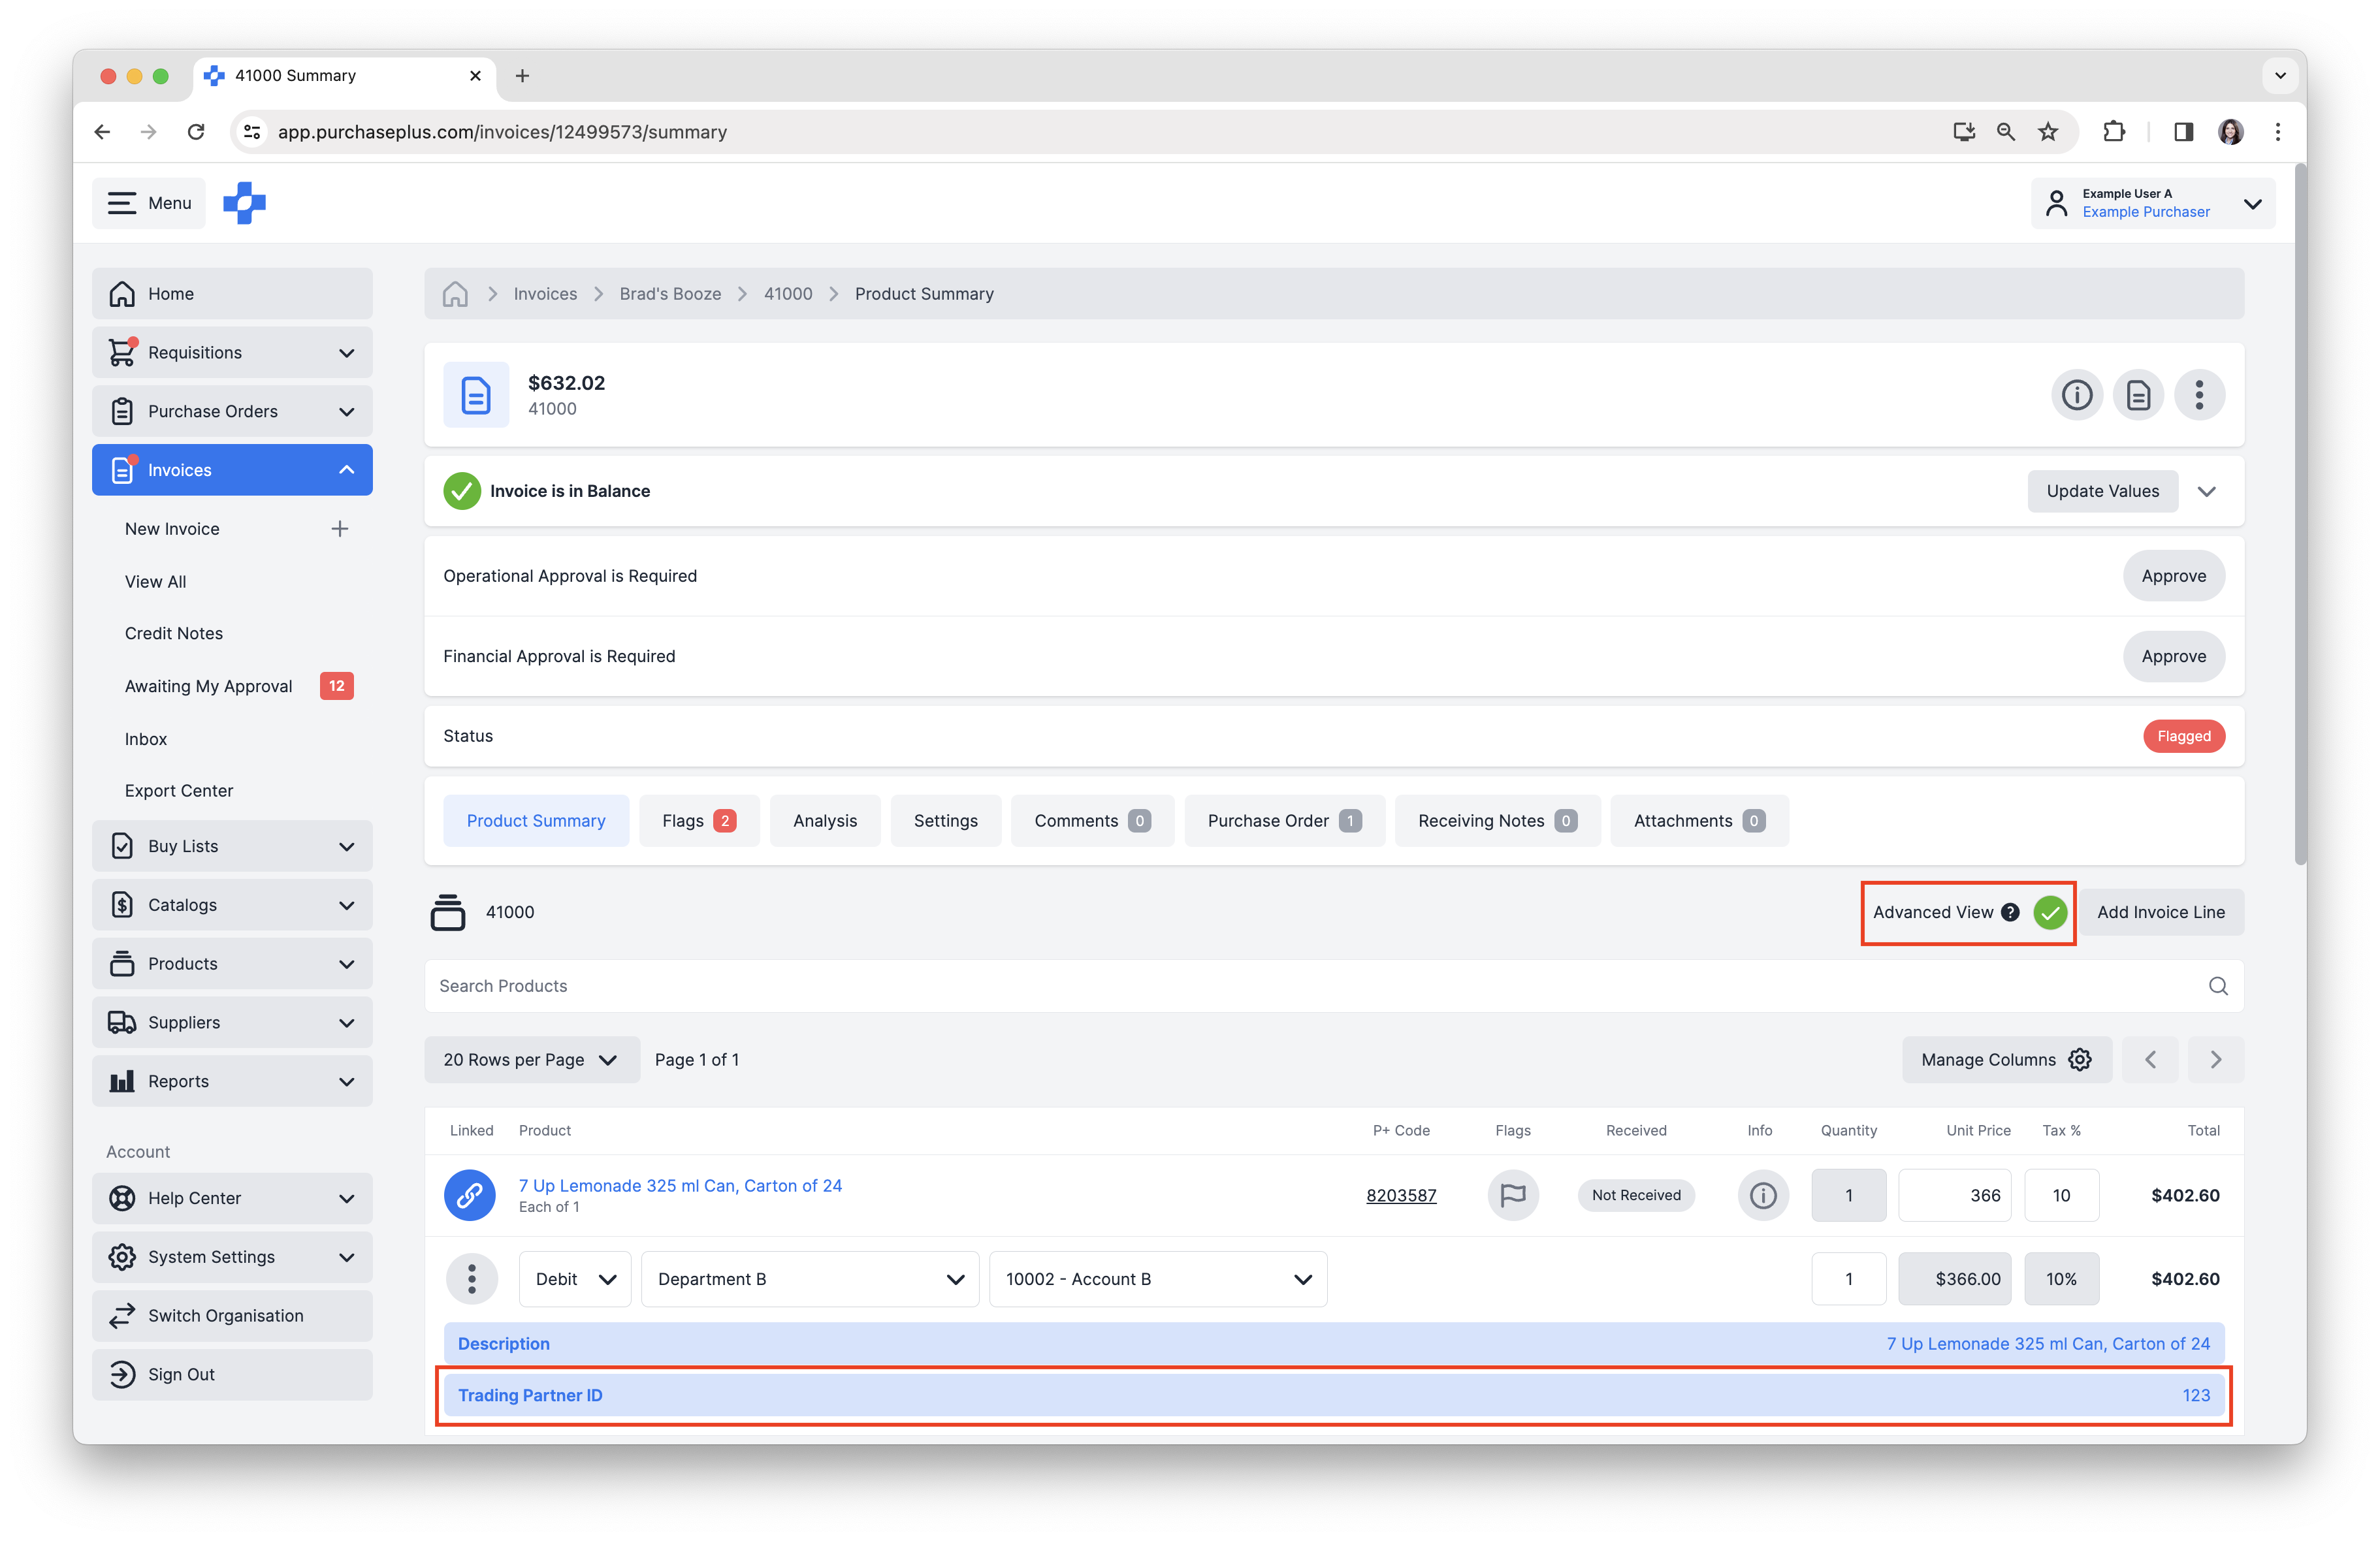
In the example below, we have a Sub-Line custom field named [Trading Partner ID].
1. Select [Advanced View], to view Invoice Sub-Lines.
2. Click on the [Trading Partner ID] Custom Field to update it.
 3. Enter the required information, then click [Save Changes].
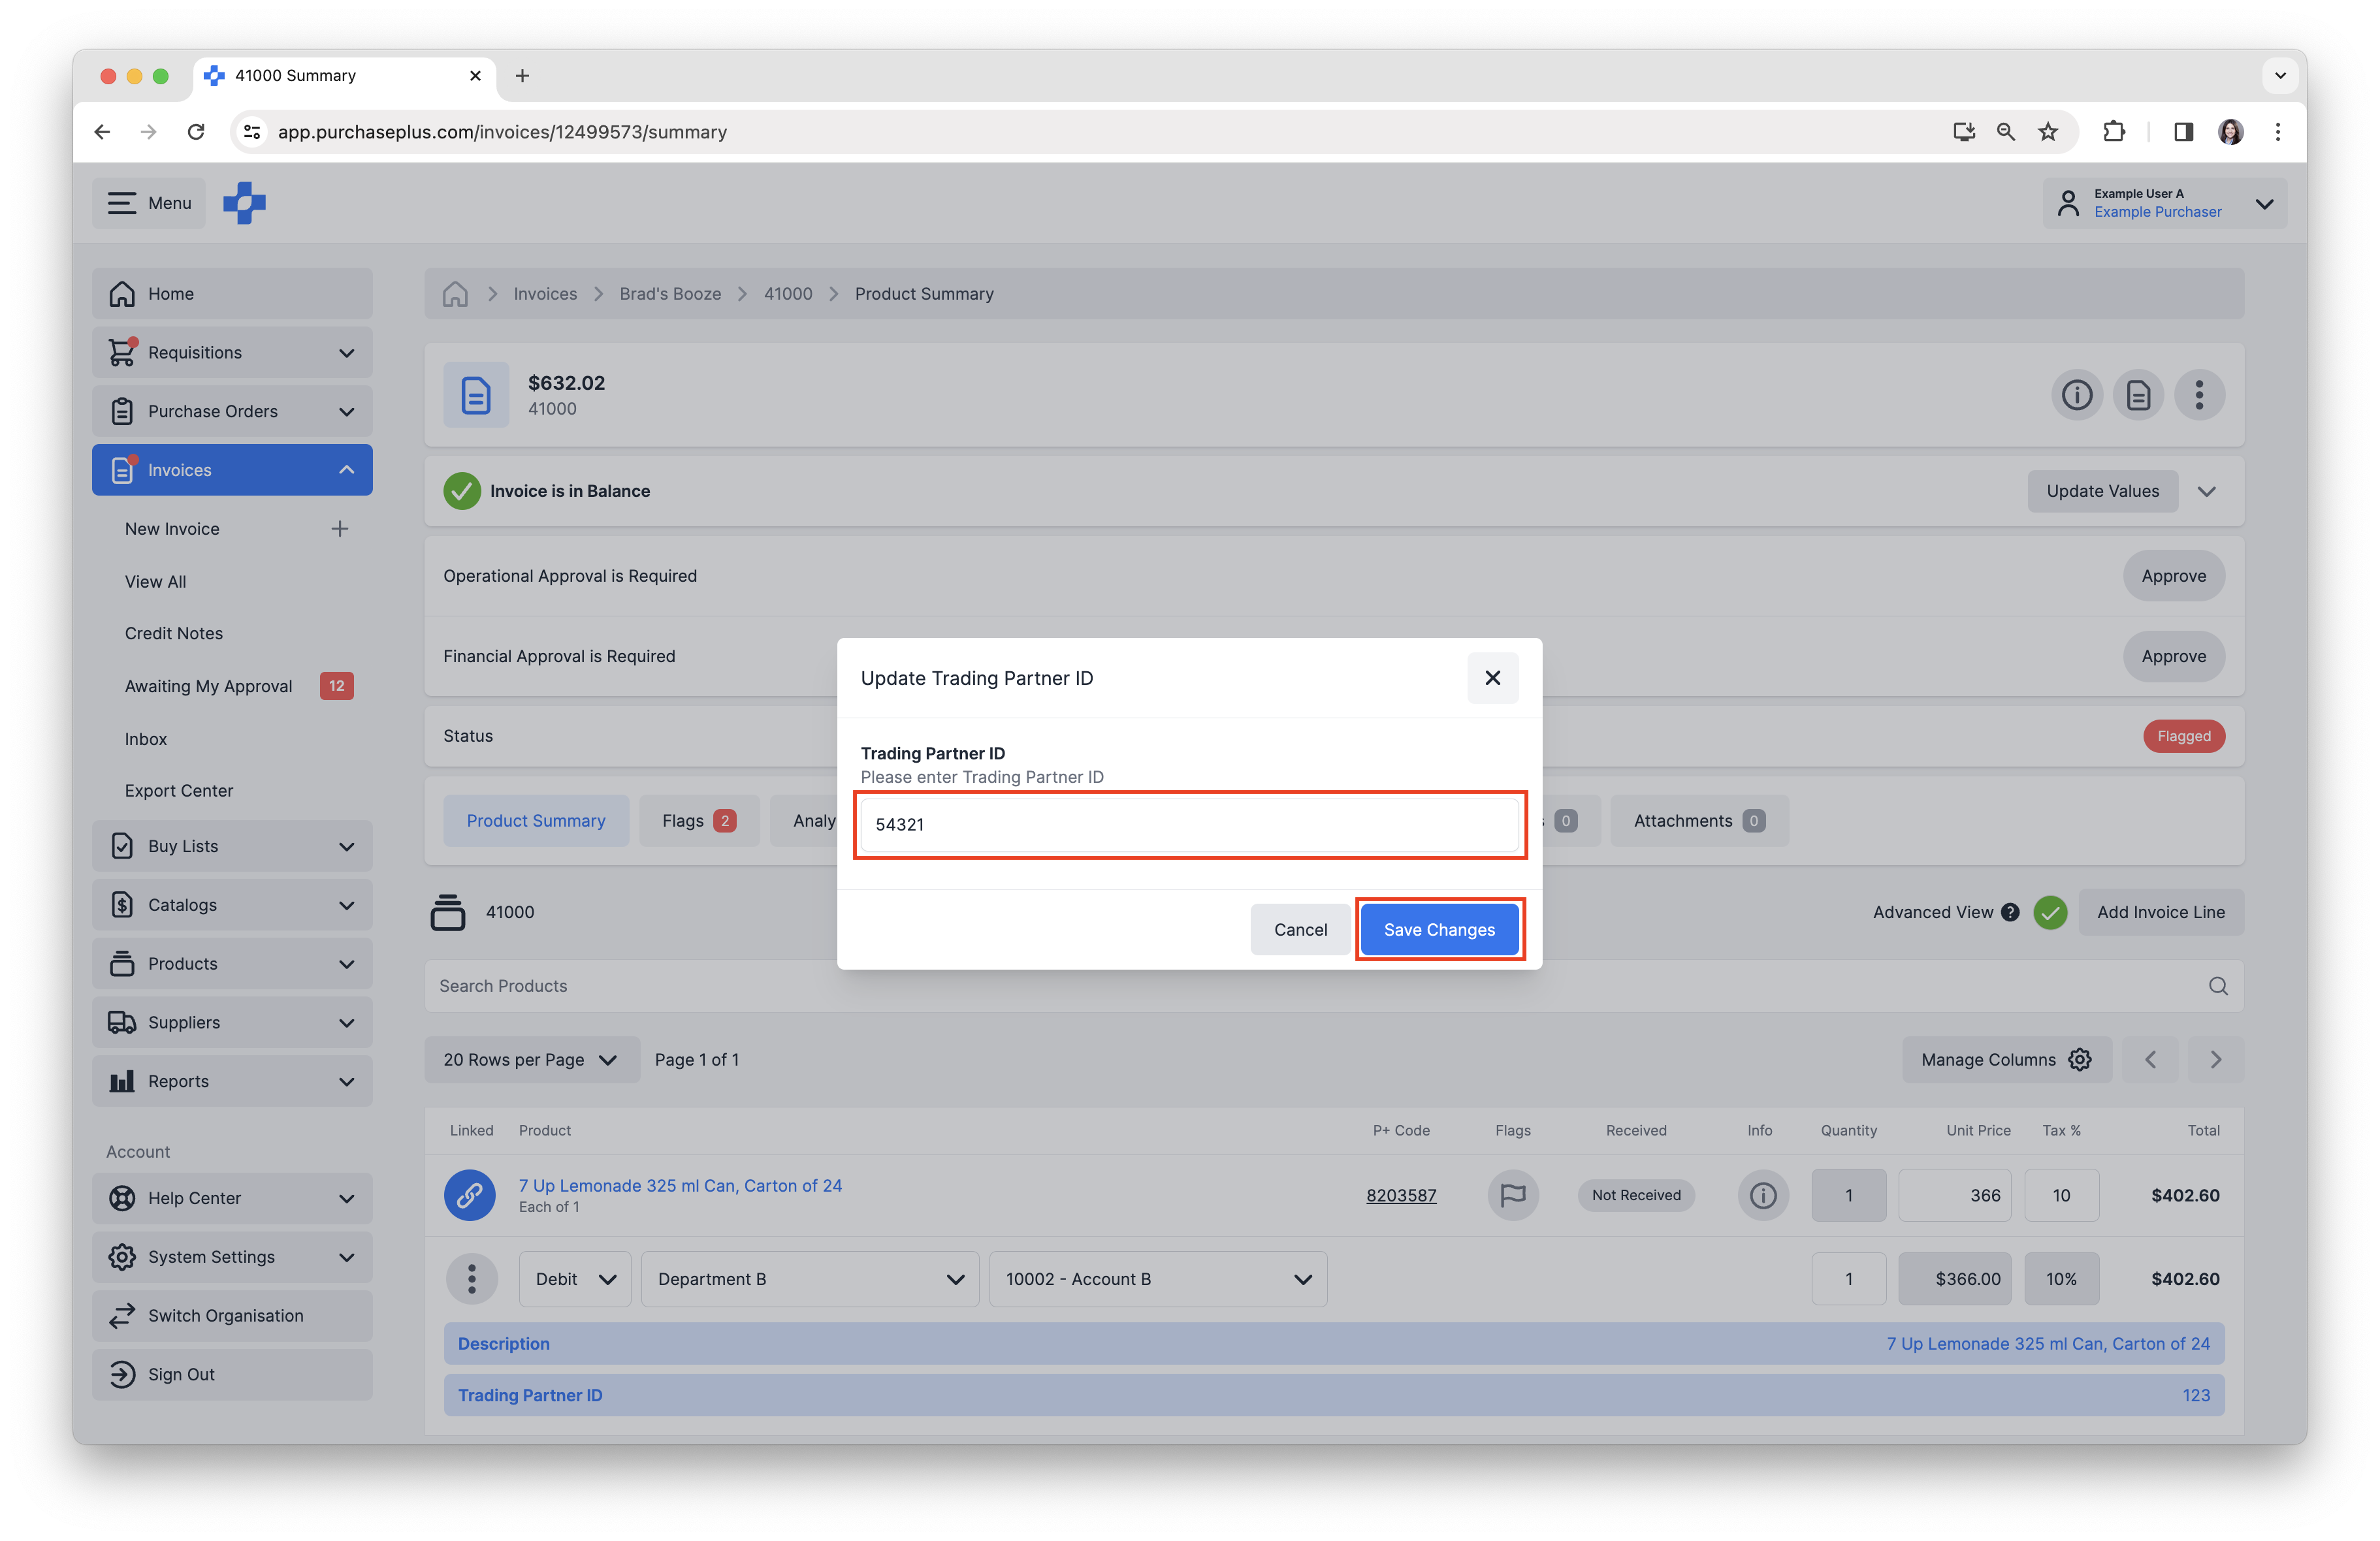
4. The Sub-Line Custom Field has now successfully updated.