Learn more about how PurchasePlus can use the data from your external Point of Sale System to automatically manage Inventory Stock Levels and more.
- What is the Point of Sale Module?
- POS Items
- POS Outlets
- Batch Sales
- POS Permissions
- Advanced: How New POS differs from Legacy POS
What is the Point of Sale Module?
- Manually,
- Uploaded as a CSV,
- via API Integration.
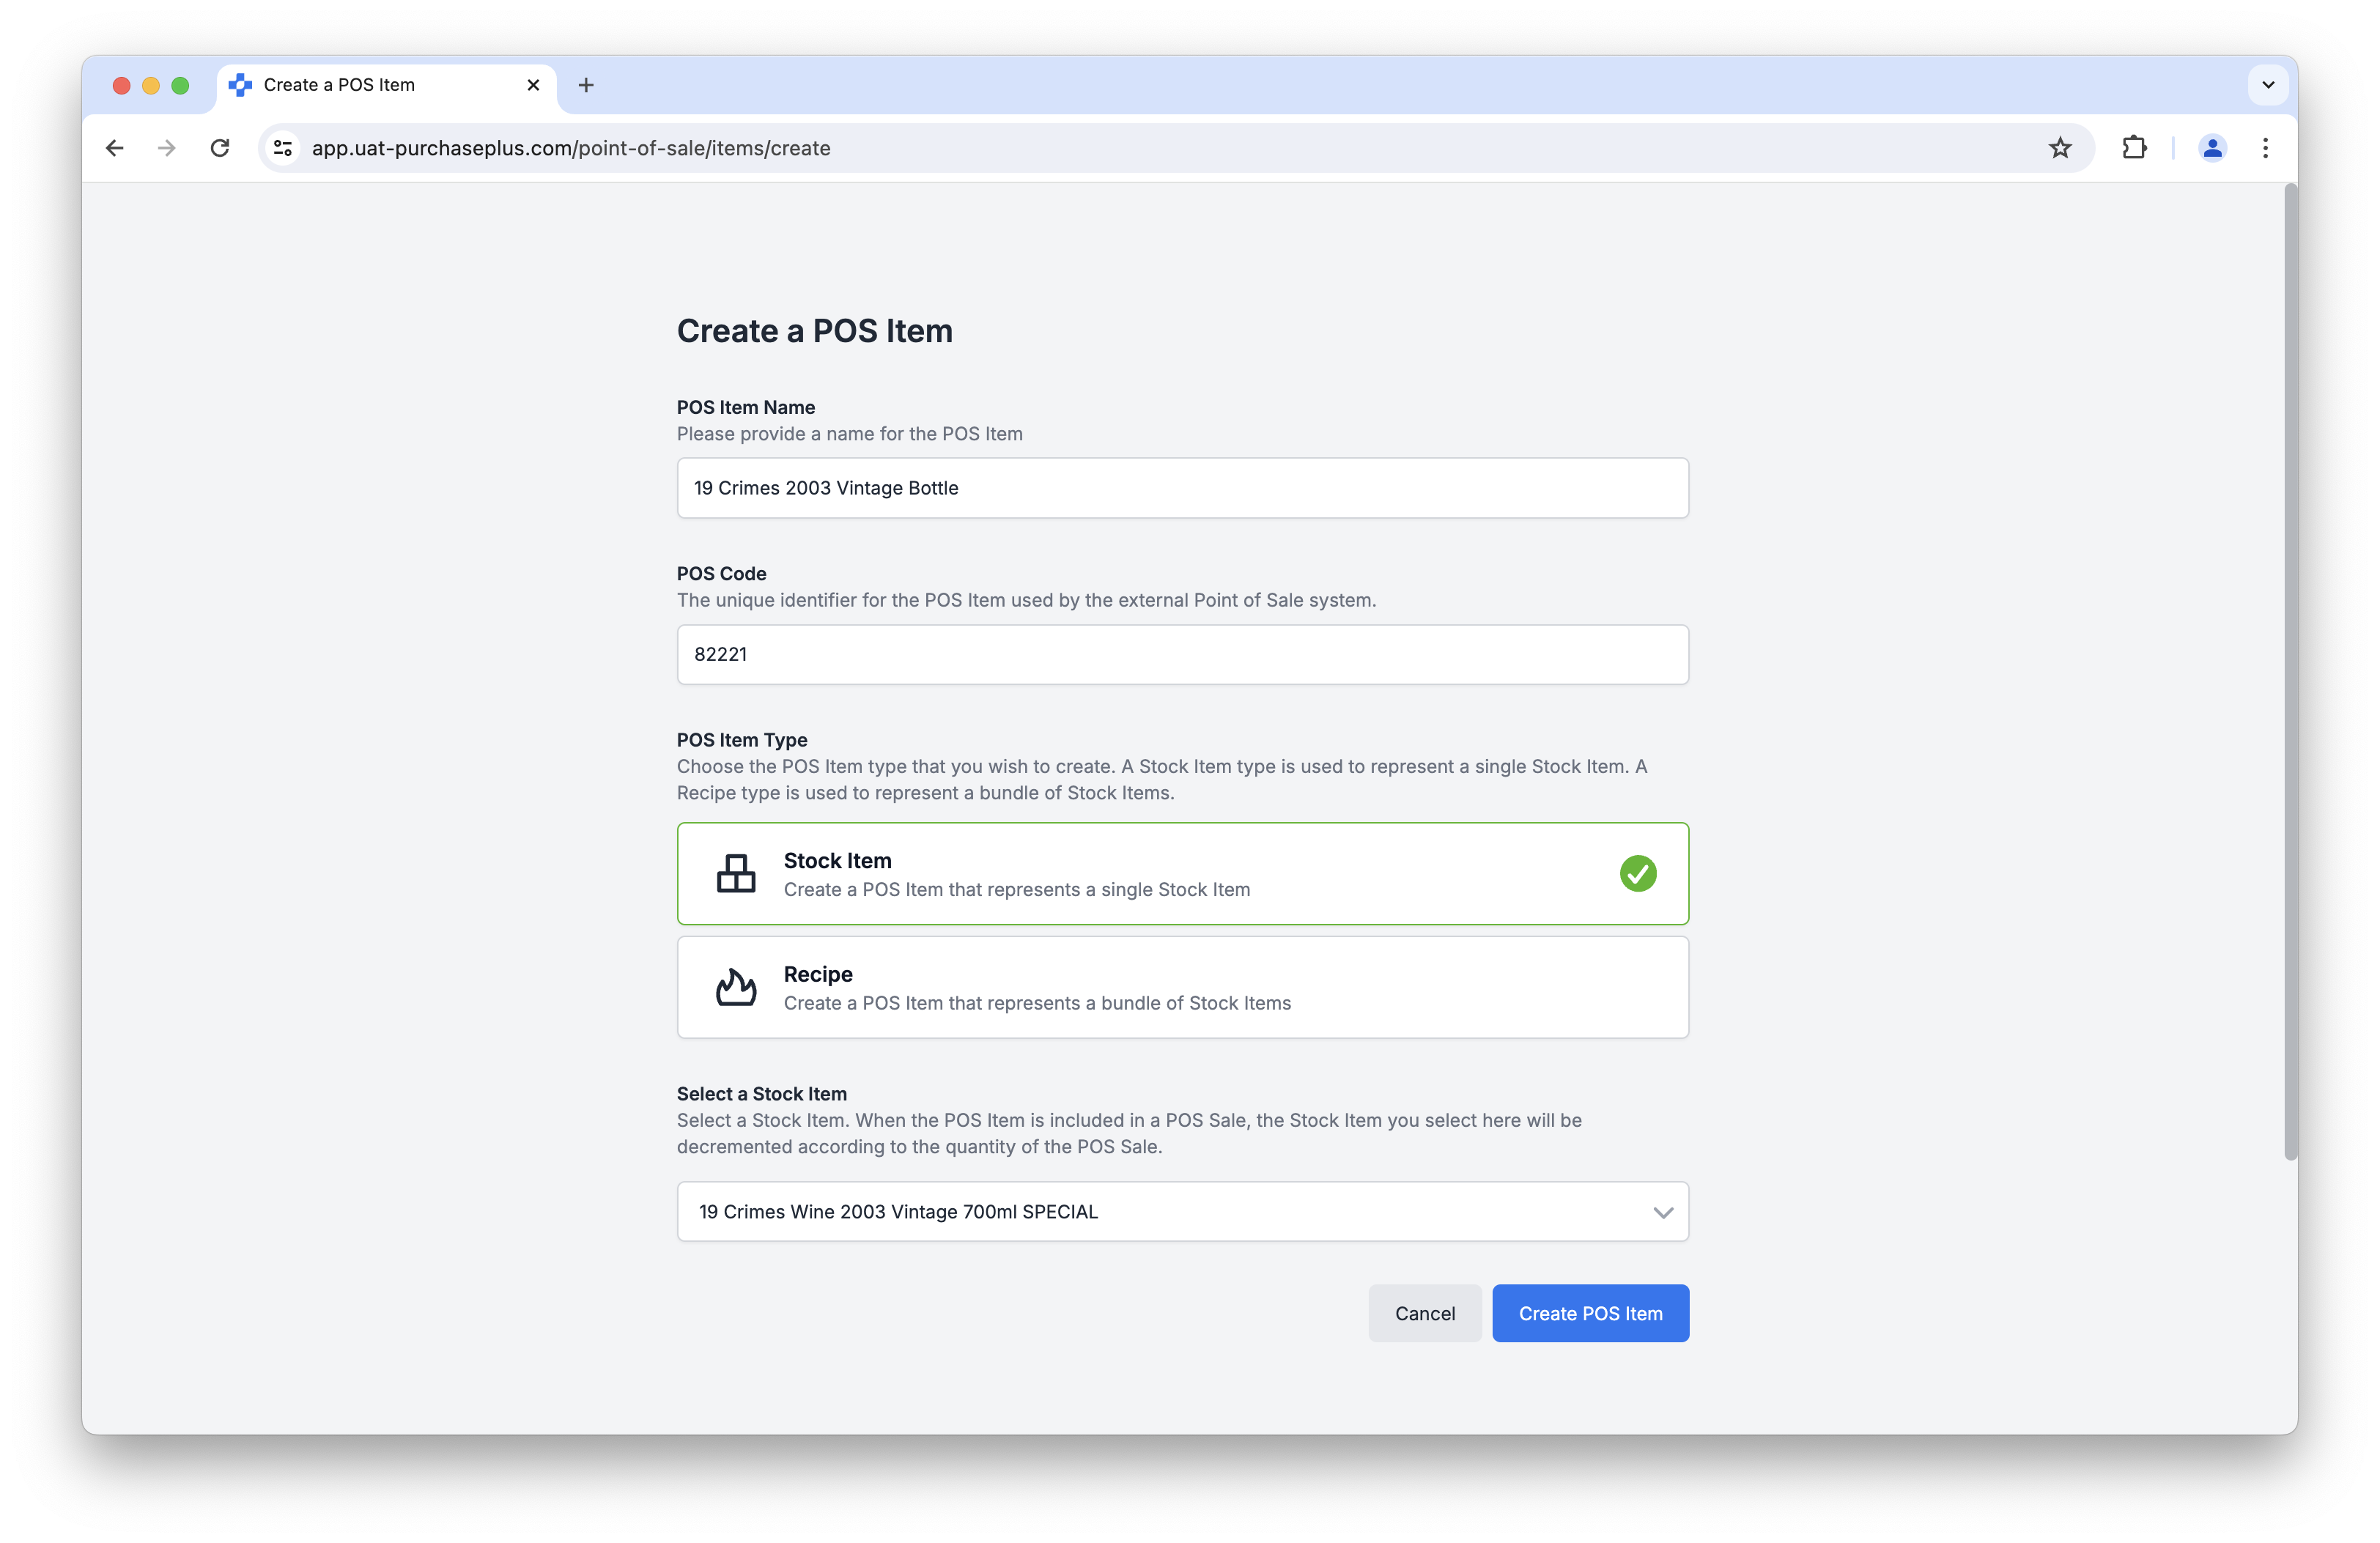
- A Name,
- A POS Code (the unique identifier that is used by your external POS System), and
- A reference to a Stock Item OR Recipe.
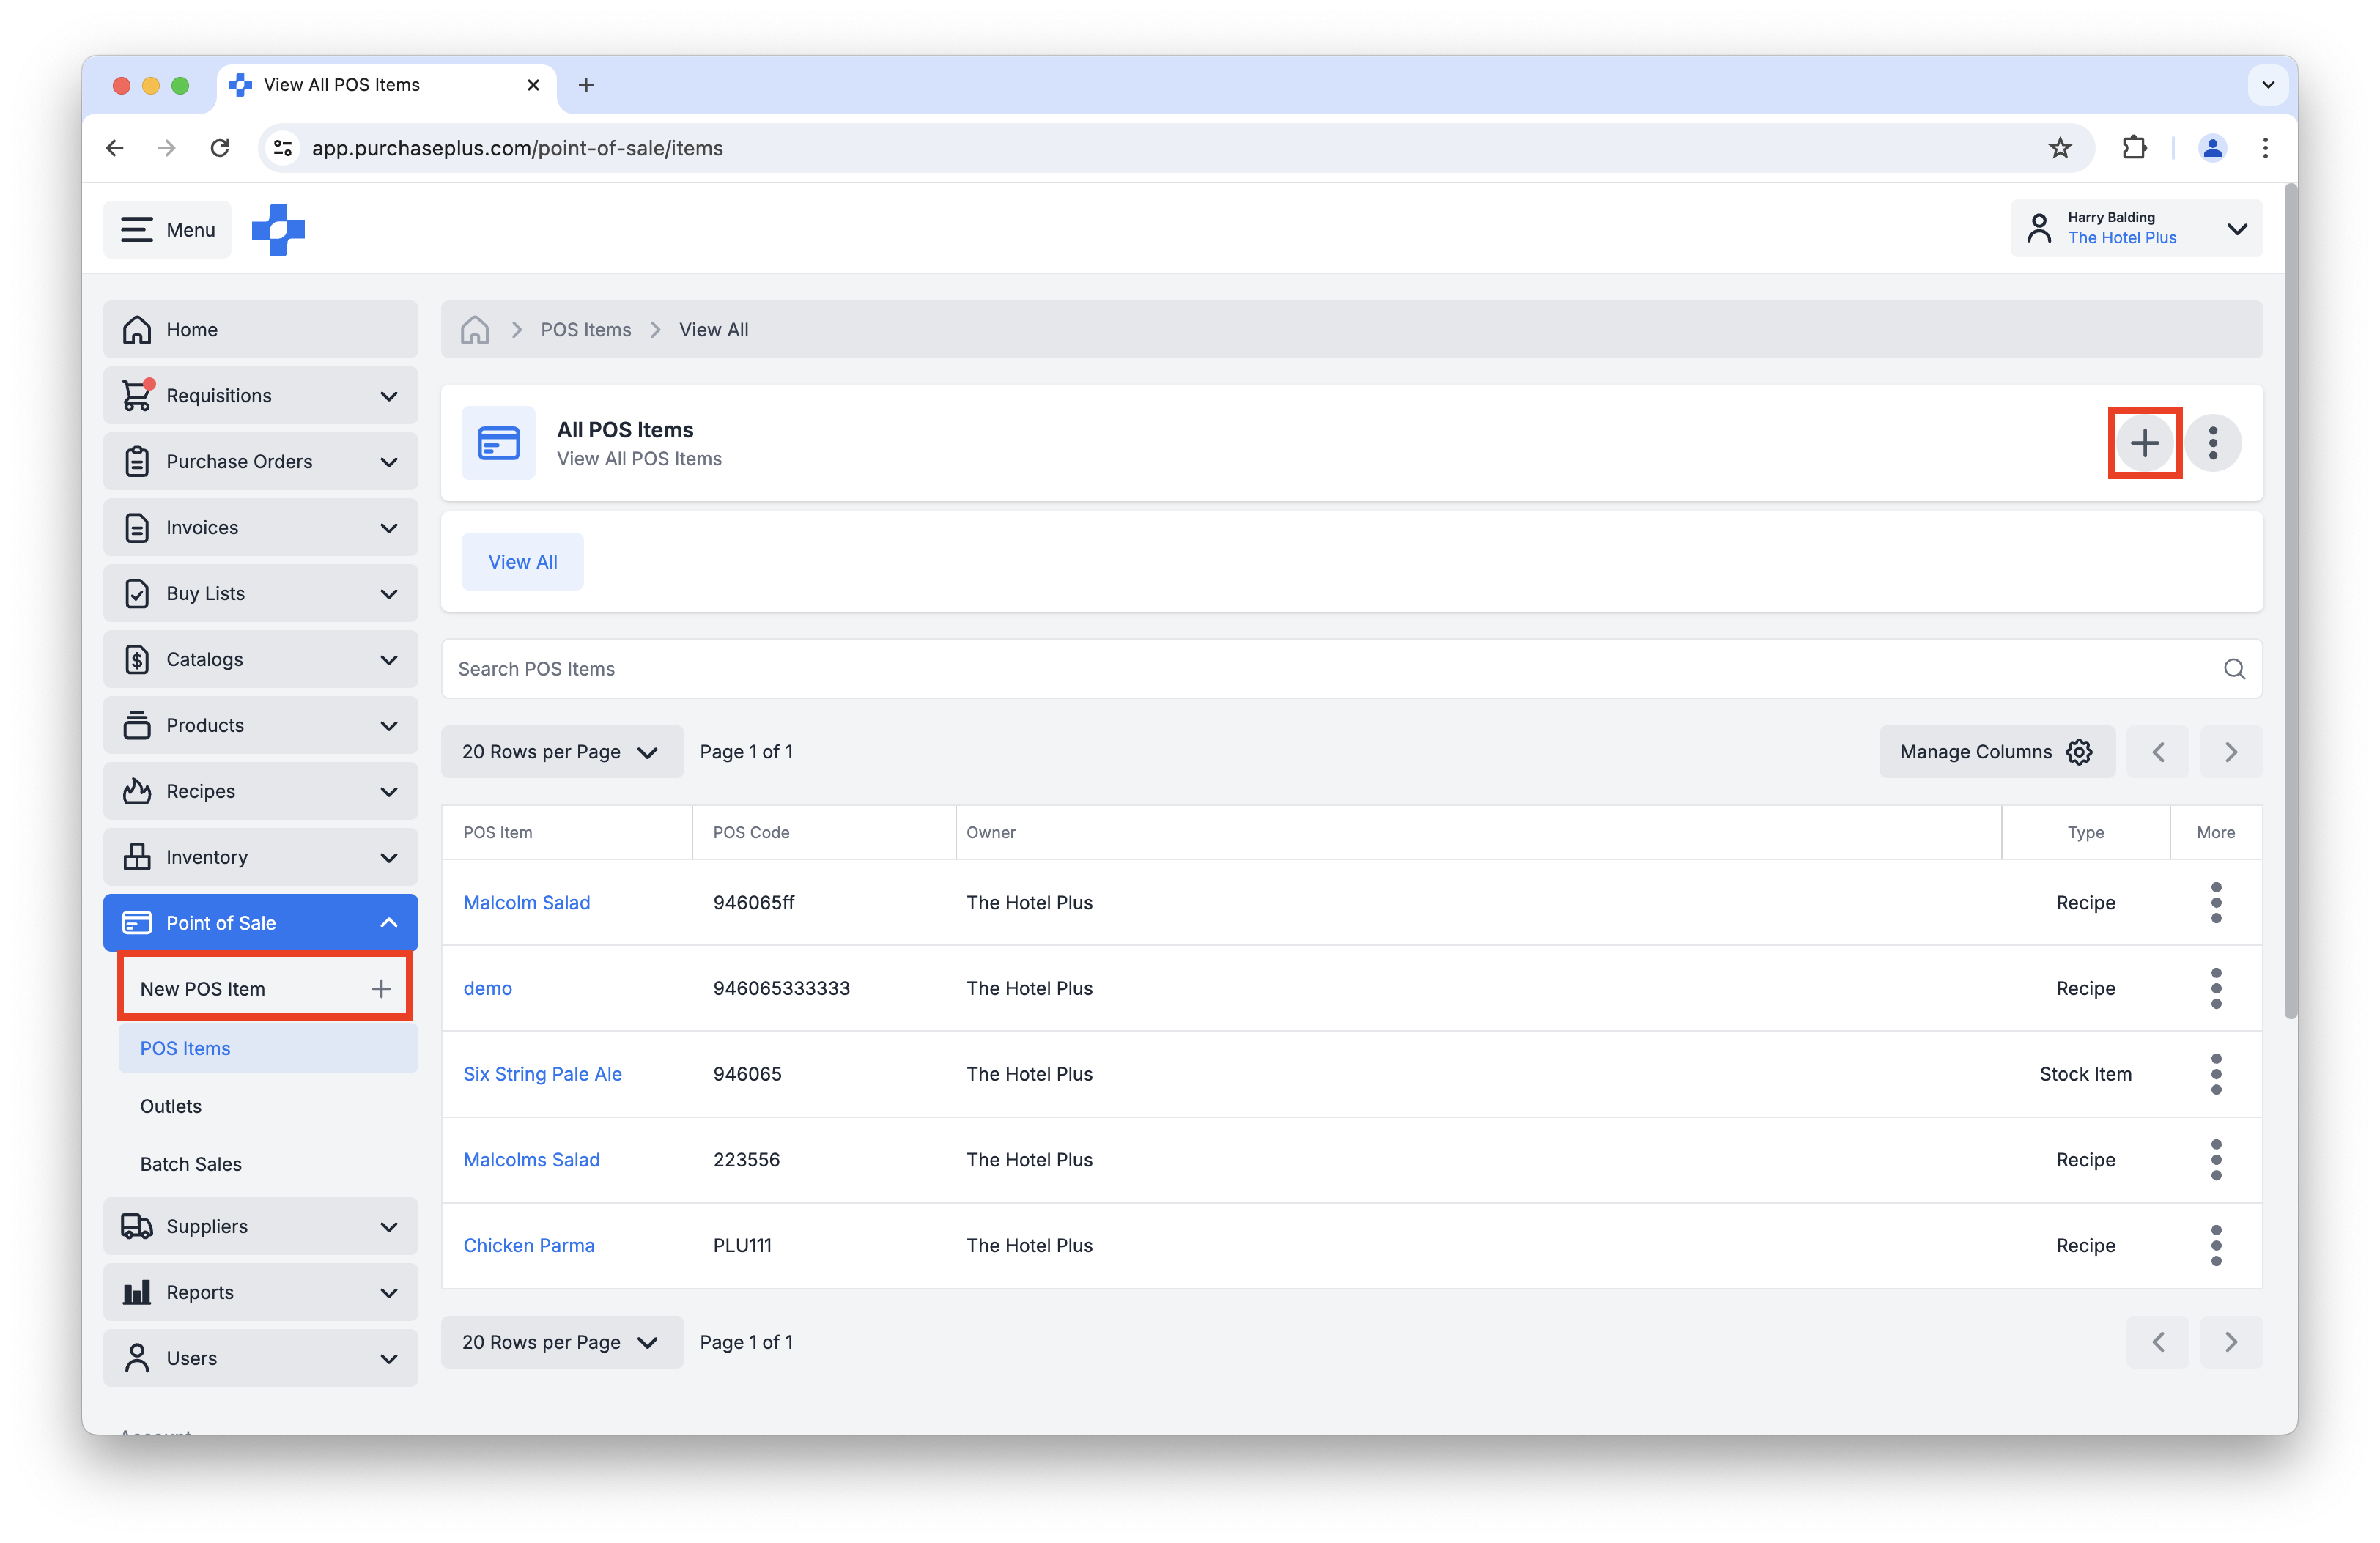
Creating POS Items
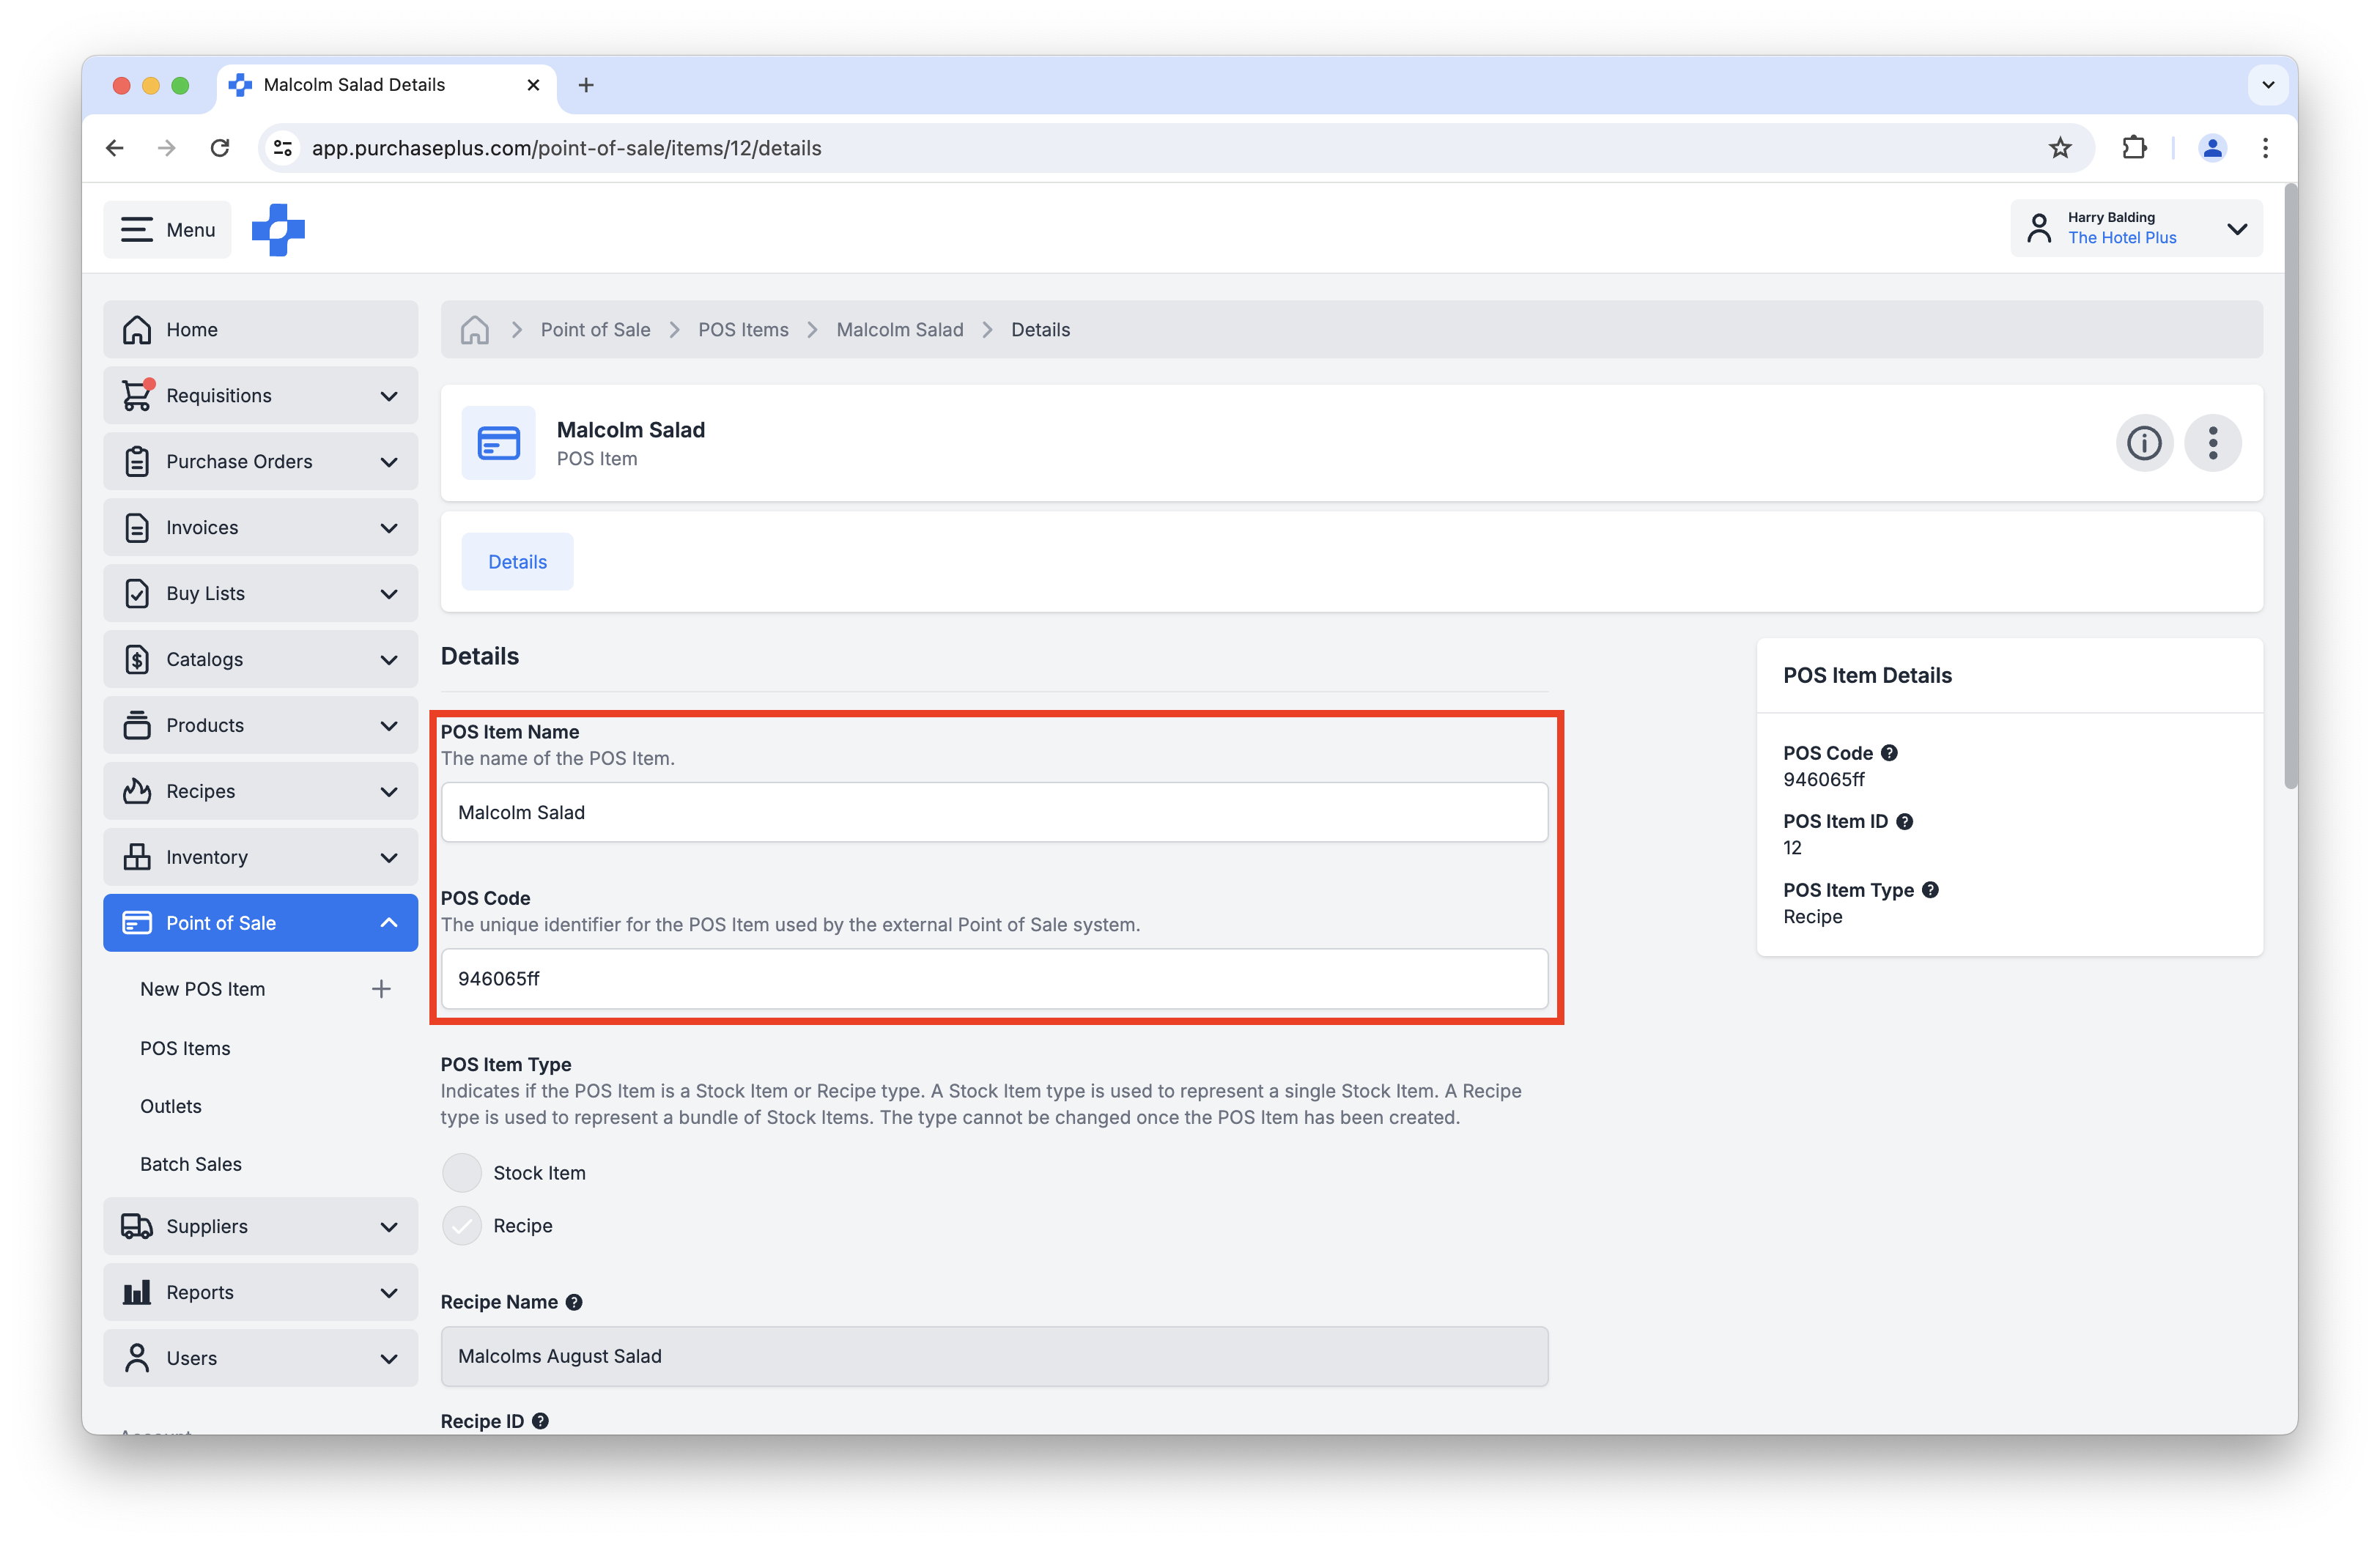
- Point a POS Item at a different Stock Item or Recipe than the one it was created with. Please create a New POS Item for this purpose.
- Delete a POS Item. Please get in touch with us to delete a POS Item from your account.
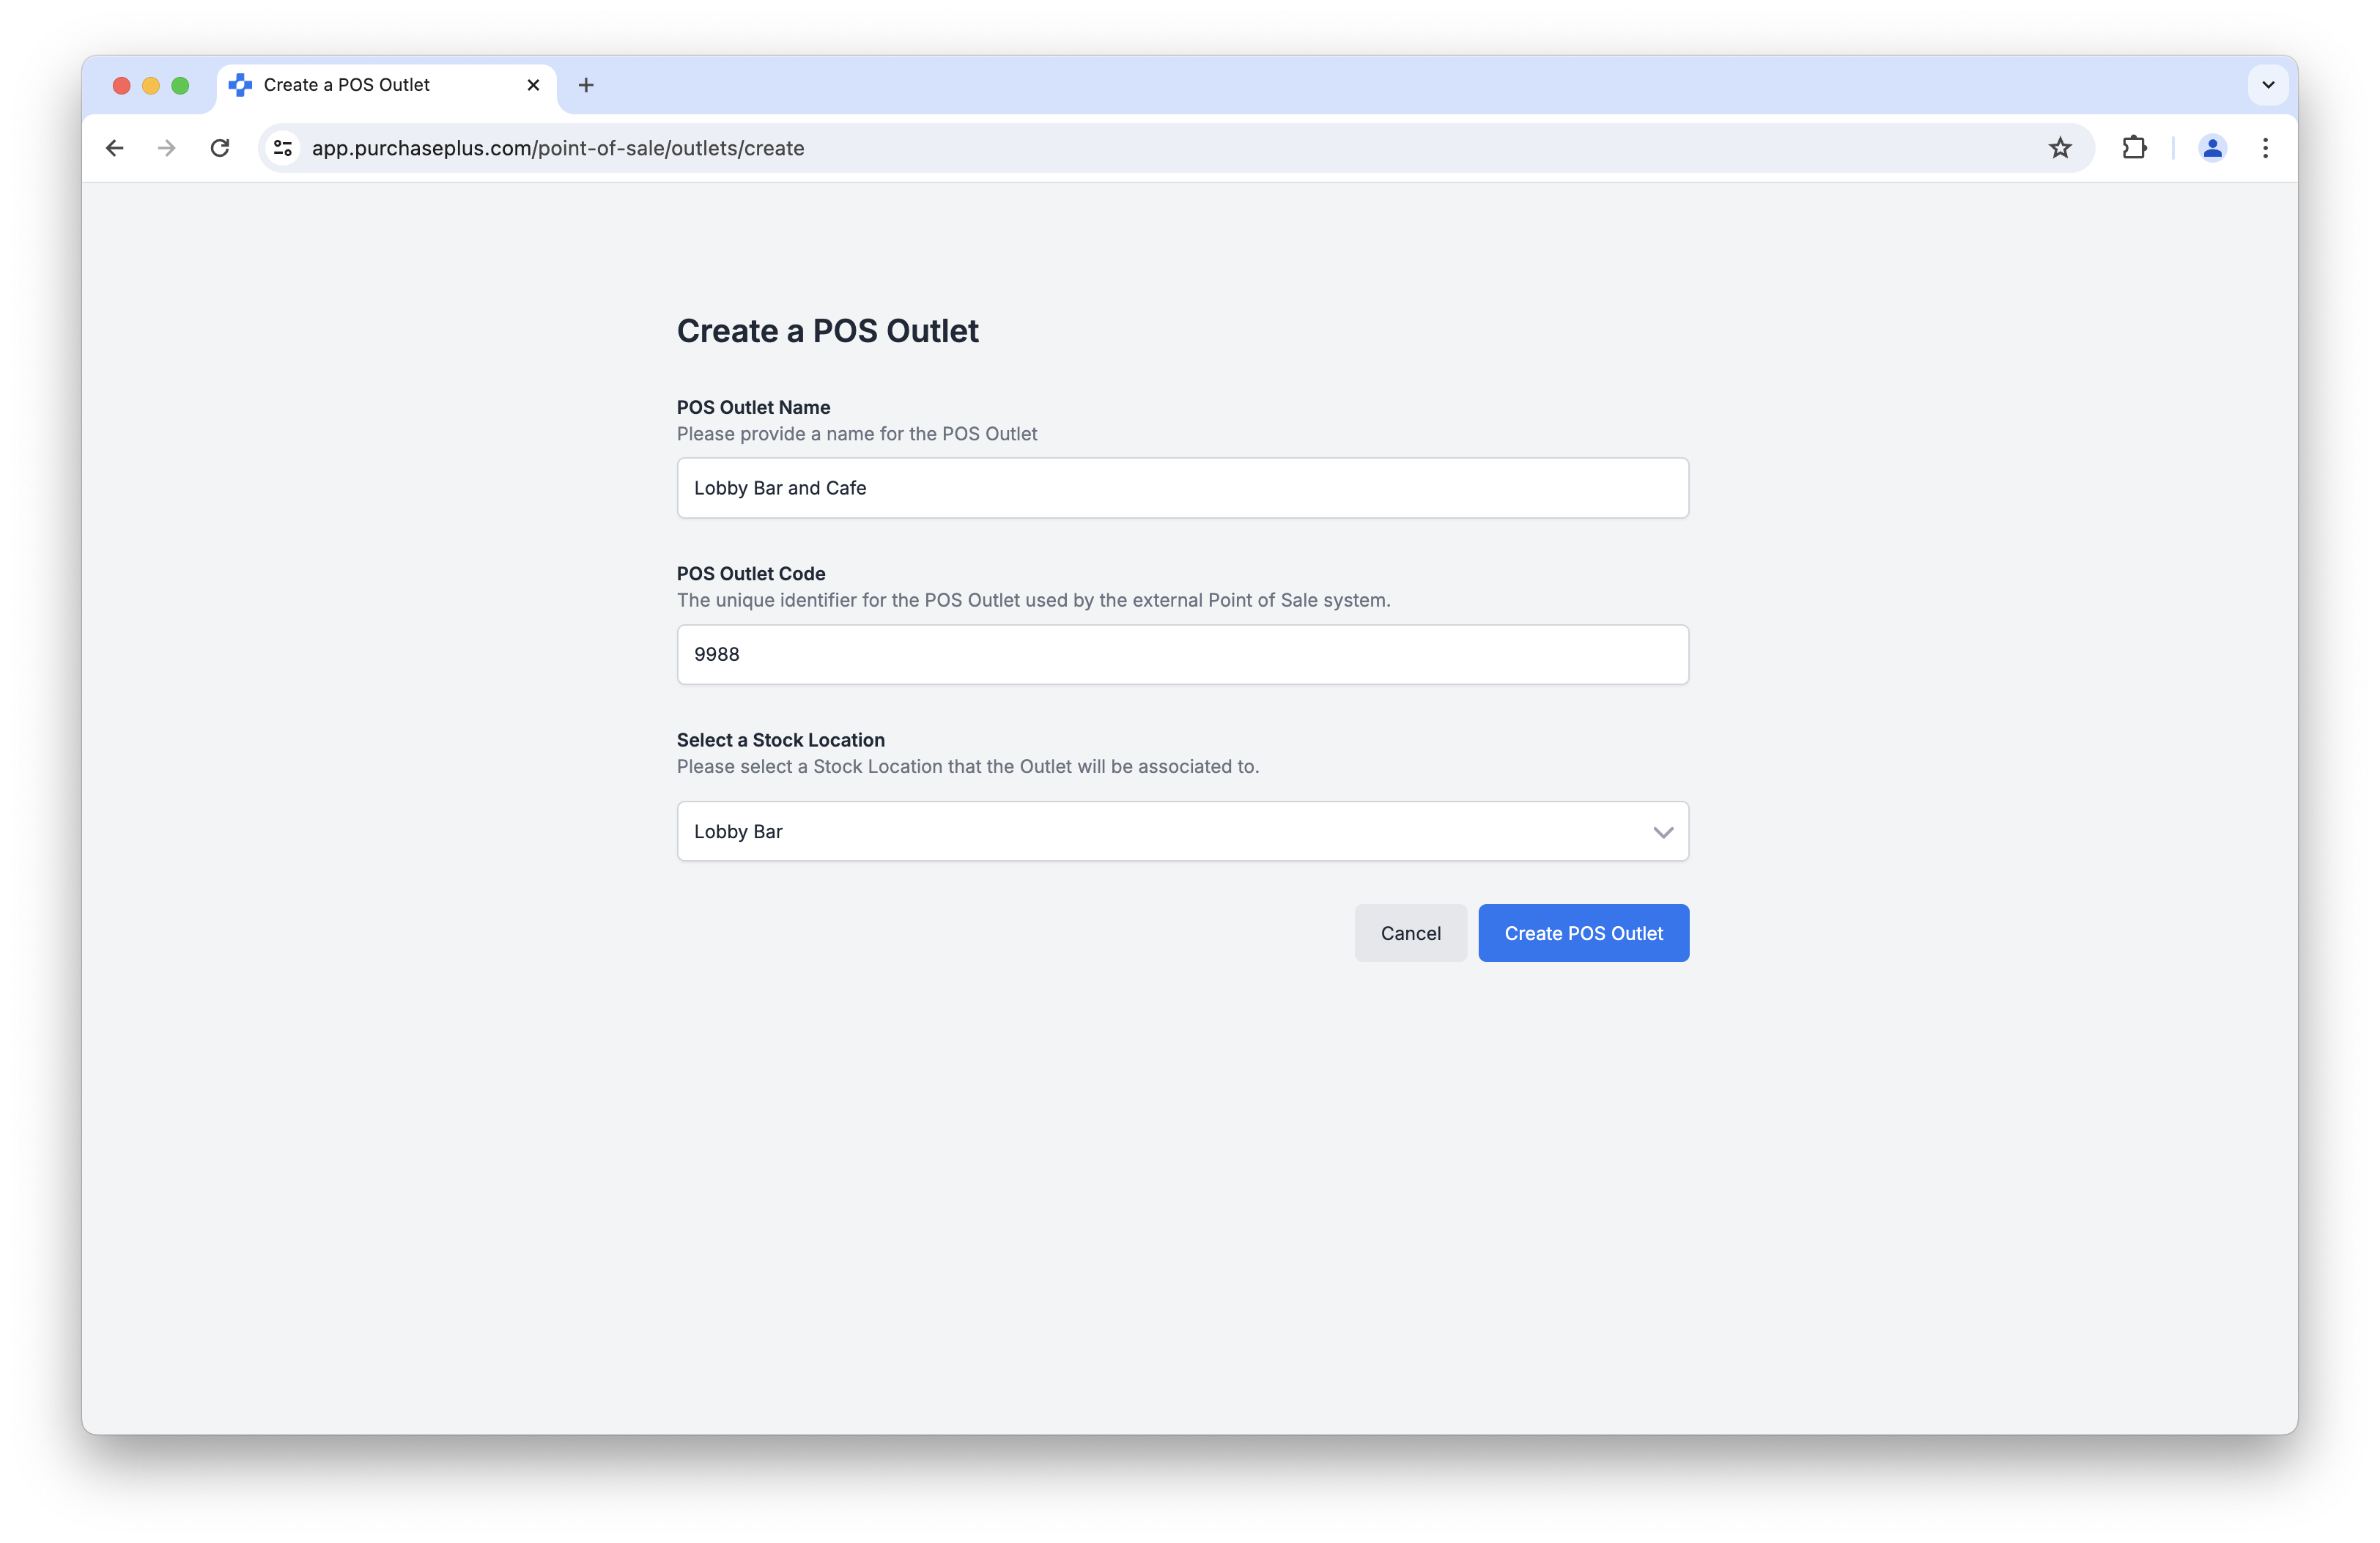
- A Name,
- A POS Outlet Code (the unique identifier that is used by your external POS System), and
- A reference to a Stock Location.
Creating POS Outlets

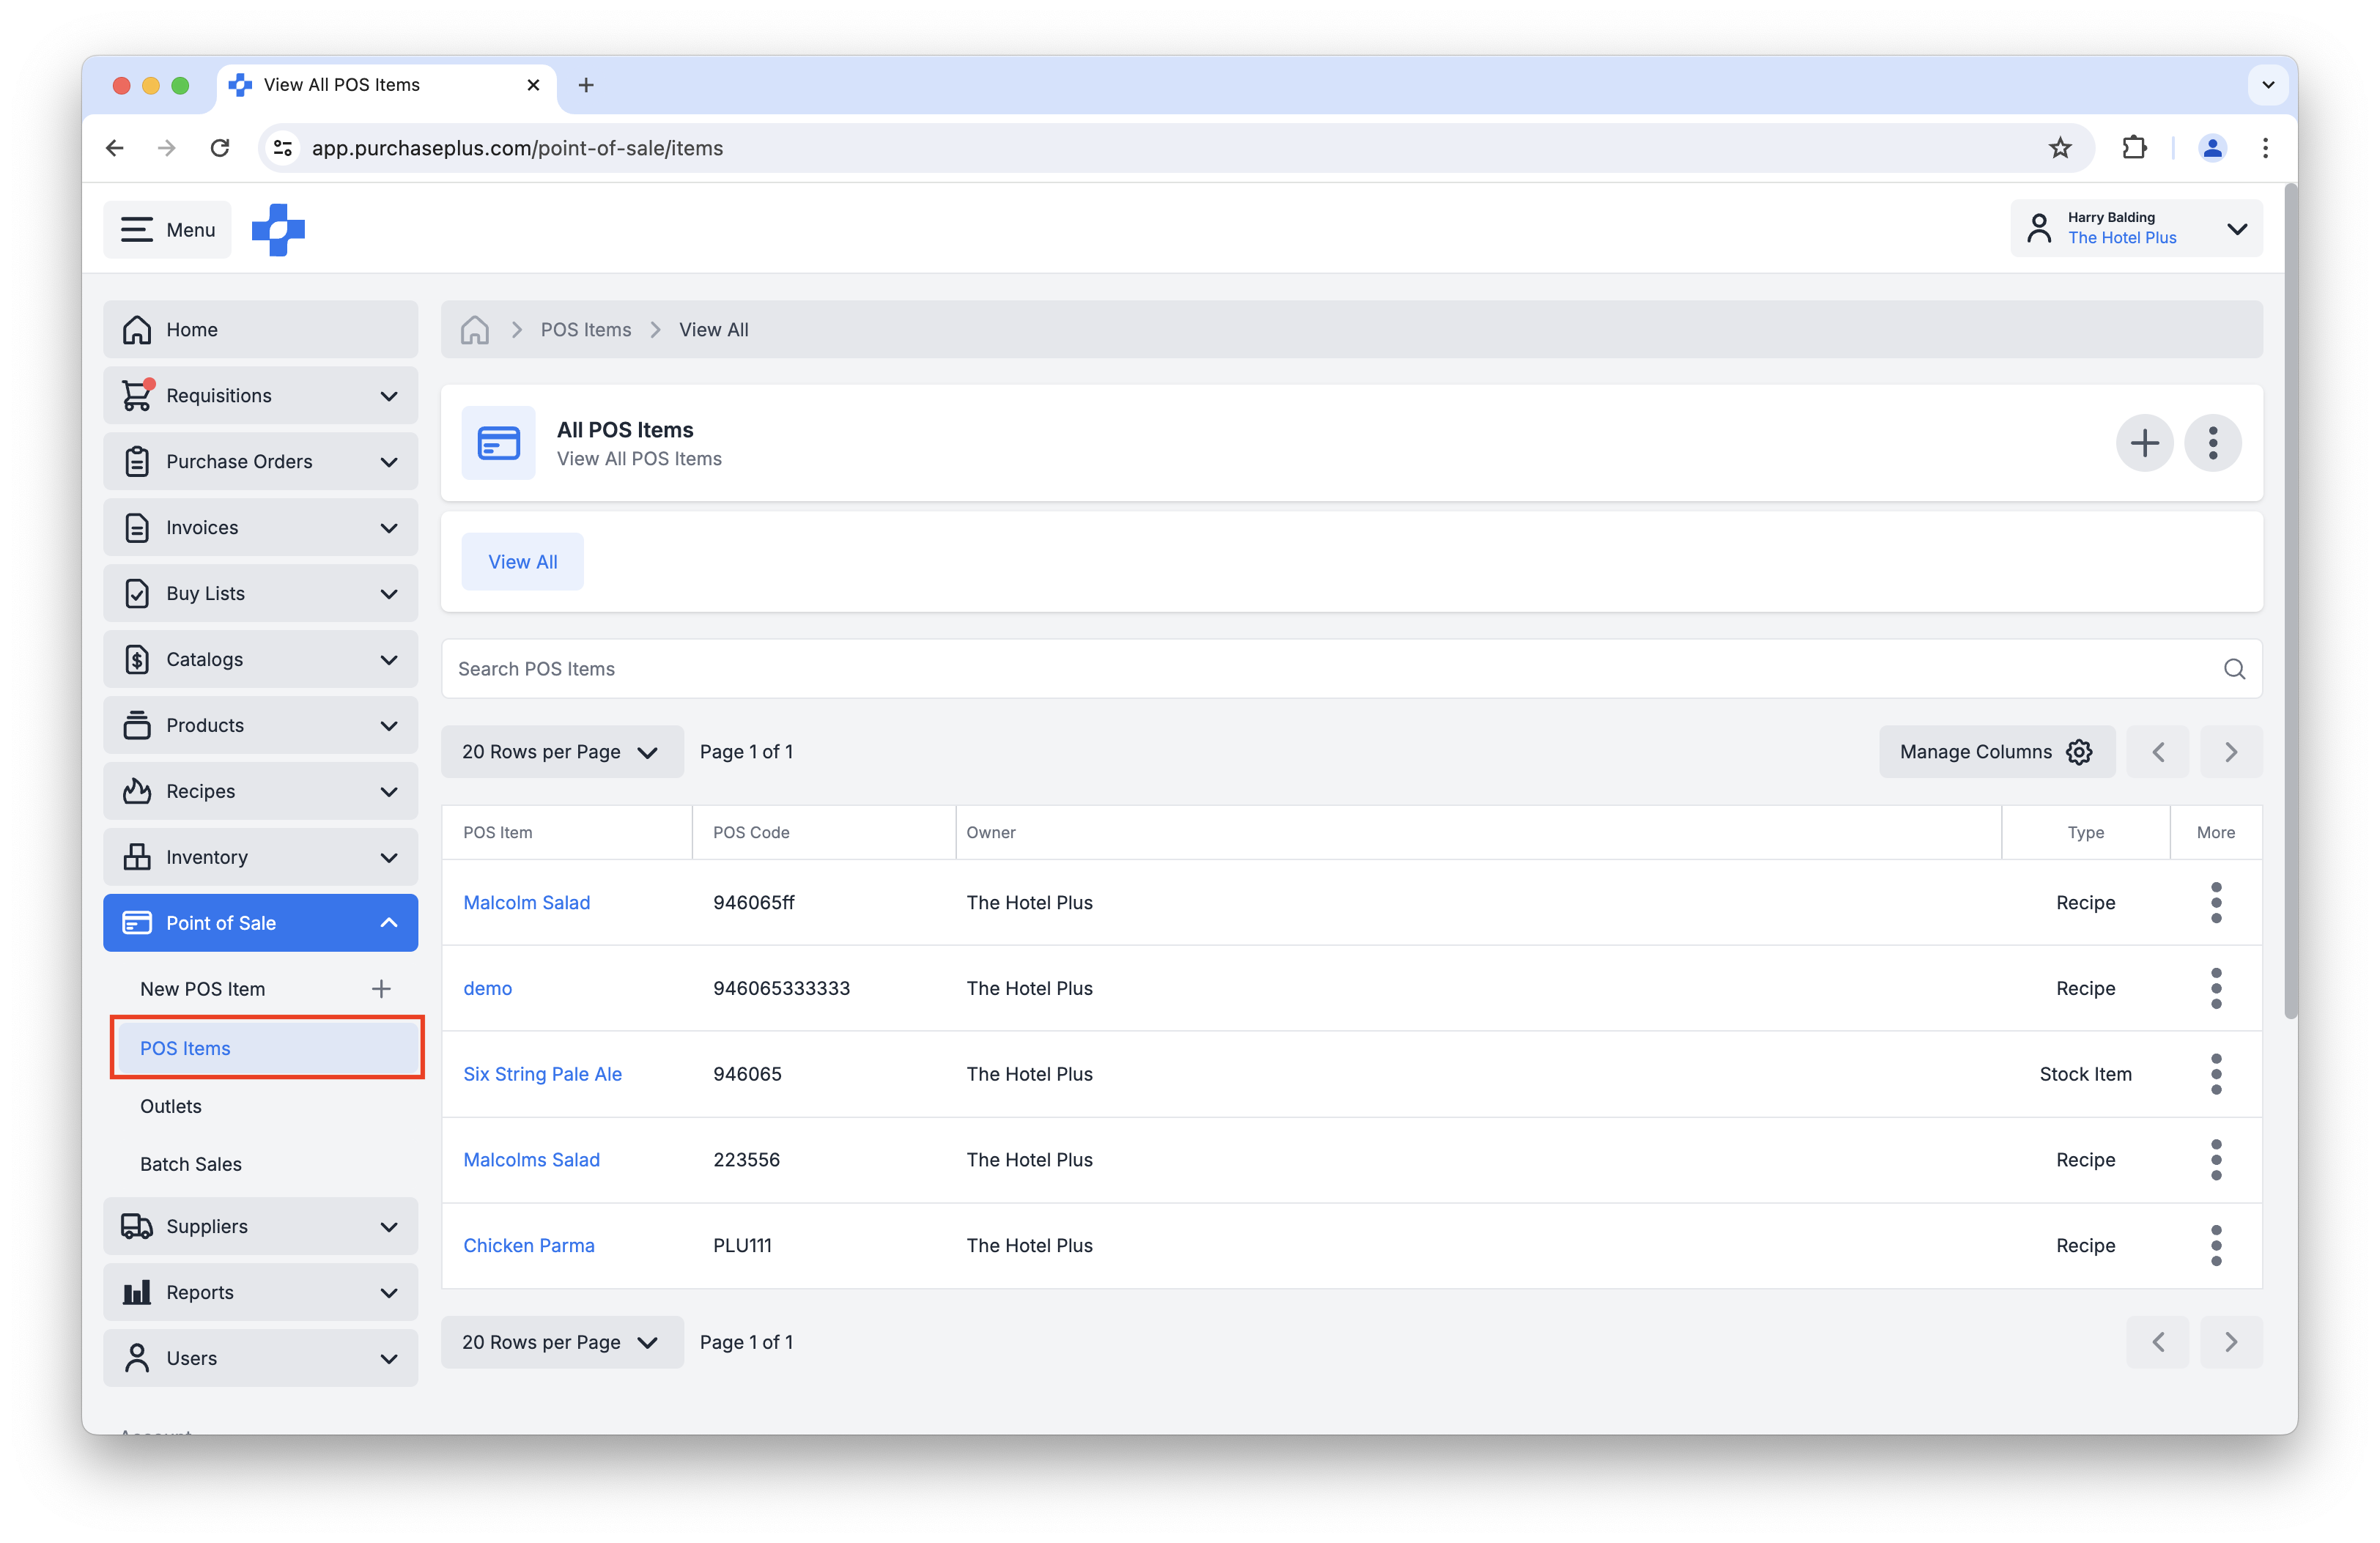
Viewing and Updating POS Outlets
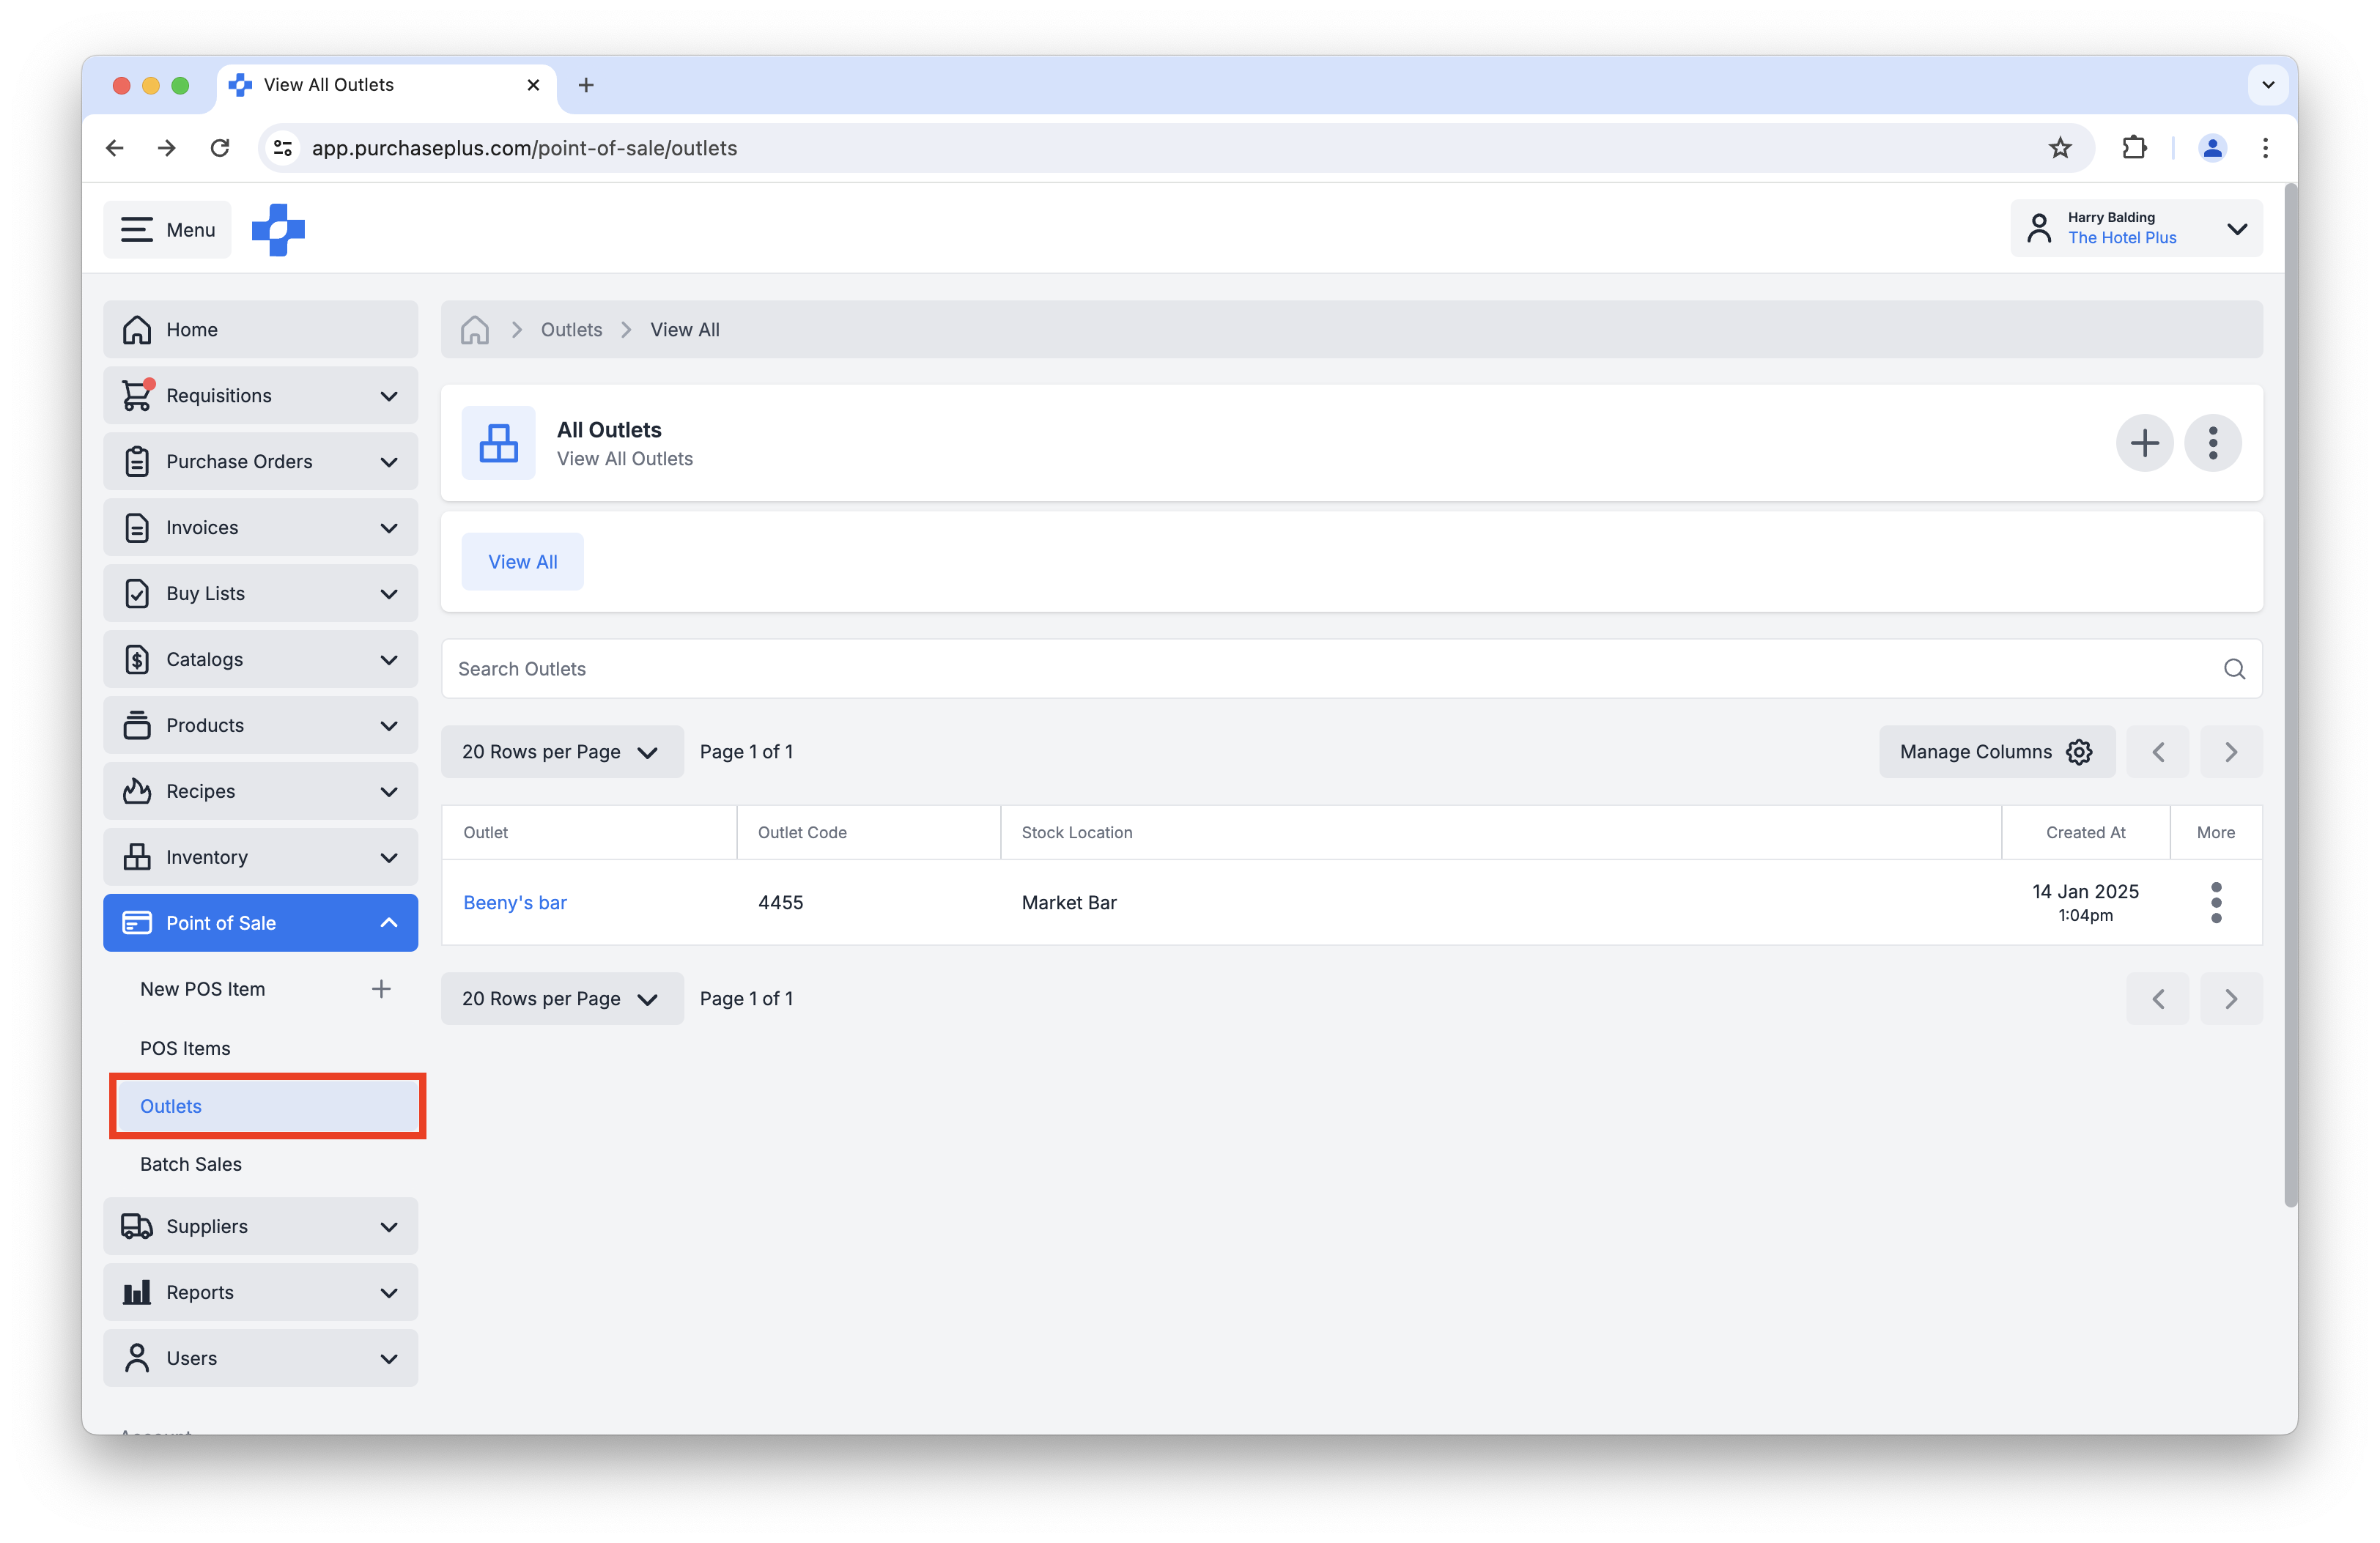
- Point a POS Outlet at a different Stock Location than the one it was created with. Please create a New POS Outlet for this purpose.
- Delete a POS Outlet. Please get in touch with us to delete a POS Outlet from your account.
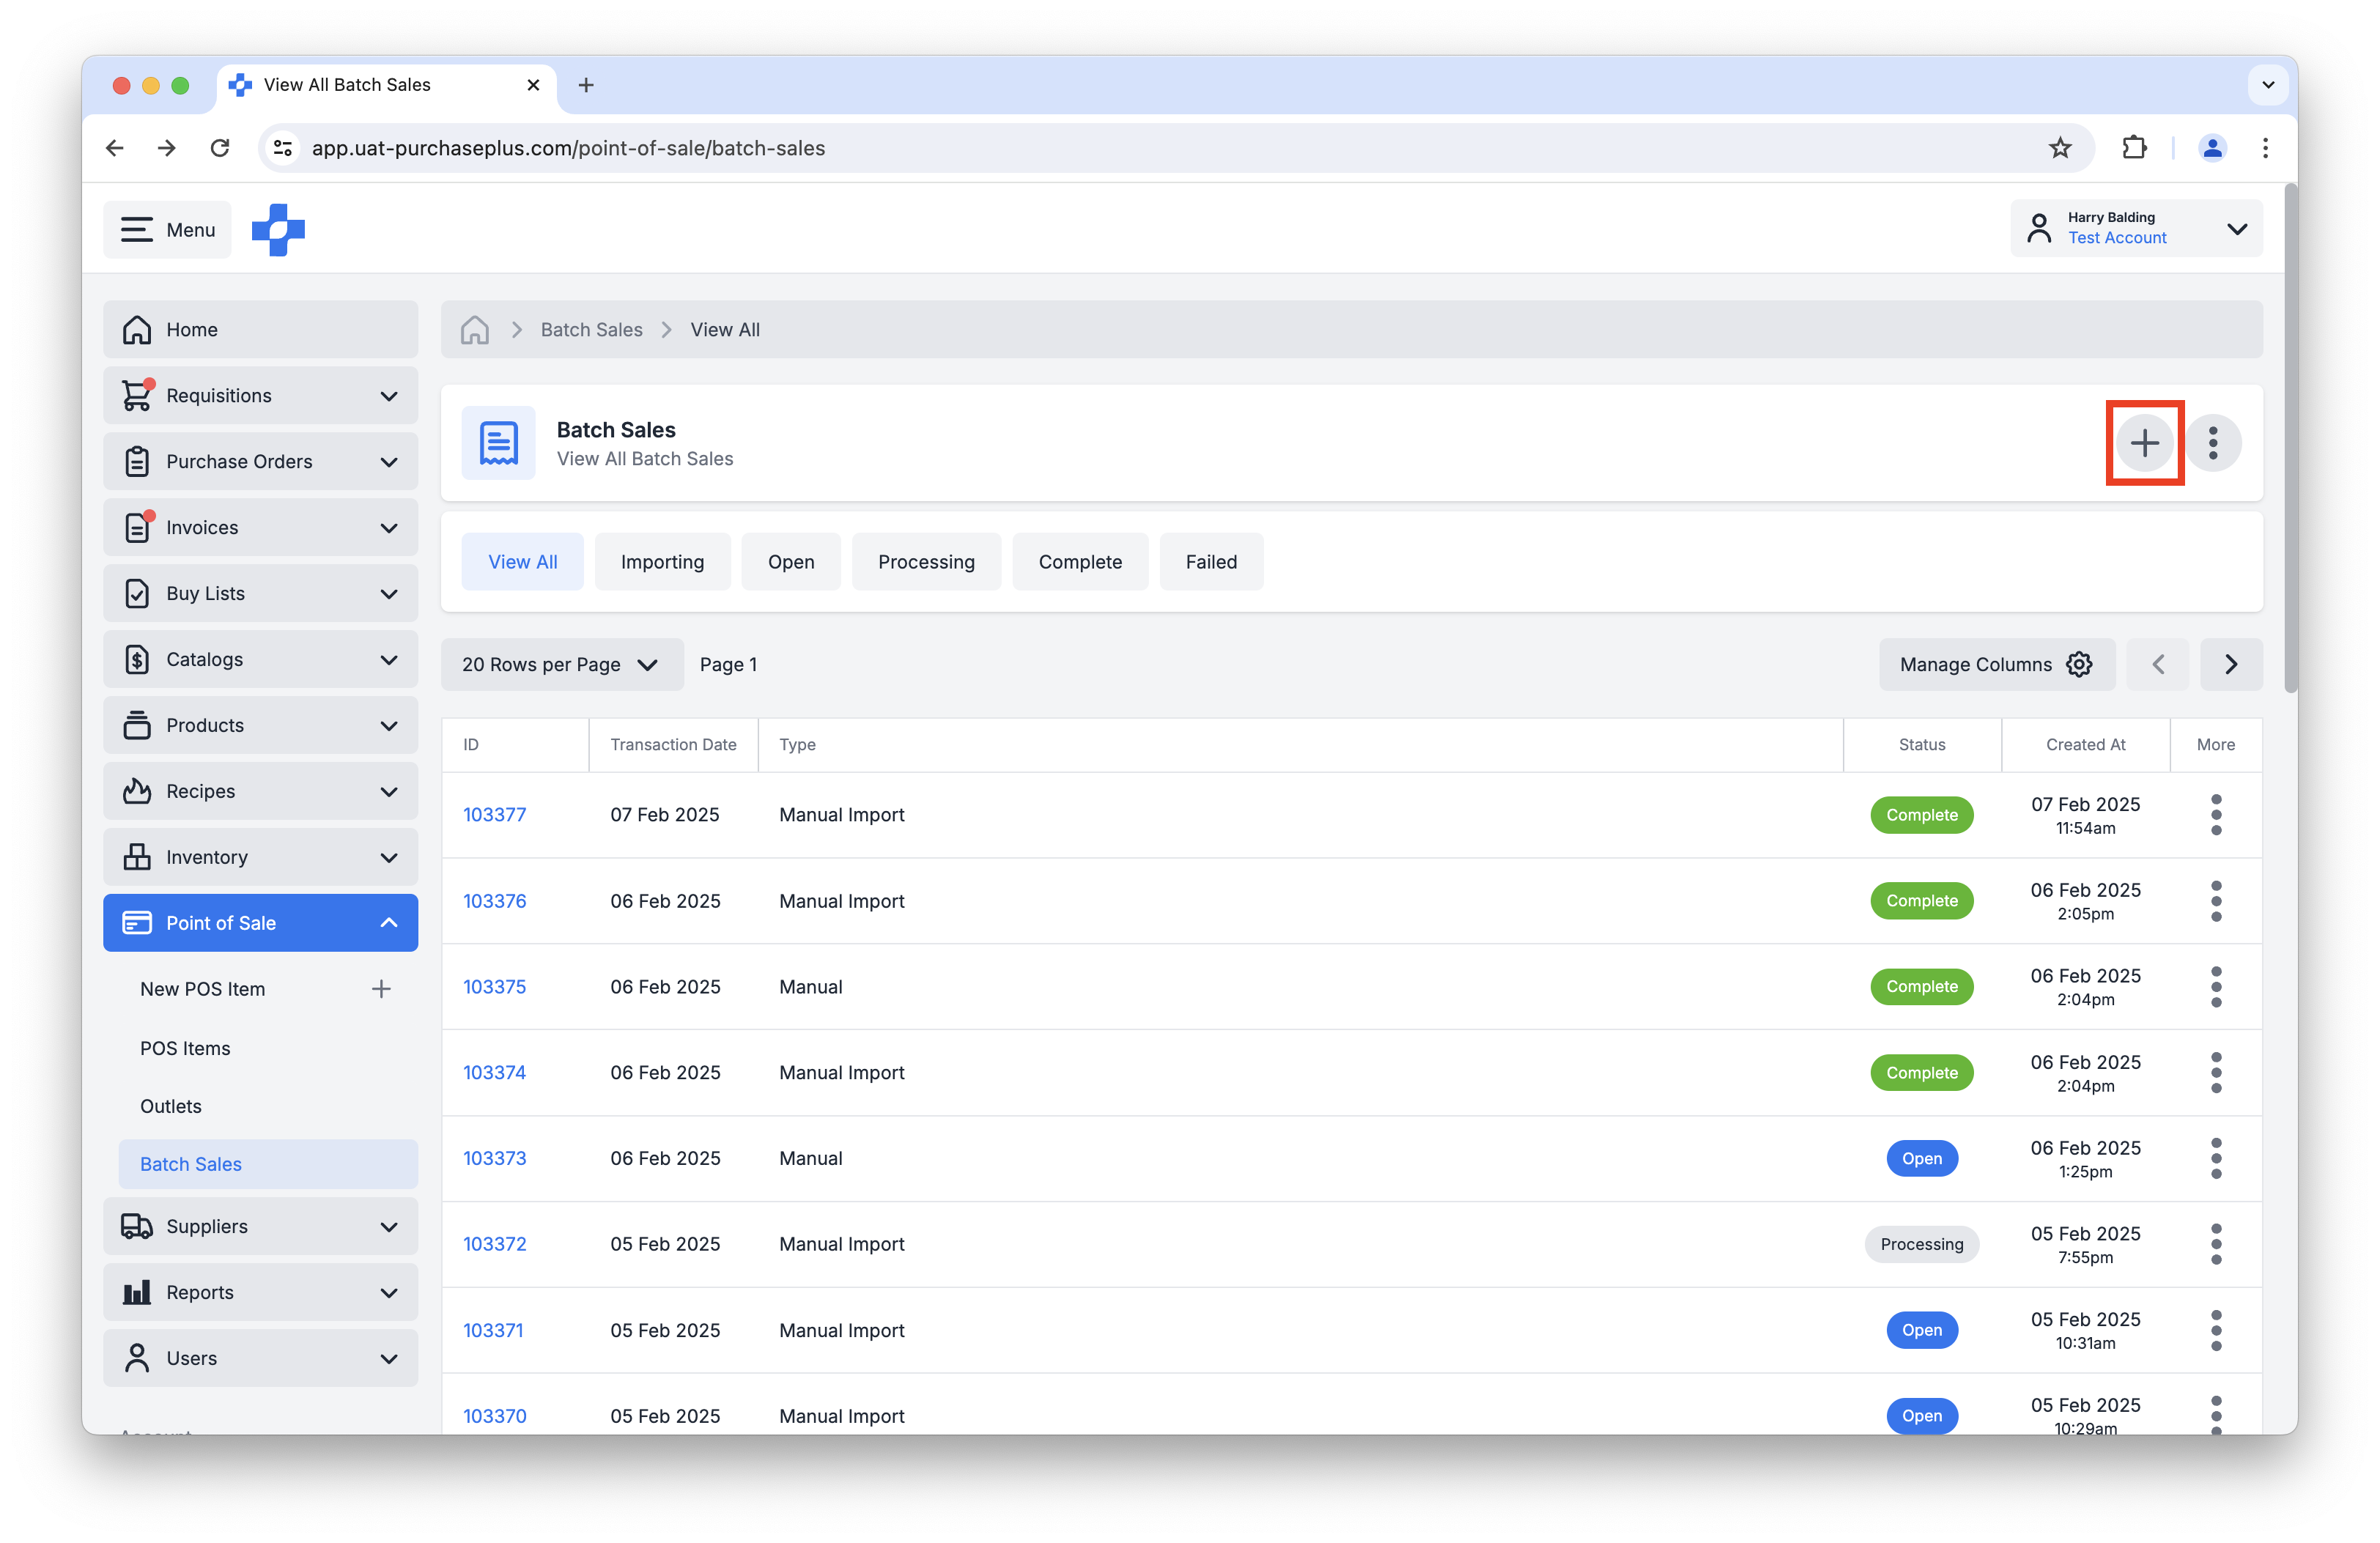
Batch Sales
- A POS Item that was sold (referencing the Stock Item to be decremented),
- An Outlet which identifies the POS terminal where the sale was made (referencing the Stock Location from which the Stock Item will be decremented),
- A Sell Unit Price, which is the price at which the POS Item was sold (exclusive of tax), and
- The Quantity of POS Items that were sold (i.e. the quantity of the Stock Item to be decremented from the Stock Location).
- Open: The Batch Sale has been Created, and it is currently able to be edited by a permitted user.
- Importing: An Import (from CSV) has been initiated. Once the Import is complete, the Batch Sale's status is reverted to Open. Batch Sales in the 'Importing' State cannot be edited.
- Processing: The POS Items (Stock Items) are currently being decremented from the target POS Outlet (Stock Location) via Transfers. Batch Sales in the 'Processing' State cannot be edited.
- Complete: All of the POS Items (Stock Items) have been successfully decremented from the target POS Outlet (Stock Location), and the Batch Sale can no longer be edited.
- Failed: An error has occurred during the Importing or Processing stage.
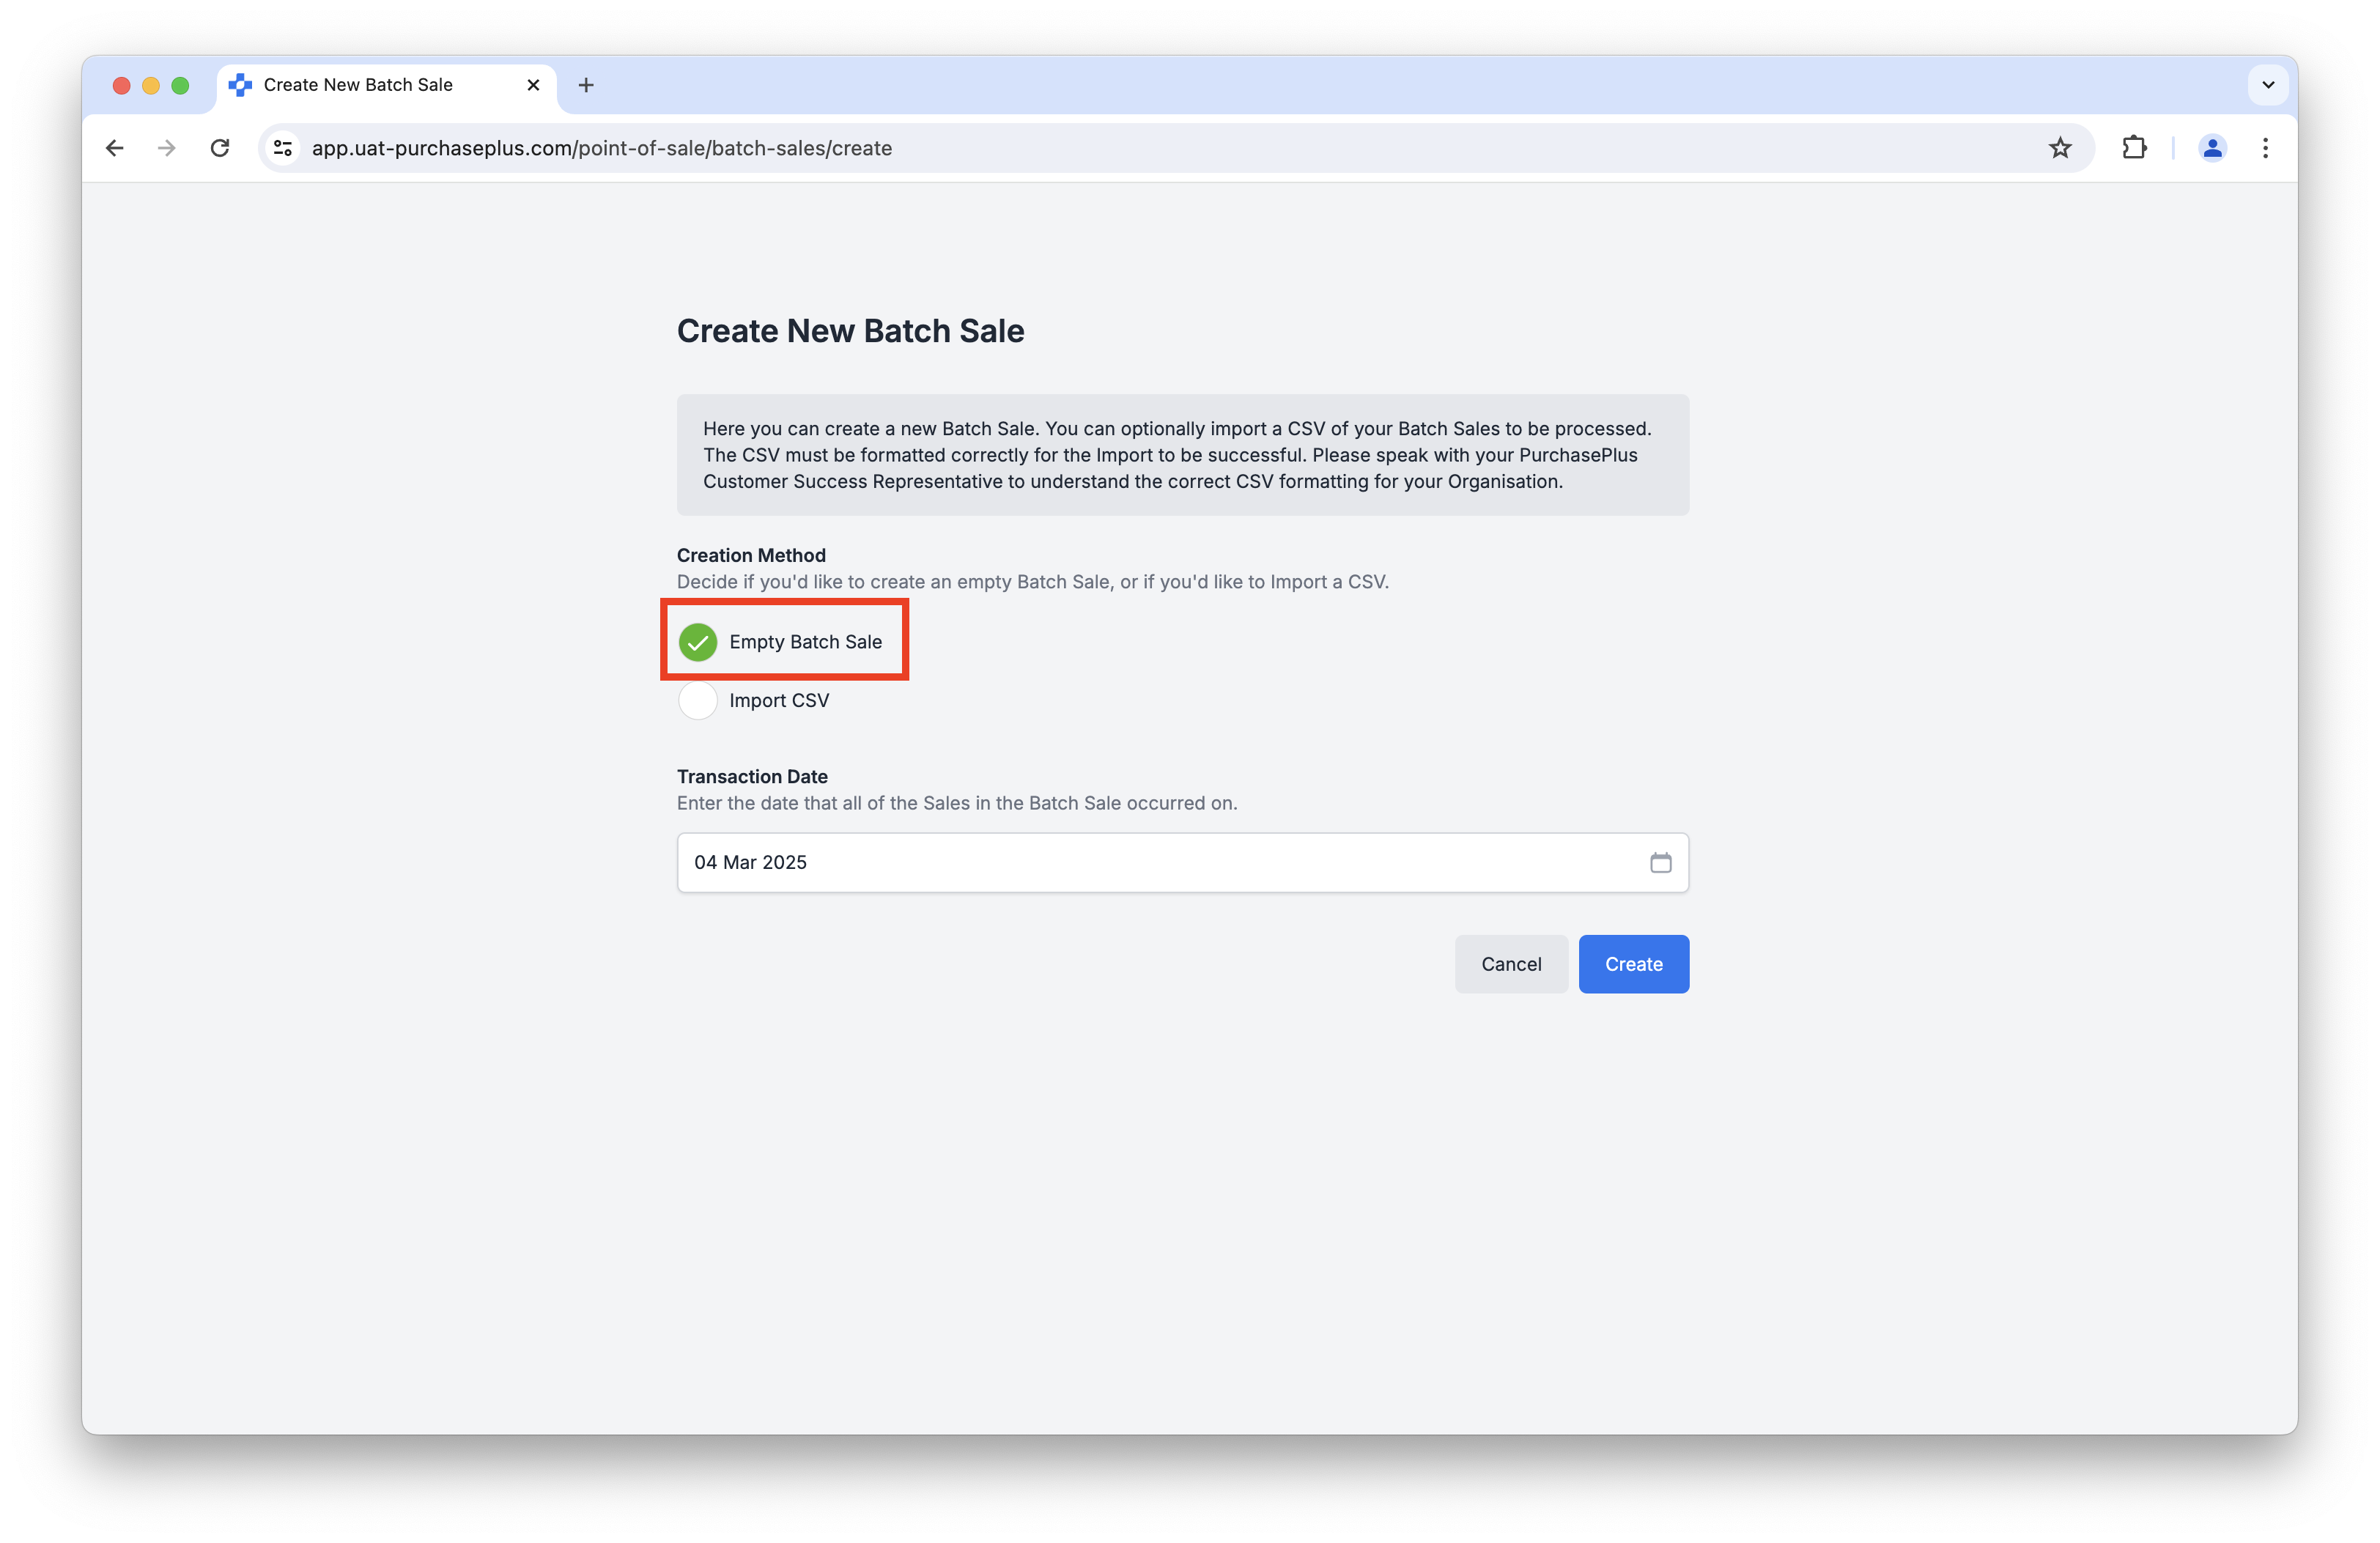
You can manually populate a Batch Sale, upload a CSV that conforms with the upload requirements, or create Batch Sales by API integration.
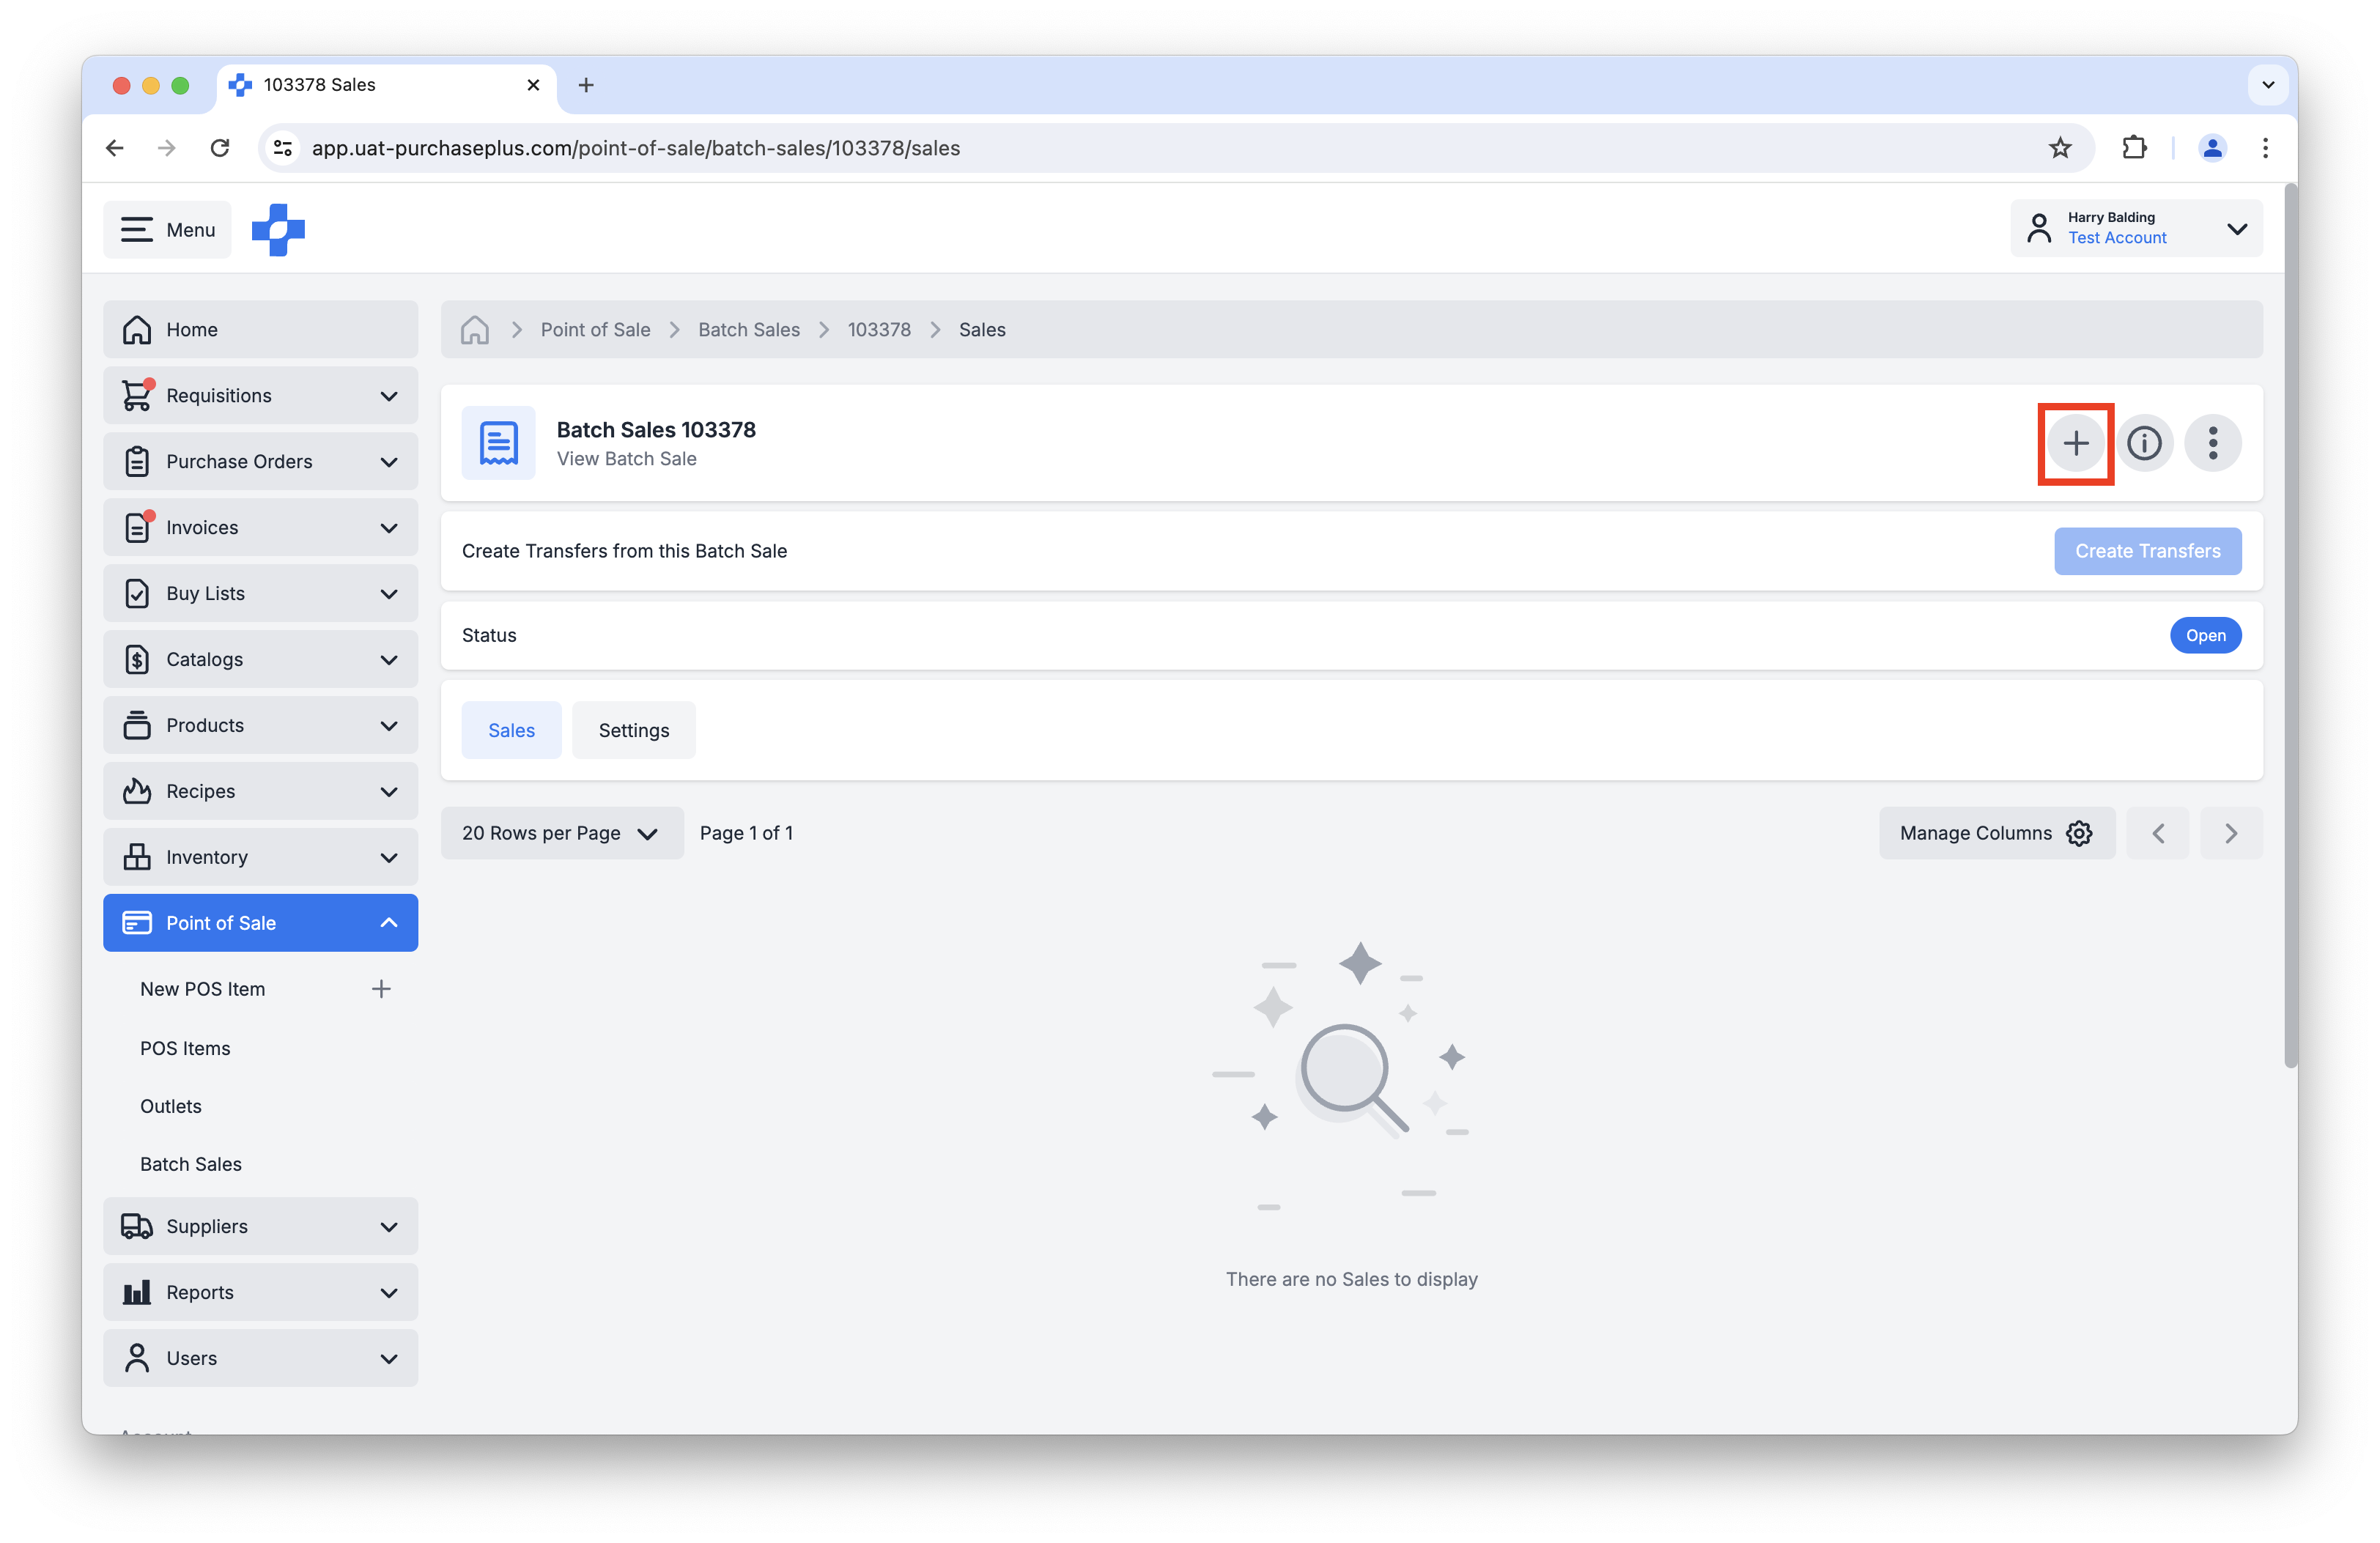
- The POS Item that was sold (and thus, the Stock Item to be decremented),
- The Outlet which identifies the POS terminal where the sale was made (and thus, the Stock Location from which the Stock Item will be decremented),
- The Sell Unit Price, which is the price at which the POS Item was sold (exclusive of tax), and
- The Quantity of POS Items that were sold (i.e. the quantity of the Stock Item to be decremented from the Stock Location).
Click [Create Sale] to progress:
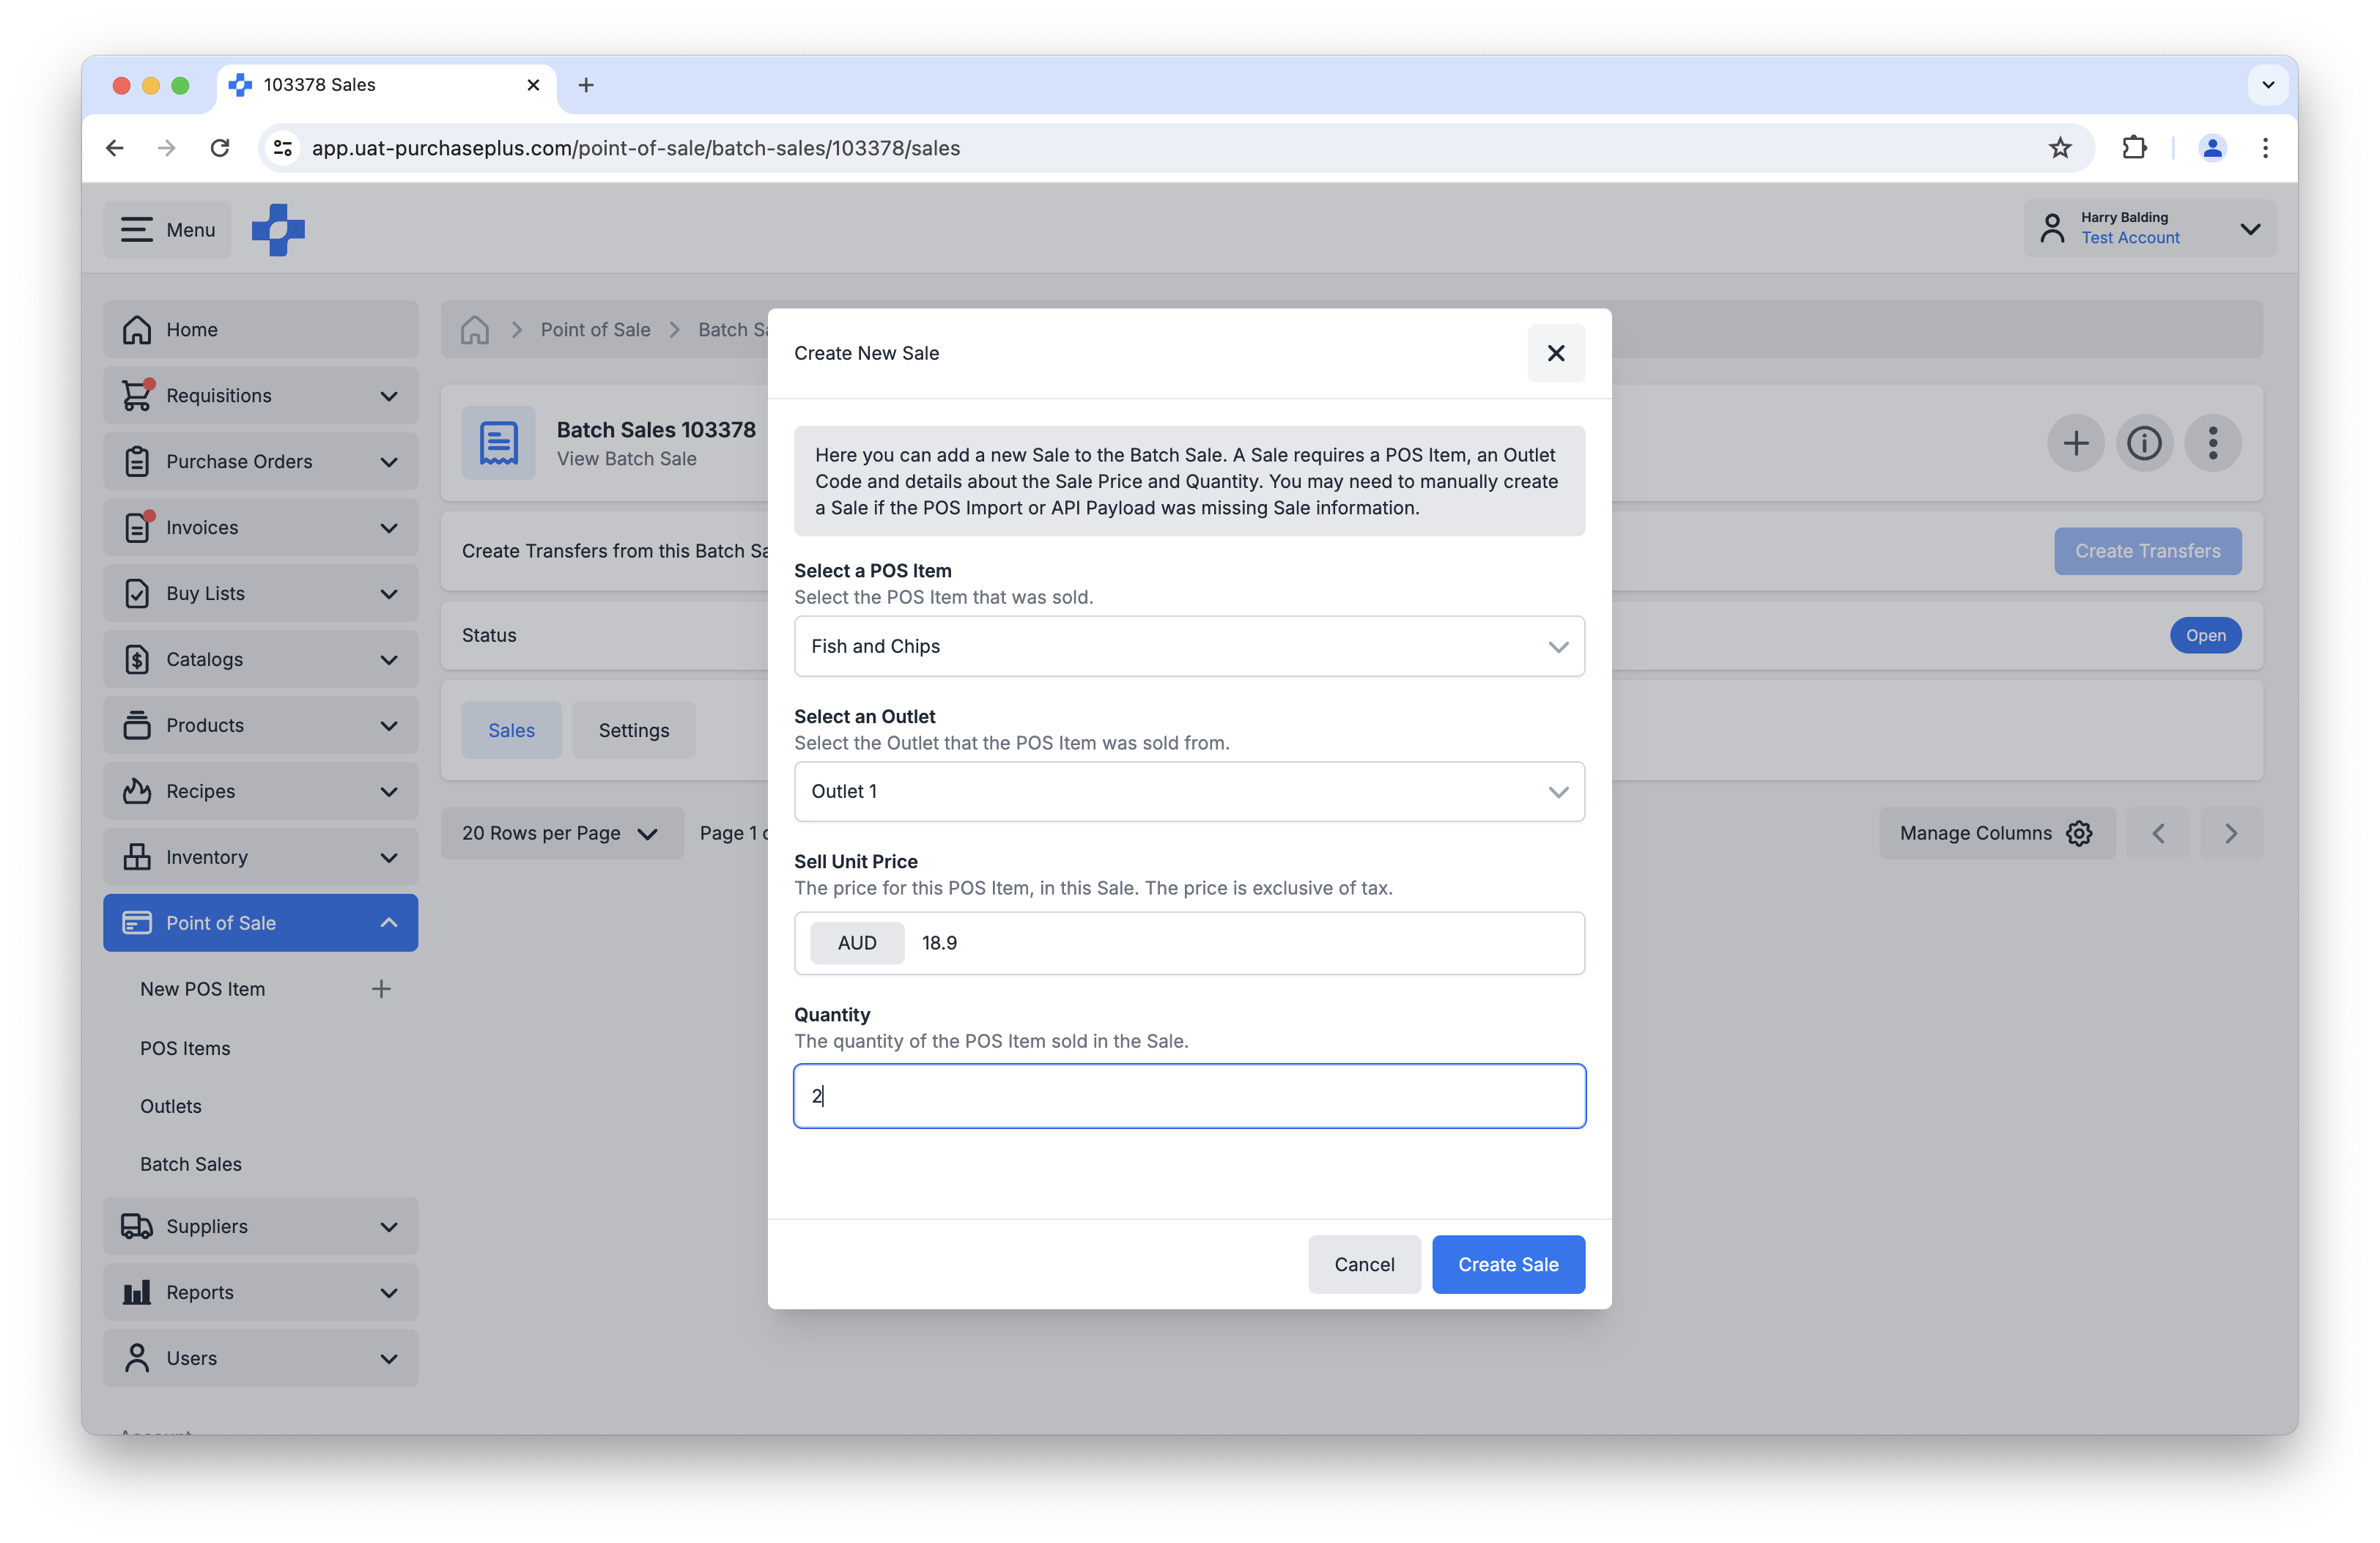
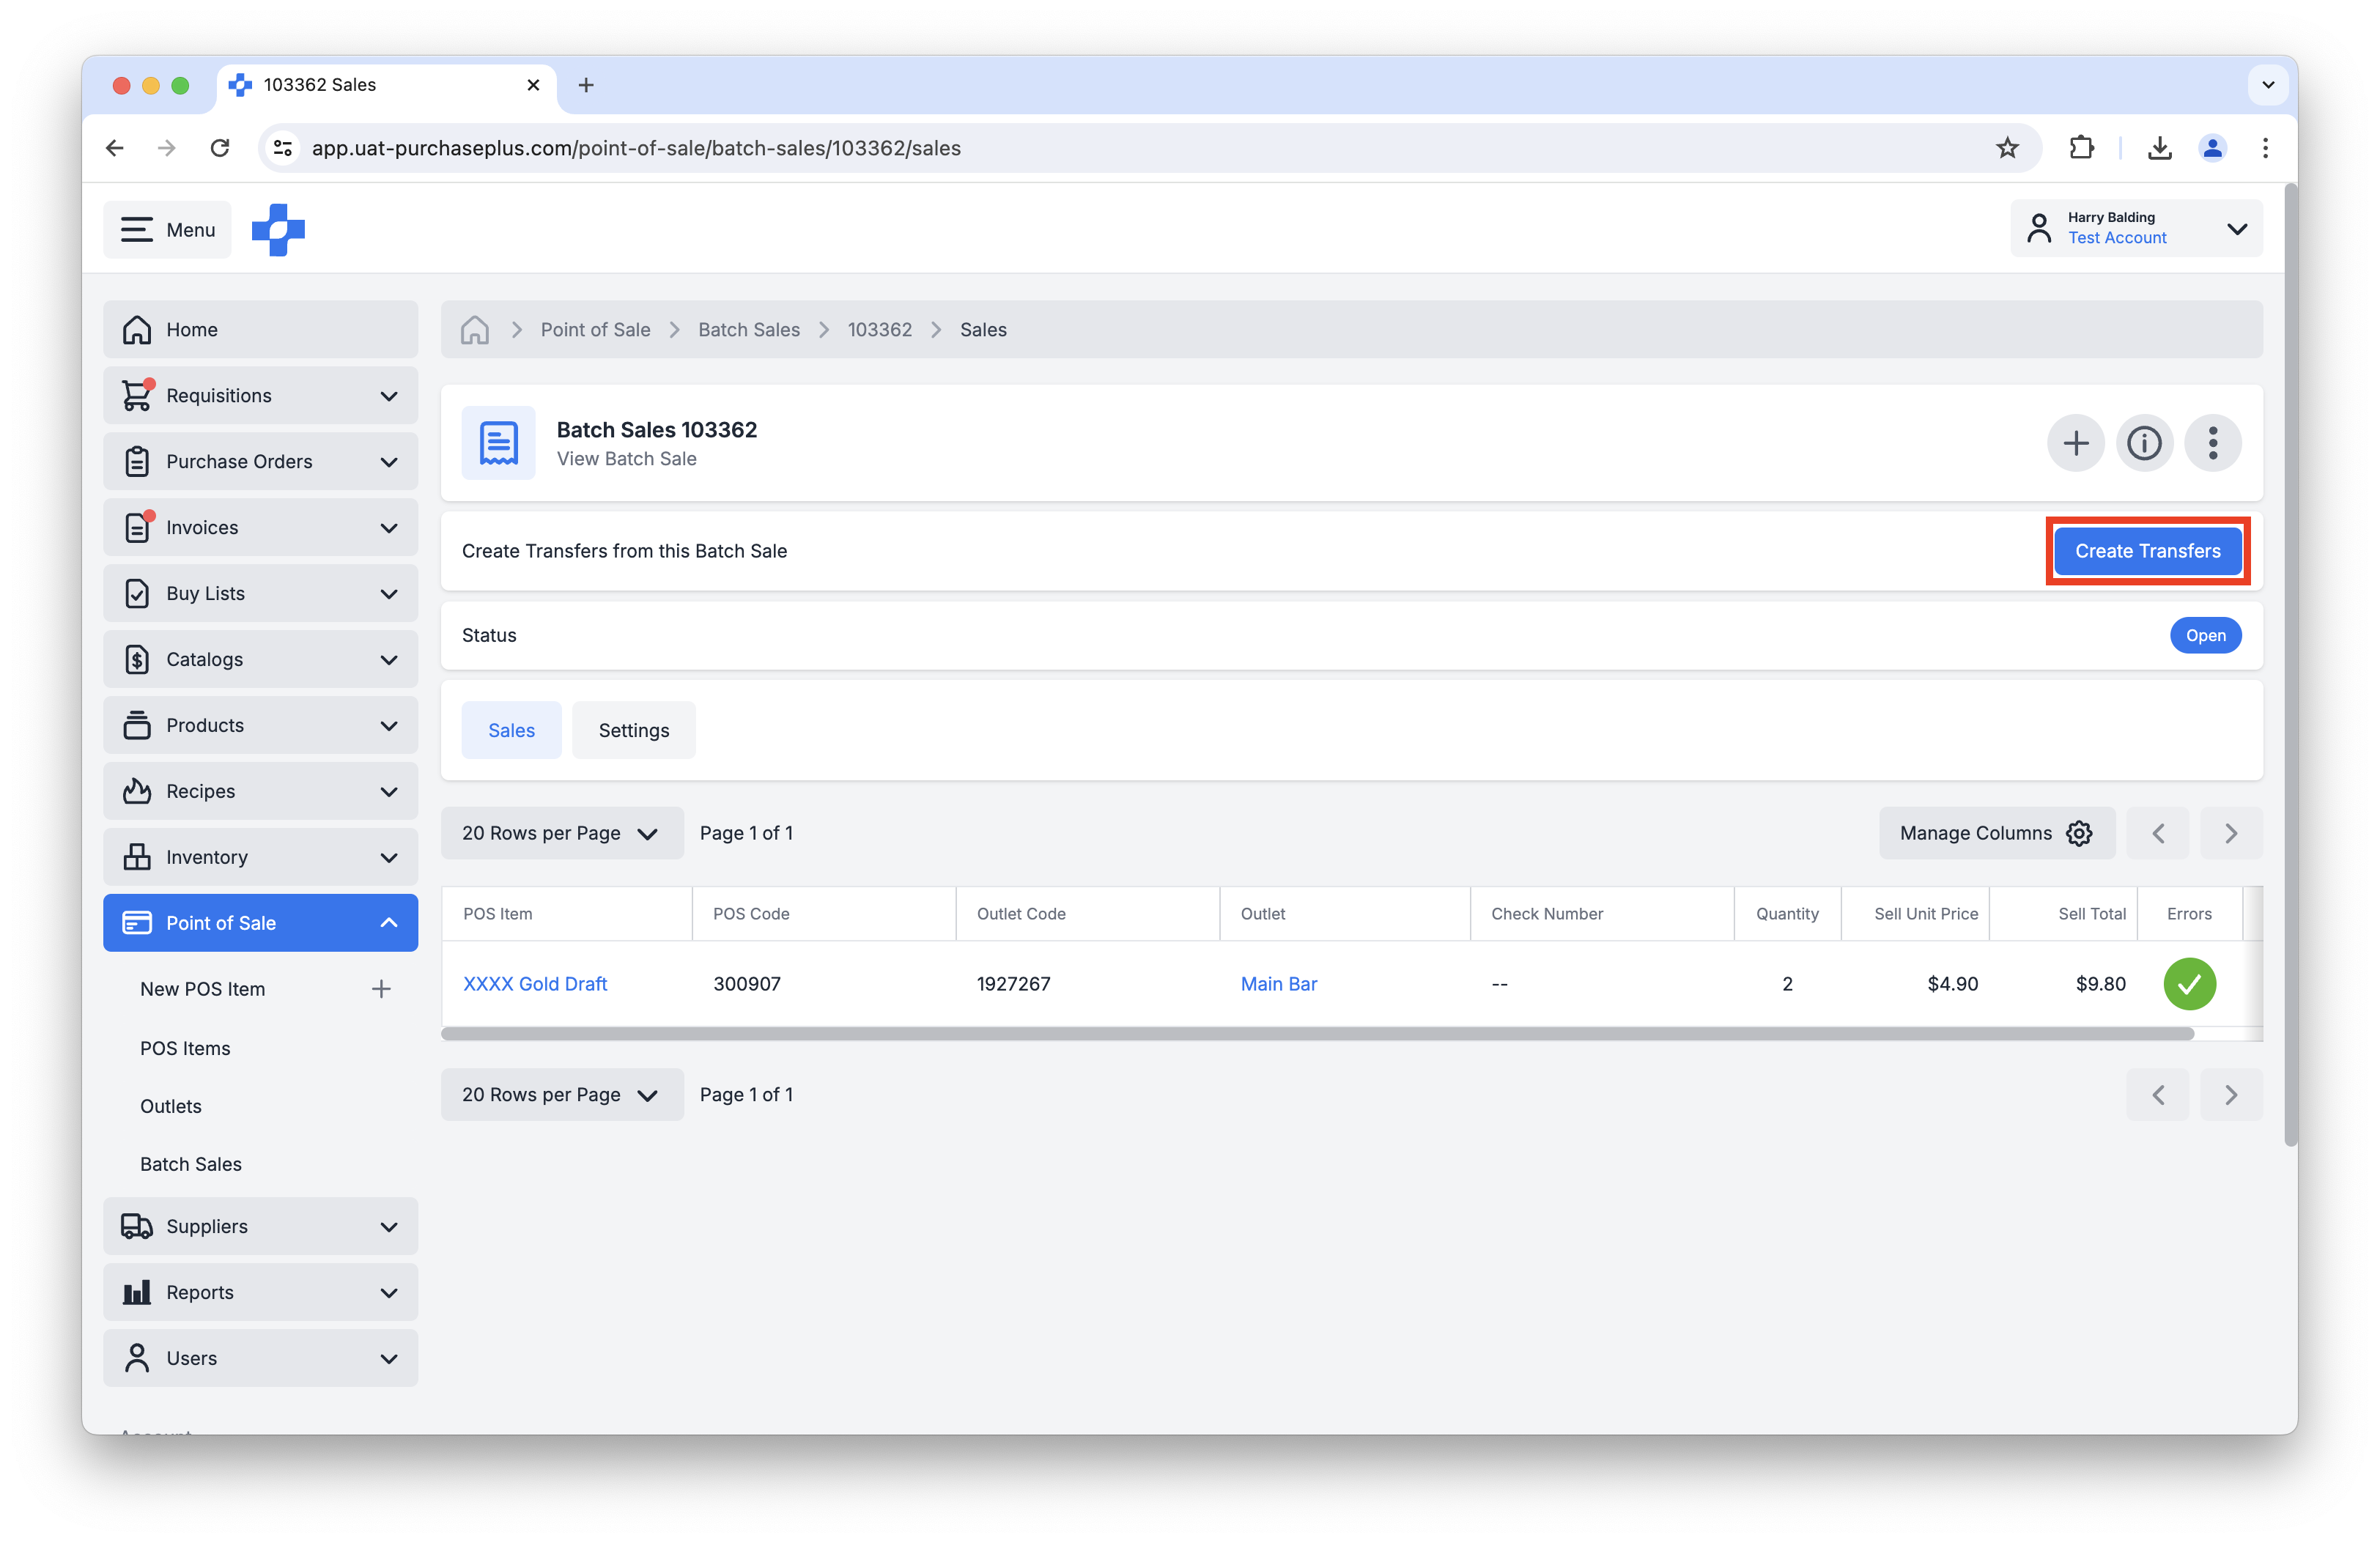
Continue adding Sale Lines as required. Once you have added all of the Sale Lines you wish to process, click [Create Transfers] in the header of the Batch Sale:
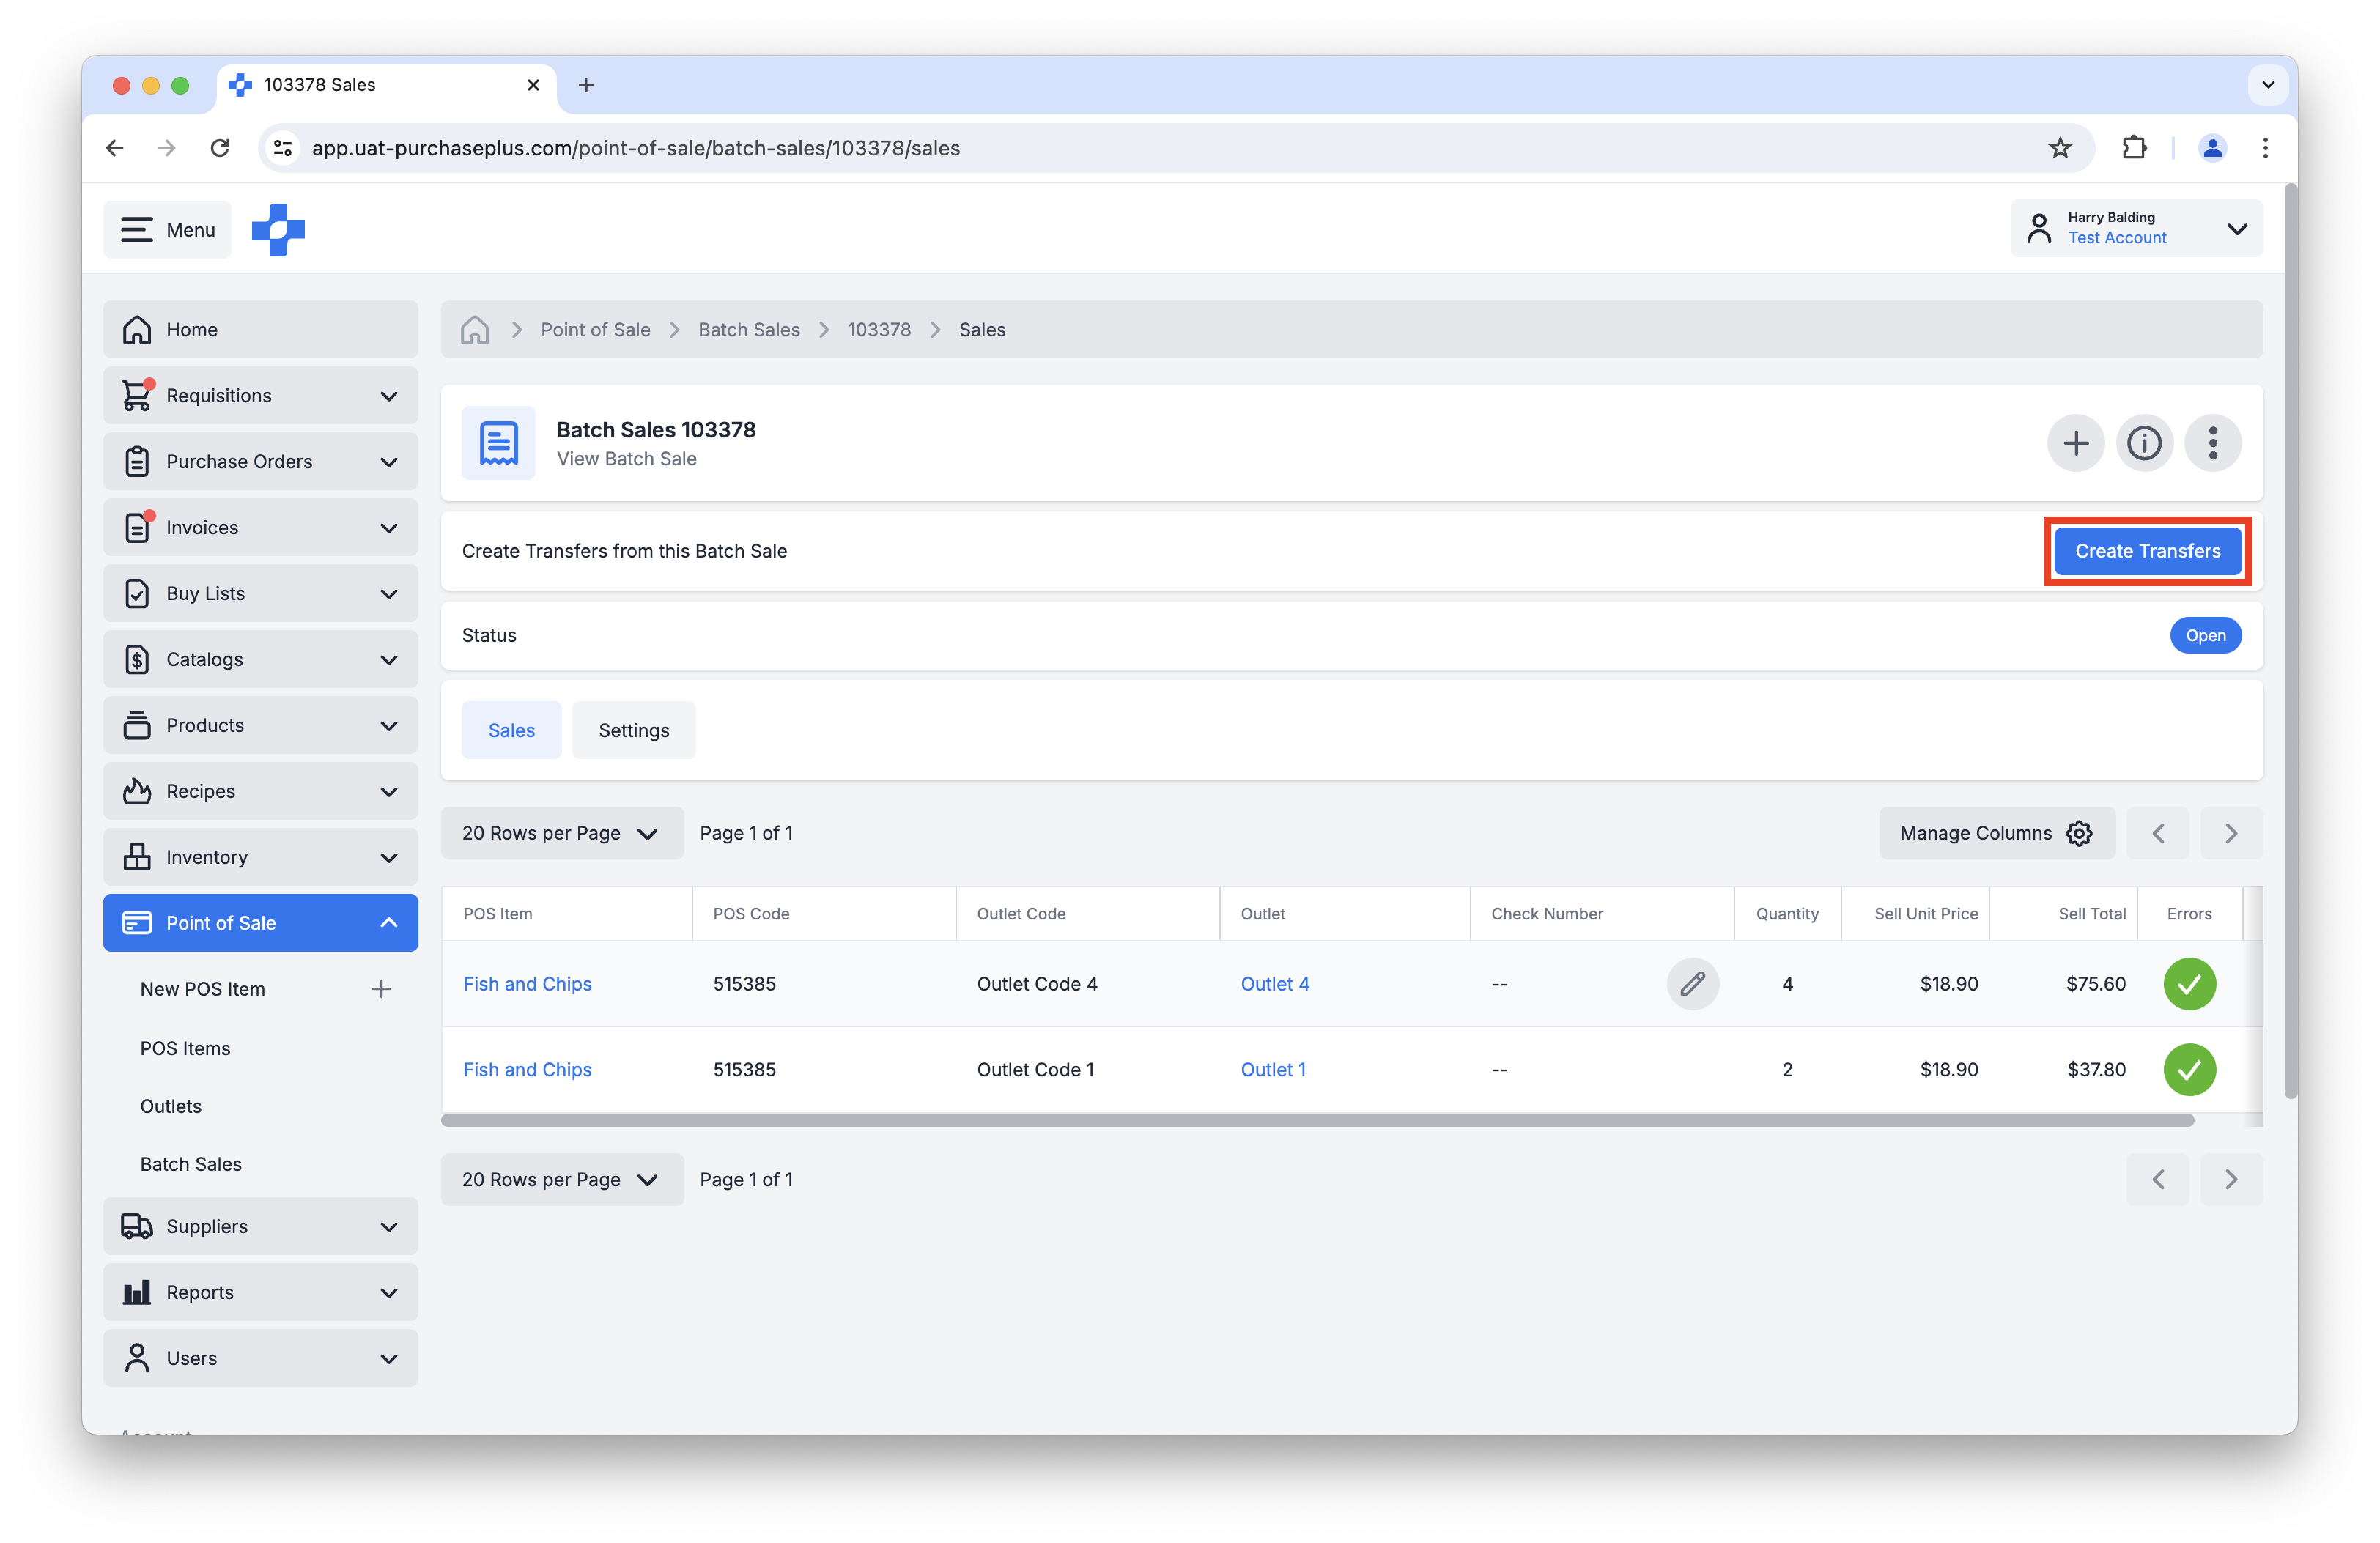
This will transfer the POS Items (i.e., the Stock Items that the POS Items reference) from the specified Outlet's Stock Location and into a Sale Location, thus decrementing the Stock Items from the Outlet's Stock Location.
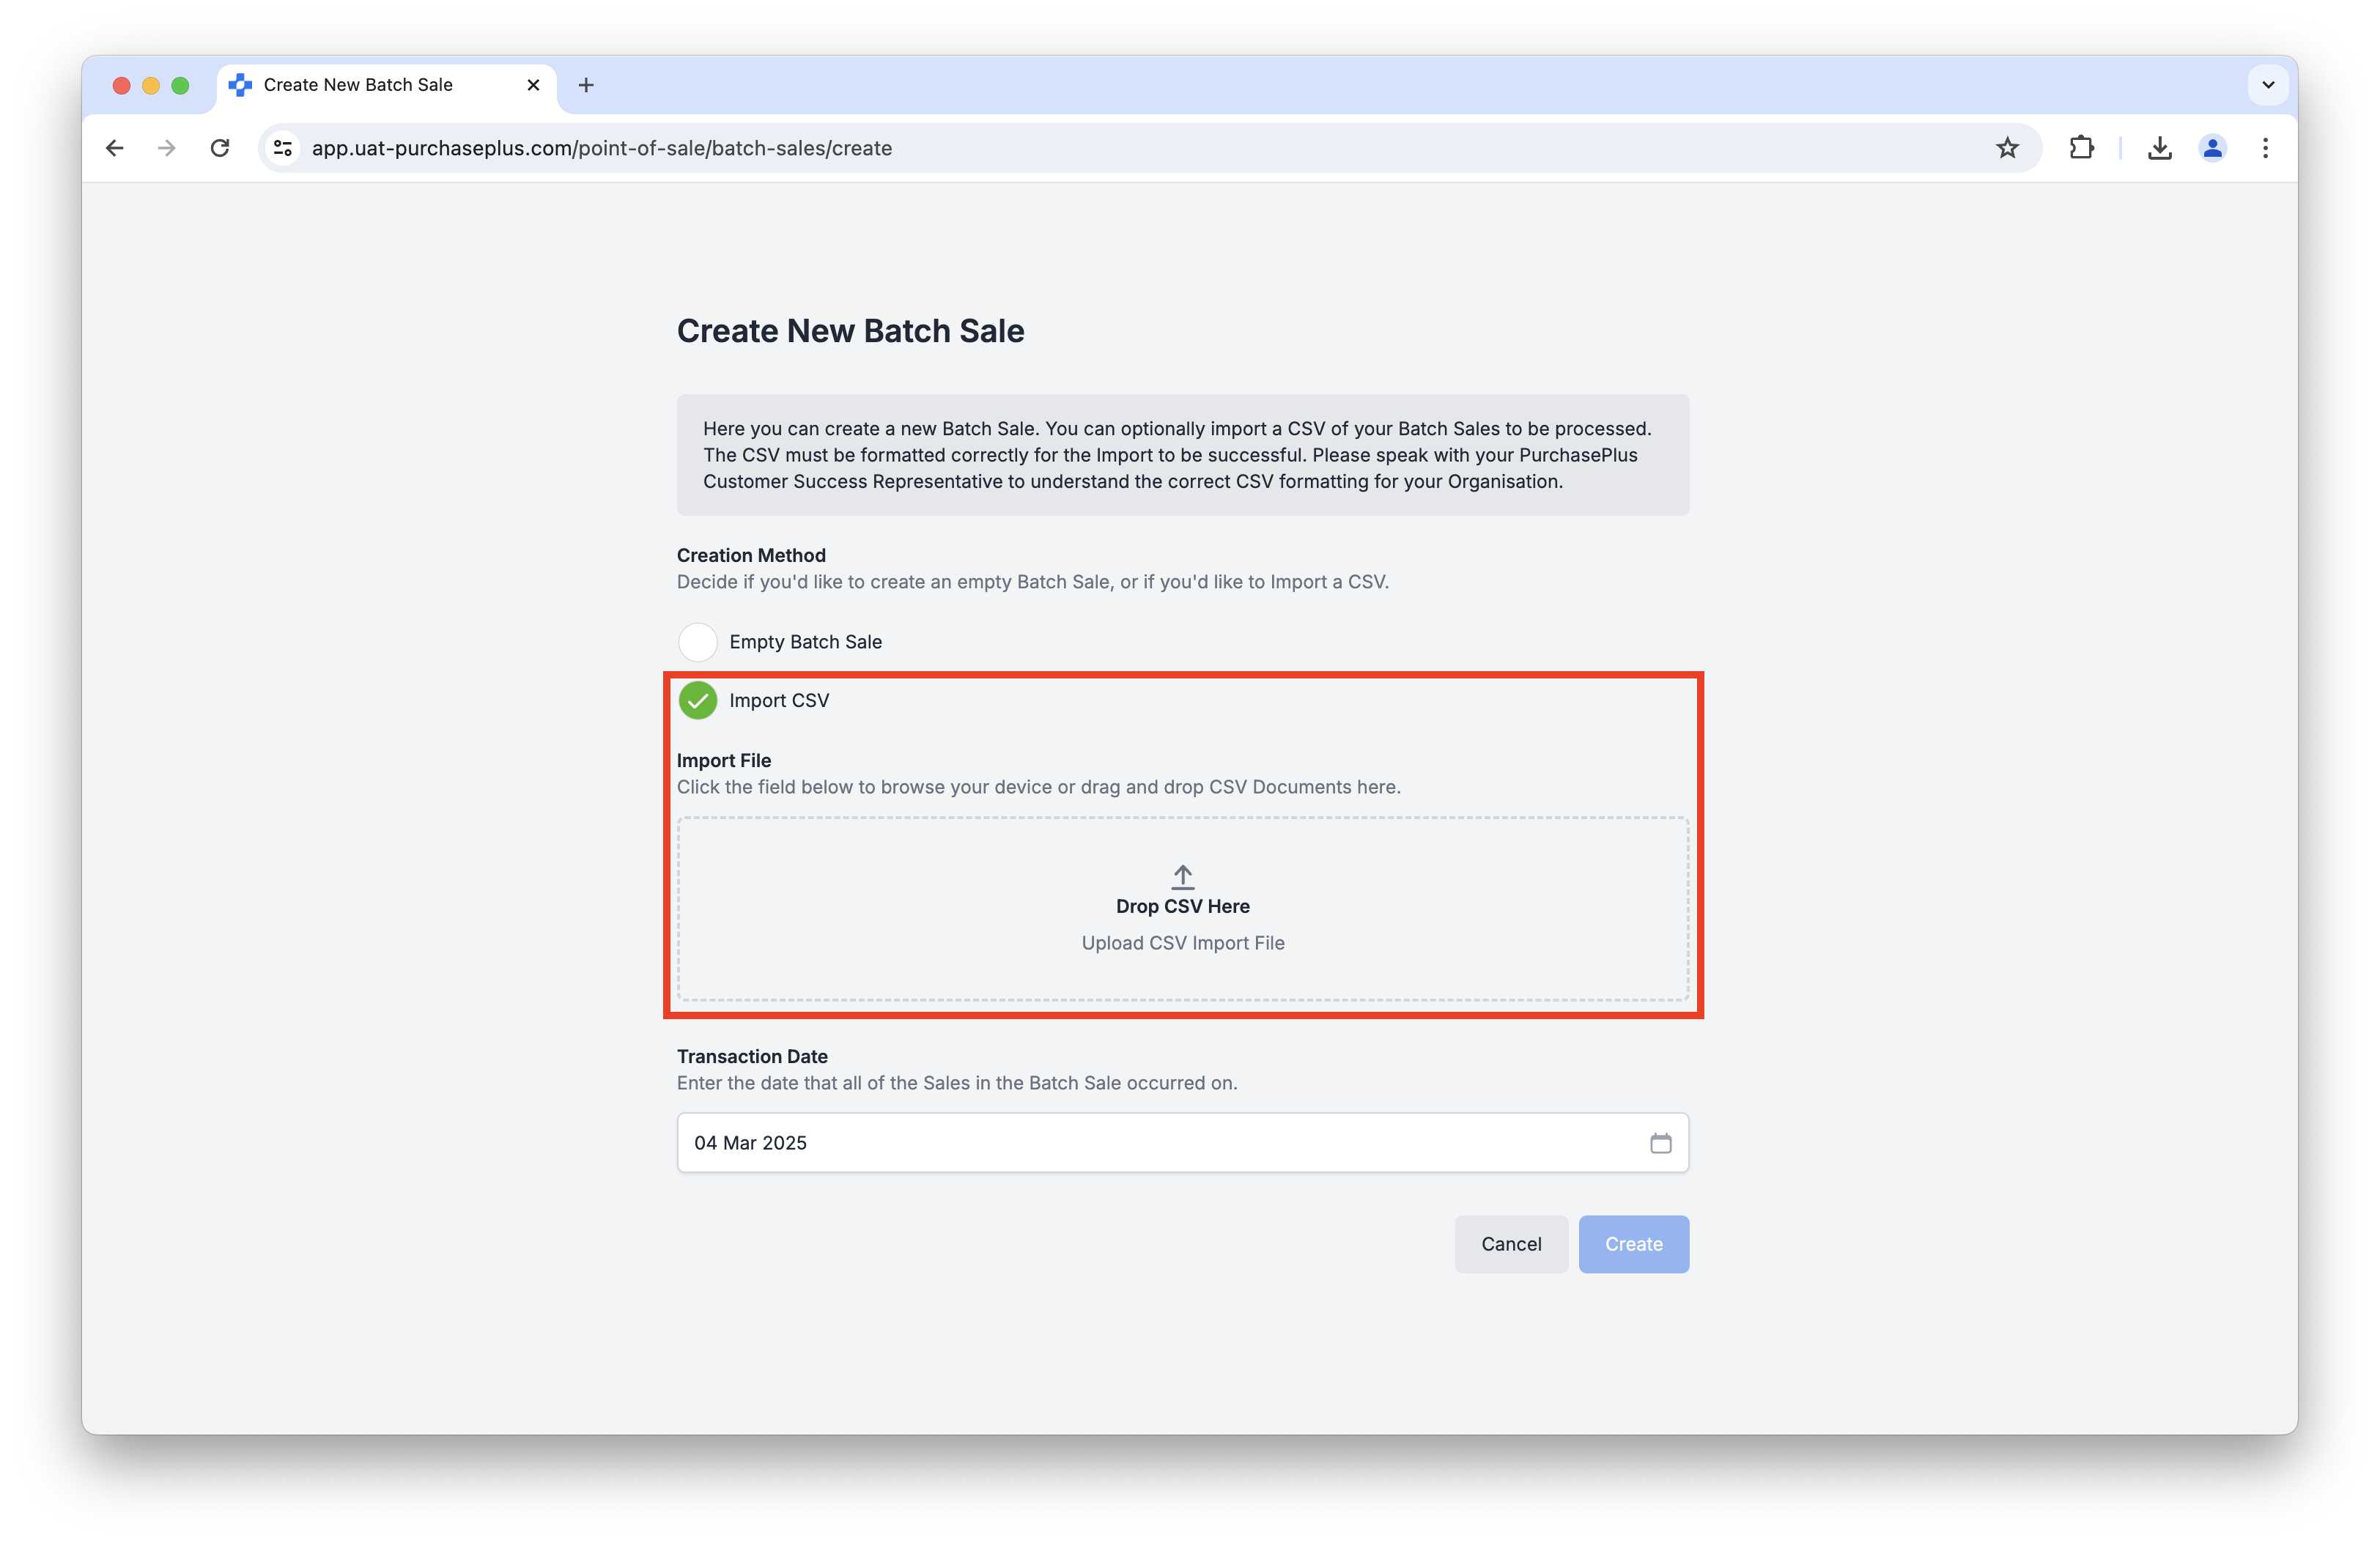
Creating Batch Sales via CSV Import
POS Permissions
- Manage POS Items - Users with this permission can Create and Update POS Items that are owned by their Organisation.
- Manage POS Outlets - Users with this permission can Create and Update POS Outlets.
- Manage Batch Sales - Users with this permission can Create, Update and Complete Batch Sales on behalf of their Organisation.
If you require one or more of these permissions enabled for your user profile, please speak to the System Administrator at your Organisation, or get in touch with your PurchasePlus Customer Success Representative.
Advanced: How New POS differs from Legacy POS
The following section may be of interest to long-time users of PurchasePlus's POS module.
It is important to note that New POS functionality is completely separate to Legacy POS functionality, and the two modules cannot coexist in the same Organisation.
The differences between the New POS and Legacy POS modules are as follows:
| NEW POS | LEGACY POS |
| Terminology: 'POS Item Codes' / 'POS Codes' | Terminology: 'PLU Codes' |
| Terminology: 'Batch Sales' | Terminology: 'Sales' |
| Terminology: 'Sale Lines' | Terminology: 'Sales' |
| Identify Stock Item or Recipe during creation of the POS Item | Assign a PLU Code in Recipes or Buy Lists |
| Set up Outlets (with Stock Locations) in [POS] → [Outlets] | Set up Outlet Codes in Department Settings |
| Create and Update Open Batch Sales in the User Interface | Not available in Legacy |
| Warnings are now available if the user attempts to create Transfers with errors in the Sale Lines | Not available in Legacy |
| There is a new v3 API endpoint that has been developed to be compatible with New Inventory. | v2 API endpoint for integration between Legacy Inventory and external POS systems. |
If you are migrating from our Legacy Platform, please reach out to our team for additional assistance in setting up POS in New PurchasePlus.